After installing WordPress and creating a website, you might want to earn some money with it. Google AdSense program is one of the most popular and easiest ways to do that.
How does it work?
Step 1 - Google AdSense signup and account activation
Step 2 - Creating Google AdSense unit
Step 3 - Adding AdSense unit to your website
How does it work?
AdSense is a free program that helps you monetize your website by placing targeted ads provided by Google next to your site content.
When someone clicks on the ad, you get paid. Google handles the process of billing all advertisers and networks for the ads, so that you receive your payments.
NOTE: Before applying to Google AdSense program, make sure that your website is filled with original and unique content, and has easy navigation, as Google ads may not be placed on sites with scraped or copyrighted content. If you have not yet begun to build your website, we recommend EasyWP by Namecheap, a managed hosting service designed so anyone can have WordPress installed in under 90 seconds.
Step 1 - Google AdSense signup and account activation
1. Sign up for Google AdSense account at https://www.google.com/adsense/start/:
2. You need to indicate the site URL and select the language of the site content.
If, for example, your website name is nctest.info, the site URL may be nctest.info or www.nctest.info or blog.nctest.info, etc. It can not be a link to some specific page, post or directory:
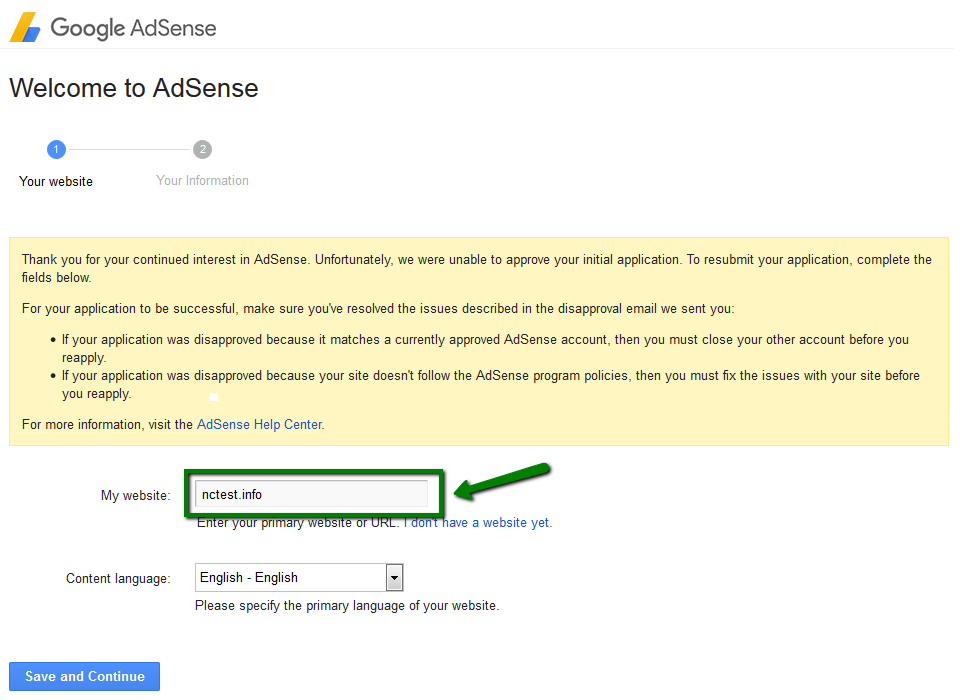
Click Save and Continue.
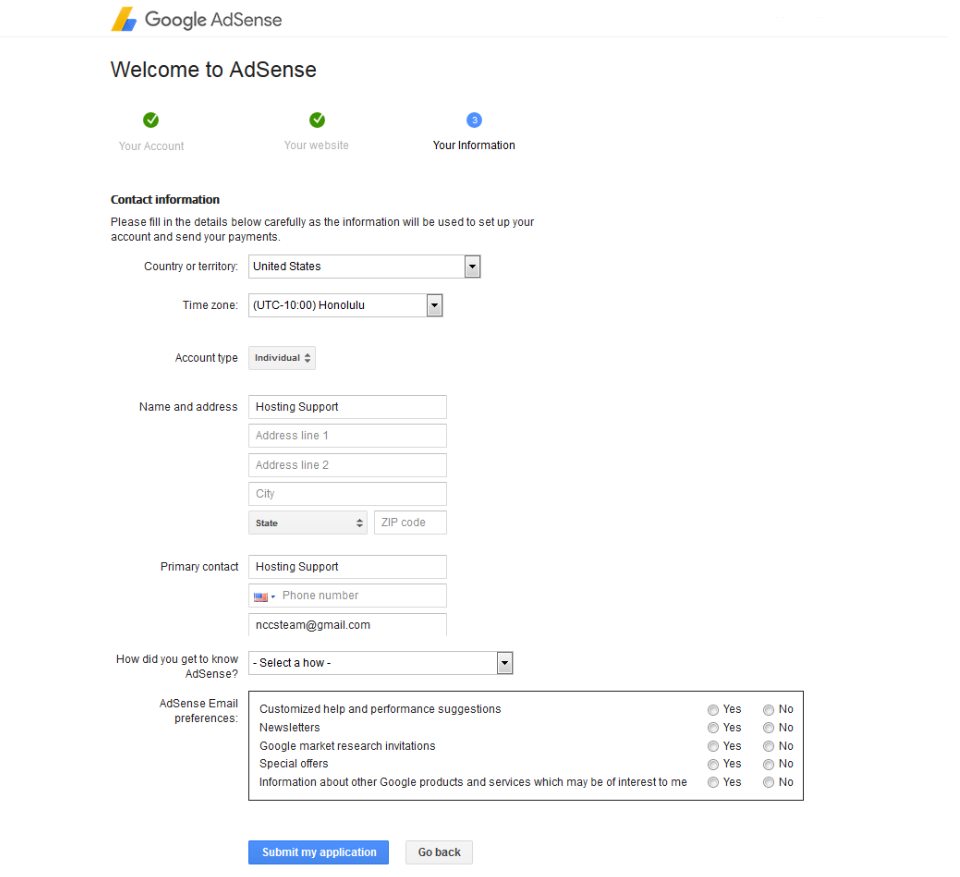
3. Enter your contact information on the next page. Make sure that you type your name exactly the way it is on your bank account. Submit your application:
4. Read Google AdSense Terms & Conditions and Program Policies and agree to them.
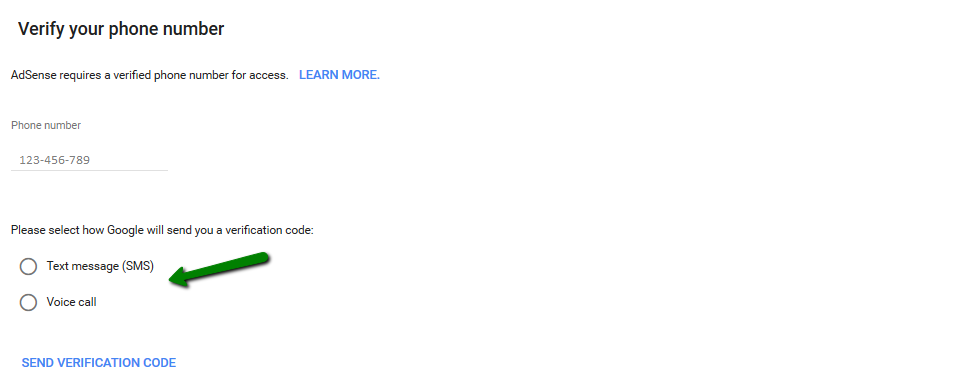
5. Then, verify your phone number either via a text message or a voice call (this step may not be required in all countries):
6. You will get a Google AdSense verification code which you need to copy:

7. Insert the copied code into your website. There are two ways of doing that:
Insert the code manually:
- Log into your WordPress admin dashboard. Go to Appearance > Editor:
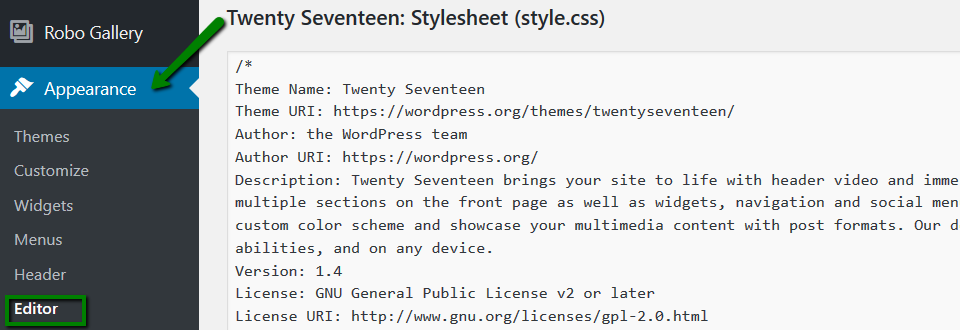
- Select your current theme from the drop-down menu Select theme to edit in the top right corner. Then, choose Theme Header (header.php) template from the list on the right:

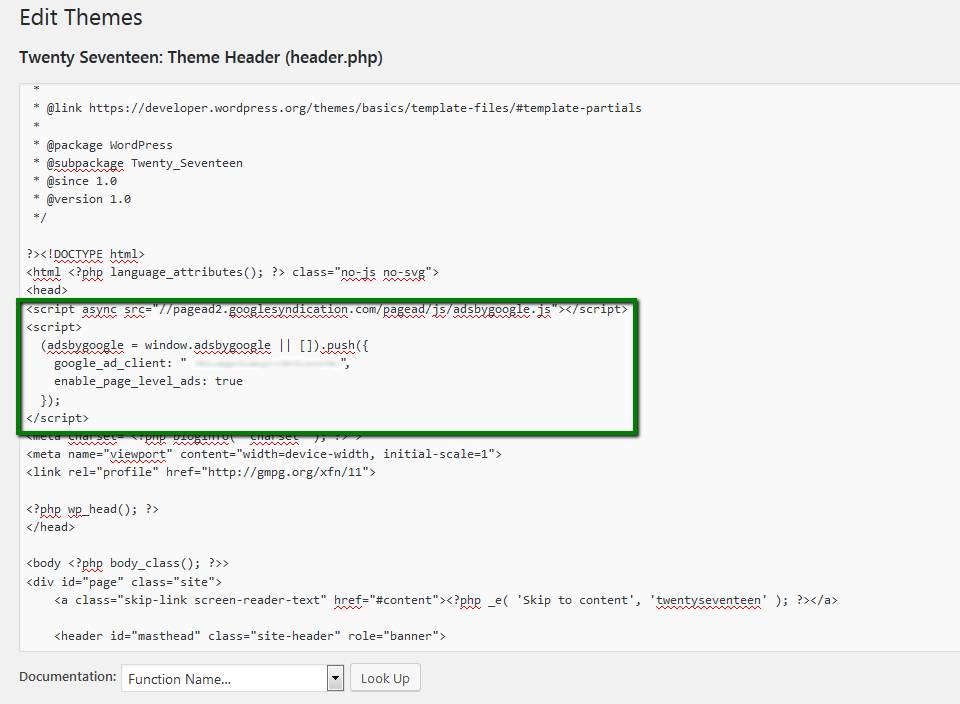
- Find the tag and paste the verification code from Google AdSense right after it. Save the changes:
Insert the code using a plugin:
-
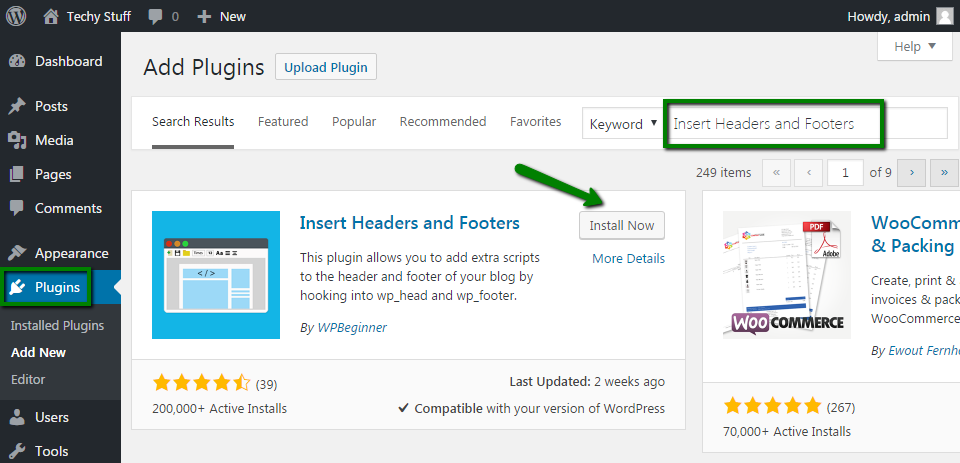
Log into your WordPress admin dashboard. Go to Plugins > Add new > Search for Insert Headers and Footers plugin. Install the plugin and activate it:
-
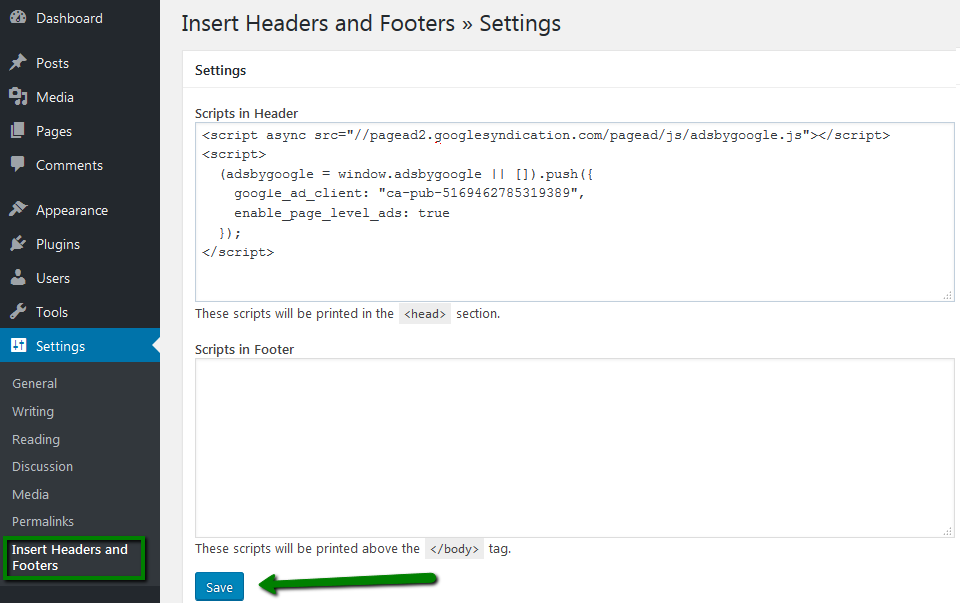
Go to Settings > Insert Headers and Footers menu. Paste the Google AdSense verification code into the Headers section. Save the changes:
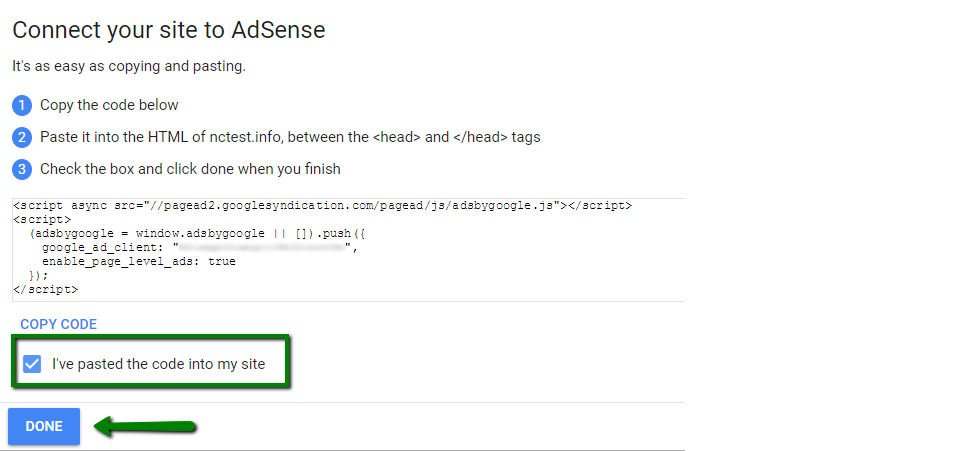
8. Return to your Google AdSense account, check the box to confirm that you pasted the code and click Done:
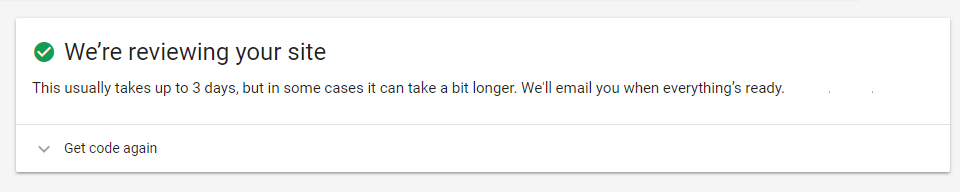
9. Wait for Google to review your entire site and activate your account. For some websites the activation process can take a day, and for others it can take up to a couple of weeks:
NOTE 1: There may be cases when Google won't be able to activate your AdSense account. If that happens, you'll receive an email explaining the reason why. But do not worry! That will allow you to fix the issue and request that your account is activated once again.
NOTE 2: The verification code has to stay on the website according to Google, so do not remove it after the account activation.
Step 2 - Creating Google AdSense unit
Once your Google AdSense account is approved, you will get access to all options within it that were previously greyed out. It is time to create a new ad unit!
An ad unit is a set of ads displayed as a result of one piece of the AdSense ad code.
To create the ad unit follow the steps below:
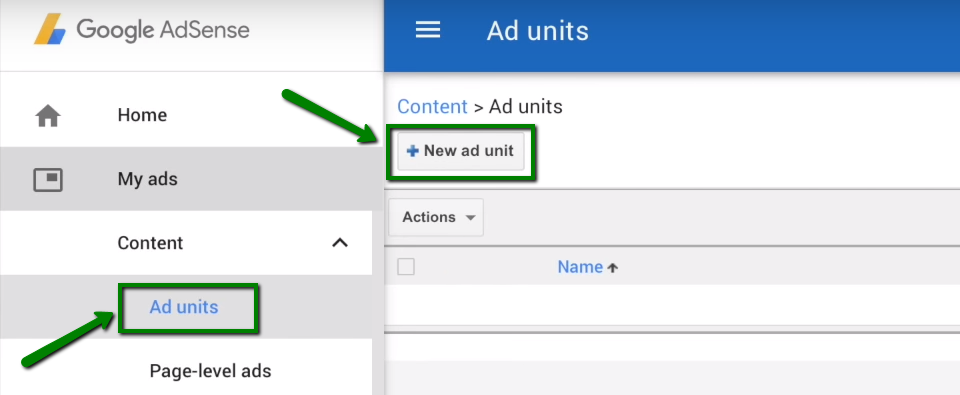
1. Log into Google AdSense account and go to My ads > Content > Ad units tab and click New ad unit:
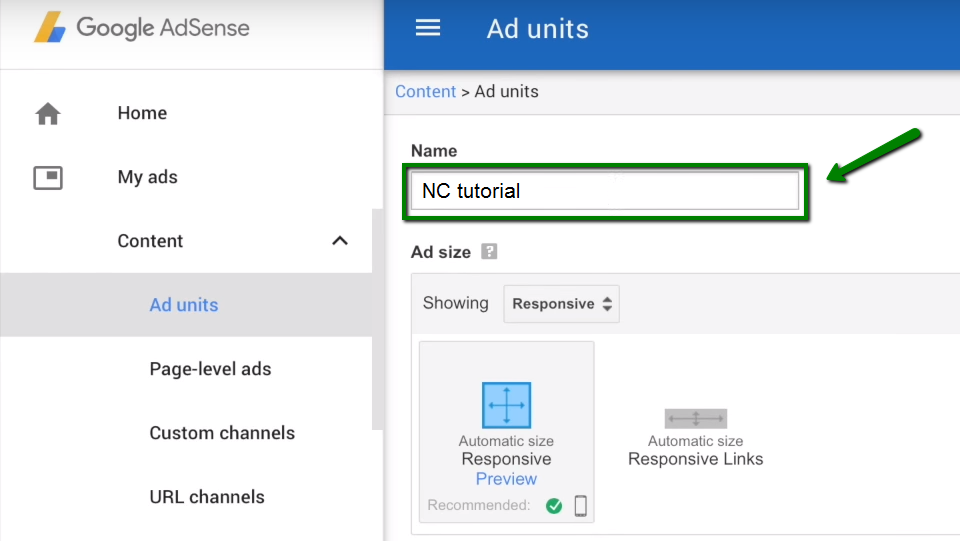
2. Give your ad unit a descriptive name that will help you find it later:
3. Choose the size of the ad in the Ad size section. You can check the examples of ads provided by Google to help you make the choice:
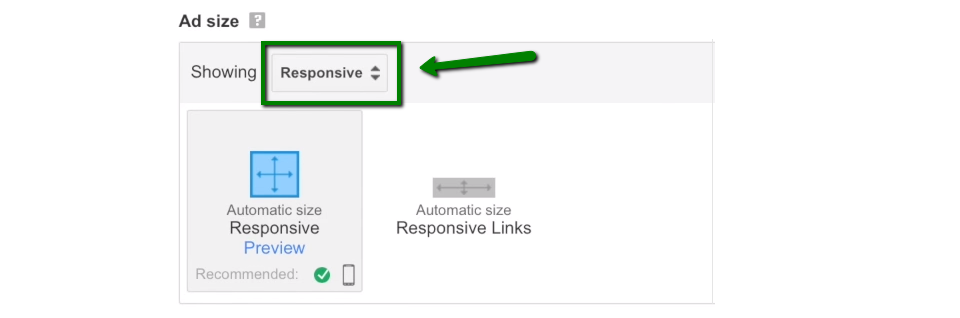
In our example, we have chosen Responsive size for the ads, since they automatically adjust their size, appearance, and format to fit into any available ad space.
4. The next step is to select which type of ads you would like to show on your website. Use the Ad type drop-down for that:

Text ads are the links with some additional description. Image ads can be plain or animated images that are proven to pay significantly more.
We have chosen Text & Display ads in our example. There are other types of ads: rich media, flash, video, animated image, audio, link units.
More information on different ad types can be found here.
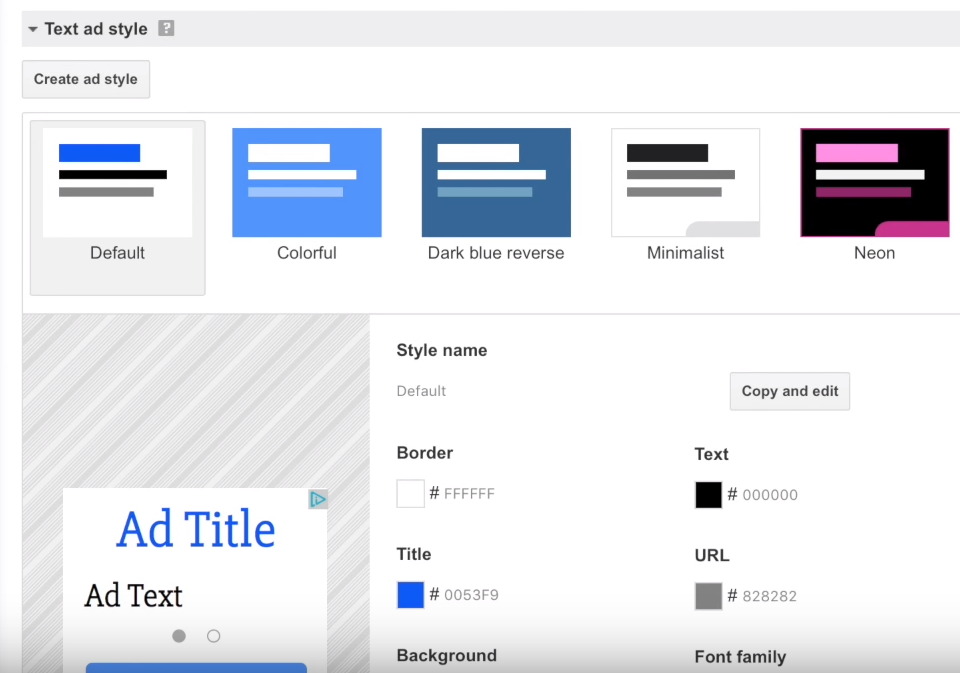
5. You may also apply an ad style for your ads if you wish to use your site’s color scheme:
6. Custom channel menu allows you to set up a custom channel to track your ad unit. It is optional though.
7. In the Backup ads section you can specify what you want to show in your ad unit if Google has no targeted ads available:

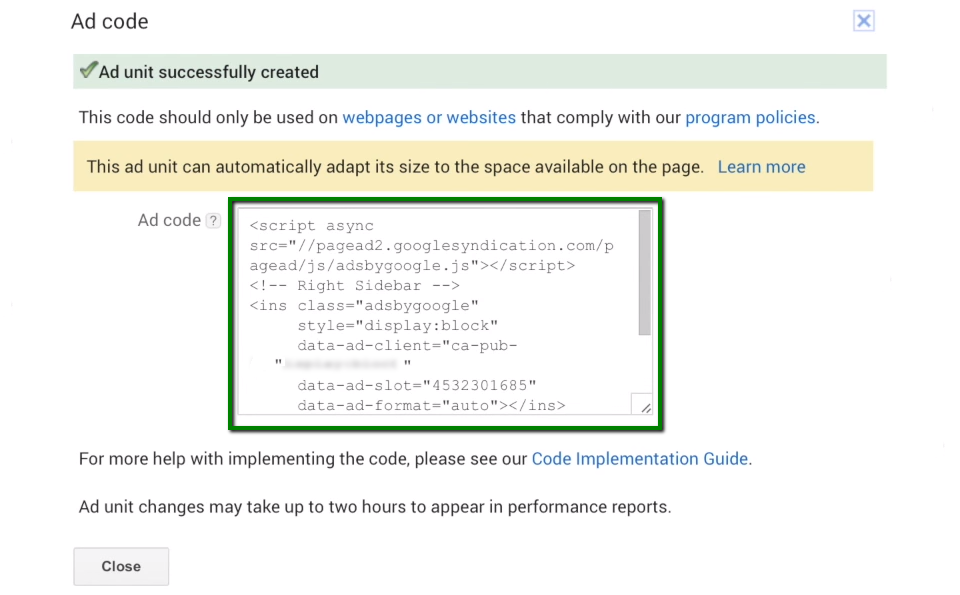
8. Click Save and get a code. In the Ad code box that opens, copy the Google AdSense ad code:
Step 3 - Adding AdSense unit to your website
Once you've copied the ad code from your AdSense account, the next step is to paste it in your website’s source code. The same steps apply when adding AdSense to sites hosted on EasyWP.
It is possible to insert the ads into some specific pages or posts, sidebars, headers and footers of the site. In this tutorial, we will show you how to paste the code into the right sidebar:
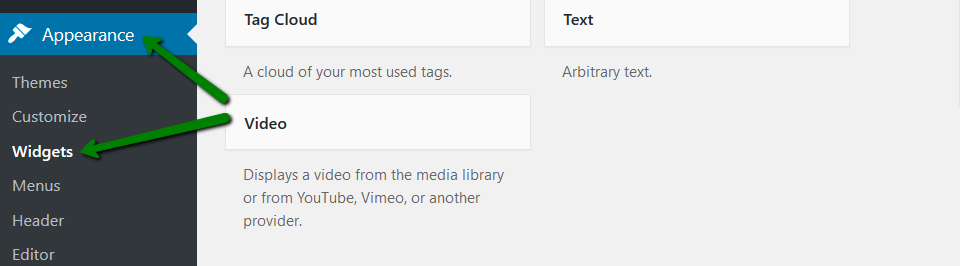
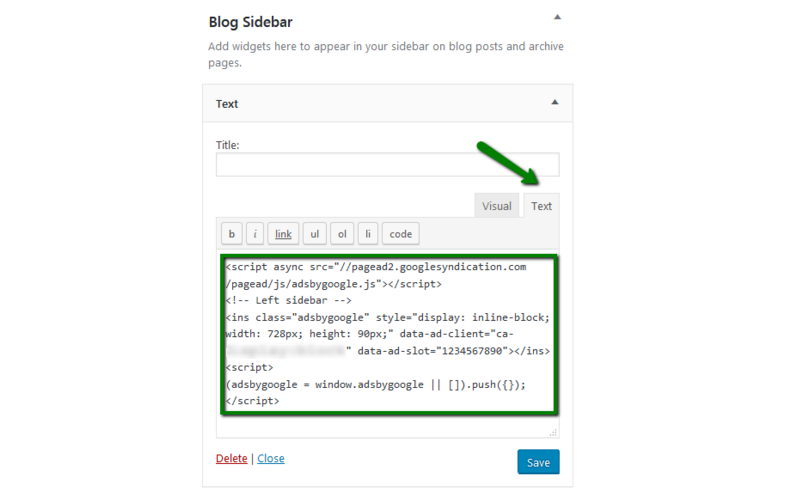
1. Log into your WordPress dashboard and go to Appearance > Widgets:
2. Choose the Text widget in the list of available widgets and drag & drop it into the Blog Sidebar area:

3. Switch to the Text tab in the Text widget area and paste the ad unit code copied from the Google AdSense account. Save the changes:
If you have more questions about Google AdSense program, you may visit their Help Center and check the policies.
That's it!
