This article describes the process of installing and disabling a WordPress plugin.
NOTE: If you just installed WordPress, follow the steps provided in this article. However, if you have a live site, you may want to make a backup of the site, since a plugin activation may alter certain site functionality.
How to install and activate a new plugin via WordPress dashboard
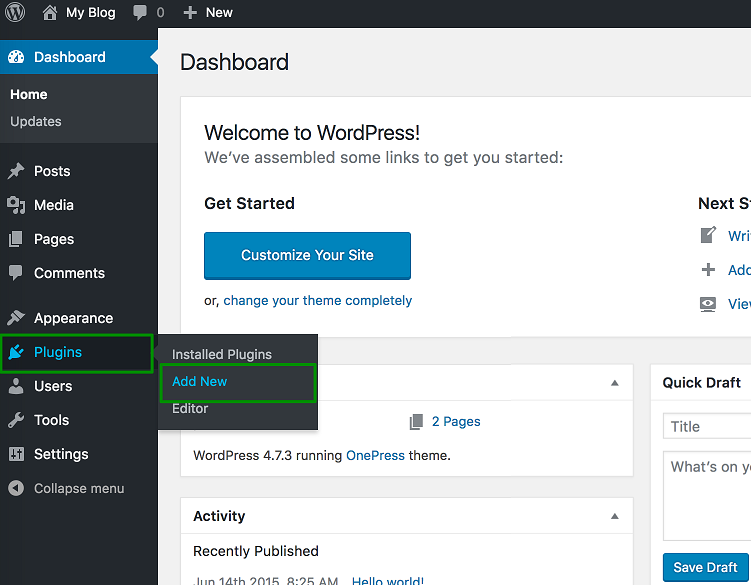
1. From within your WordPress Dashboard, navigate to the Plugins menu and click Add New:
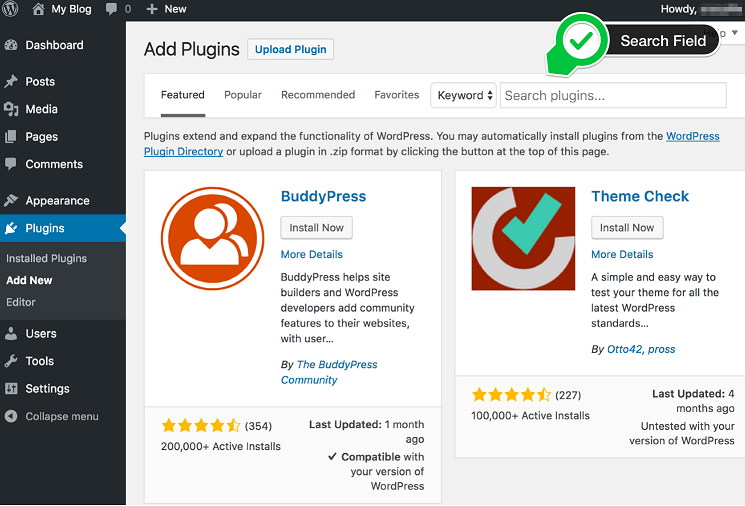
2. On the next page, you can select a plugin from the list of Featured, Popular, Latest, or Favorites plugins. You may also search plugins by name or functionality in the Search Field:
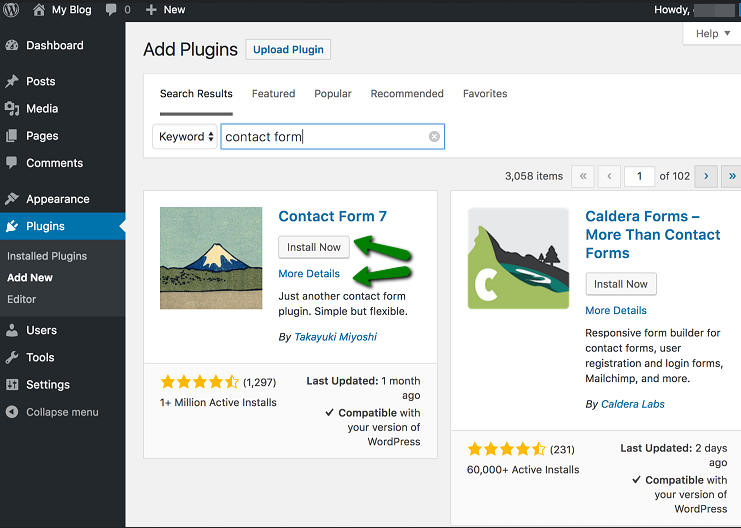
3. To see more details (description, changelog, reviews, etc.) about a plugin, select More Details. Click Install Now to install the plugin:
NOTE: Make sure that your selected plugin is compatible with the WordPress version and other plugins you have installed.
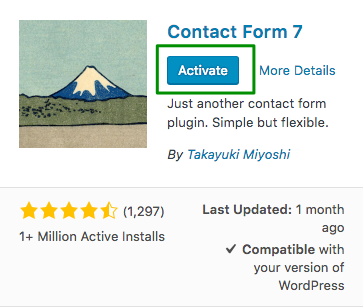
4. Finally, click on Activate:
Once finished, you will be redirected to the plugins page where you may configure your plugin settings.
Disable plugins via WordPress dashboard
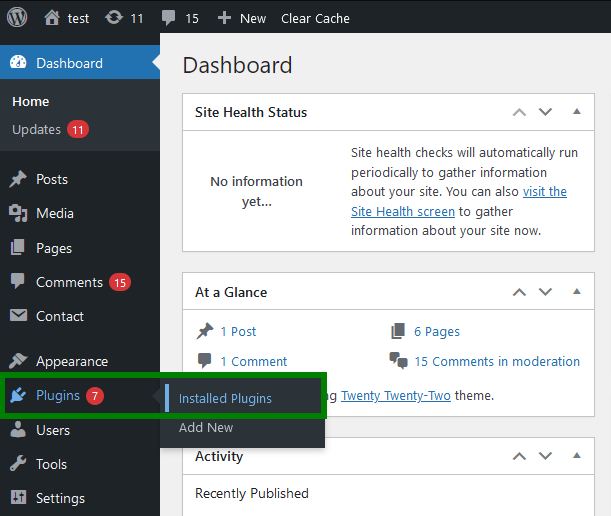
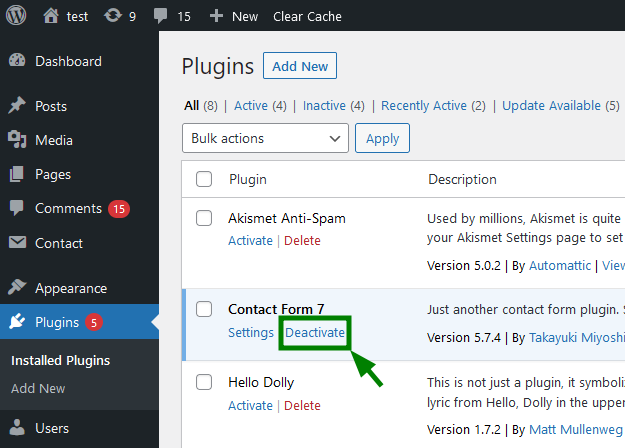
1. Log into your WordPress dashboard and navigate to Plugins menu >> Installed Plugins:
2. You will be redirected to the list of the plugins. Here you can check the number of installed plugins and their statuses.
Each active plugin has Deactivate button beneath. Click on it and the plugin will be turned off:
There are two other ways to disable WordPress plugins except using the WP Admin Dashboard.
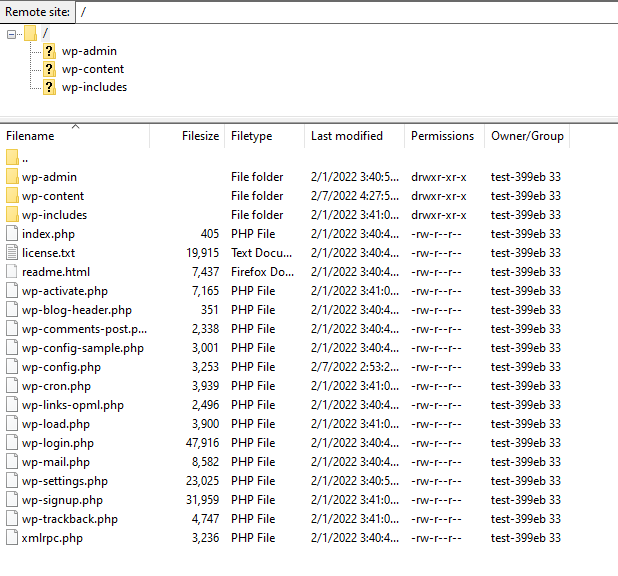
2. Once it is done, navigate to the
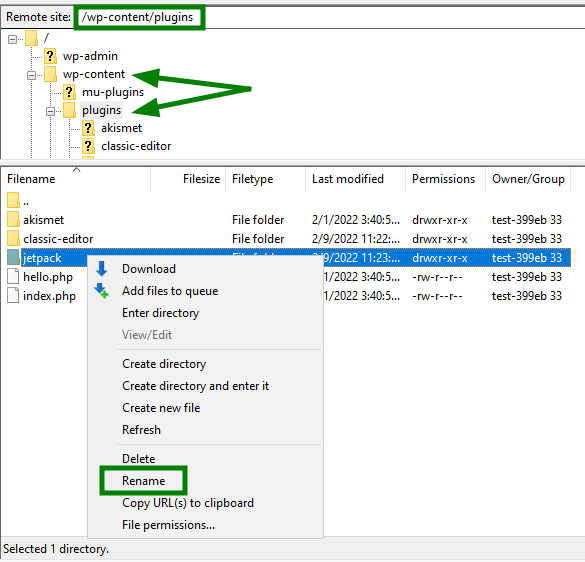
wp-content/plugins folder and find the plugin you wish to disable.
Here you will need to rename the plugin's folder and save the changes.
Make sure that you remember the initial name of the plugin folder, just in case you need to turn it back on at some point:
NOTE: Some plugins, e.g. caching ones, are hard-coded, and renaming the folder will not disable them. In such cases, you will need to disable the plugin via the database.
Disable plugins via phpMyAdmin
1. Access your website database as in the
following article.
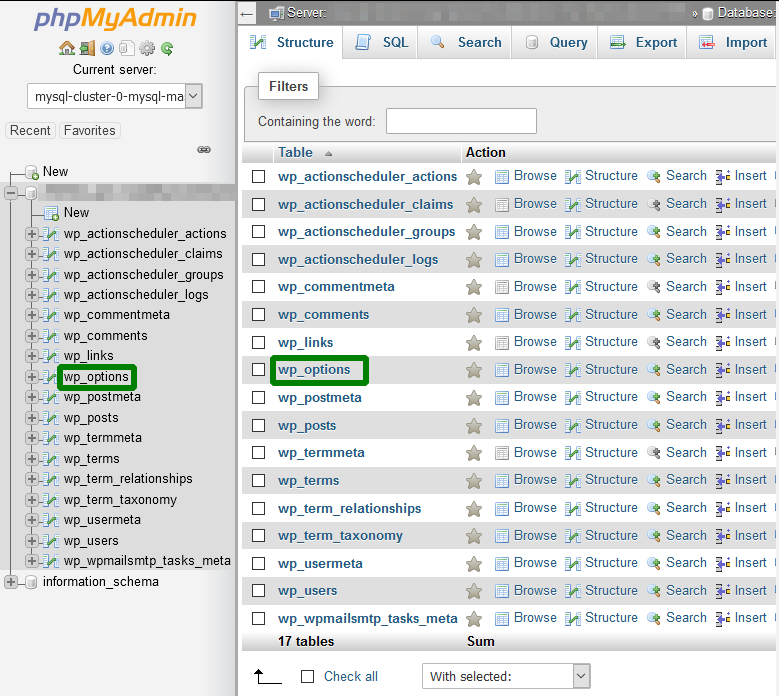
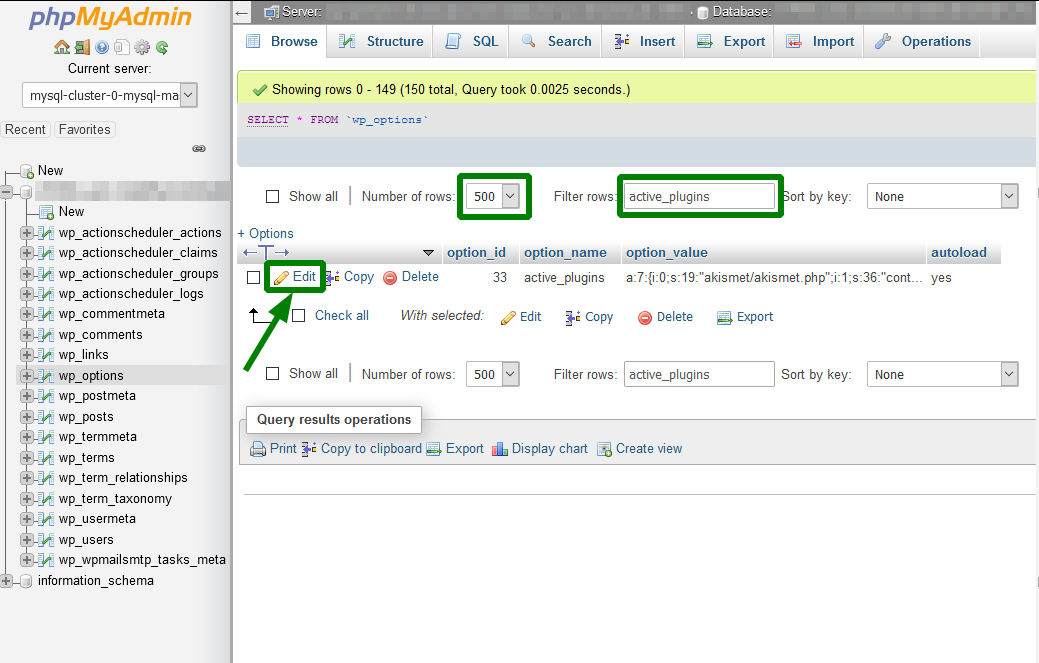
2. Once you are in phpMyAdmin, search for the
wp_options section:
3. Then, increase the Number of rows and insert active_plugins in the Filter rows search.
Click Edit next to the active_plugins option:
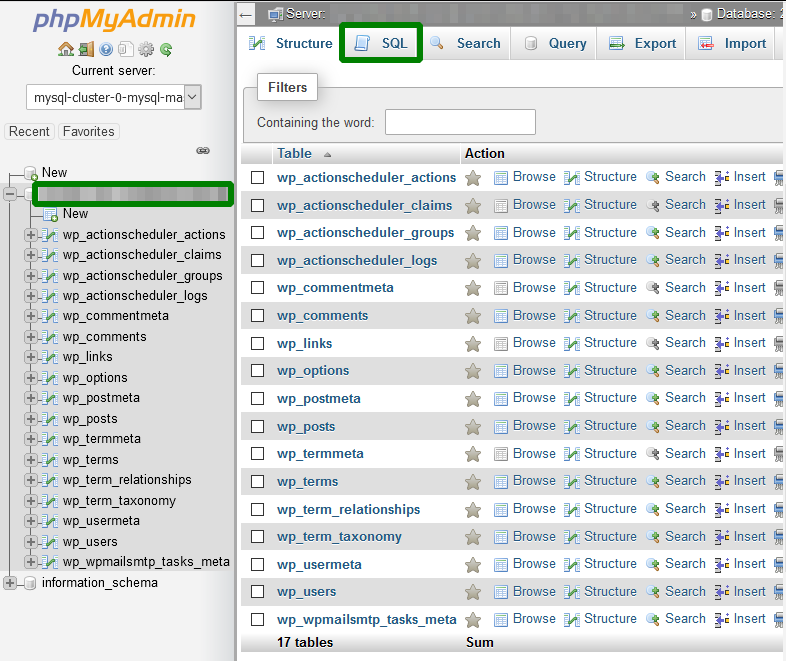
Another option to find the active_plugins is to choose the database for your WordPress installation and navigate to the upper menu bar and click on SQL:
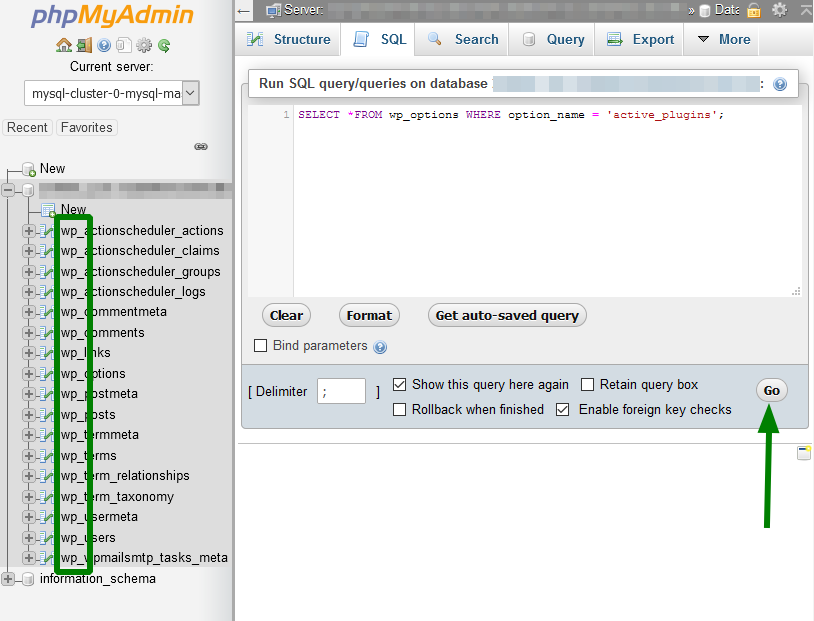
Insert the following query:
SELECT *FROM wp_options WHERE option_name = 'active_plugins';And now click
Go.
NOTE: Make sure to double check your table prefix. Your table prefix is located next to your database tables. For example, if your table prefix is “wptest_” while you use “wp_” in SQL command, you will receive an error.
4. After clicking Edit, you will see a code like this one:
a:6:
{
i:0;s:19:"akismet/akismet.php";
i:1;s:36:"contact-form-7/wp-contact-form-7.php";
i:2;s:25:"elementor/elementor.php";
i:3;s:9:"hello.php";
i:4;s:19:"jetpack/jetpack.php";
i:5;s:29:"wp-mail-smtp/wp_mail_smtp.php";
}
The number next to “a” is the total amount of active plugins. The variable “i” is the number of a plugin in the list of active plugins.
To disable a plugin, remove the corresponding line of code that starts with “i” and ends with “;”.
Make sure that the variables a and i are updated correctly. If it isn’t done, all the plugins will be disabled.
For instance, if you wish to disable the Elementor plugin, the code should be updated in the following way:
a:5:
{
i:0;s:19:"akismet/akismet.php";
i:1;s:36:"contact-form-7/wp-contact-form-7.php";
i:2;s:9:"hello.php";
i:3;s:19:"jetpack/jetpack.php";
i:4;s:29:"wp-mail-smtp/wp_mail_smtp.php";
}
NOTE: To deactivate all plugins, simply erase the code from the box.
Once all the changes have been made, click on the Go button.
NOTE: The final output is displayed in a single row and should be saved in the same way. We have divided it into several ones for your convenience. That’s why we recommend that you copy the code into any TXT editor, edit it, and then copy-paste it back in one line.
That's it!