This article is valid for Private Email subscriptions purchased before June 2, 2026.
This tutorial will show you how to set up Private Email account in Mail application on macOS Sierra/Mojave/Catalina/Big Sur using IMAP for incoming and SMTP for outgoing mail.
There are two possible options for incoming mail, and this article covers just one of them: IMAP. IMAP protocol will allow syncing emails in various folders between a number of devices. POP will download emails from Inbox folder to this device only. IMAP is recommended.
You can set up your mail account Automatically or Manually by following the instructions below.
Automatic configuration
Manual setup
Automatic configuration
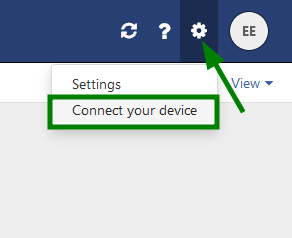
To set up the private Email account, log in to webmail from your Mac. Then click on the Gear icon in the top right corner >> Connect Your Device:
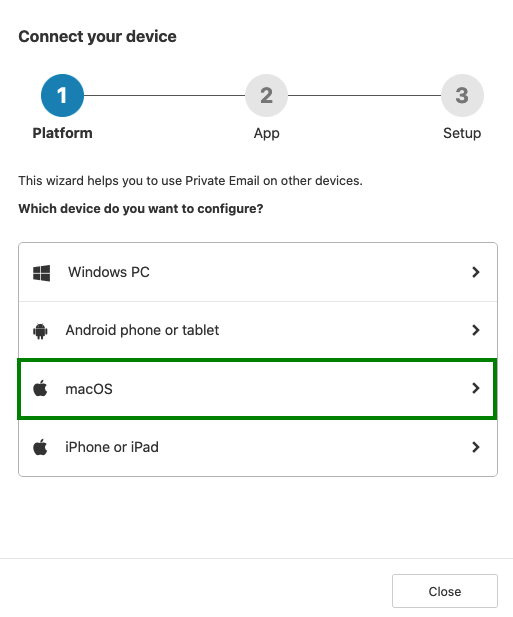
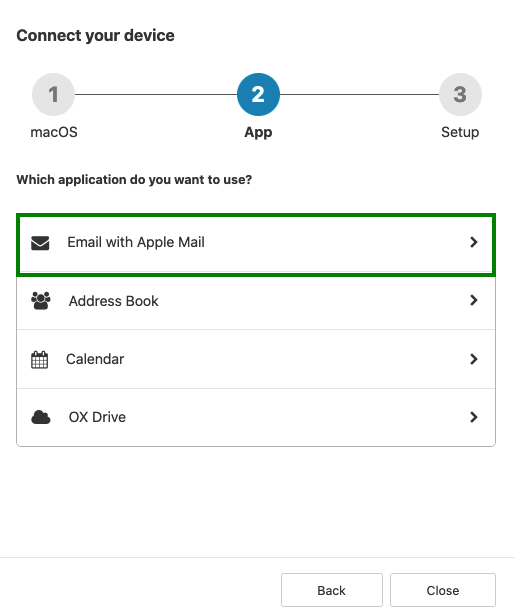
1. Click on the MacOS tab >> choose Email with Apple Mail:
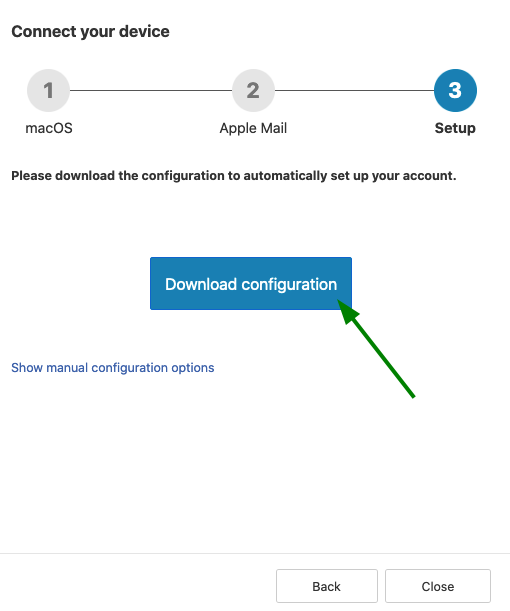
2. To set up your Mail account click Download configuration to install the settings automatically:
3. Once the installation file is uploaded to your PC, you will be redirected to the Profiles window. Click Continue to install the settings:
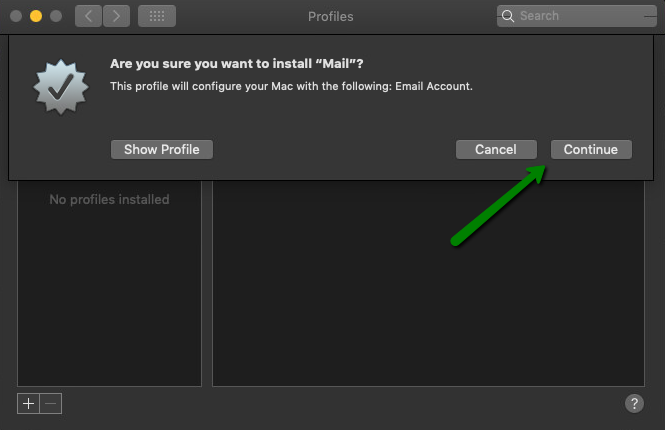
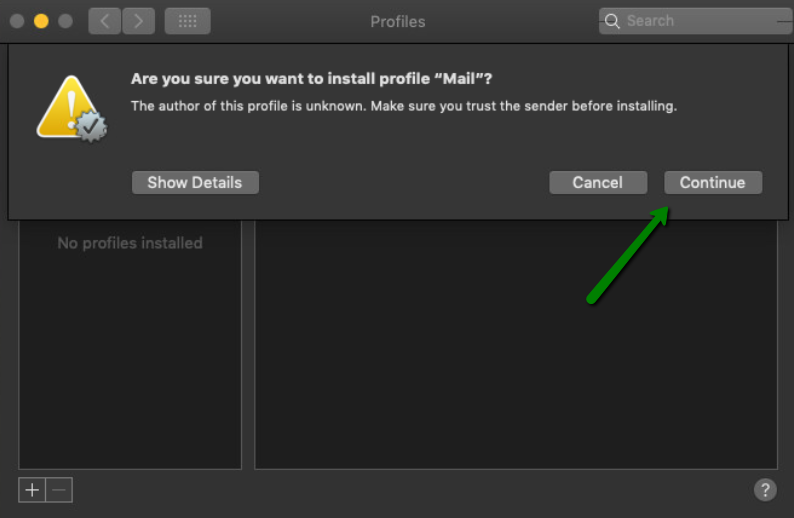
4. The following message may appear, in this case click Continue to proceed:
5. You will need to enter the password to your Private email account and click Install:

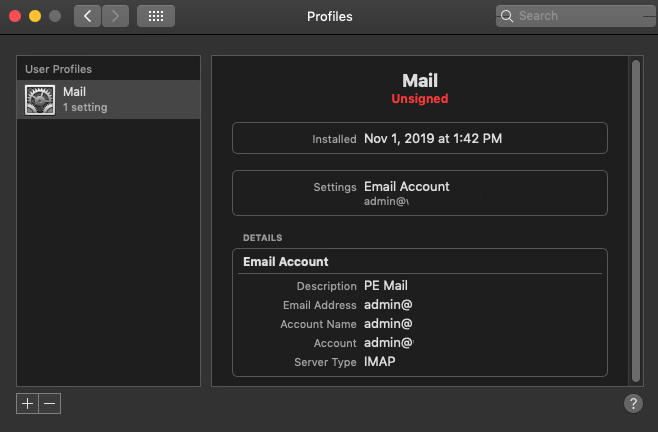
5. Now your email account is installed via IMAP:
Manual setup
You can check the manual settings for your account by clicking on the Gear icon >> Connect Your Device section:
Click on the MacOS tab >> choose Email with Apple Mail:
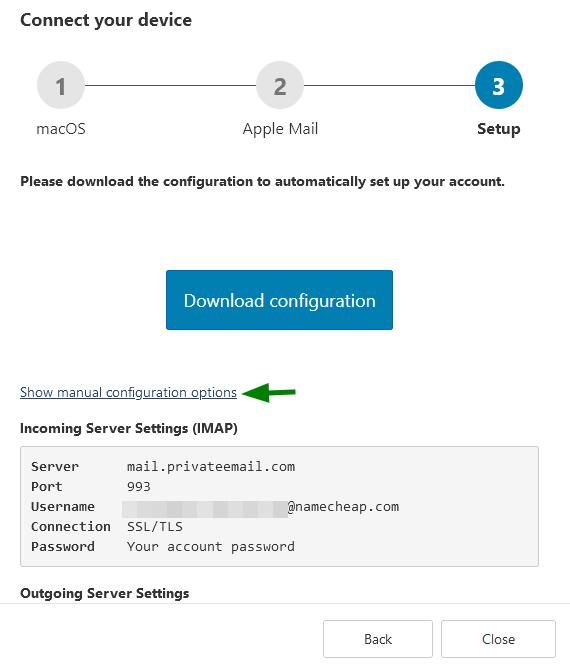
To check the settings for the Manual setup, click Show manual configuration options:
To use these settings on your Mac follow the steps below:
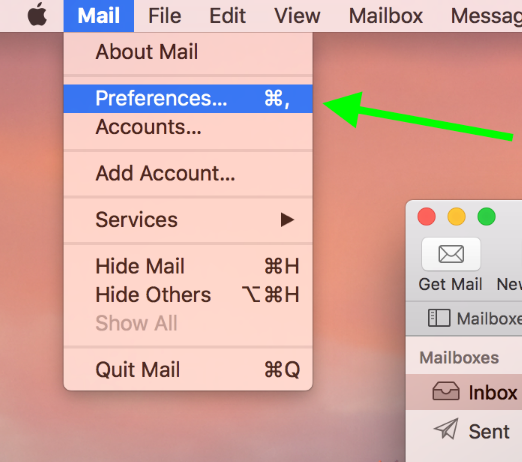
1. In case you already have some account set up in your Mail – select Preferences in Mail menu (you can use shortcut CMD + , while Mail is opened on the screen):
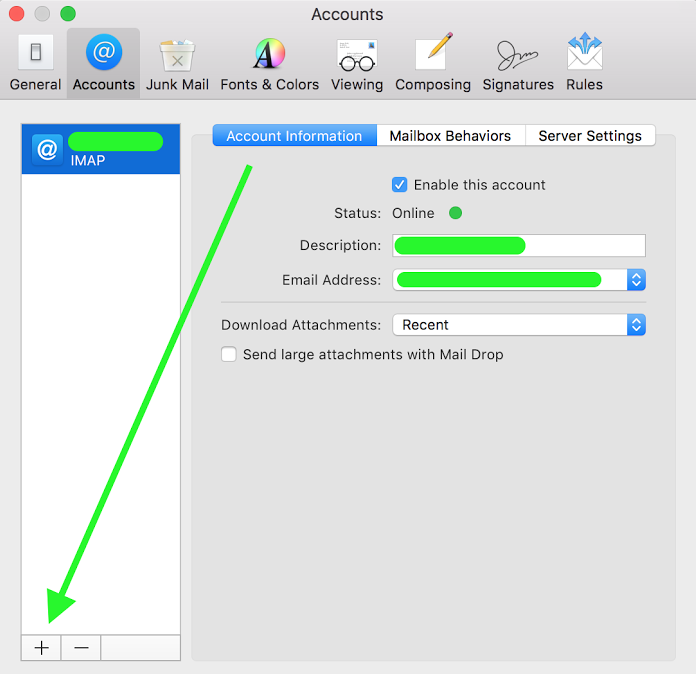
2. Go to Accounts tab, and click on + icon:
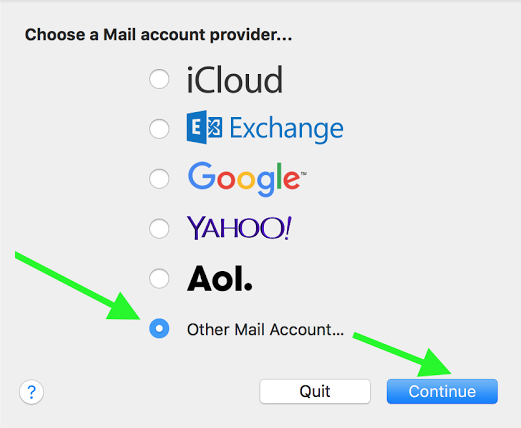
If it is the first time you use Mail, you will see the pop-up where you can add the email account. Select Other Mail Account... option and hit Continue button:
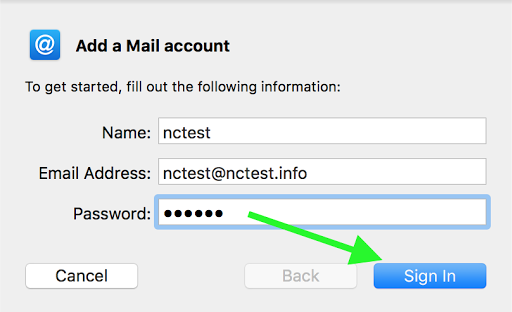
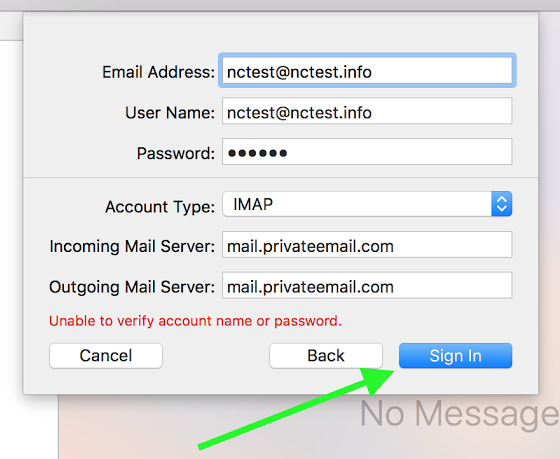
3. In Add a Mail Account window enter your full name, email address and email account password, then click on Sign In:
4. Application will try to detect settings automatically. Disregard the result and fill in these boxes manually. Enter your account details:
- Email address: full email address
- Username: full email address
- Password: password for your email account
- Account type: IMAP
- Incoming Mail Server: mail.privateemail.com (it should not be changed)
- Outgoing Mail Server: mail.privateemail.com (it should not be changed)
Click on Sign In once the details are filled:
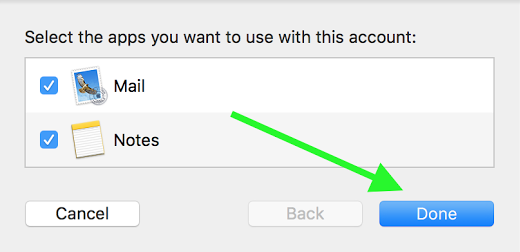
5. You may use both Mail and Notes here. Click Done button in order to finish account adding to Mail app:
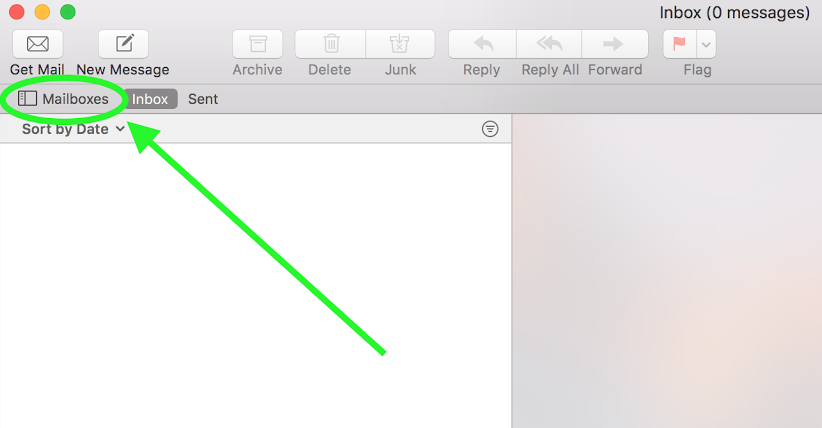
6. Once you click Done button, you will see the blank window without mailboxes. In order to open the mailboxes tree you need to click on Mailboxes button here:
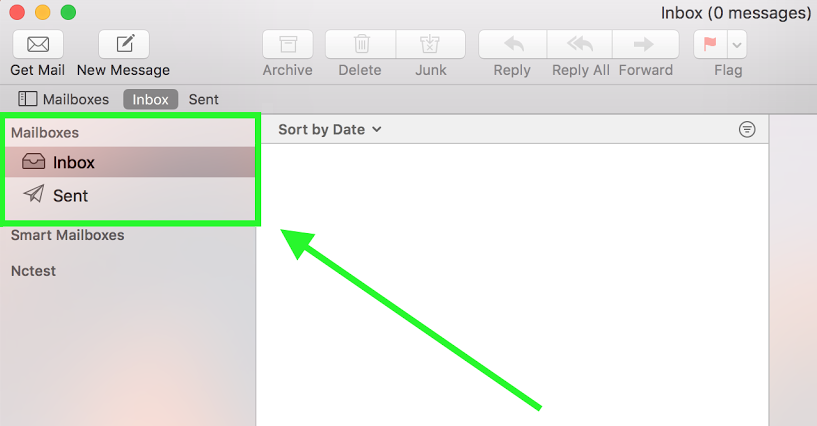
Now you will find your Inbox and Sent folders in the left sidebar:
7. The next step is to verify that Incoming and Outgoing Mail Server settings are correct. While on Accounts tab of Preferences window click on Server Settings section:

7.1 On the Server Settings tab make sure that Automatically manage connection settings is unchecked at the Incoming Mail Server (IMAP) section so that you can see the following menu with Port and Authentication fields:
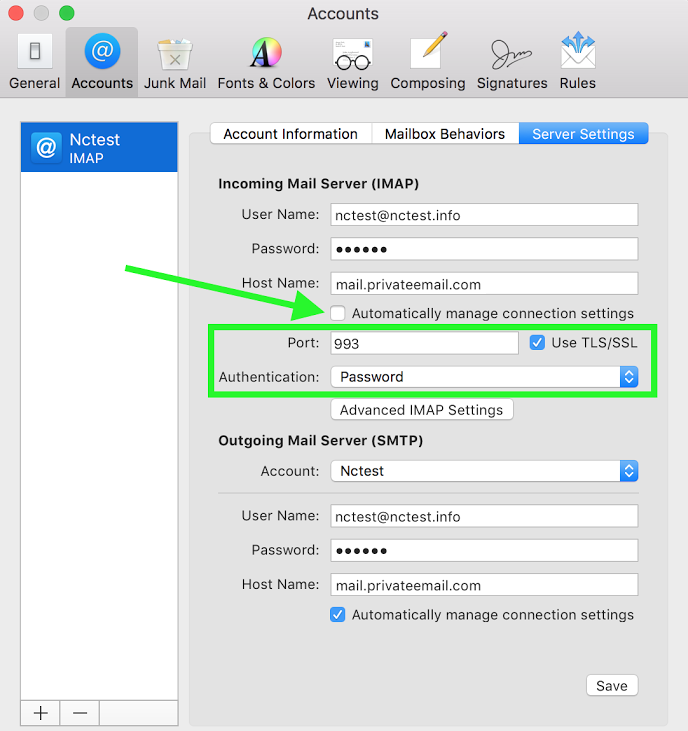
- Port: 993 for SSL or 143 for TLS
- Use TLS/SSL: should be enabled
- Authentication: set to Password
7.2 On the Server Settings tab make sure that Automatically manage connection settings is unchecked at the Outgoing Mail Server (SMTP) section so that you can see the following menu with Port and Authentication fields:
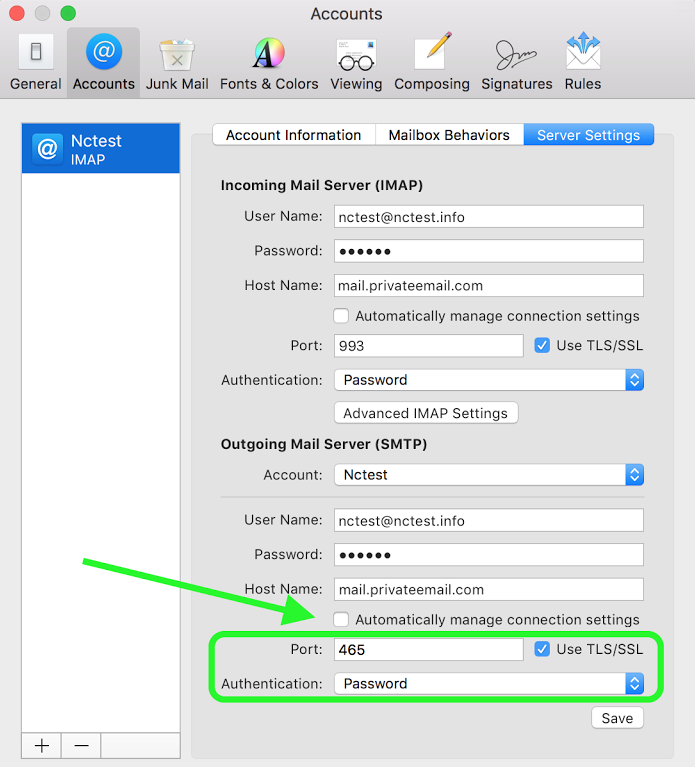
- Port: 465 for SSL or 587 for TLS
- Use TLS/SSL: should be enabled
- Authentication: set to Password
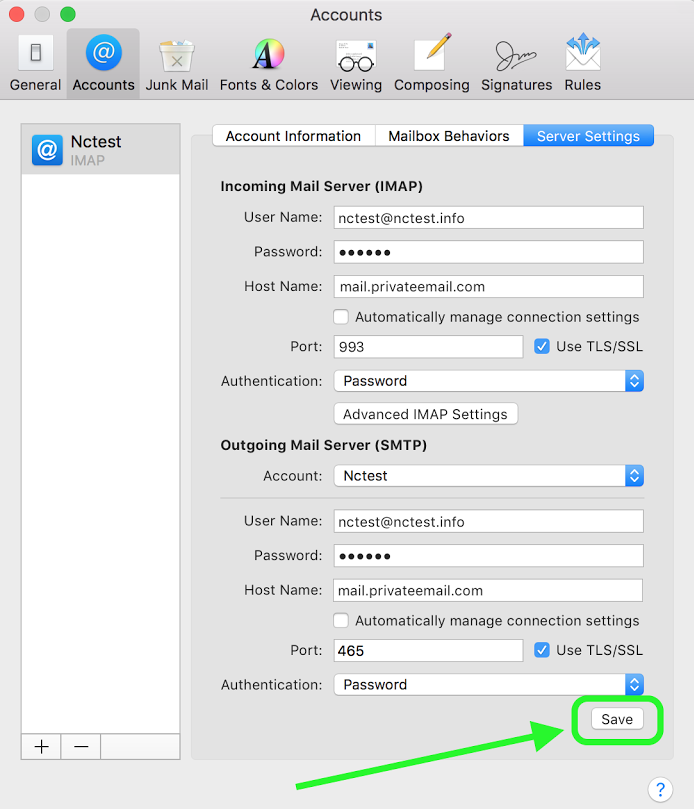
8. Once everything is done, click Save and feel free to start using Mail application on your macOS:
That's it!
Need any help? Contact our HelpDesk