
Our shared hosting servers have limitation of 100 email checks per hour for IMAP/POP3 mailboxes. This limitation can be found in our Acceptable Use Policy here. Therefore, if your email client checks emails more often, it can endanger the overall server performance and your IP address can be blocked on the server by firewall.
You can find the necessary instructions on how to change the frequency of email checks in your email client depending on the email client you are using:
Microsoft Outlook
Microsoft Outlook for OS X
Thunderbird
MacMail
iPhone/iPod
Android Default Email Client
Android Google Email Client
Android BlueMail
For Microsoft Outlook:
Option 1:
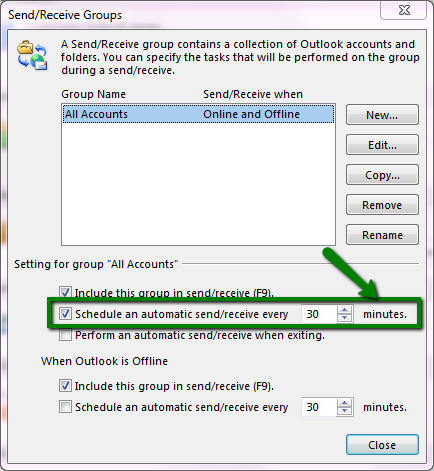
Open your Outlook and press Ctrl+Alt+S keyboard shortcut (it works for all Microsoft Outlook versions except for Microsoft Outlook for OS X). The window as in screenshot below will appear. In Schedule an automatic send/receive every … minutes line you need to set how often Outlook will check emails for the email account and close the window:
Option 2:
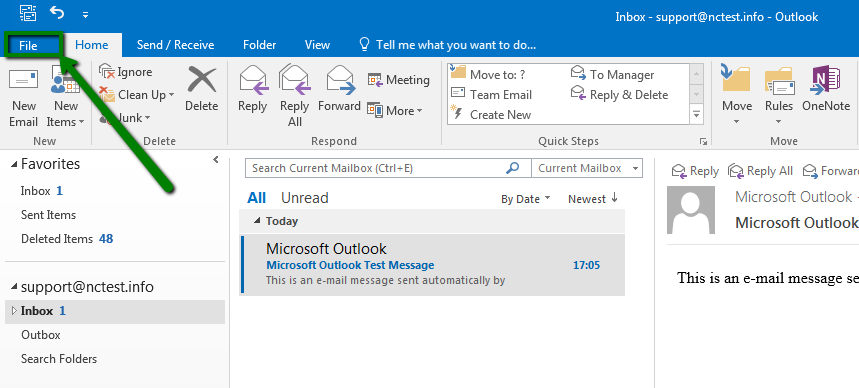
1. In Outlook click on File menu on top bar:
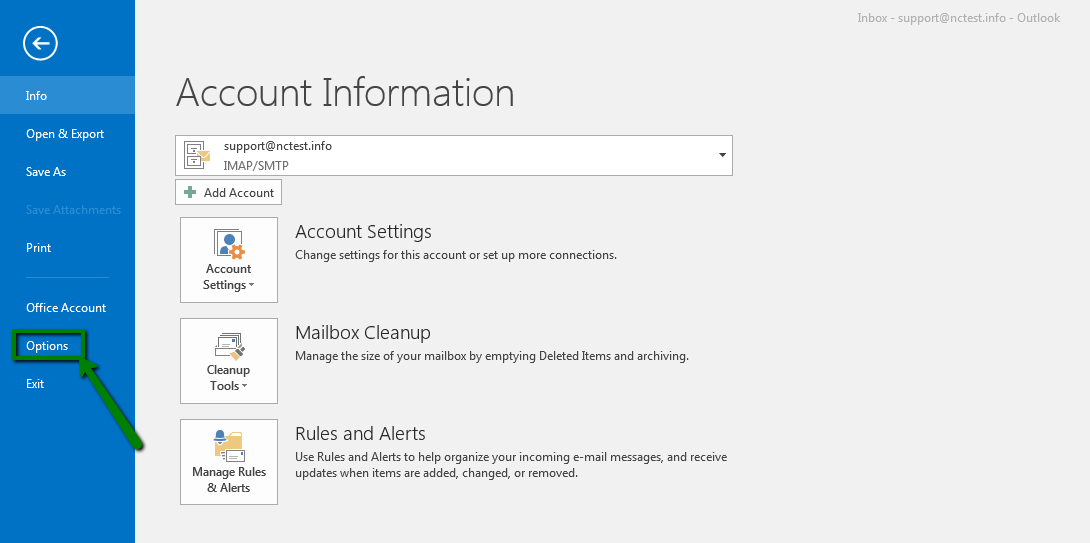
2. Go to Options menu:
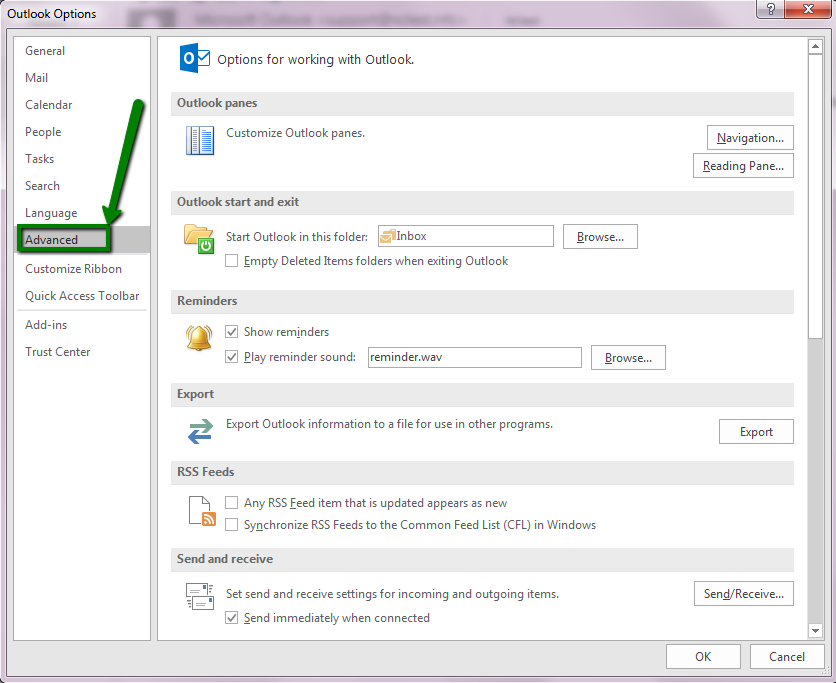
3. Select Advanced tab:
4. Click on Send/Receive button:
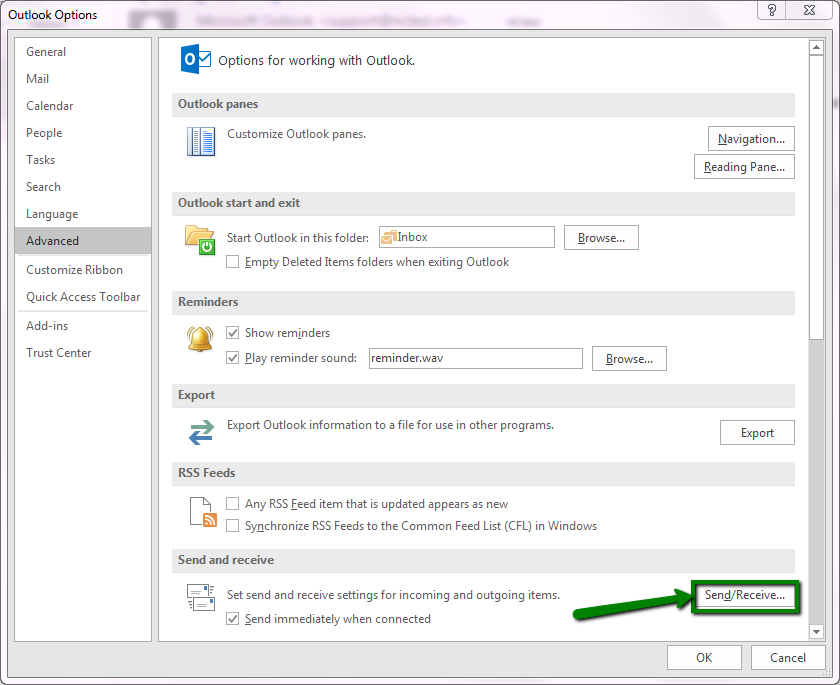
5. In the pop-up window locate Schedule an automatic send/receive every … minutes line and set there how often Outlook will check emails for the email account. After that just close the window:

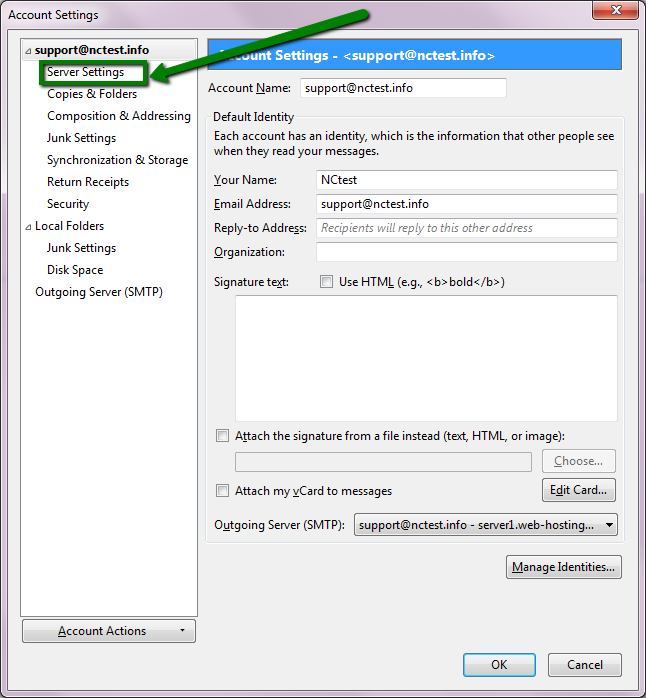
For Microsoft Outlook for OS X:
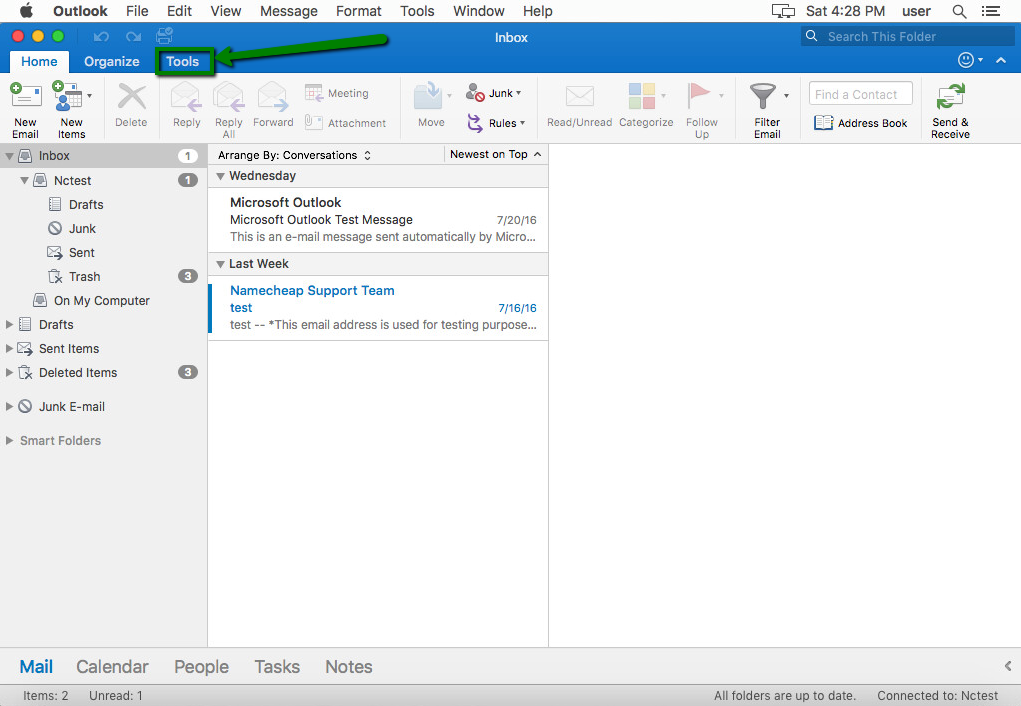
1. In Outlook go to Tools menu:
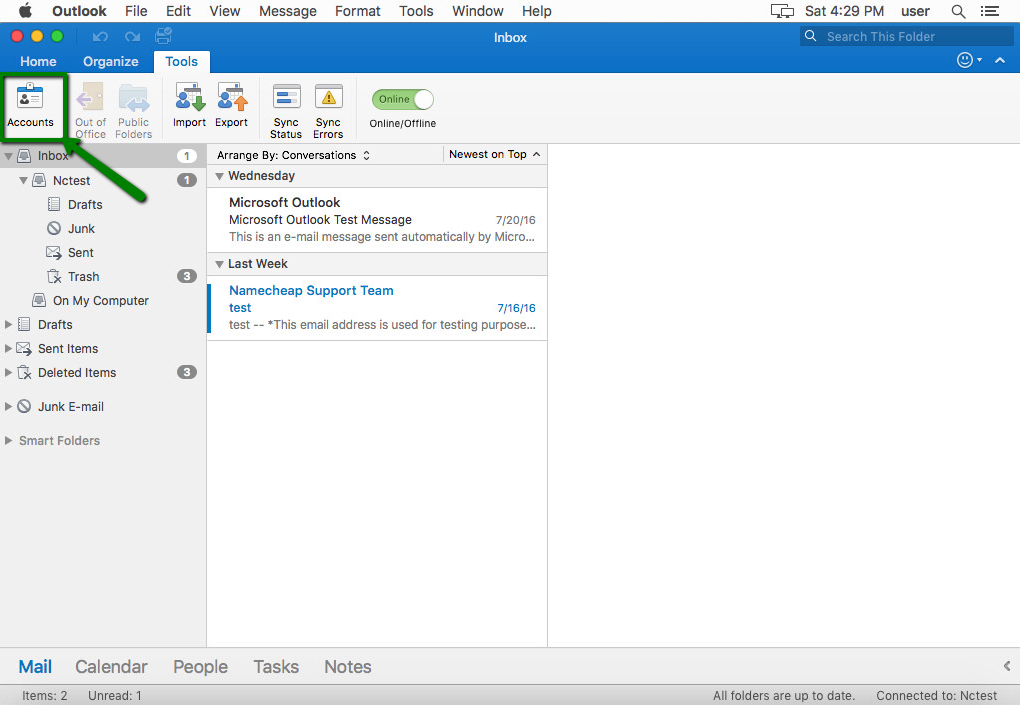
2. Then click on Accounts button:
3. In the window that appears click on Advanced button:
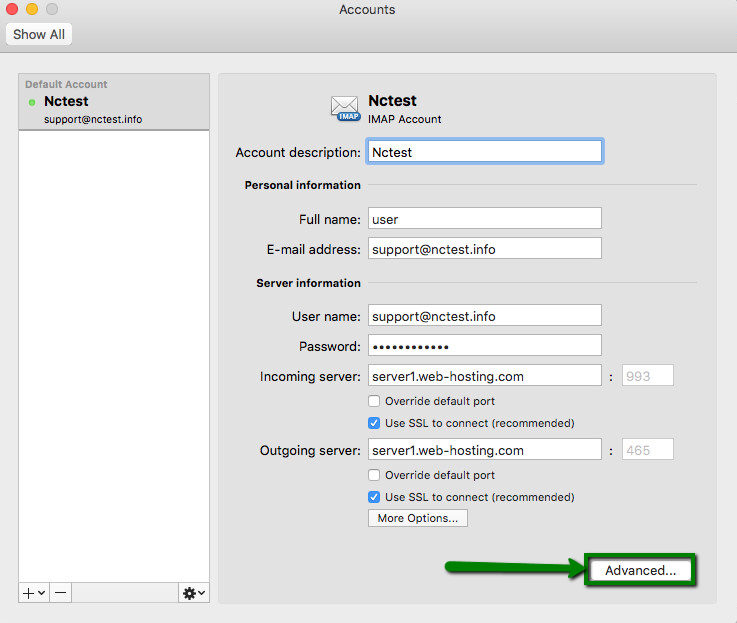
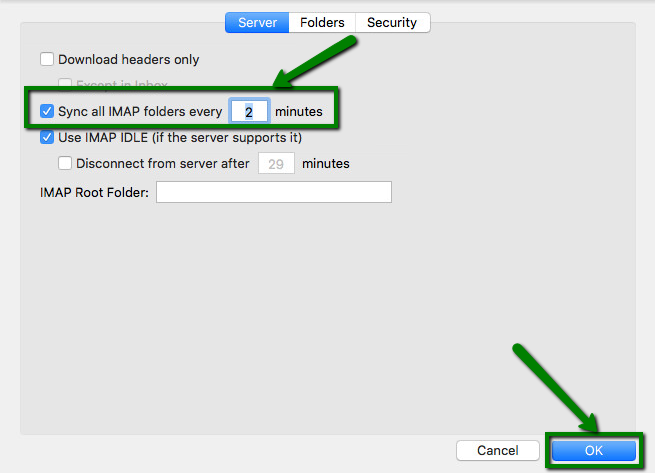
4. In the pop-up window locate Sync all IMAP folders every … minutes line and set there how often Outlook will check emails for the email account. After that click Ok:
For Thunderbird:
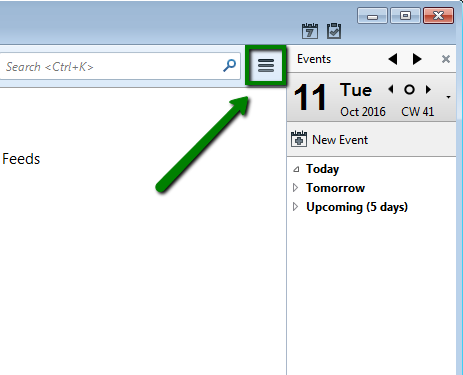
1. In Thunderbird click on hamburger button:
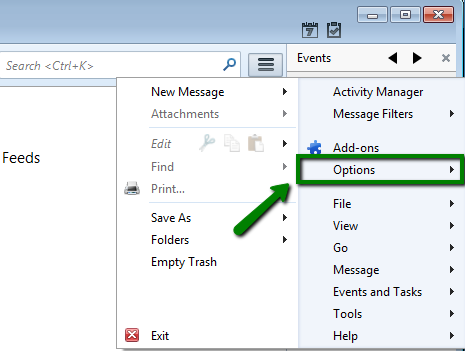
2. Navigate to Options menu:
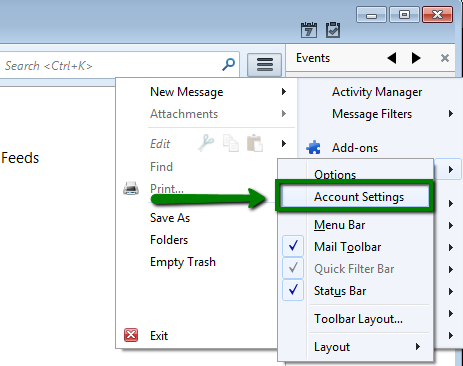
3. A new menu window will pop-up. In this menu select Account Settings option:
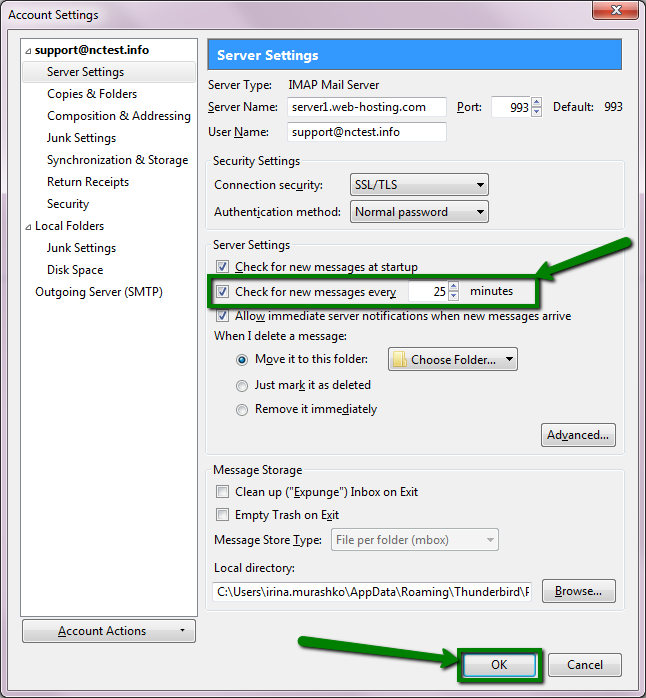
4. In the pop-up window select Server Settings menu:
5. In Server Settings section locate Check for new messages every … minutes line and set there how often Thunderbird should check emails for the email account. Then click Ok:
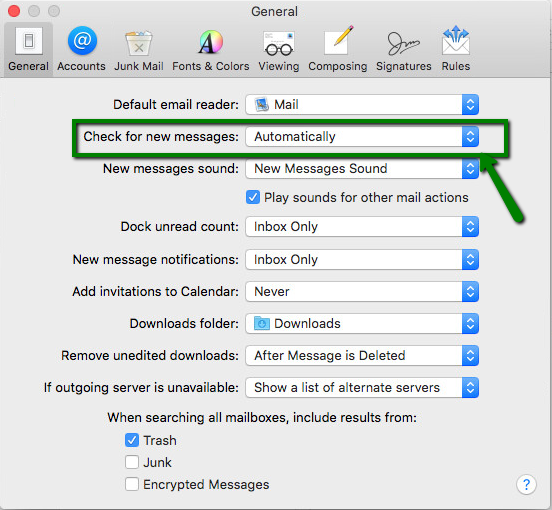
For MacMail:
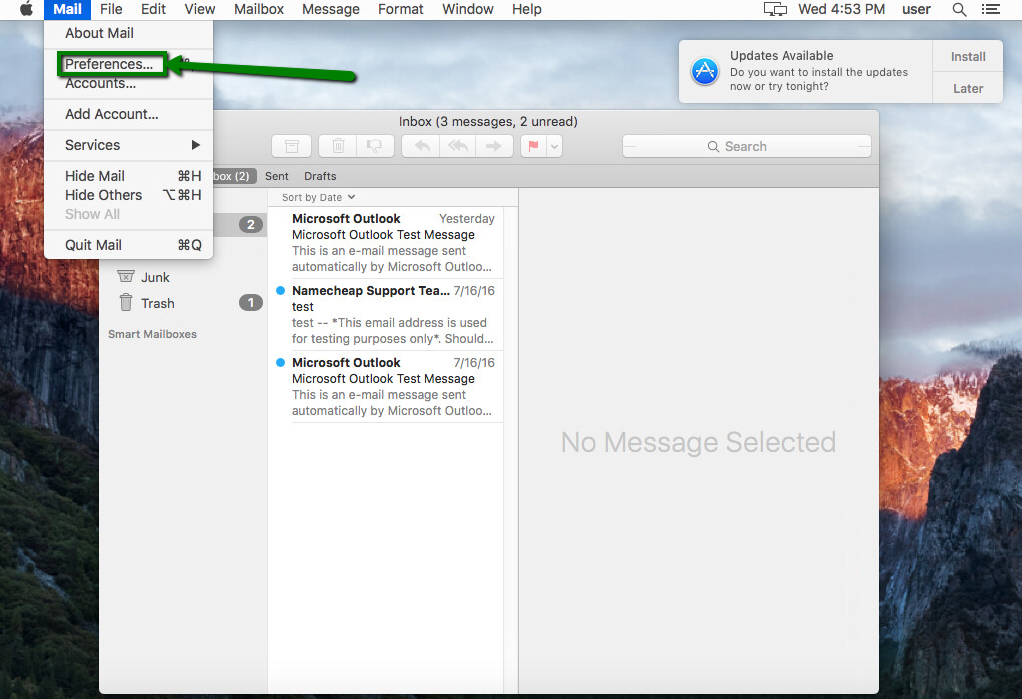
1. In MacMail go to Mail menu and select Preferences option:
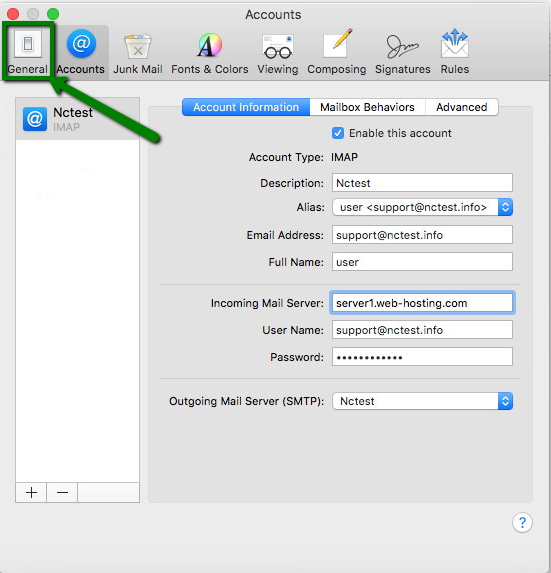
2. In the pop-up window select General tab:
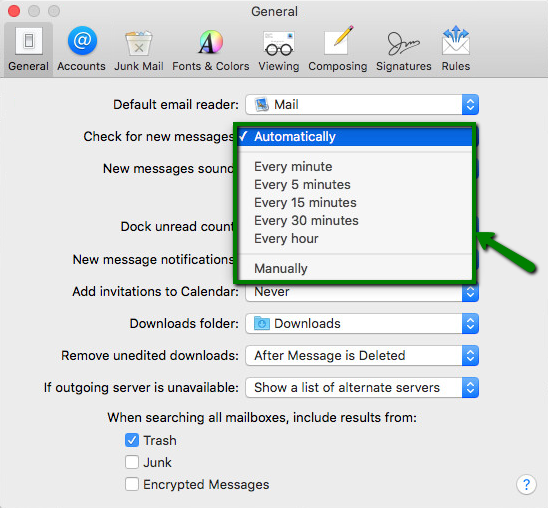
3. There locate Check for new messages line and click on drop-down menu:
4. Select the needed frequency:
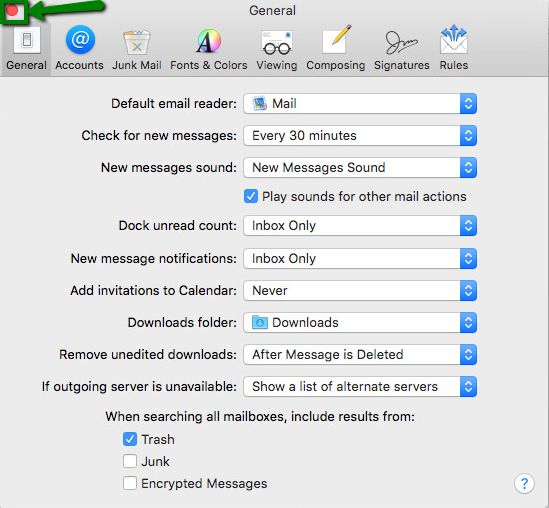
5. Click red close button and save changes:
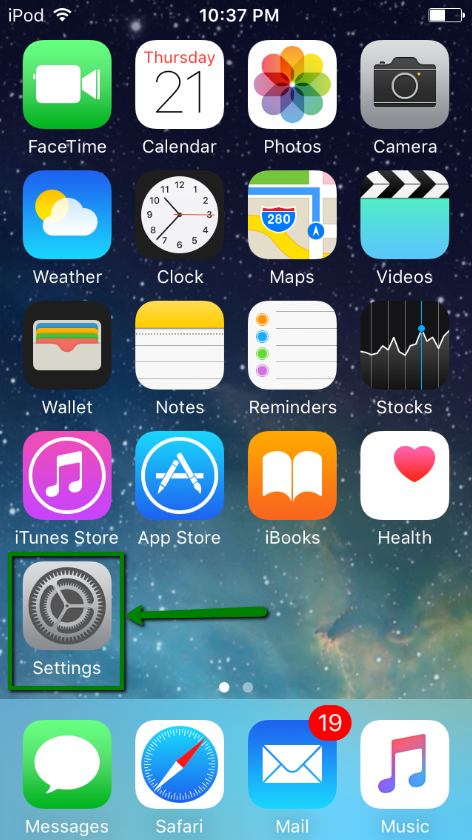
For iPhone/iPod:
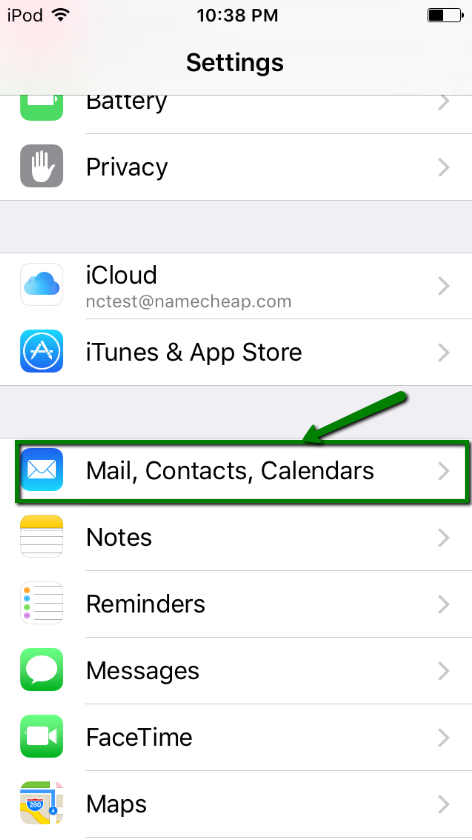
1. Go to Settings menu in your iPhone:
2. There navigate to Mail, Contacts, Calendars menu:
3. Locate Fetch New Data menu:
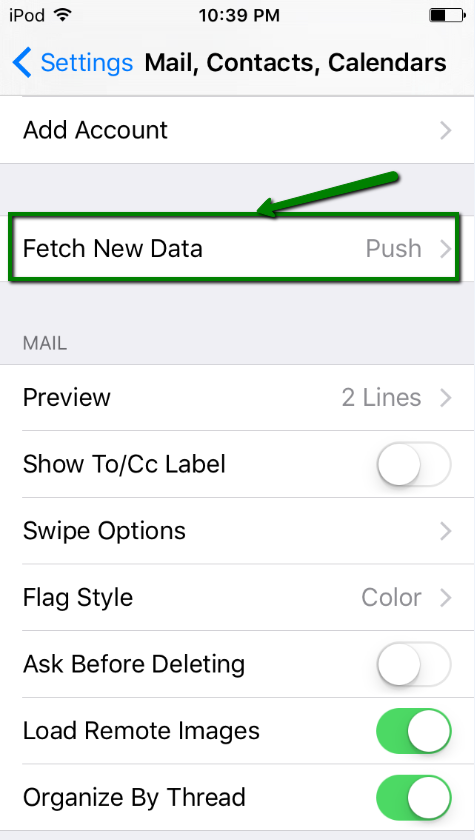
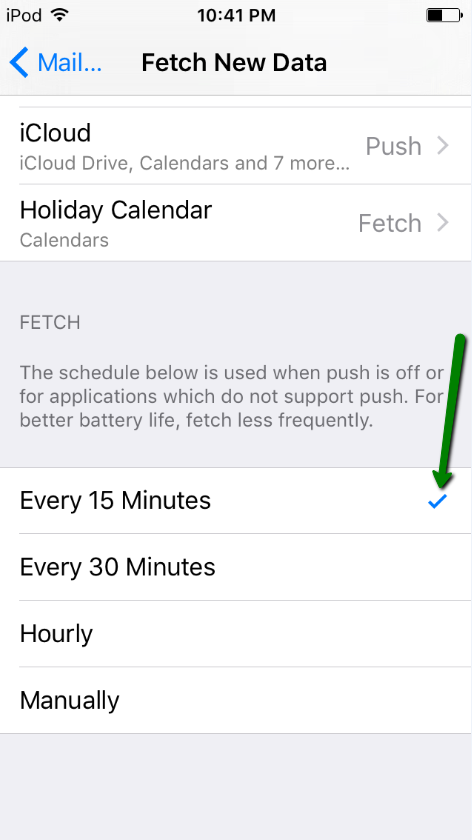
4. In this menu you can select Push option at the top. This option allows the email client to push new emails to your iPhone/iPod from the server when possible. In order to set a particular email check interval you need to turn off this option and navigate down this menu:

5. There you can see Fetch section with several options. Select the needed email check frequency interval by placing check mark sign there:
For Android Default Email Client:
Option 1:
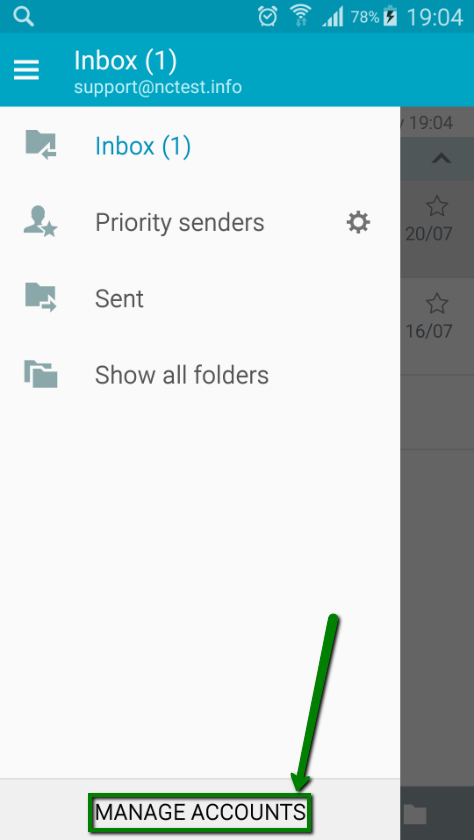
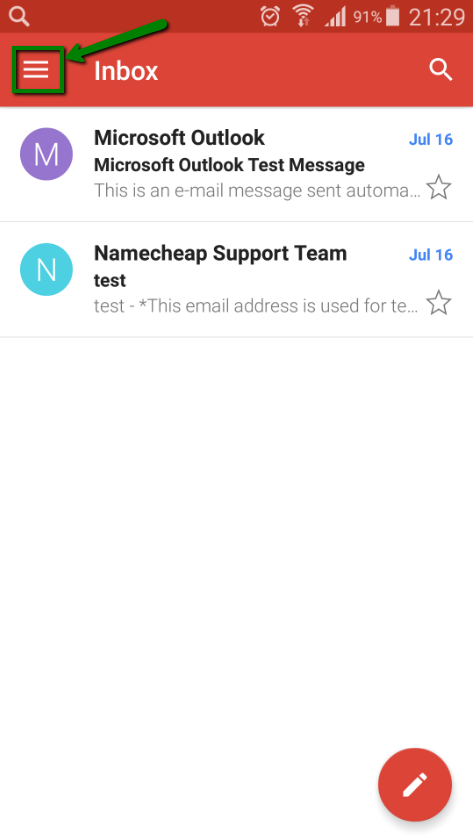
1. In your Android email client tap on hamburger button:

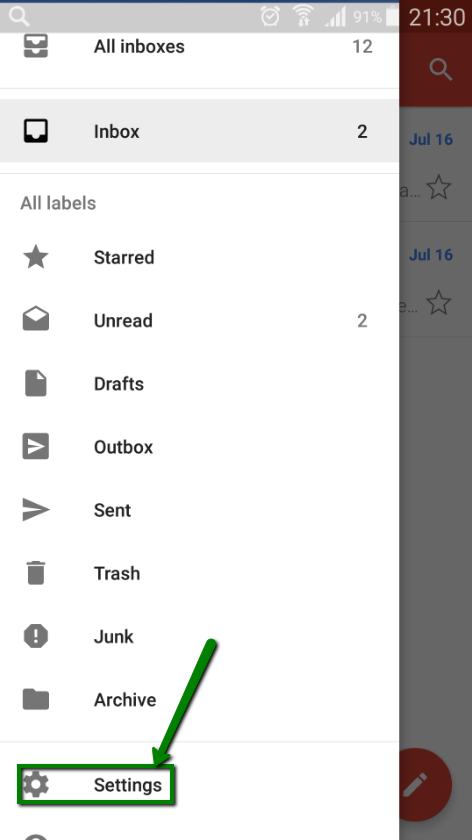
2. In the menu which appears select Manage Accounts option:
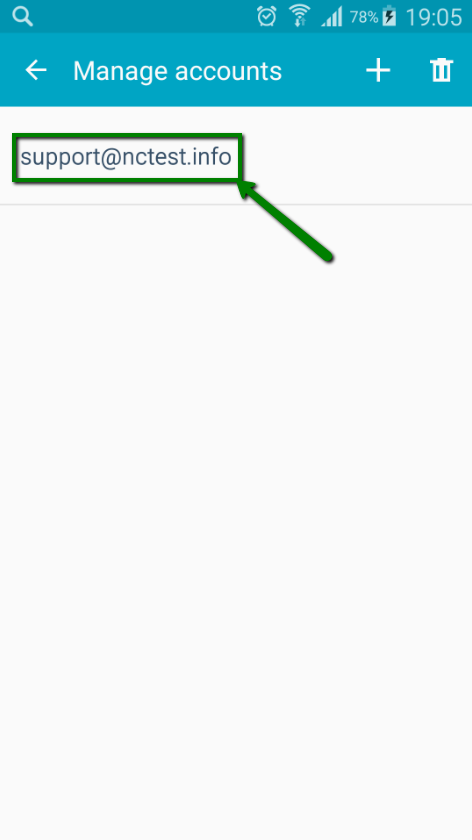
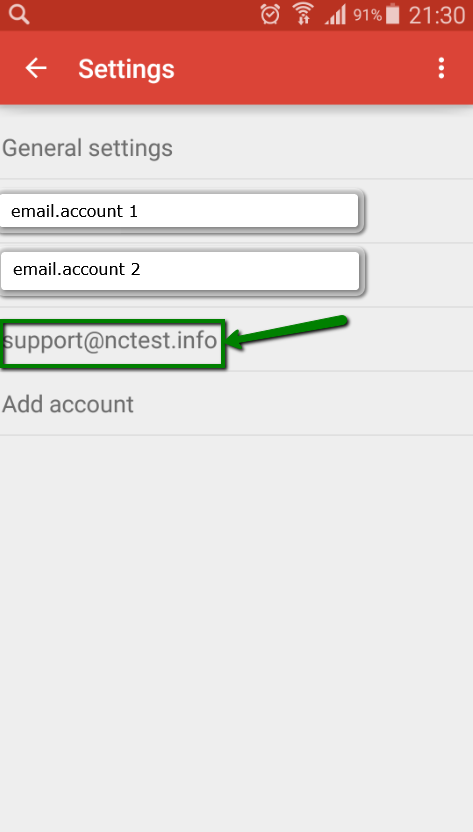
3. There select the account for which you need to adjust frequency of email checks:
4. Then select Sync settings menu:

5. Go to Sync schedule menu:

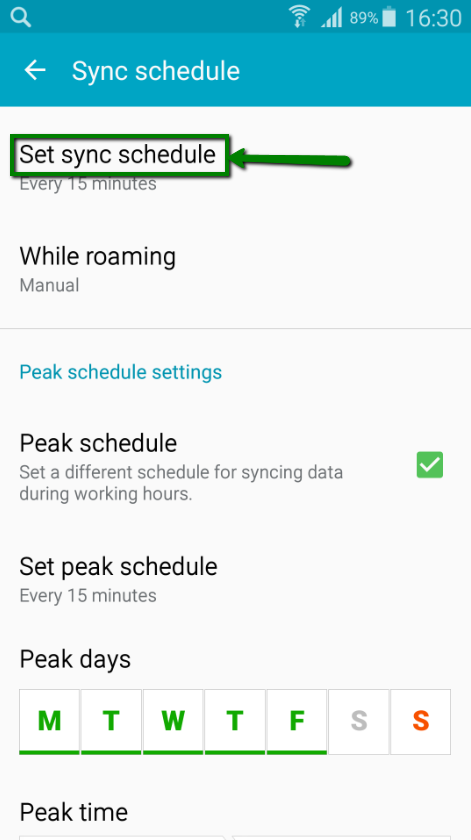
6. Then click on Set sync schedule menu:
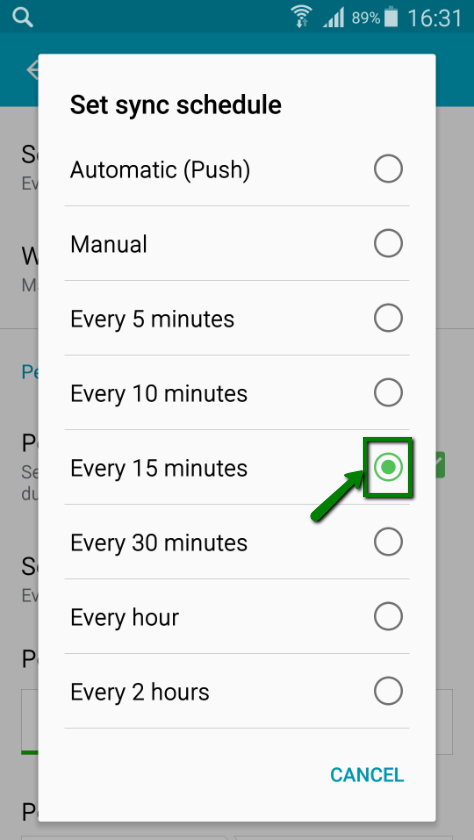
7. In the pop-up window which appears you can set how often the email client will check emails for the email account. If you select Push option, the email client will push new emails to your phone from the server when possible. In order to set a particular email check interval you need to select another option:
Option 2:
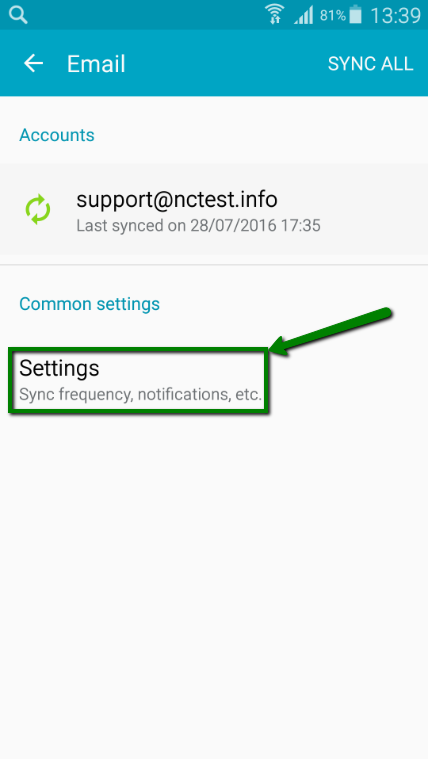
1. From your phone menu go to Settings menu:

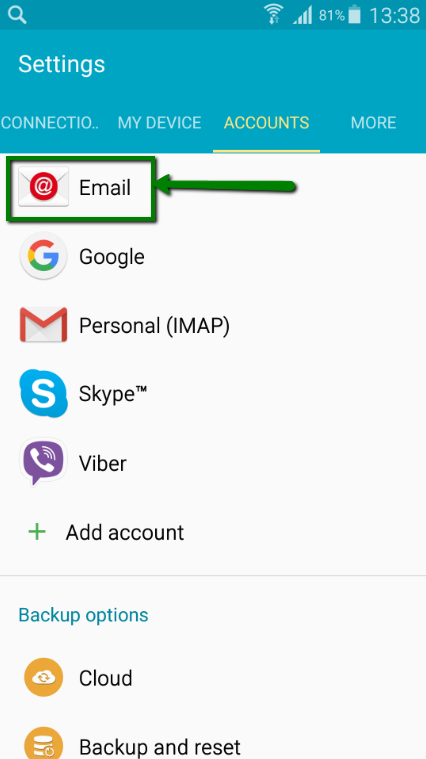
2. There go to Email menu:
3. In Common settings section tap on Settings menu:
4. After that proceed to paragraphs 3 through 7 of the Option 1 above.
For Android Google Email Client:
Option 1:
1. In your Android Google email client tap on hamburger button:
2. In the pop-up window select Settings menu:
3. In the window which appears you need to locate the email account for which you need to edit the frequency of email checks and click on it:
4. There you need to select Sync frequency menu:
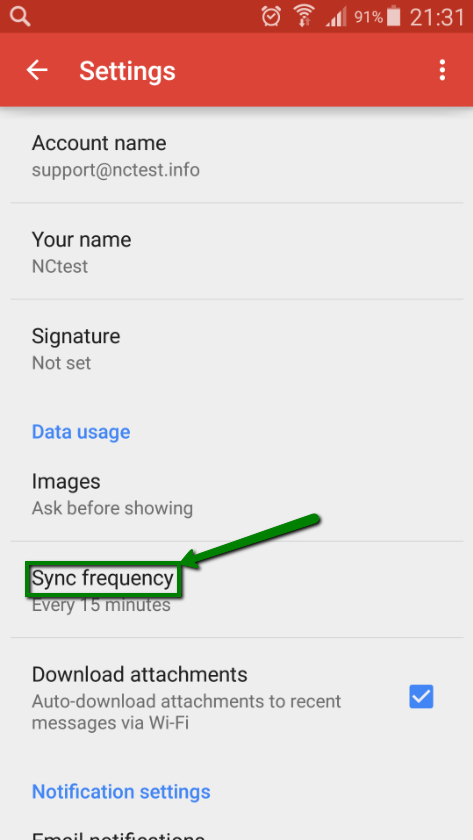
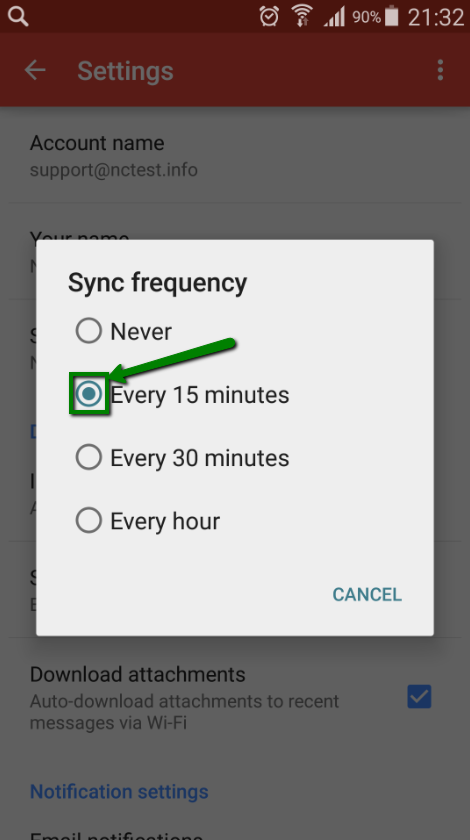
5. In the pop-up window which appears you need to set how often Google email client will check emails for the email account:
Option 2:
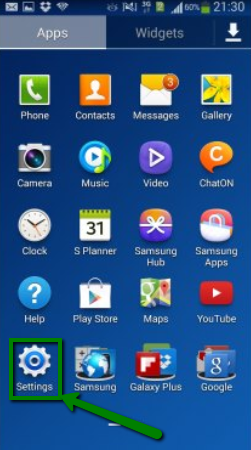
1. From your phone menu go to Settings menu:
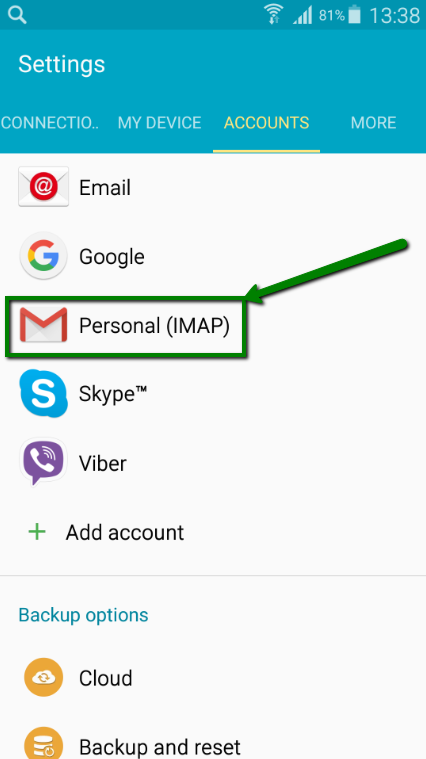
2. There go to Personal (IMAP) or Personal (POP3) menu (depending on which protocol you selected when set up the account on your phone):
3. There select Account settings menu:
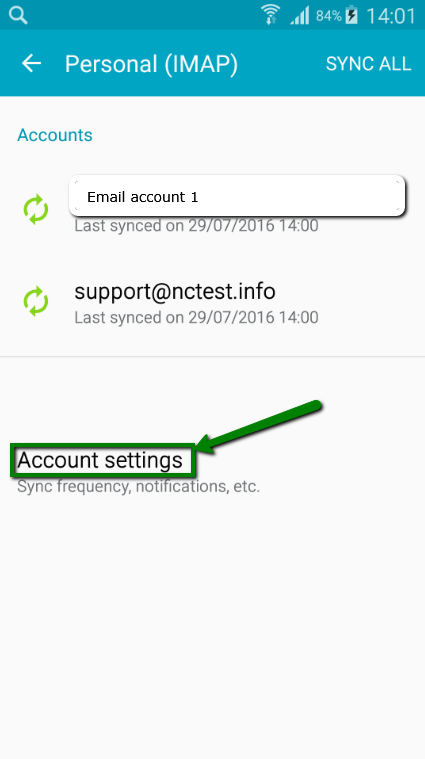
4. After that proceed to paragraphs 3 through 5 of the Option 1 above.
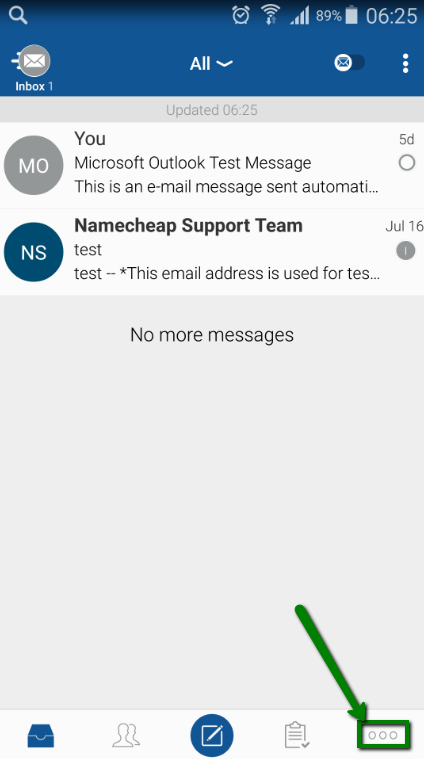
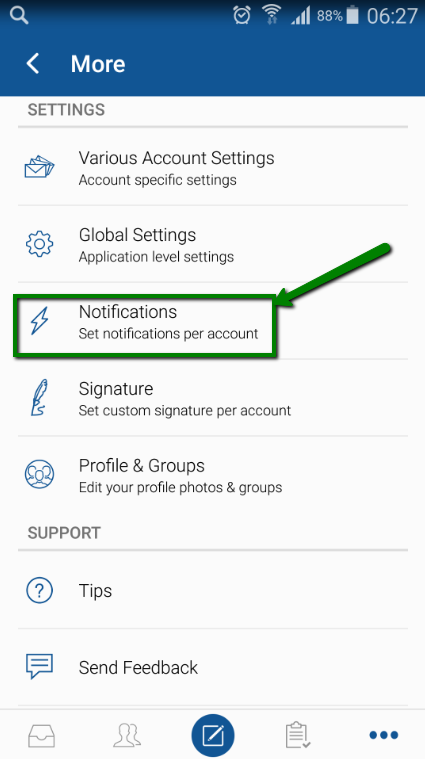
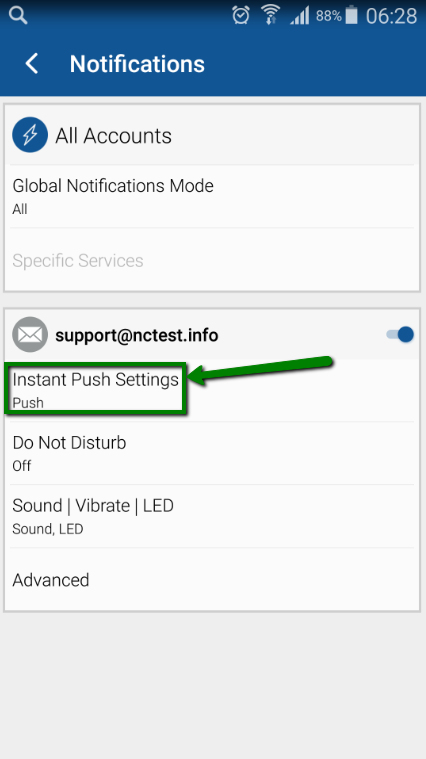
For Android BlueMail:
1. In BlueMail tap on more sign (looks like 3 dots):
2. In the window which appears select Notifications menu:
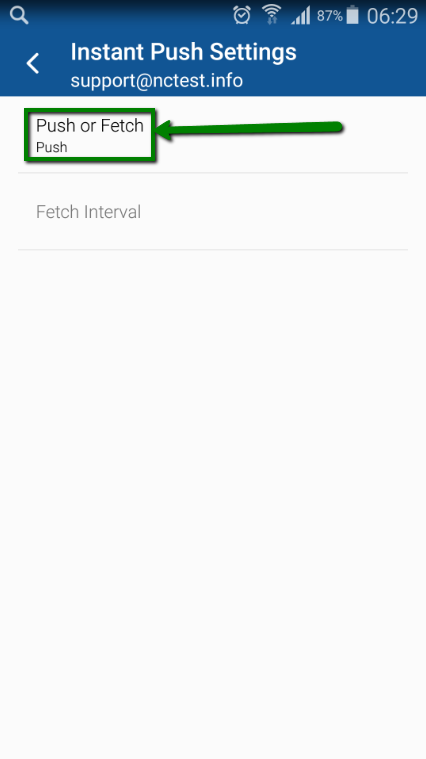
3. Then go to Instant Push Settings menu:
4. Go to Push or Fetch menu:
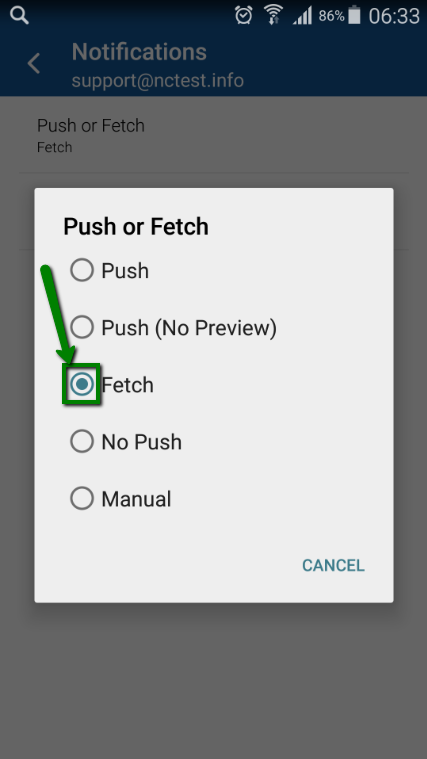
5. In this menu you need to select whether emails will be pushed to your phone or fetched by it. If you select Push option, the email client will push new emails to your phone from the server when possible. In order to set a particular email check interval you need to select Fetch option:
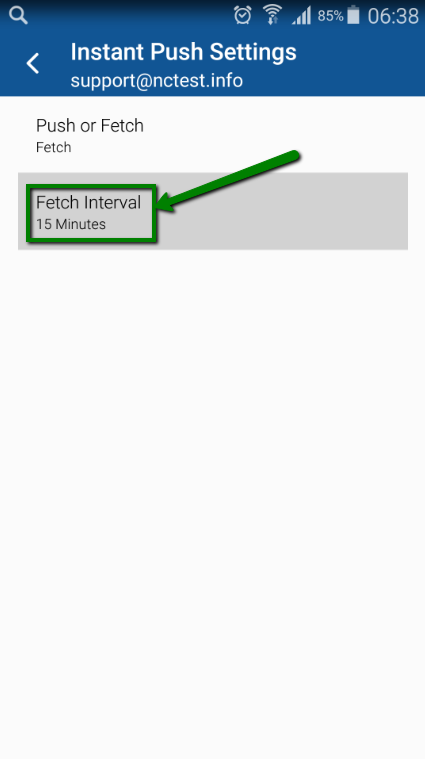
6. Then you need to go to Fetch Interval menu:
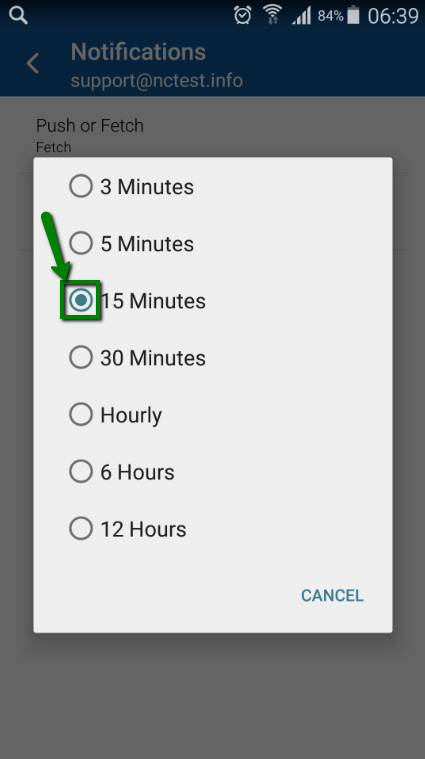
7. In the pop-up window which appears you can set how often BlueMail will check emails for the email account:
That's it!
Need any help? Contact our HelpDesk
Need help? We're always here for you.