PremiumDNS is our globally available DNS service which provides you with the 100% service level agreement for DNS resolution. Once you've ordered it and enabled it (requires to change the nameservers to premium ones), you can start
configuring the DNS zone for your domain.
It is not possible to use both PremiumDNS and private nameservers simultaneously:
- Once you point the domain to the new private nameservers, you will lose all the benefits of PremiumDNS.
- If you would like to use PremiumDNS with your hosting, you should create corresponding Hosting Host records at the side of our PremiumDNS service. Follow the instructions below to proceed.
To connect your domain with the hosting service, you need to copy the
DNS zone records for your domain from the
hosting account (cPanel) to your Namecheap account. It is needed to copy all DNS records for your domain, if you would like to use all associated with these records services.
We can split the default cPanel records into the following groups:
- A/CNAME records for @ (domain name itself) indicate a server that hosts content;
- A records for default subdomains (cpane/ftp/webdisk, etc.) define how additional cPanel services will work;
- MX for @ (domain name itself), A record for mail.domain.com, and SPF/DKIM TXT records of the domain are responsible for an email service;
- SRV records are used to identify specific services:
- autodiscovery and autoconfiguration enable some e-mail clients to automatically discover and configure access to e-mail accounts. More information can be found here;
- CardDAV and CalDAV are responsible for CalDAV Calendars and CardDAV Contacts support in cPanel.
Please note that if you create subdomains for the domain, the A records for these subdomains should be created in the Namecheap account as well. Otherwise, the subdomains will not work.
For the domain's content and the cPanel email service to work properly, it is required to move the main A/CNAME record for @, MX record for @, A record for the subdomain mail.domain.com, and SPF/DKIM TXT records from cPanel to the Namecheap account.
To do so, use the instructions:
Step 1 – Find the hosting records to be copied 1. Log in to your
cPanel account.
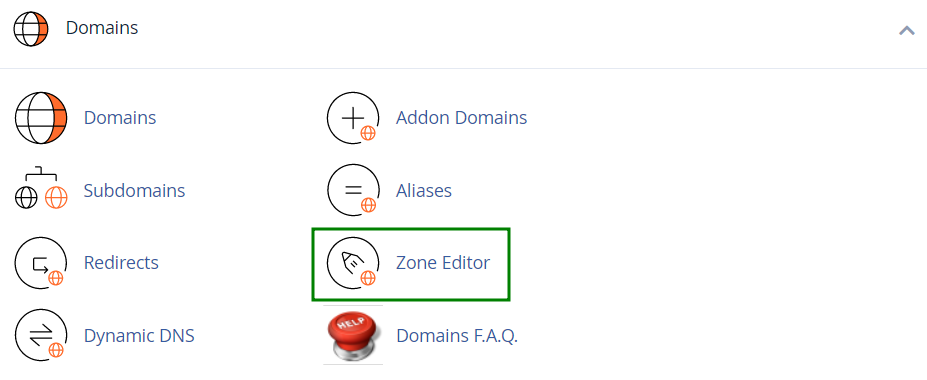
2. Navigate to the
Domains section and click on the
Zone Editor menu:
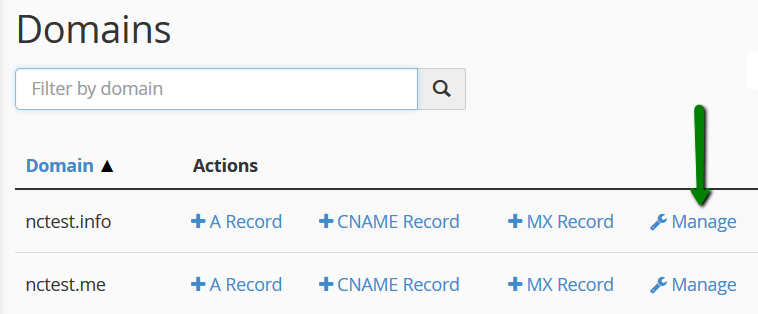
3. Click
Manage next to the domain you would like to edit:
We are using a
test domain nctest.info to show you how it works. Please select your own domain from the list and make adjustments depending on the domain selected.
You will see the list of DNS zone records you need to copy from cPanel to the Namecheap account:
.png)
There are 10 A records, 1 CNAME, 2 TXT and 5 SRV records to be set.
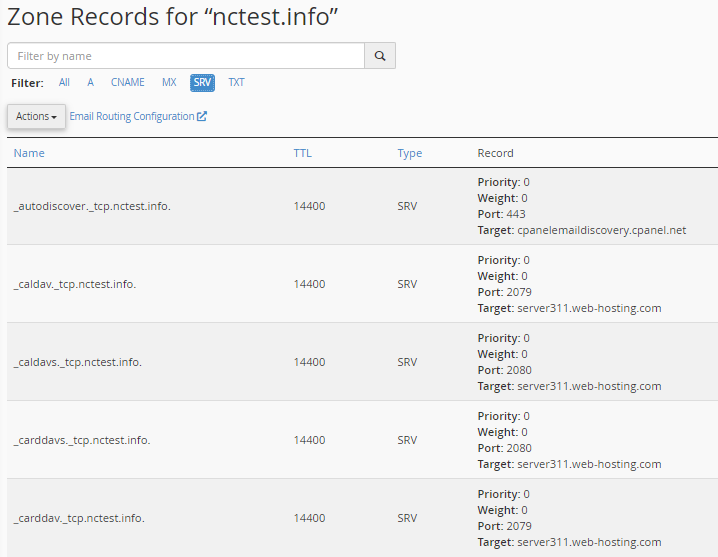
Plus, you will need to create 1 more record: MX for a proper work of your Webmail service (the number of records can be different for your domain, copy all the records from cPanel to Namecheap Dashboard).
Step 2 – Add DNS Records to the Namecheap account
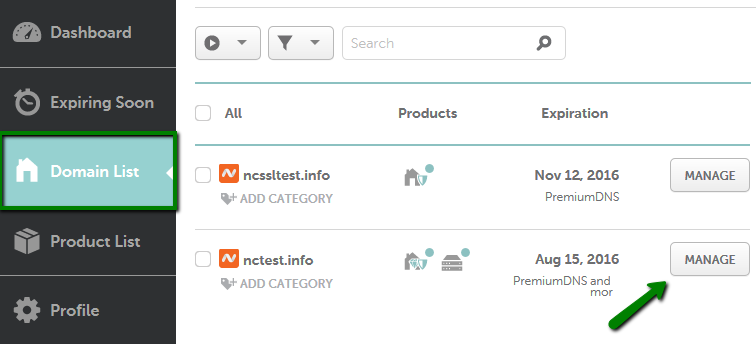
1. Sign in to your Namecheap account.
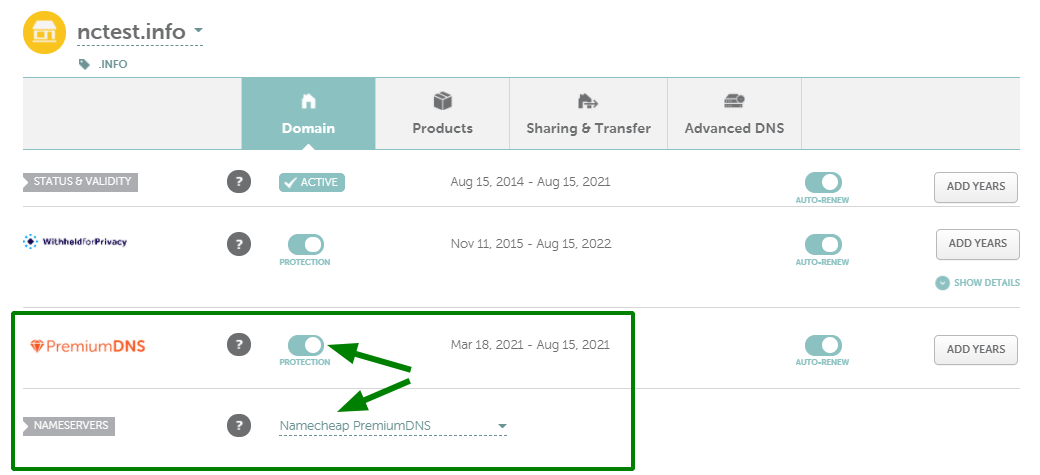
2. Select Domain List from the left sidebar and click on Manage next to your domain:
3. Make sure that PremiumDNS is enabled here:
4. Switch to Advanced DNS at the top of the page:
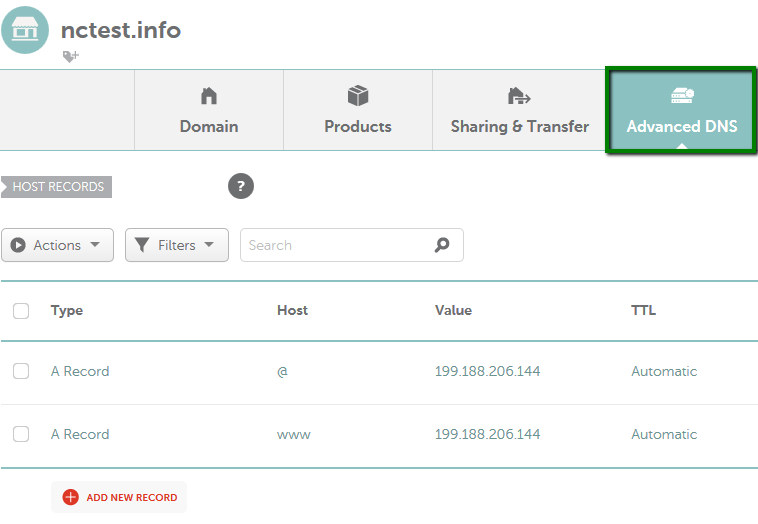
5. Find the Host records section and click on the Add New Record button (not able to edit Host Records?)
You can find out more details about each DNS record type in this article.
6. Create the same records as it's shown in your cPanel.
PLEASE NOTE: To create a record for a bare domain (e.g., mydomain.tld), put @ in the Host field. To create records for any subdomain (like www.mydomain.tld or blog.mydomain.tld), put only the name of your subdomain into the Host field without mentioning the domain itself. As such, the record for www.mydomain.tld should have only www in the Host.
At the end, you should have 18 new host records added:
.png)
.png)
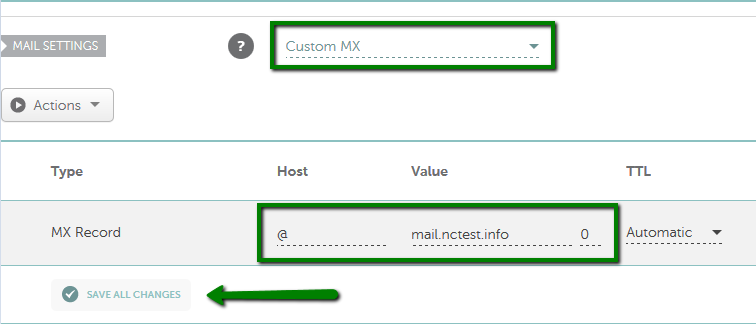
Scroll down to the Mail Settings section and select Custom MX from the drop-down menu to create the last record:
Type: MX record
Host: @
Value: mail.yourdomain.com
Priority: 0
TTL: Automatic
7. Save All Changes in both sections. Normally, it takes 30 minutes for newly created host records to take effect.
That's it!
If you have any questions, feel free to contact our Support Team.
