If you have purchased a domain name at Namecheap and would like to link it to your Zoho email – this article is just for you!
Zoho Mail Suite provides enterprise Email Hosting features, which meet the requirements of organizations of different types and sizes. The entire process is simple, and you can get a custom domain-based email address for all the members of the organization with no downtime.
In order to verify your domain with Zoho, you need to generate a verification
CNAME or
TXT record in your
Zoho account and set it up in your
Namecheap account.
You are welcome to use the video guide or follow the text instructions provided further in this article.
The default values for MX records:
@ | mx.zoho.eu. | 10
@ | mx2.zoho.eu. | 20
@ | mx3.zoho.eu. | 50
To connect your domain with Zoho, follow the steps:
1.
Sign in to your
Namecheap account.
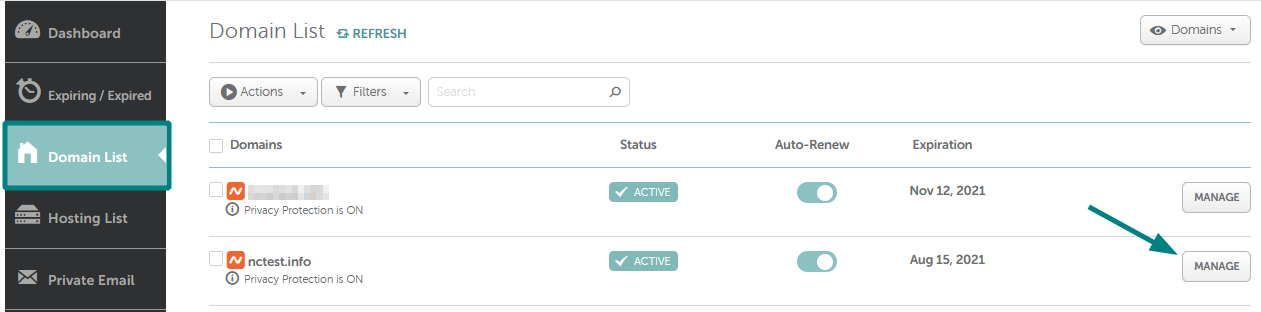
2. Select Domain List from the left sidebar and click on the Manage button next to your domain name:
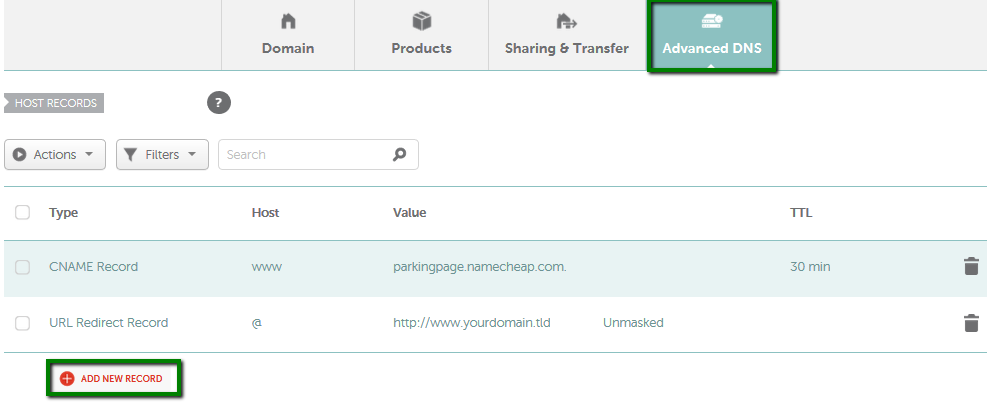
3. Click on the Advanced DNS tab and find the Host records section. Then click on the Add New Record button (are you unable to edit host records?):
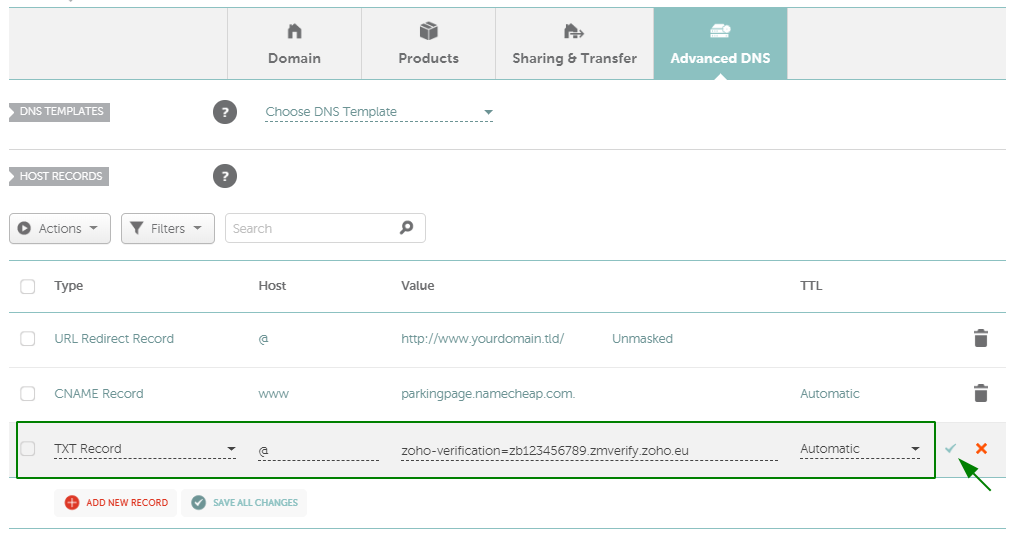
4. Select TXT Record/CNAME Record for Type depending on the verification method you prefer to use. For the TXT record, add @ to the Host field and enter the string provided on the verification page of the Zoho Control Panel (it looks like zoho-verification=zb*****.zmverify.zoho.eu) into the Value field:
When creating the CNAME record, fill the Host field with the code zb******** generated in the Zoho Control Panel. In the Value field, enter the value provided by Zoho, e.g. zmverify.zoho.eu:
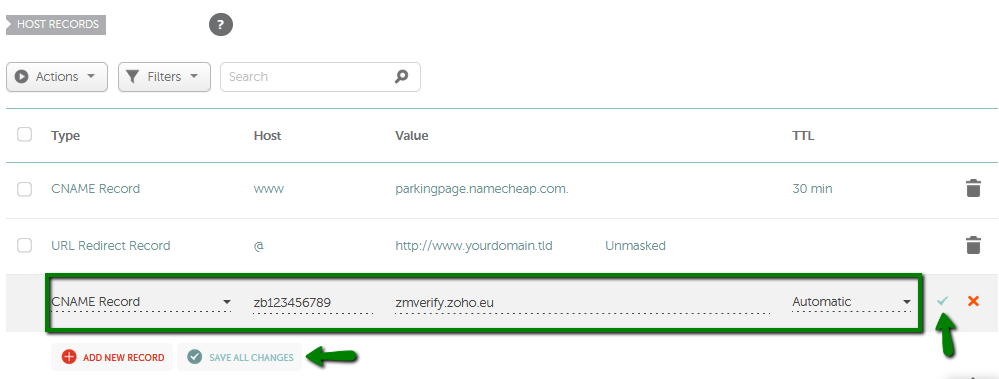
Press Save All Changes or a green checkmark on the right to confirm the settings.
Please allow up to 30 minutes for the newly-created record to take effect and verify your domain in your Zoho Control Panel.
5. Once the domain is verified, it is required to create MX records in order to link the domain to the mail service.
NOTE: Based on the data center (US/UK/CN), the MX record values will differ for your domain. The correct MX records specific for your domain will be available in
this section in the Admin Control Panel.
Follow the steps below:
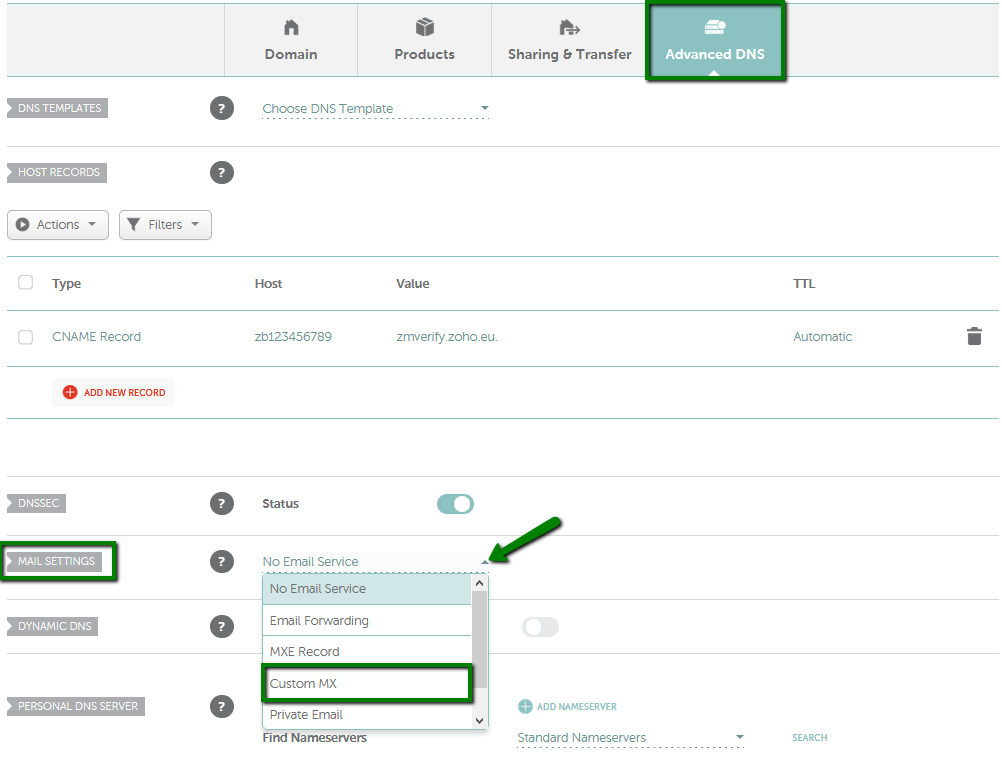
- In the same Advanced DNS tab, scroll down to the Mail Settings area and select Custom MX from the drop-down:
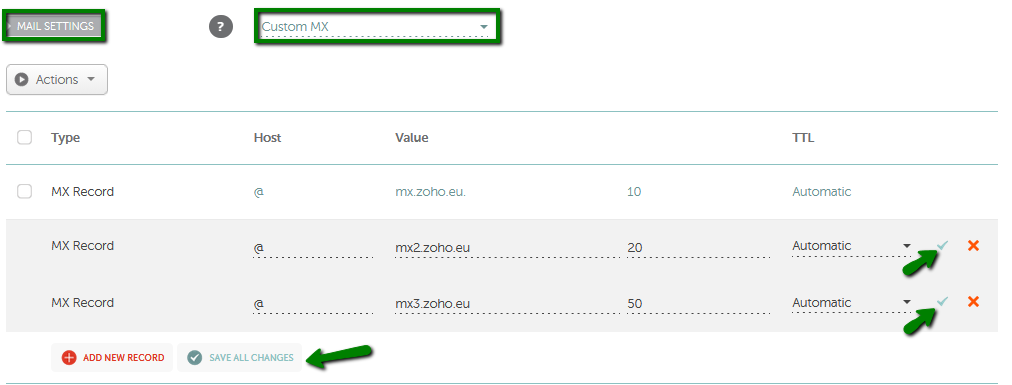
- In the fields that appear, enter the MX Records you have, for example:
@ | mx.zoho.eu. | 10
@ | mx2.zoho.eu. | 20
@ | mx3.zoho.eu. | 50
- Click on Save All Changes button or on the green checkmarks next to each record to apply the new settings:
NB! The MX values specified above are based on the generic configuration
information. For more specific configuration particular for your domain,
refer to
this section of the Zoho Control Panel.
Normally, the changes should take effect within 30 minutes.
6. You will also need to configure a DKIM record and an SPF record which can be checked in your Zoho Control Panel.
In your Namecheap account, go to the Advanced DNS tab >> click Add New Record >> select TXT Record as the record type, fill the Host field with the symbol @ and enter v=spf1 include:zoho.eu -all into the Value field.
Click Add New Record once again, select TXT Record as the record type, enter zoho._domainkey into the Host field (if zoho was entered as the selector in the Zoho Control Panel) and enter the corresponding value of the DKIM record, the one that was copied from the TXT record value field of your Zoho account, into the Value field:
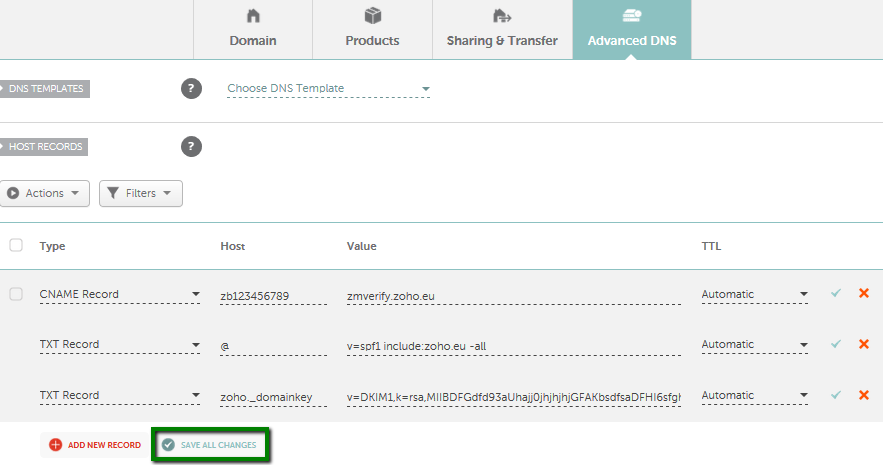
Click Save All Changes or the green checkmarks on the right.
These changes will take effect within 30 minutes.
If you have any questions, feel free to contact our Support Team.