This article provides instructions for synchronizing cPanel Calendar & Contacts using CardDAV and CalDAV on your Apple devices.
CardDAV is an address book client/server protocol designed to allow users to access and share contact data on a server. CalDAV is an Internet standard allowing to access scheduling information on a remote server. It’s a calendaring and scheduling client/server protocol designed to allow users to access calendar data on a server.
With CalDAV and CardDAV, cPanel account users and Webmail users can access their calendars and contacts remotely with third-party applications, in our case, using OS X and iOS devices. The Calendars and Contacts Configuration menu is located in the cPanel account interface under the Email section:

Calendars and Contacts setup on iOS 8.X
Calendars and Contacts setup on OS X El Capitan
In order to configure Contacts and Calendars synchronization on your iPhone, you will need to follow the steps below:
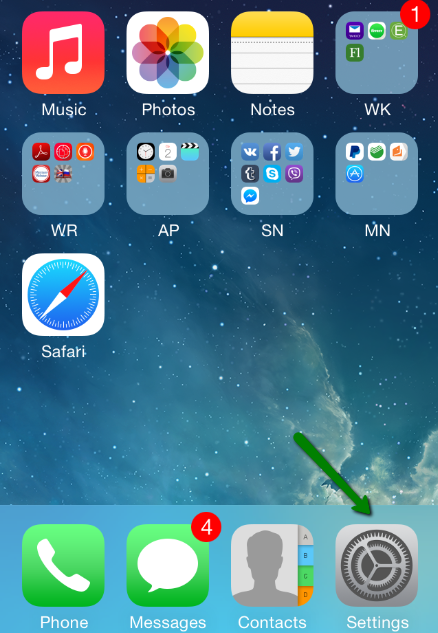
1. Select Settings from the home screen of your iPhone:
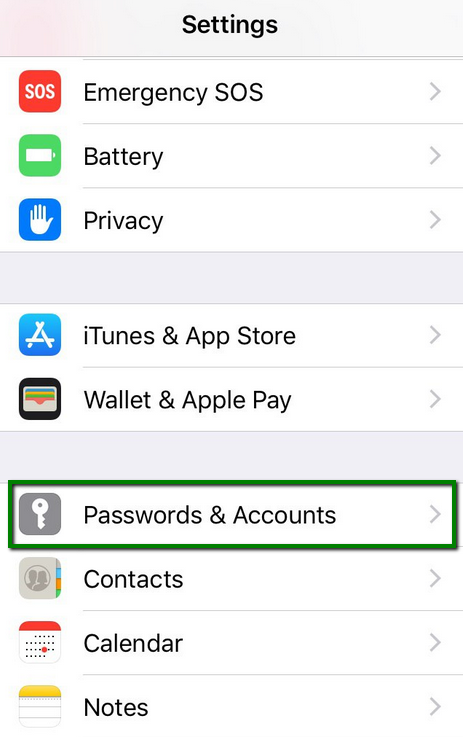
2. Choose Passwords and Accounts:
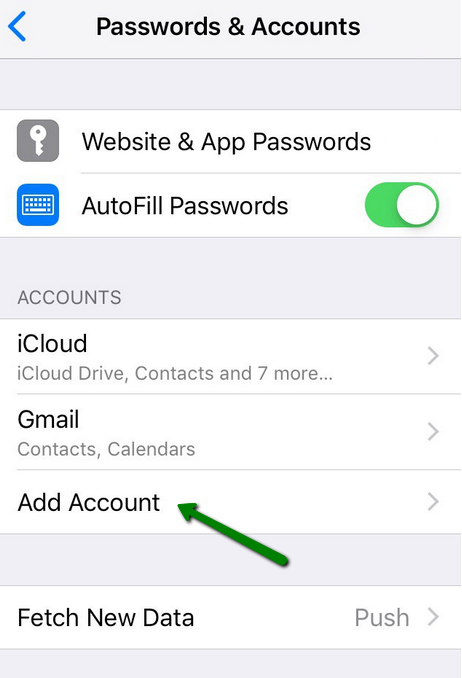
3. Click Add Account:
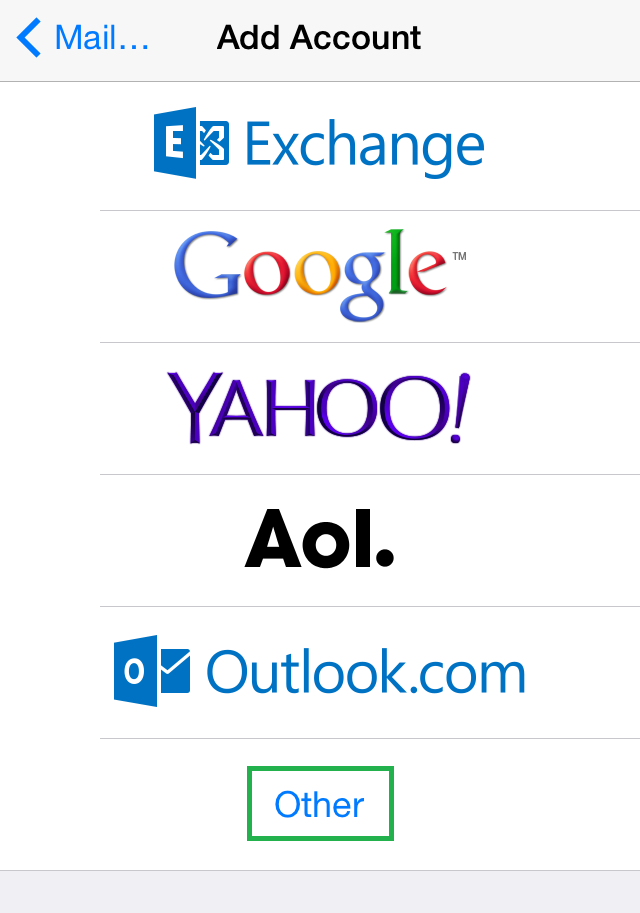
4. Choose Other from the list that appears:
How to set up your contacts:
To set up contacts on iPhone, select Add CardDAV Account.
In the CardDAV menu, you will need to specify the following settings:
Server: server your account is hosted on and port 2080 (e.g., server1.web-hosting.com:2080)
User Name: your cPanel username
Password: your cPanel password
Description: specify any description you wish (e.g., My Contacts)
NOTE: You can find your CardDAV configuration settings within the Calendars and Contacts Configuration interface of your cPanel account.

After that, click on Next.
Once done, the cPanel address book will be synchronized with your iPhone address book.
To set up contacts for a single email address, you will need to specify the following settings:
Server: server your account is hosted on and port 2080 (e.g., server1.web-hosting.com:2080)
User Name: your full email address that was created in your cPanel > Email Accounts menu
Password: password for this email address
Description: lets you specify any description (e.g., My Contacts)
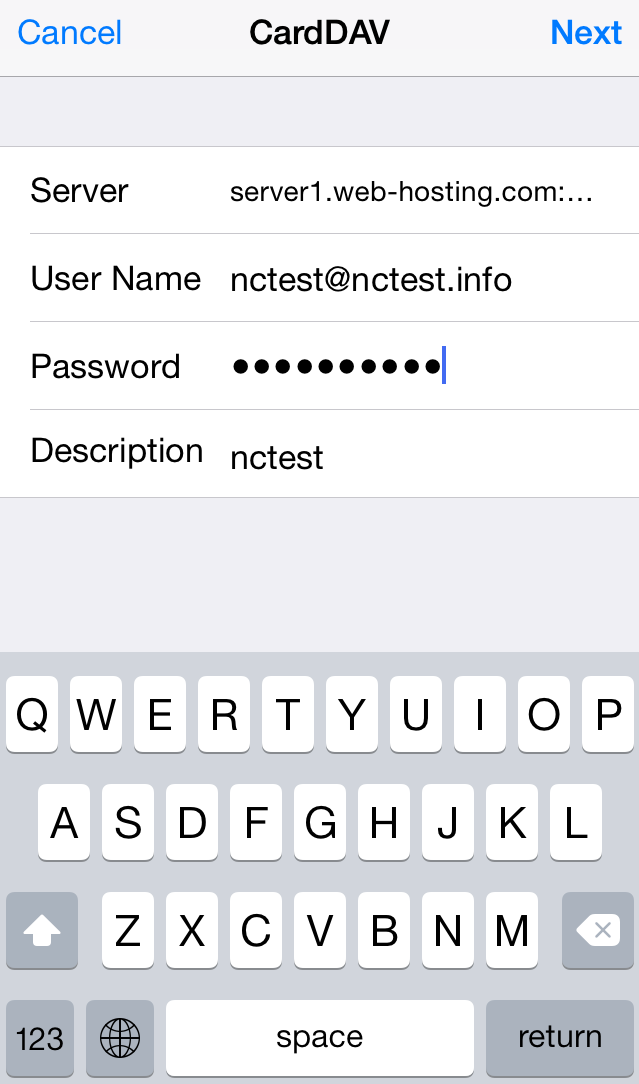
Click on Next.
How to set up your calendars:
Follow the steps below to set up contacts on iPhone:
1. Select Add CalDAV Account.
2. In the CalDAV menu, you will need to specify the following settings:
Server: server your account is hosted on and port 2080 (e.g., server1.web-hosting.com:2080)
User Name: your cPanel username
Password: your cPanel password
Description: specify any description you wish (e.g., My Contacts)
NOTE: You can find your CalDAV setup information within the Calendars and Contacts Configuration interface of your cPanel account.
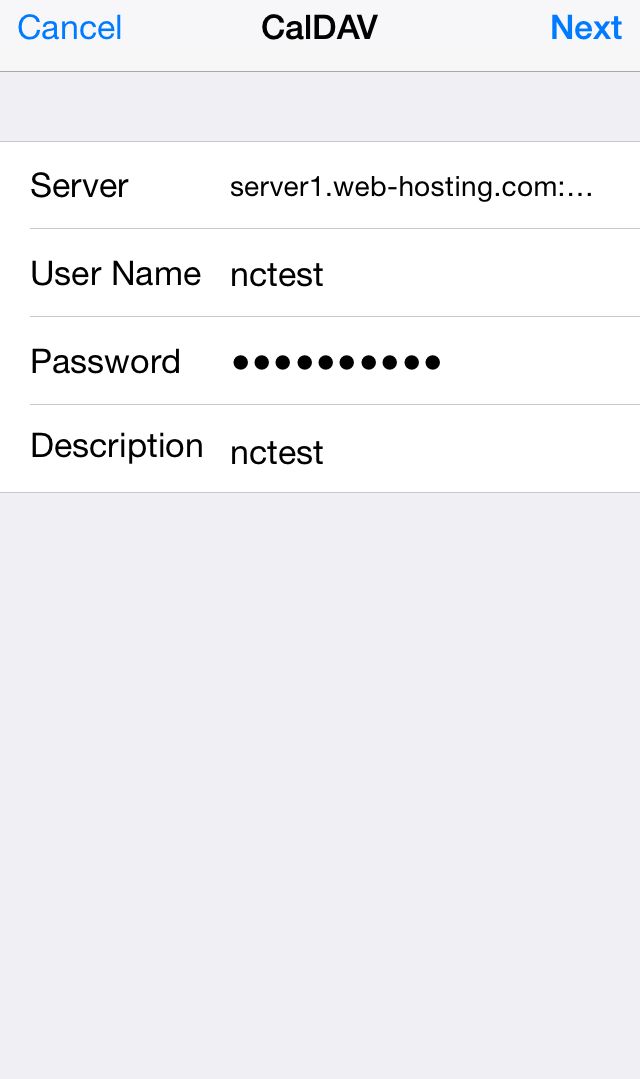
3. Click on Next.
4. Choose what exactly you would like to use CalDAV with:
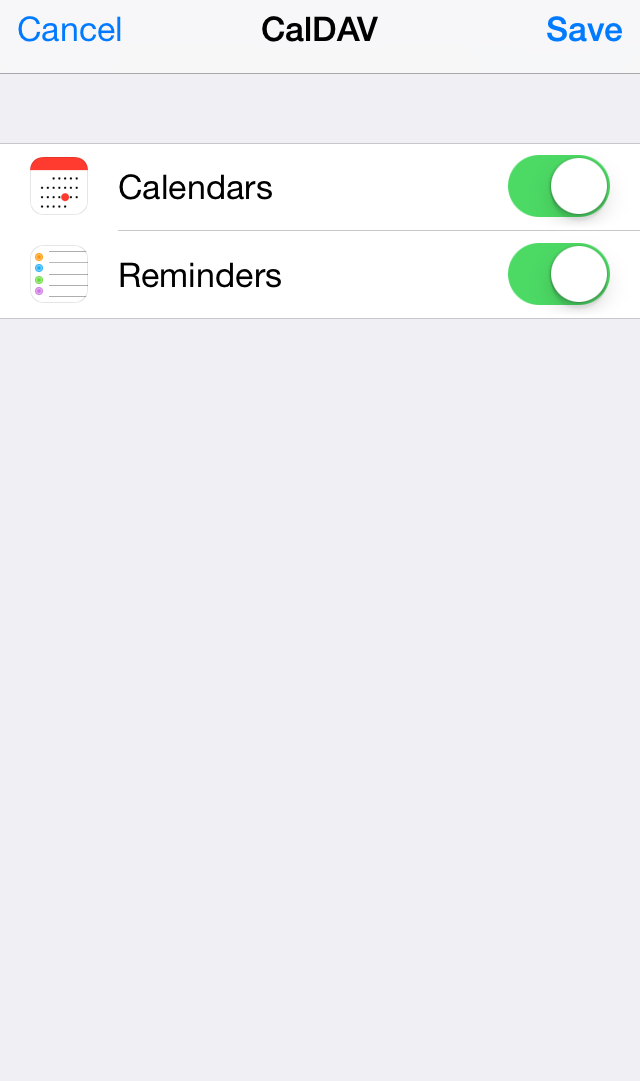
5. Click on Save.
Once done, the cPanel calendar will be synchronized with the calendar on your iPhone.
To set up calendars for a single email address, you will need to specify the following settings:
Server: server your account is hosted on and port 2080 (e.g., server1.web-hosting.com:2080)
User Name: your full email address that was created in your cPanel > Email Accounts menu
Password: password for this email address
Description: specify any description you wish (e.g., My Contacts)
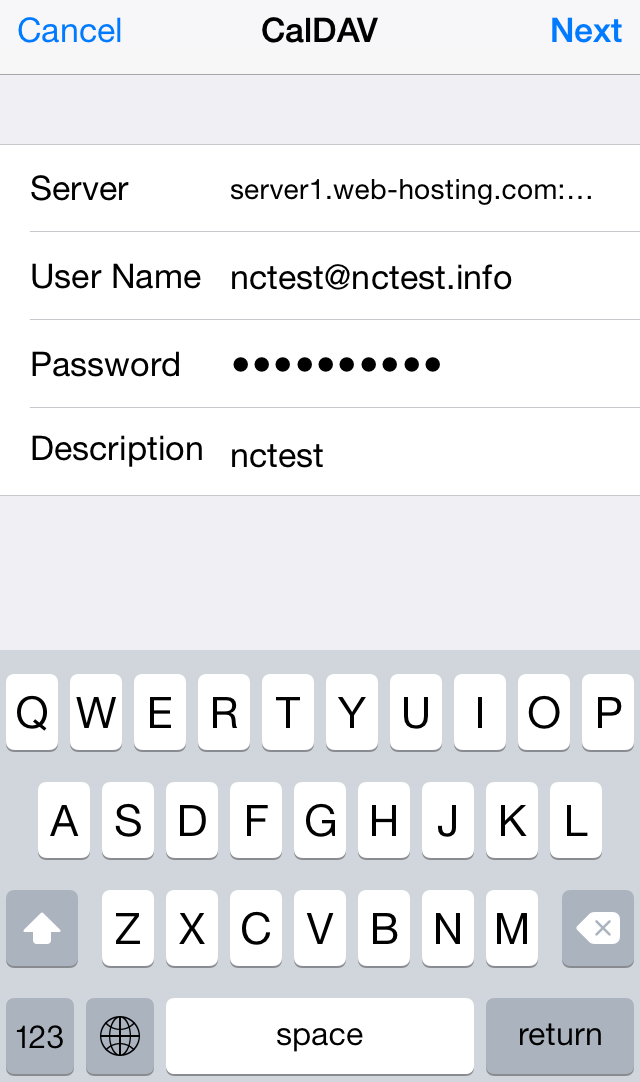
Click on Next, choose what exactly you would like to use CalDAV with and click on Save.
Calendars and Contacts setup on OS X El Capitan
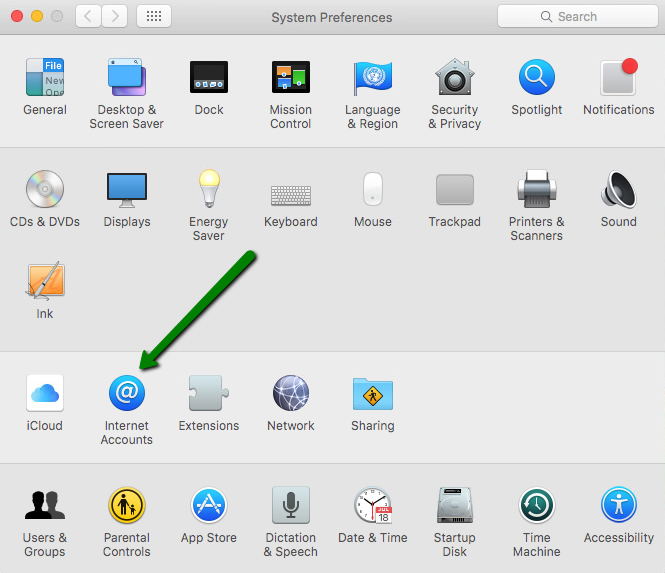
1. Click System Preferences >> Internet Accounts:
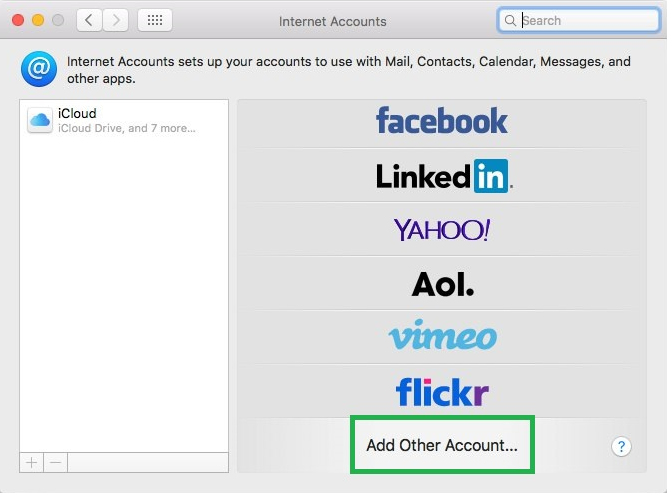
2. Click Add Other Account...:
How to set up contacts:
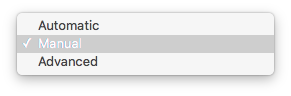
1. Select Add a CardDAV account and click Create.... Use the menu to select Manual:
2. Enter your cPanel account CardDAV information:
Account Type: manual
User Name: your cPanel username
Password: password for your cPanel account
Server Address: server your account is hosted on and port 2080 (e.g., server1.web-hosting.com:2080)

3. Click Sign In.
Once done, cPanel contacts will be added to the address book on your device.
To set up contacts for a single email address, you will need to specify the following records:
Account Type: manual
User Name: your full email address that was created in your cPanel > Email Accounts menu
Password: password for this email account
Server Address: server your account is hosted on and port 2080 (e.g., server1.web-hosting.com:2080)

Click Sign In.
How to set up your calendars
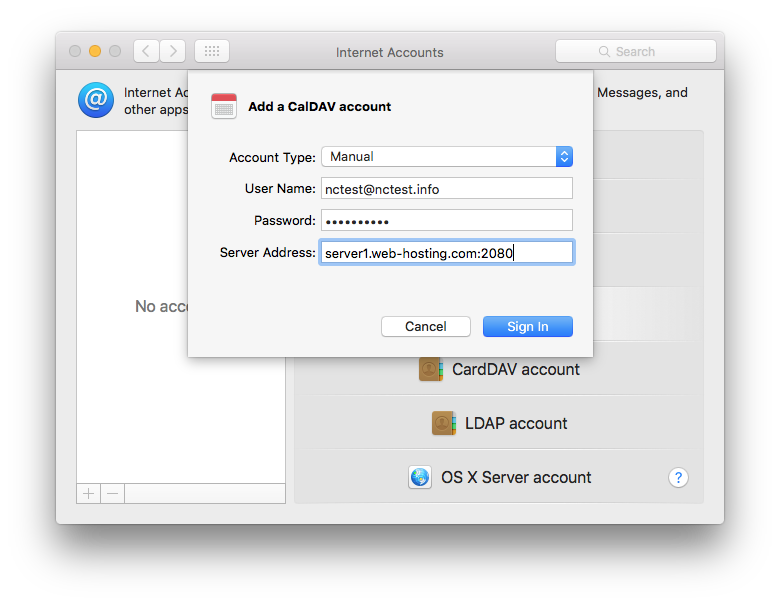
1. Select Add a CalDAV account and click Create.... Use the menu to select Manual:
2. Enter your cPanel account CalDAV information:
Account Type: manual
User Name: your cPanel username
Password: password for your cPanel account
Server Address: server your account is hosted on and port 2080(e.g., server1.web-hosting.com:2080)
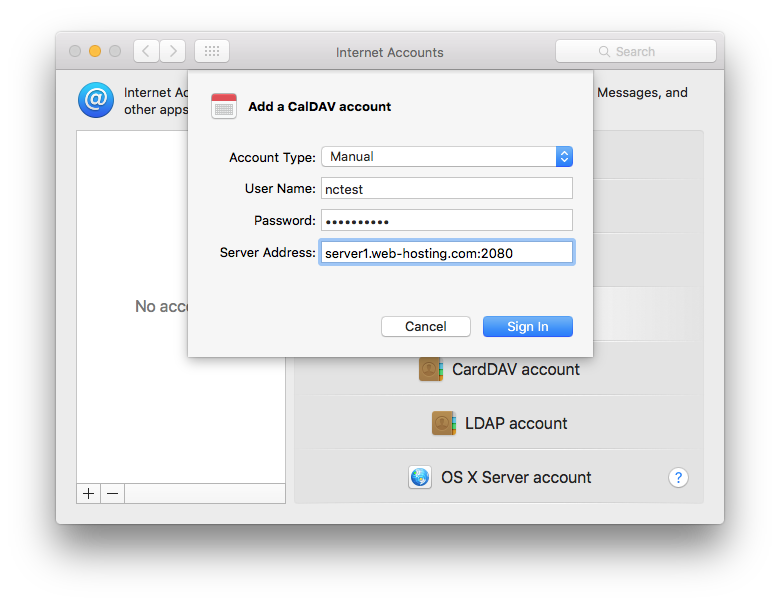
3. Click Sign In.
4. Choose what exactly you would like to use CalDAV with and click Save:

Once done, the cPanel calendar will be synchronized with the calendar on your device.
To set up calendars for a single email address, specify these settings:
Account Type: manual
User Name: your full email address that was created in your cPanel > Email Accounts menu
Password: password for this email account
Server Address: server your account is hosted on and port 2080 (e.g., server1.web-hosting.com:2080)
Click Sign In, choose what exactly you would like to use CalDAV with and click Save.
That's it!
Need any help? Contact our HelpDesk
