Laravel is a free, open-source PHP web application framework. It provides an expressive, elegant syntax and is used for the development of web applications following the model–view–controller (MVC) architectural pattern. Developers believe development must be an enjoyable, creative experience to be truly fulfilling. Laravel attempts to take the pain out of development by easing common tasks used in the majority of web projects, such as authentication, routing, sessions, queueing, and caching. Laravel is accessible, yet powerful, providing powerful tools needed for large, robust applications.
As of March 2015, Laravel is regarded as one of the most popular PHP frameworks, together with Symfony2, Nette, CodeIgniter, Yii2 and other frameworks. Documentation for the framework can be found on the Laravel website.
You are able to choose two different variants of Laravel installation – automatic via the Softaculous and manual.
Laravel automatic installation via the Softaculous
Currently, Softaculous allow you to install the two latest Laravel versions: 11.13.0 and 8.83.27. The Laravel framework has a few system requirements that may be
checked here for every version.
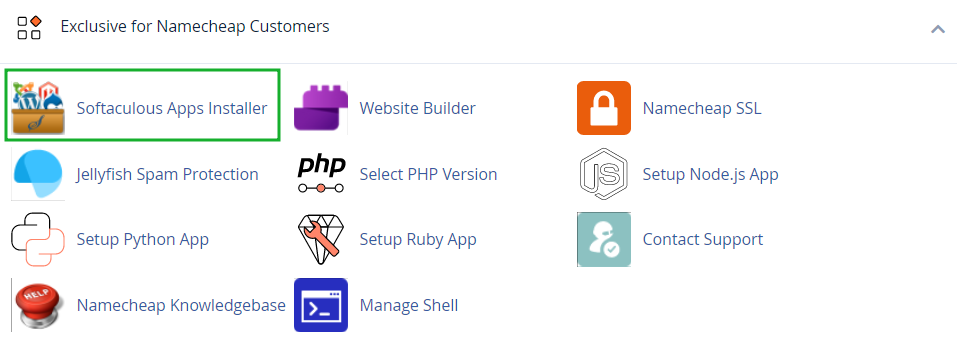
First of all, you need to log into your cPanel account and find Softaculous menu in Exclusive for Namecheap Customers section:
Once done, you will be redirected to Softaculous main page. Type Laravel in the search bar and click on the result:

Move to Install tab, there you will be prompted to choose the folder where Laravel will be installed. Feel free to choose the one you need (note that this directory will be created by Softaculous):

Click the Install button and that’s all.
Laravel manual installation
Other software which should be installed in order to set up Laravel is Composer. It is a tool for dependency management in PHP. It allows you to declare the libraries your project depends on, and it will manage (install/update) them for you. Composer is not a package manager in the same sense as Yum or Apt are. Yes, it deals with 'packages' or libraries, but it manages them on a per-project basis, installing them in a directory (e.g., vendor) inside your project. By default, it will never install anything globally. Thus, it is a dependency manager.
Let’s stick to the algorithm of installation now:
1. SSH access should be enabled for your hosting account with us. You can do this with the help of this guide.
2. To access your account via SSH, download and install one of available SSH clients. You can find the list of free SSH clients here. In case you are using a Unix-based OS (Linux or OSX), you can easily run the Terminal application and connect to the server using the command:
ssh username@servername -p21098
ssh – command for logging into the remote server
username – your cPanel username
servername – name of the server where your hosting account is located (you can find it using this tutorial)
-p21098 – port which is used on the shared server
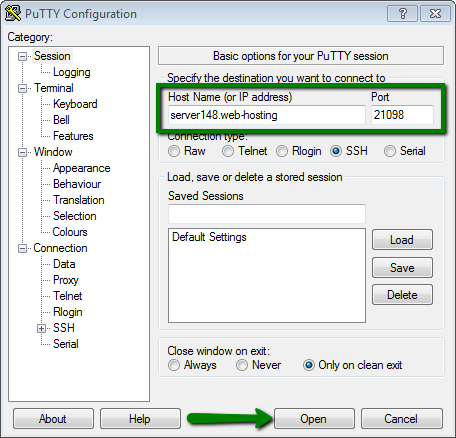
3. Open your SSH client, put your domain name or the IP address of the server into the Host Name field, enter 21098 into the Port field, choose SSH as your connection type and press the Open button:
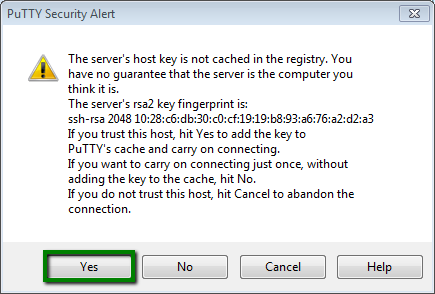
4. If you receive PuTTY Security Alert, press Yes:
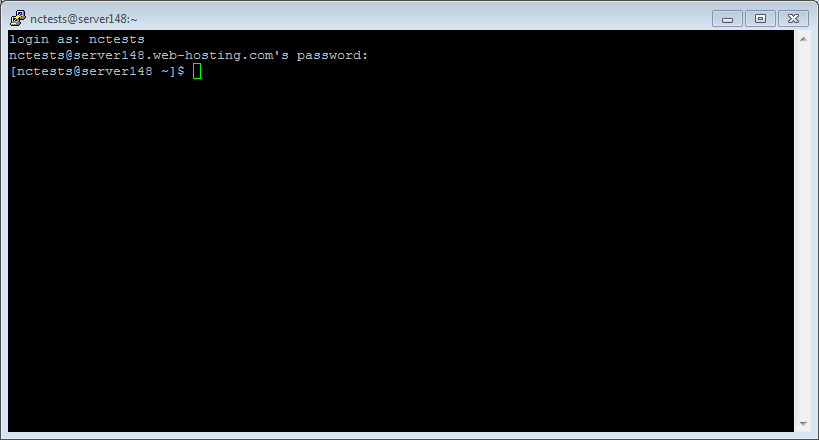
When prompted, enter your cPanel username and password (when you enter the password, it is automatically hidden for security purposes):
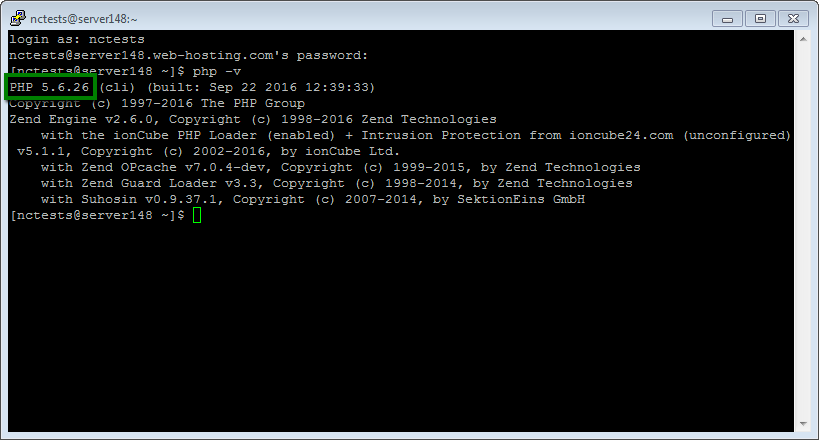
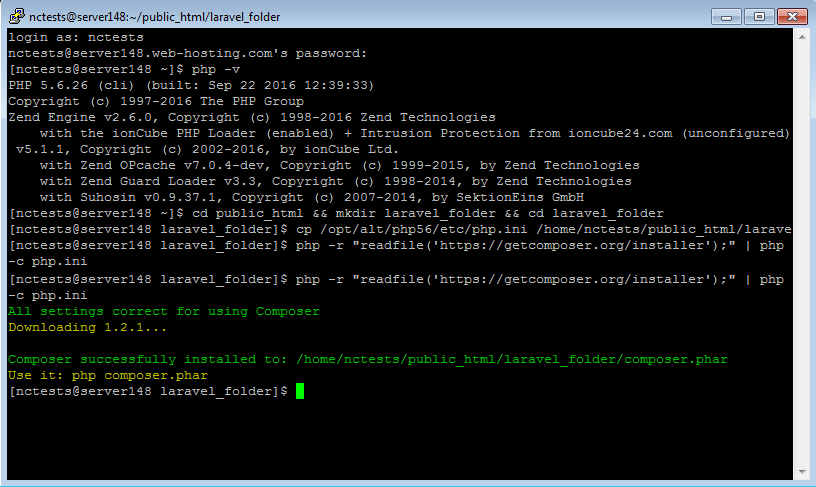
5. Laravel and Composer require PHP 7.1.3 version, so we need to check whether the needed version is set up. Type the php -v command in PuTTY (or in Terminal) and you will get the following output:
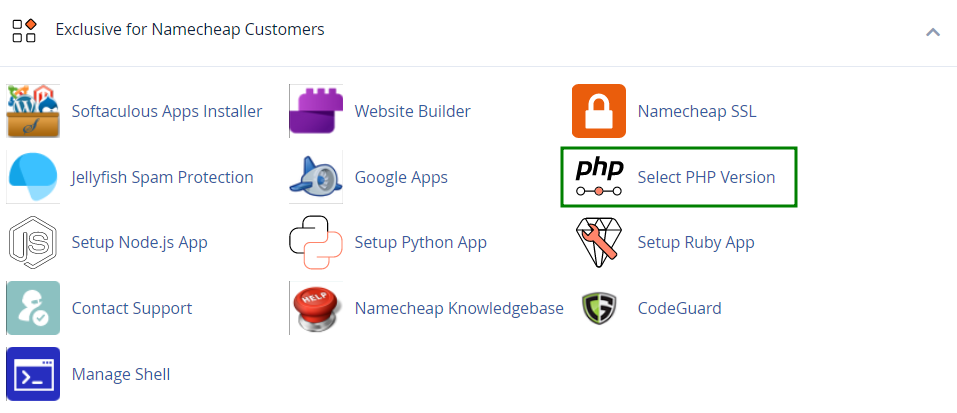
6. In order to set up 7.1 version, you need to log into your cPanel, navigate to Exclusive for Namecheap Customers section > Select PHP Version menu:
Select 7.1 version from the drop-down menu and then click on the Set as current button >> Save:

You can also find additional information about PHP selector here.
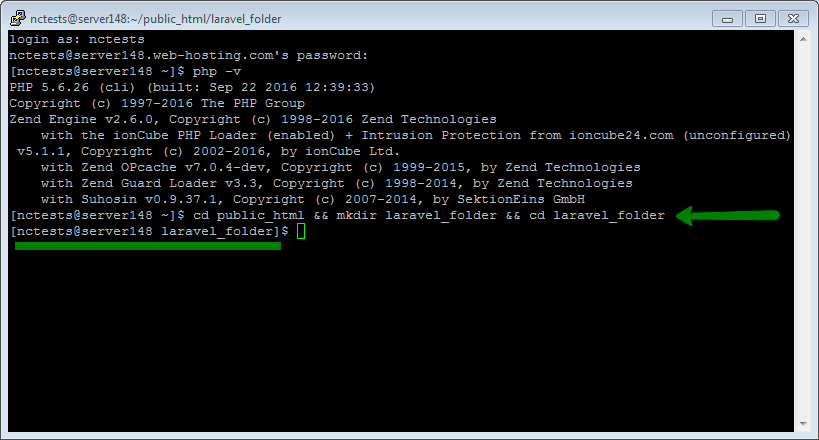
7. Now you need to decide where you wish to put your Laravel installation. For example, we will create laravel_folder in public_html using the following command:
cd public_html && mkdir laravel_folder && cd laravel_folder
This line can be divided into three separate commands:
- cd public_html: navigation to the public_html folder, since after logging in you will be located in the /home/username/ folder by default
- mkdir laravel_folder: mkdir command will create of a new folder named laravel_folder, you can replace laravel_folder with any desired name
- cd laravel_folder: navigation to the newly created laravel_folder
- &&:used for combination of several different commands.
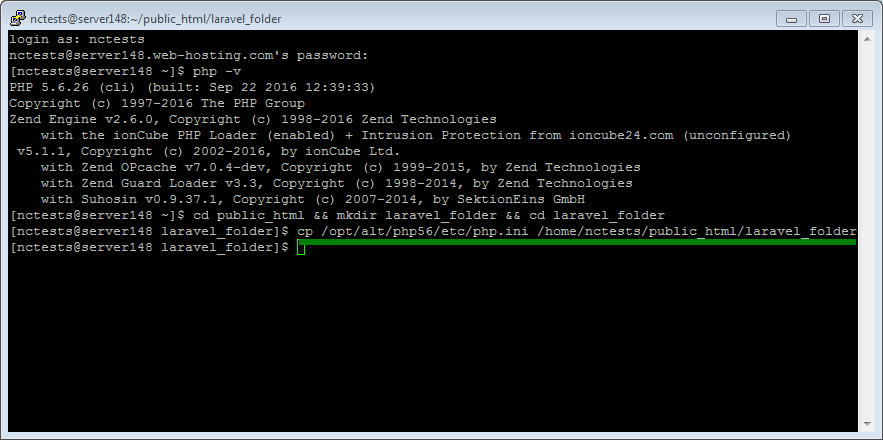
8. Then you need to copy php.ini file from the default location on the server to your laravel_folder using this command:
cp /opt/alt/php56/etc/php.ini /home/username/public_html/laravel_folder
- cp:this command is used to copy the php.ini file to the folder you wish to use with Laravel.
NOTE 1: make sure that you replace username with your actual cPanel username
NOTE 2: in case you need php.ini for any other PHP version, just change php56 to php55 or to any other value corresponding to the current version.
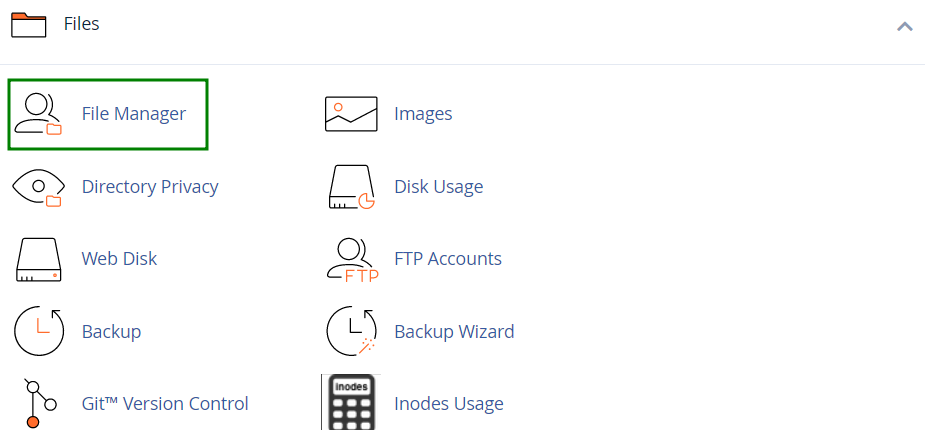
9. Now you will need to find php.ini file in current location. Log into cPanel and navigate File Manager menu:
Move to the folder you have chosen for Laravel and open php.ini with Editor:
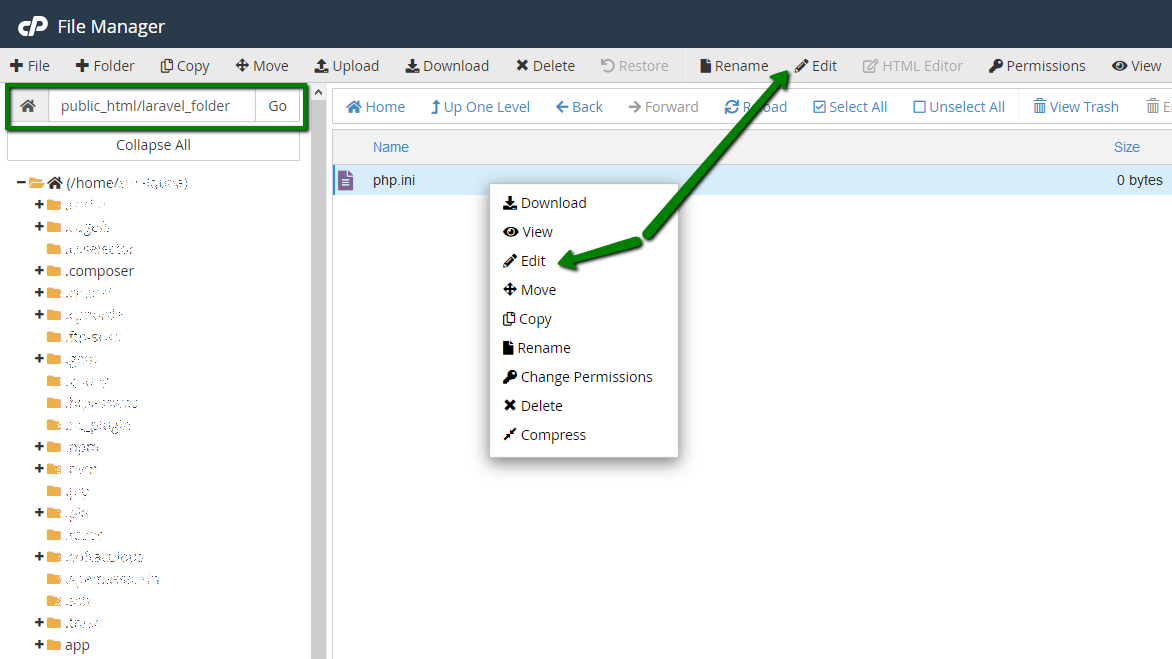
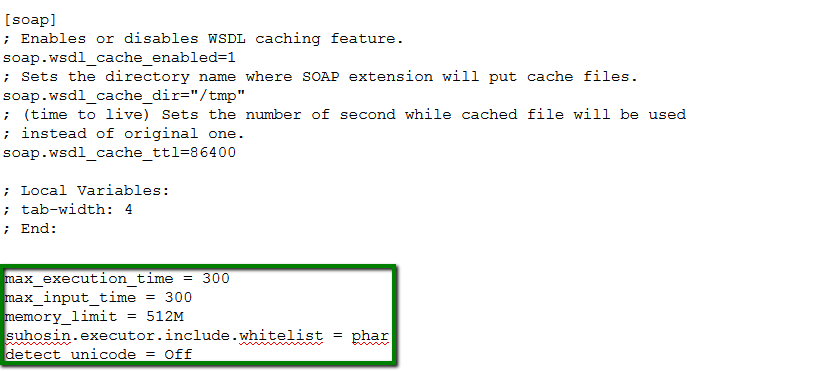
Then add the following block to the end of the file and hit Save button:
max_execution_time = 300

max_input_time = 300

memory_limit = 512M

suhosin.executor.include.whitelist = phar

detect_unicode = Off
10. When all the preparations are done, you are ready to install Composer and then Laravel. Open PuTTY window where you have logged into your cPanel account and fill in the following command:
php -r "readfile('https://getcomposer.org/installer');" | php -c php.ini
This will execute the Composer installation:
NOTE: To run composer commands use: php -c php.ini composer.phar
In case you get a notification Some settings on your machine make Composer unable to work properly, make sure that the PHP version is 5.5 or higher and all the changes in the php.ini file are saved.
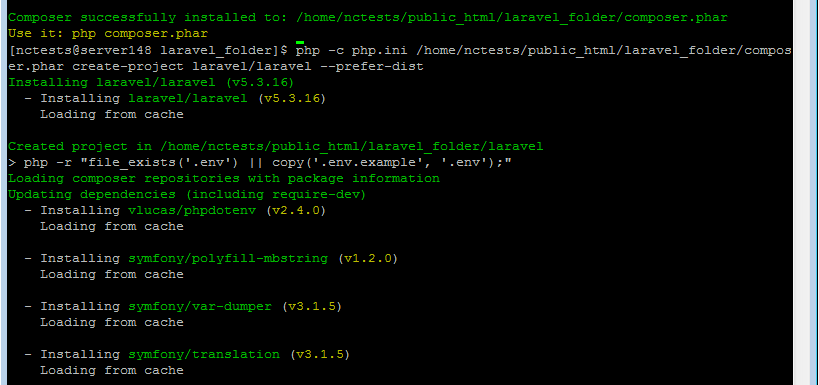
11. Now you are ready to install Laravel. Execute the command provided below:
php -c php.ini /home/username/public_html/directory/composer.phar create-project laravel/laravel --prefer-dist
NOTE: make sure that you replace the default details with the actual ones – username should be replaced with your cPanel username, directory should be replaced with the name of the folder you installed Composer to.
You will see the output like it is shown in the screenshot which means that some dependencies are installing:
Once the installation is successfully completed, you will get this output:
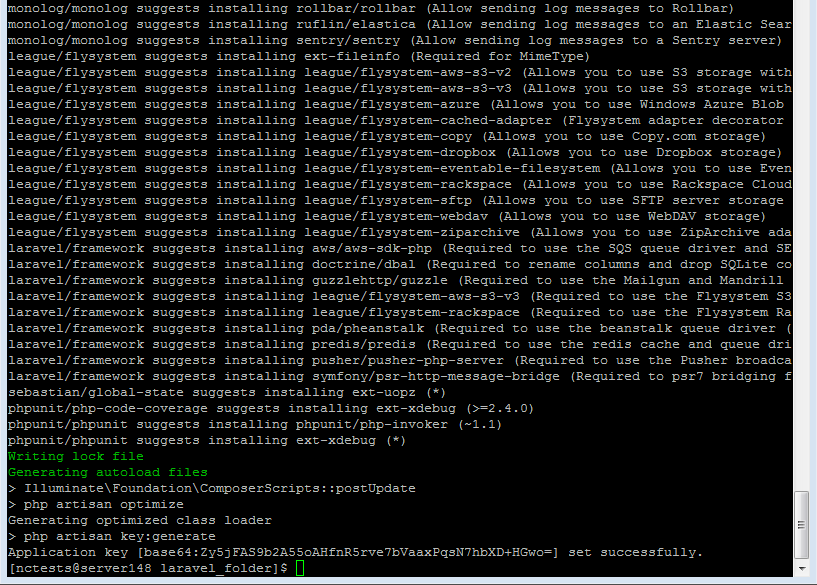
By default Laravel installation will be installed in laravel folder in the same directory chosen for Composer installation.
After installing Laravel, you should configure your web server's document/web root to be the public directory. The
index.php file in this directory serves as the front controller for all HTTP requests entering your application.
In order to create an
index.php file, navigate to the root directory of Laravel installation in
cPanel >>
File Manager >> root folder of the installation (in this case it is
public_html >>
laravel_folder >>
laravel).
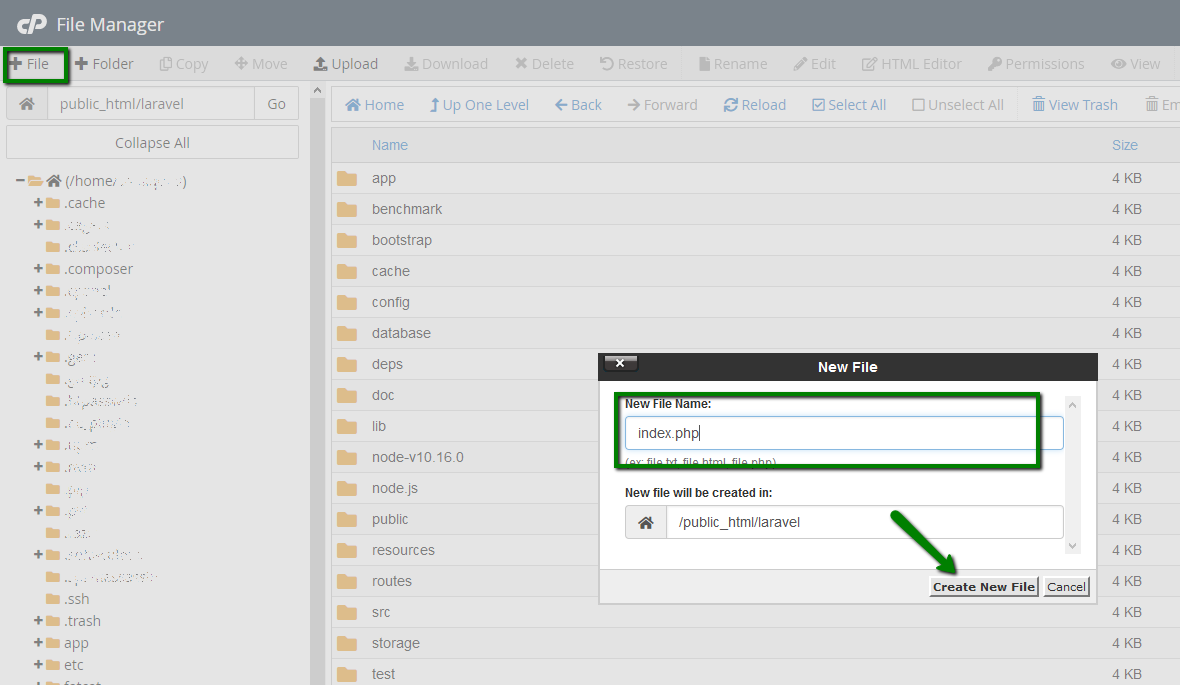
There you may create an
index.php file if it was not created automatically. In order to add the file click
+File and type the name:
index.php >>
Create new file:
Right click on the
index.php file >>
Edit and paste the code below:
 <?php
header("refresh: 5; http://yourdomain.com/laravel/public/");

    echo '<title>Laravel Installed</title><div style="background: #e9ffed; border: 1px solid #b0dab7; padding: 15px;" align="center" >
    <font size="5" color="#182e7a">Laravel is installed successfully.</font><br /><br />
    <font size="4">Laravel is a Framework and doesn\'t have an index page.<br /><br />
    You will be redirected to its "public" folder in 5 seconds...<br /><br />
    Laravel is a clean and classy framework for PHP web development.

Freeing you from spaghetti code, Laravel helps you create wonderful applications using simple, expressive syntax. Development should be a creative experience that you enjoy, not something that is painful. Enjoy the fresh air.
</font></div>';
?>
Click Save.
NOTE: Do not forget to change http://yourdomain.com/laravel/public/ link to your actual domain name.
