The option to use a custom domain name with Microsoft 365 is only available for Microsoft business packages.
To map your Namecheap domain with a Microsoft 365 account, you'll need to do the following:
1.
Sign in to your
Namecheap account.
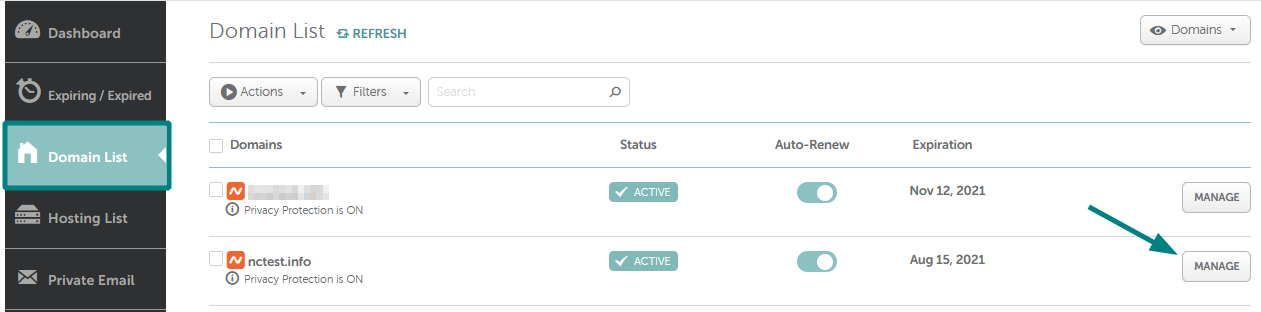
2. Select Domain List from the left sidebar and click on the Manage button in front of your domain name:
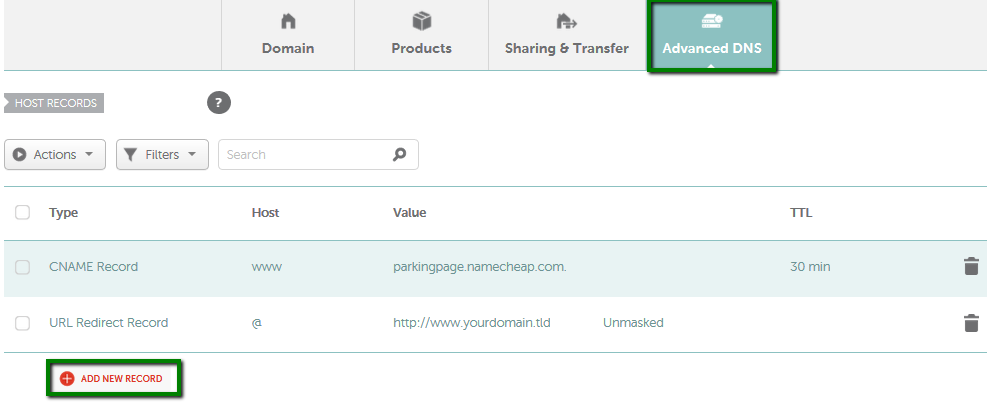
3. Go to the Advanced DNS tab and click on the Add New Record button:
4. Here you will need to make the necessary changes in the Host Records and Mail Settings sections.
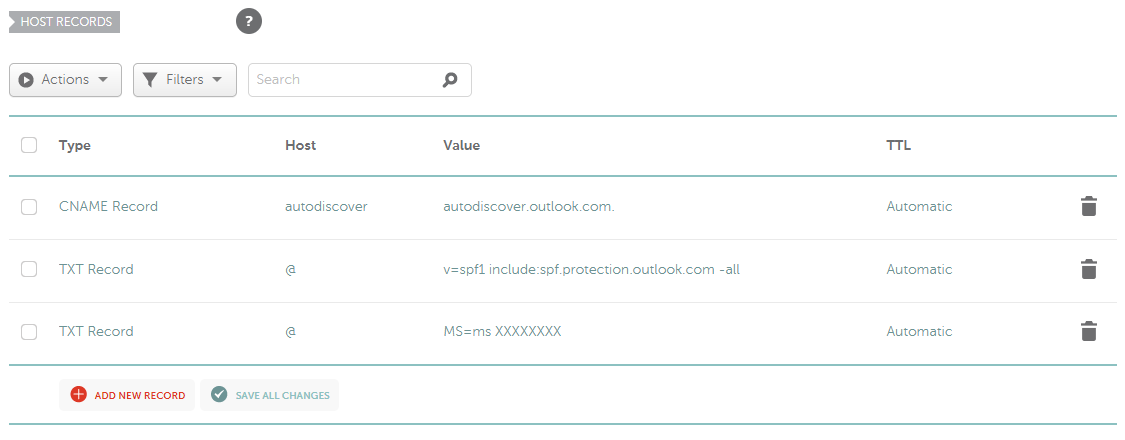
In the Host Records section, you will need to add the following ones:
Type | Host | Value |
| CNAME Record
| autodiscover | autodiscover.outlook.com |
| TXT Record
| @ | TXT Value generated for your domain in the Office 365 account*
|
| TXT Record
| @ |
v=spf1 include:spf.protection.outlook.com -all |
This is how your records should look like:
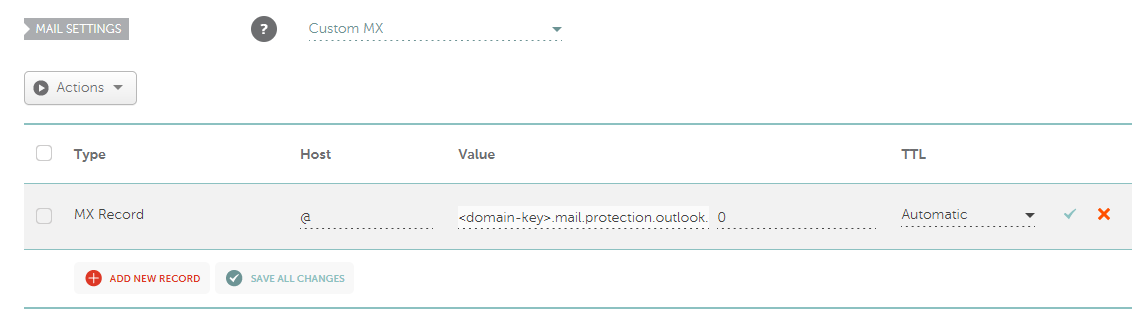
In the Mail Settings section, select the Custom MX option and create the record for @ Host pointing to your value from the Microsoft account (looks like <domain-key>.mail.protection.outlook.com.)** with 0 Priority:
** You can get
<domain-key> value generated for your domain in
the
Microsoft account.
Once you've done so, press Save All Changes in both sections.
Give it some time and a few tries to pick up the change.
If you need to set up additional services from Microsoft, follow
these guidelines.