Amazon Web Services provides hosting instances that can be used to host both common servers and applications, as well as some specific additional services. Because of this, there are multiple options for installing an SSL certificate on AWS.
This article describes how to install your SSL certificate on several specific Amazon-related applications or services. Below is the main content of the article:
Some prerequisite information
For SSL installation you generally need three components: a certificate, an intermediate certificate chain (CA-bundle) and a Private key.
- SSL Certificates are sent as a PEM-formatted file with a .crt extension. If the extensions are not shown in your system by default for all files, an SSL will have "Security certificate" in the file description. The same file can be also downloaded this way.
Inside the file there is a code like this:

- An Intermediate certificate chain (CA-bundle) is also sent in a PEM-format file, but this file has a .ca-bundle extension. Inside the file, there are normally one or two codes similar to the certificate. The CA-bundle, as with the certificate, is usually in the SSL archive you receive after SSL activation. It can also be downloaded here.
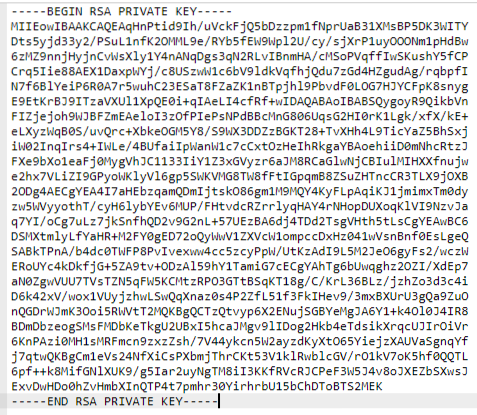
- A Private key is generated along with the certificate signing request (CSR) used to activate your SSL. If you generated the CSR on your server, the key is saved in the same place. It has .key extension.
It contains a code like this:
On your server, the content of the files can be checked using the cat command (specify the actual file name in your command):
cat example.crt
On a local machine, you can right-click on the file, select Open with, and choose any plain text editor.
The aforementioned SSL components will sometimes need to be uploaded as files or uploaded as codes, depending on the particular Amazon service you use.
Elastic Compute Cloud (EC2)
If you have EC2, it generally means that a separate web, mail or application server is installed, and the SSL should be installed on that server. For more information on installing SSL certificates, you can refer to instructions
here.
Things will differ slightly if you use the Amazon Linux AMI.
Amazon Linux is a specific Linux distribution provided by Amazon. It is normally based on CentOS Linux with the Apache server installed (though a Debian-based version also exists).
For other versions of Amazon Linux, there is one peculiarity. To run an encrypted HTTPS connection on an Apache web server, mod_ssl needs to be installed with the help of a slightly different command to the one usually used on Apache:
sudo yum install -y mod24_ssl
The default SSL configuration file location on Linux AMI is /etc/httpd/conf.d/ssl.conf. All the changes required to install an SSL can be made within this file.
Elastic Load Balancer (ELB)
A load balancer is a specific service that allows the managing of traffic across several hosting instances. Amazon provides a load balancer service that can be secured with an SSL certificate.
You can either upload the SSL directly through the graphic interface to AWS certificate manager (ACM) (1) or do it through the command line in the AWS Identity & Access Management (IAM) (2).
- The first option is pretty simple. During the Load balancer creation you can import the new certificate in the second step of the setup:
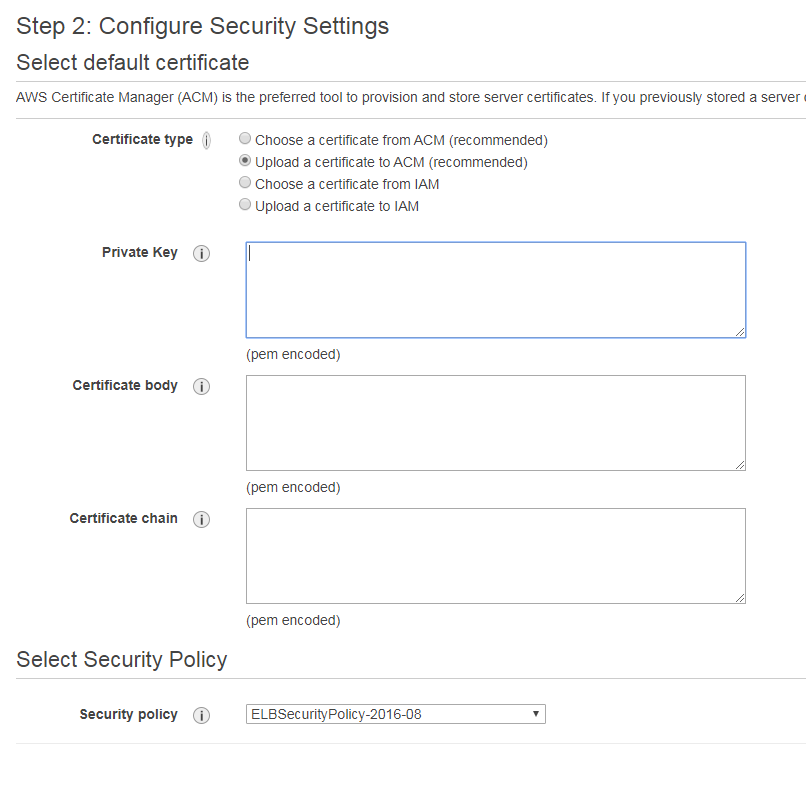
Simply choose to upload the certificate to ACM (this option sets a default SSL for all unassigned cases) or IAM (this one allows you to add multiple SSLs) and paste all 3 SSL components as codes:
- The Certificate in the "Certificate body" form;
- CA-bundle in the "Certificate chain" form;
- And the Private key in the "Private key" form.
Choose the security policy from the drop-down list (the default one will work just fine) and proceed with the load balancer setup.
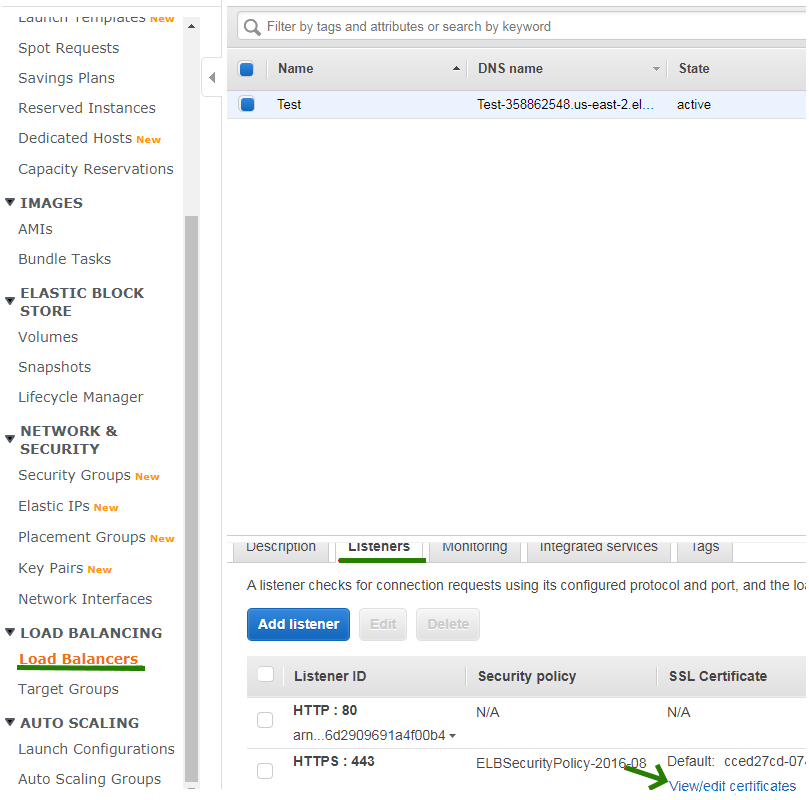
The SSL can be also added later by going to the Load Balancers menu >> Listeners >> View/edit certificates.
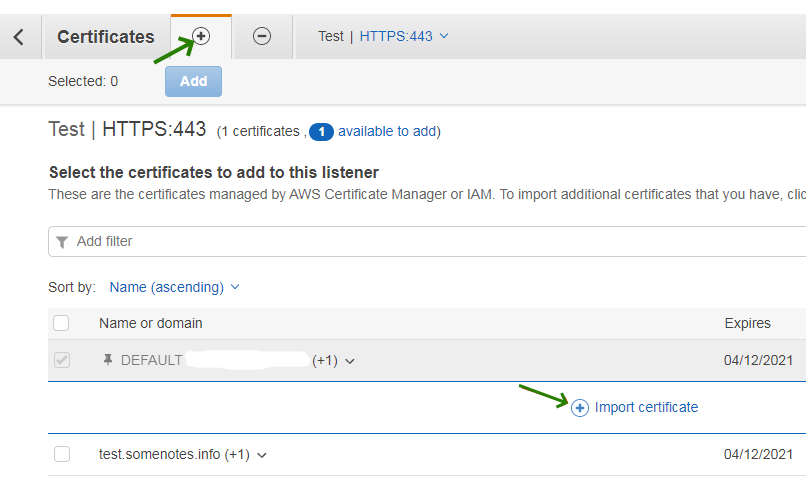
Click on the + (plus) button to add a new certificate and open the Import certificate panel.
The form for SSL upload will show:
- For the second option, upload the certificate, Private key and CA Bundle to your server and open the command line. All three files can be installed using a single command:
aws iam upload-server-certificate --server-certificate-name certificate_object_name --certificate-body file://*path to your certificate file* --private-key file://*path to your private key file* --certificate-chain file://*path to your CA-bundle file*
Note: When you specify a file as a parameter (for example, for the certificate-body and private-key parameters), file:// should be included as a part of the file name.
Note: The certificate_object_name parameter is used to assign your own name to the certificate so that you can identify it further.
When you upload your certificate files, IAM will validate the files if the following criteria are met:
- Certificates should be in X.509 PEM format.
- The current date should be between the certificate’s issuance and expiration date.
- The certificate and Private key files should contain only a single item, meaning one certificate file and one corresponding key.
- The Private key should match the certificate.
- The Private key should be in PEM format, just like the certificate is. The correct format of the text within the key file should begin with -----BEGIN RSA PRIVATE KEY----- and ends with -----END RSA PRIVATE KEY-----.
- The Private key should not be encrypted with a password.
Once the files are uploaded, you can verify the certificate information in the IAM store by using the following command:
aws iam get-server-certificate --server-certificate-name certificate_object_name
The output should look like this:
arn:aws:iam::Your_AWS_Account_ID:server-certificate/Your_Certificate_Object_Name Certificate_Object_GUIDYour_AWS_Account_ID is a unique Amazon Resource Name (ARN) and Certificate_Object_GUID is the ID of the certificate.
Here’s an example:
arn:aws:iam::123456789012:server-certificate/certificate_object_name ADGTHexampleLKBASAH
Digits in the first line are the ARN, and the second line is the certificate ID.
- If you need to update the certificate for a HTTPS load balancer, you will need to use the ARN of the certificate. The following command is used in such a case to set the certificate for the load balancer:
aws elb set-load-balancer-listener-ssl-certificate --load-balancer-name my-loadbalancer --load-balancer-port 443 --ssl-certificate-id arn:aws:iam::123456789012:server-certificate/certificate_object_name
Parameter my-loadbalancer is the name of your load balancer.
For more details about creating a HTTPS load balancer and setting its name, please check the
following guide.
AWS API Gateway
By default, Amazon API uses a default access link that looks like this:
https://api-id.execute-api.region.amazonaws.com/stage
In some cases, it’s more convenient to set up a custom hostname for it instead. The custom link can be also secured with an SSL certificate.
The process is similar to the load balancer securing.
- Log in to the AWS Certificate Manager console.
- Choose the Import a certificate option.
- A similar form for the SSL upload will open.
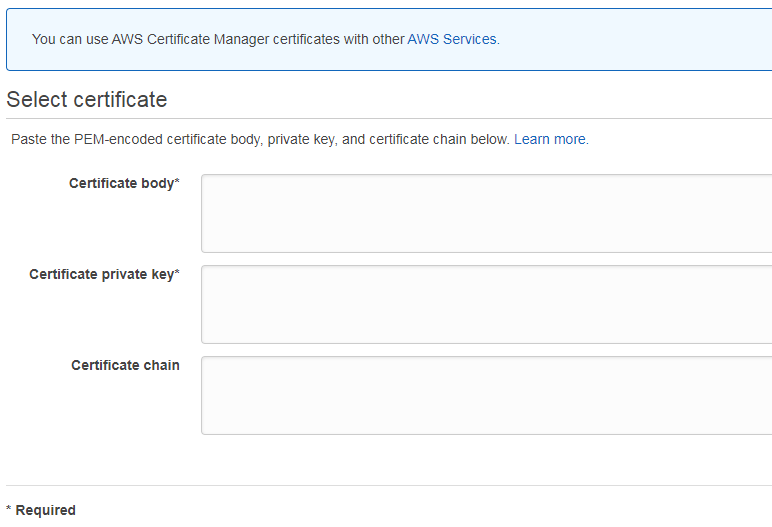
- Paste the certificate file code as the "Certificate body", CA-bundle code as the "Certificate chain" and Private key code as the "Certificate private key" and click Next.
- Save the changes by selecting the Review and import option.
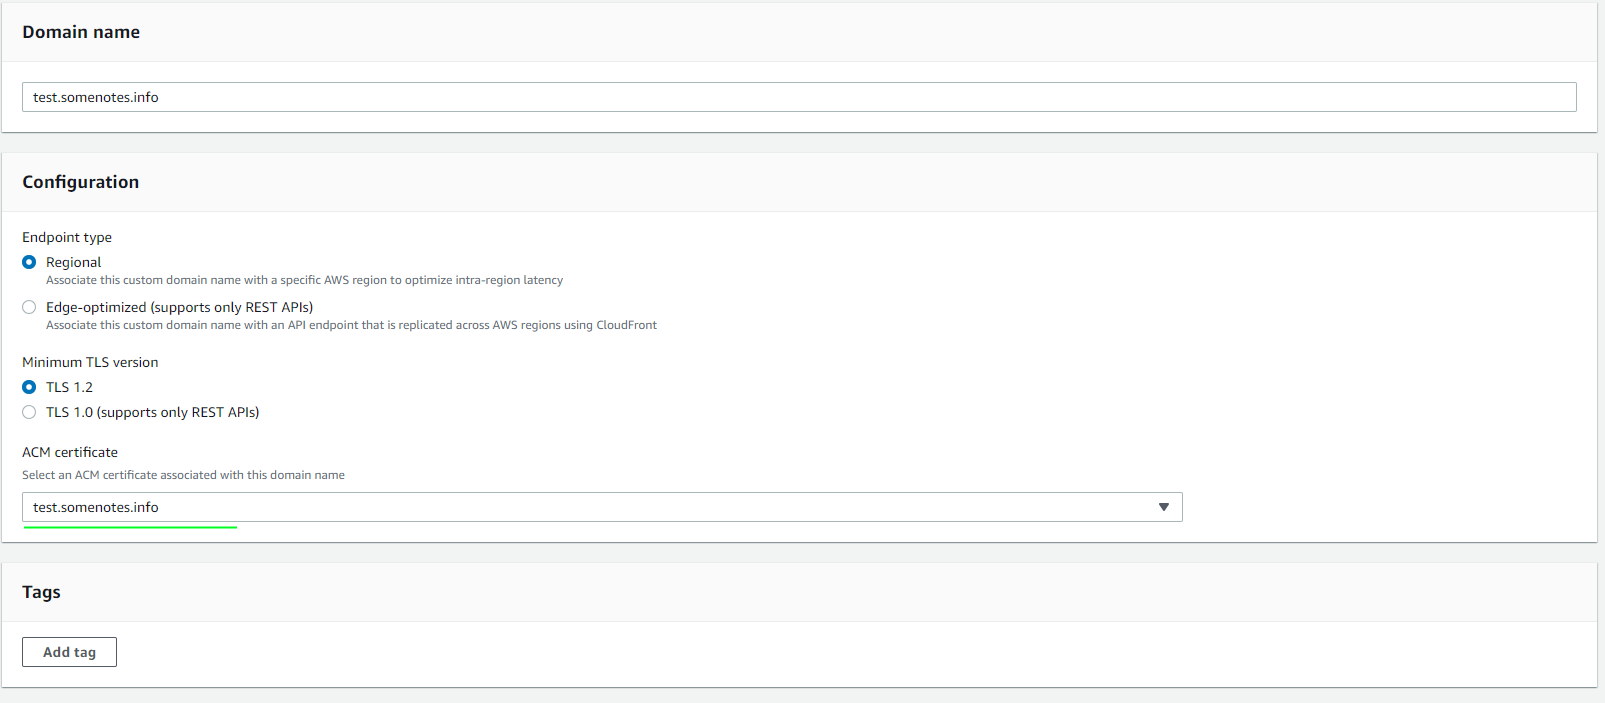
- Choose the Custom domain names option from the API Gateway menu.
- Choose your custom domain name.
- Click Edit.
- Choose the correct SSL from the drop-down list and save the changes.
Keep in mind! The certificate may take up to 40 minutes to apply.
Alternatively, you can also install an SSL through the domainname:update API-call via the command line.
The request itself will look like this:
PATCH /domainnames/*Your API domain name*
{
"patchOperations" : [ {
"op" : replace,
"path" : *parameter used to identify the SSL*,
"value" : *parameter value*,
"from" : // optional parameter where you can specify what specific part of the application should use the SSL.
} ]
}
More details about the command can be found
here.
Amazon CloudFront
Amazon CloudFront is a web service that allows you to speed up content distribution in different locations by caching some of it in a special storage.
You can either upload an SSL certificate through SSL manager or through the command line, as described
above.
After adding the SSL, CloudFront settings need to be updated as follows:
- Open your AWS console and go to the CloudFront console.
- Choose the ID of the CloudFront entity that needs to be updated.
- Go to the General tab and choose Edit.
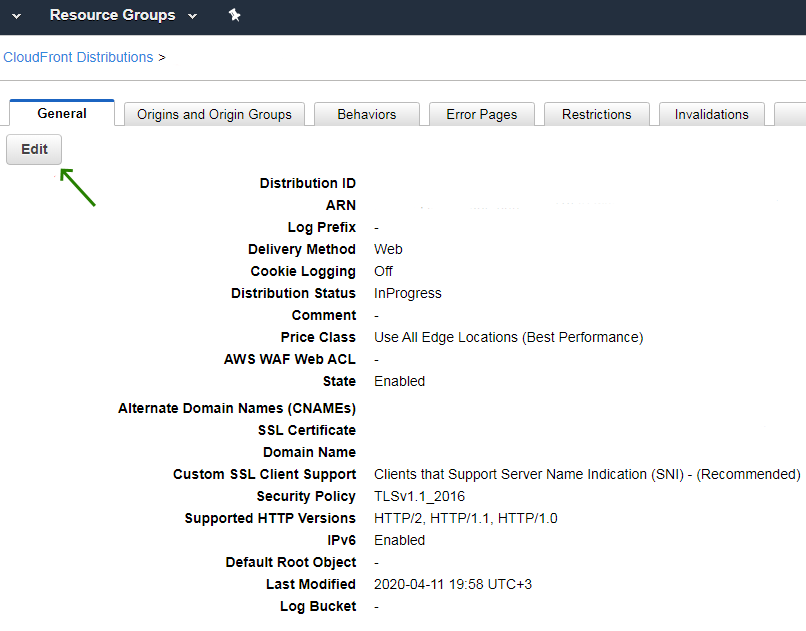
- Update Alternate Domain Names (CNAMEs) with your SSL domain name(s) and choose the correct SSL from the list.

- Click Yes, Edit.
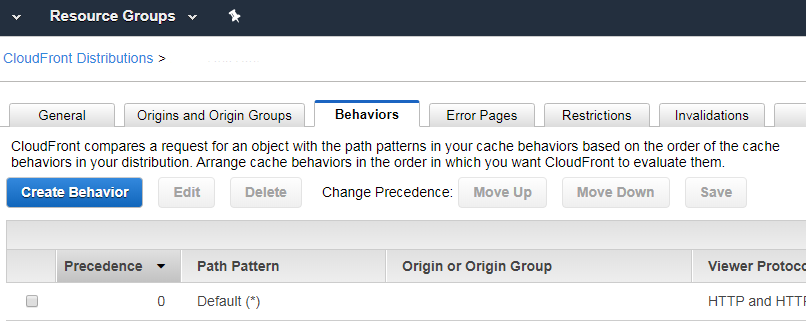
- After this, you can go to the Behaviors tab and either set a redirect from HTTP to HTTPS or set the Cloudfront to HTTPS only.
The SSL can be set up during the CloudFront entity creation also.
Note: If you want to use an ACM certificate with Amazon CloudFront, make sure you import a certificate stored in the US East (N. Virginia) region. Otherwise, use the certificate imported to IAM.
You can verify that a certificate has been installed correctly by checking directly or using an online checker, such as
this one.