
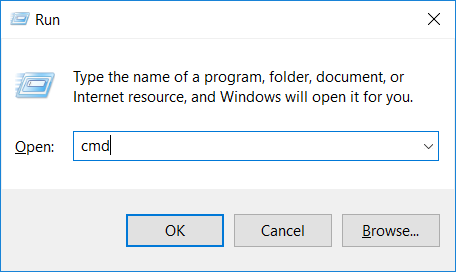
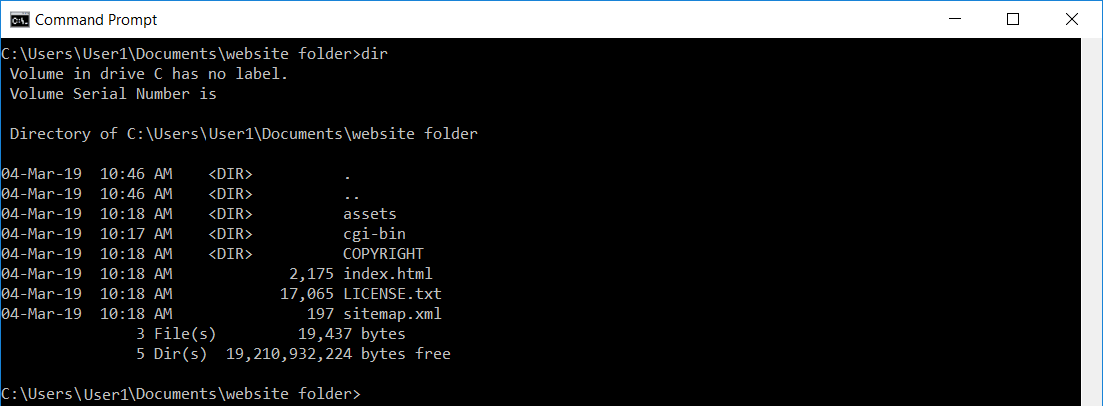
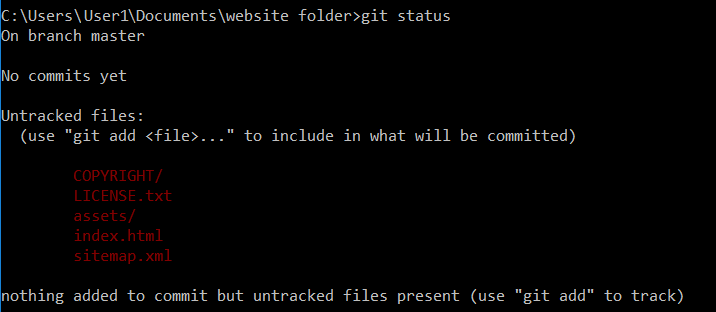
{"/api/v1/ncpl/simplekb/getarticle:\"{\\\"articleId\\\":9586,\\\"categoryId\\\":89}\"":{"body":{"Id":9586,"FriendlyId":"","ArticleTypeId":3,"Title":"How to deal with Git on our Shared servers","ArticleName":"How to deal with Git on our Shared servers","ArticleSummary":null,"PreponedSummary":false,"Approved":true,"Body":"SW4gdGhpcyBhcnRpY2xlLCB5b3Ugd2lsbCBsZWFybiBob3cgdG8gY3JlYXRlIGxvY2FsIGFuZCByZW1vdGUgR2l0IHJlcG9zaXRvcmllcy4gUGFydCBvZiB0aGlzIGlzIGhvdyB0byBjb21taXQsIHB1c2ggYW5kIHB1bGwgZmlsZXMgYmV0d2VlbiB5b3VyIGxvY2FsIGNvbXB1dGVyIGFuZCBzZXJ2ZXIuPGJyIC8+PGJyIC8+PGI+R2l0IDwvYj5pcyBhIGZyZWUgYW5kIG9wZW4gc291cmNlIHZlcnNpb24gY29udHJvbCBzb2Z0d2FyZS4gSXQgdHJhY2tzIGNoYW5nZXMgbWFkZSB0byB0aGUgZmlsZXMsIGFuZCBnaXZlcyB5b3UgYWNjZXNzIHRvIGFsbCB2ZXJzaW9ucyBvZiBhbGwgZmlsZXMgaW4gdGhlIEdpdCByZXBvc2l0b3J5IGF0IGFueSB0aW1lLiBJdCBhbHNvIGFsbG93cyBtdWx0aXBsZSBkZXZlbG9wZXJzIHRvIHdvcmsgc2ltdWx0YW5lb3VzbHkgb24gb25lIHByb2plY3QgYXQgdGhlIHNhbWUgdGltZSB1c2luZyB0aGVpciBvd24gYnJhbmNoZXMuPGJyIC8+PGJyIC8+QSA8Yj5HaXQgcmVwb3NpdG9yeTwvYj4gKHJlcG8gZm9yIHNob3J0KSBpcyBhIHNwYWNlIHdoZXJlIEdpdCBzdG9yZXMgcHJvamVjdCBmaWxlcyBhbmQgaGlzdG9yeSBvZiBjaGFuZ2VzIG1hZGUgdG8gdGhvc2UgZmlsZXMuPGJyIC8+PGJyIC8+V2hpbGUgdGhlcmUgYXJlIGEgbnVtYmVyIG9mIEdVSSAoZ3JhcGhpY2FsIHVzZXIgaW50ZXJmYWNlcykgR2l0IGNsaWVudHMsIHdlIHdpbGwgYmUgdXNpbmcgdGhlIGNvbW1hbmQgbGluZSAoVGVybWluYWwgb24gTWFjKSBmb3IgdGhlIHB1cnBvc2Ugb2YgdGhpcyBndWlkZS48YnIgLz48YnIgLz5MZXQncyBpbWFnaW5lIHlvdSBkZXZlbG9wZWQgYSBwYXJ0IG9mIHlvdXIgc2l0ZSBvbiB5b3VyIGNvbXB1dGVyIGFuZCB3YW50IHRvIG1vdmUgd2hhdCB5b3UgaGF2ZSBkb25lIHNvIGZhciB0byBvdXIgc2VydmVyLiBZb3UgYWxzbyBwbGFuIHRvIGNvbnRpbnVlIGRldmVsb3BpbmcgdGhlIHdlYnNpdGUgYW5kIGtlZXAgdHJhY2sgb2YgYWxsIHRoZSBjaGFuZ2VzIHVzaW5nIEdpdC48YnIgLz48ZGl2PjxiciAvPjwvZGl2PjxkaXY+PGJyIC8+PC9kaXY+PGRpdj48YSBocmVmPSIjc3RlcF8xIj5TdGVwIDEuIEluc3RhbGwgR2l0PC9hPjxiciAvPjxhIGhyZWY9IiNzdGVwXzIiPlN0ZXAgMi4gQ3JlYXRlIGEgbG9jYWwgR2l0IHJlcG9zaXRvcnk8L2E+PGJyIC8+PGEgaHJlZj0iI3N0ZXBfMyI+U3RlcCAzLiBJbml0aWFsIGNvbW1pdDwvYT48YnIgLz48YSBocmVmPSIjc3RlcF80Ij5TdGVwIDQuIENyZWF0ZSBhIHJlbW90ZSBHaXQgcmVwb3NpdG9yeTwvYT48YnIgLz48YSBocmVmPSIjc3RlcF81Ij5TdGVwIDUuIFB1c2ggZmlsZXMgdG8gdGhlIHJlbW90ZSBzZXJ2ZXI8L2E+PGJyIC8+PGEgaHJlZj0iI3N0ZXBfNiI+U3RlcCA2LiBGdXR1cmUgZWRpdHM8L2E+PGJyIC8+PGEgaHJlZj0iI3N0ZXBfNyI+U3RlcCA3LiBSZXN0b3JlIGEgdmVyc2lvbiBvZiBhIGZpbGUvZmlsZXMgZnJvbSBhIGNvbW1pdDwvYT48YnIgLz48YnIgLz48YnIgLz48YnIgLz48cD48YSBuYW1lPSJzdGVwXzEiPjxiPlN0ZXAgMS4gSW5zdGFsbCBHaXQ8L2I+PC9hPjwvcD48YnIgLz5JbiBvcmRlciB0byBiZSBhYmxlIHRvIHVzZSBHaXQgY29tbWFuZHMsIEdpdCBuZWVkcyB0byBiZSBpbnN0YWxsZWQgZmlyc3QuIEl0IGlzIGFscmVhZHkgcHJlLWluc3RhbGxlZCBvbiBvdXIgU2hhcmVkIHNlcnZlcnMuIFRvIDxiPmluc3RhbGwgaXQgb24geW91ciBjb21wdXRlcjwvYj4sIGZvbGxvdyA8YSBocmVmPSJodHRwczovL2dpdC1zY20uY29tL2Jvb2svZW4vdjIvR2V0dGluZy1TdGFydGVkLUluc3RhbGxpbmctR2l0IiBsaW5rdGV4dD0idGhlc2UgaW5zdHJ1Y3Rpb25zIiBsaW5rdHlwZT0iQ3VzdG9tIiB0YXJnZXQ9Il9ibGFuayI+dGhlc2UgaW5zdHJ1Y3Rpb25zPC9hPi48L2Rpdj48ZGl2PjxiciAvPjwvZGl2PjxkaXY+PGJyIC8+PHA+PGEgbmFtZT0ic3RlcF8yIj48Yj5TdGVwIDIuIENyZWF0ZSBhIGxvY2FsIEdpdCByZXBvc2l0b3J5PC9iPjwvYT48L3A+PGJyIC8+MS4gV2Ugd2lsbCB1c2UgdGhlIFdpbmRvd3MgY29tbWFuZCBsaW5lL1Rlcm1pbmFsIG9uIE1hYyB0byBydW4gR2l0IGNvbW1hbmRzLiA8YnIgLz48dWw+PGxpPlRvIG9wZW4gYSBjb21tYW5kIGxpbmUgb24gV2luZG93cywgcHJlc3MgdGhlIDxiPldpbiArIFI8L2I+IGtleXMgb24geW91ciBrZXlib2FyZC4gVGhlbiwgdHlwZSA8aT48Yj5jbWQgPC9iPjwvaT5hbmQgcHJlc3MgPGI+RW50ZXIgPC9iPm9yIGNsaWNrIDxiPk9LPC9iPi4gPC9saT48L3VsPjwvZGl2PjxiciAvPjxkaXY+PGltZyBjbGFzcz0ia2ItaW1hZ2UiIHNyYz0iaHR0cHM6Ly9OYW1lY2hlYXAuc2ltcGxla2IuY29tL1NpdGVDb250ZW50cy8yLTdDMjJENTIzNkE0NTQzRUI4MjdGM0JEODkzNkUxNTNFL21lZGlhL2hvd190b19kZWFsX3dpdGhfZ2l0XzEucG5nIiAvPjwvZGl2PjxkaXY+PGJyIC8+PC9kaXY+PHVsPjxsaT5UbyBvcGVuIFRlcm1pbmFsIG9uIE1hYywgcHJlc3MgPGI+Q29tbWFuZCAtIHNwYWNlYmFyPC9iPiB0byBsYXVuY2ggU3BvdGxpZ2h0LiBUeXBlIDxpPjxiPnRlcm1pbmFsPC9iPjwvaT4gYW5kIGhpdCA8Yj5yZXR1cm4vZW50ZXI8L2I+LjwvbGk+PC91bD48YnIgLz48ZGl2PjIuIEluIHRoZSBjb21tYW5kIGxpbmUgdXRpbGl0eSAoVGVybWluYWwpLCBnbyB0byB0aGUgZm9sZGVyIHRoYXQgY29udGFpbnMgeW91ciB3ZWJzaXRlIGZpbGVzIHVzaW5nOjwvZGl2PjxkaXY+PGJyIC8+PC9kaXY+PHByZSBjbGFzcz0icHJldHR5cHJpbnQiPmNkIHBhdGhcdG9cdGhlXHdvcmtpbmdcZm9sZGVyPC9wcmU+PGJyIC8+RS5nLiw8YnIgLz48aT5jZCBDOlxVc2Vyc1xVc2VyMVxEb2N1bWVudHNcd2Vic2l0ZSBmb2xkZXI8L2k+PGJyIC8+PGJyIC8+PGltZyBjbGFzcz0ia2ItaW1hZ2UiIHNyYz0iaHR0cHM6Ly9OYW1lY2hlYXAuc2ltcGxla2IuY29tL1NpdGVDb250ZW50cy8yLTdDMjJENTIzNkE0NTQzRUI4MjdGM0JEODkzNkUxNTNFL21lZGlhL2hvd190b19kZWFsX3dpdGhfZ2l0XzIucG5nIiAvPjxiciAvPjxkaXY+PGJyIC8+PC9kaXY+PGRpdj5Zb3UgY2FuIGNoZWNrIHRoZSBjb250ZW50IG9mIHRoZSBmb2xkZXIgYnkgcnVubmluZyB0aGUgPGk+PGI+ZGlyIDwvYj48L2k+Y29tbWFuZDo8YnIgLz48L2Rpdj48ZGl2PjxiciAvPjwvZGl2PjxpbWcgY2xhc3M9ImtiLWltYWdlIiBzcmM9Imh0dHBzOi8vTmFtZWNoZWFwLnNpbXBsZWtiLmNvbS9TaXRlQ29udGVudHMvMi03QzIyRDUyMzZBNDU0M0VCODI3RjNCRDg5MzZFMTUzRS9tZWRpYS9ob3dfdG9fZGVhbF93aXRoX2dpdF8zLnBuZyIgLz48YnIgLz48ZGl2PjxiciAvPjwvZGl2PjxkaXY+My4gVG8gY3JlYXRlIGEgbmV3IHJlcG9zaXRvcnksIHJ1biB0aGUgPGk+PGI+Z2l0IGluaXQ8L2I+PC9pPiBjb21tYW5kOjxiciAvPjwvZGl2PjxkaXY+PGJyIC8+PC9kaXY+PGltZyBjbGFzcz0ia2ItaW1hZ2UiIHNyYz0iaHR0cHM6Ly9OYW1lY2hlYXAuc2ltcGxla2IuY29tL1NpdGVDb250ZW50cy8yLTdDMjJENTIzNkE0NTQzRUI4MjdGM0JEODkzNkUxNTNFL21lZGlhL2hvd190b19kZWFsX3dpdGhfZ2l0XzQucG5nIiAvPjxiciAvPjxkaXY+PGJyIC8+PC9kaXY+PGRpdj40LiBOZXh0LCBjb25maWd1cmUgdGhlIGVtYWlsIGFkZHJlc3MgYW5kIG5hbWUgdGhhdCB3aWxsIGJlIHVzZWQgZm9yIHlvdXIgR2l0IGNvbW1pdHMuIFRvIGRvIHRoYXQgcnVuOjwvZGl2PjxkaXY+PGJyIC8+PC9kaXY+PGRpdj48cHJlIGNsYXNzPSJwcmV0dHlwcmludCI+Z2l0IGNvbmZpZyAtLWdsb2JhbCB1c2VyLm5hbWUgIllvdXIgTmFtZSI8YnIgLz5naXQgY29uZmlnIC0tZ2xvYmFsIHVzZXIuZW1haWwgeW91cmVtYWlsQGV4YW1wbGUuY29tPC9wcmU+PGJyIC8+PC9kaXY+PGltZyBjbGFzcz0ia2ItaW1hZ2UiIHNyYz0iaHR0cHM6Ly9OYW1lY2hlYXAuc2ltcGxla2IuY29tL1NpdGVDb250ZW50cy8yLTdDMjJENTIzNkE0NTQzRUI4MjdGM0JEODkzNkUxNTNFL21lZGlhL2hvd190b19kZWFsX3dpdGhfZ2l0XzUucG5nIiAvPjxiciAvPjxkaXY+PGJyIC8+PC9kaXY+PGRpdj53aGVyZSA8Yj48aT5Zb3VyIG5hbWU8L2k+PC9iPiBpcyB0aGUgbmFtZSB5b3Ugd2FudCB0byBzZXQgYW5kIDxiPjxpPnlvdXJlbWFpbEBleGFtcGxlLmNvbTwvaT48L2I+IHlvdXIgcmVhbCBlbWFpbCBhZGRyZXNzLjxiciAvPjxiciAvPjxiciAvPjxwPjxhIG5hbWU9InN0ZXBfMyI+PGI+U3RlcCAzLiBJbml0aWFsIGNvbW1pdDwvYj48L2E+PC9wPjxiciAvPlJpZ2h0IG5vdywgeW91ciBsb2NhbCBHaXQgcmVwbyBhbmQgdGhlIHdlYnNpdGUgZmlsZXMgYXJlIGxvY2F0ZWQgaW4gdGhlIHNhbWUgZGlyZWN0b3J5LiBCdXQgR2l0IHdpbGwgbm90IGtlZXAgdHJhY2sgb2YgdGhvc2UgZmlsZXMgdW5sZXNzIHlvdSB0ZWxsIGl0IHRvIGRvIHNvLiA8YnIgLz48L2Rpdj48ZGl2PjxiciAvPjwvZGl2PjxkaXY+MS4gVXNlIHRoZSA8aT48Yj5naXQgc3RhdHVzPC9iPjwvaT4gY29tbWFuZCB0byBjaGVjayB3aGF0IGZpbGVzIEdpdCBzZWVzIGFzIG5ldy9tb2RpZmllZDo8YnIgLz48L2Rpdj48ZGl2PjxiciAvPjwvZGl2PjxpbWcgY2xhc3M9ImtiLWltYWdlIiBzcmM9Imh0dHBzOi8vTmFtZWNoZWFwLnNpbXBsZWtiLmNvbS9TaXRlQ29udGVudHMvMi03QzIyRDUyMzZBNDU0M0VCODI3RjNCRDg5MzZFMTUzRS9tZWRpYS9ob3dfdG9fZGVhbF93aXRoX2dpdF82LnBuZyIgLz48YnIgLz48ZGl2PjxiciAvPjwvZGl2PjxkaXY+Mi4gTmV4dCwgdGVsbCBHaXQgd2hhdCBmaWxlcyB5b3Ugd2FudCBpdCB0byBhZGQgdG8gdGhlIGNvbW1pdCBieSB1c2luZyA8aT48Yj5naXQgYWRkPC9iPjwvaT4gY29tbWFuZDogPGJyIC8+PGJyIC8+PHVsPjxsaT5UbyBhZGQgYWxsIGZpbGVzIHJ1bjogPGk+PGI+Z2l0IGFkZDwvYj48L2k+PC9saT48bGk+VG8gYWRkIGEgc2luZ2xlIGZpbGUgcnVuOiA8aT48Yj5naXQgYWRkIGZpbGVfbmFtZS5leHQ8L2I+PC9pPjwvbGk+PC91bD48L2Rpdj48ZGl2PjxiciAvPjwvZGl2PjxpbWcgY2xhc3M9ImtiLWltYWdlIiBzcmM9Imh0dHBzOi8vTmFtZWNoZWFwLnNpbXBsZWtiLmNvbS9TaXRlQ29udGVudHMvMi03QzIyRDUyMzZBNDU0M0VCODI3RjNCRDg5MzZFMTUzRS9tZWRpYS9ob3dfdG9fZGVhbF93aXRoX2dpdF83LnBuZyIgLz48YnIgLz48ZGl2PjxiciAvPjwvZGl2PjxkaXY+My4gT25jZSBhbGwgdGhlIGZpbGVzIGFyZSBhZGRlZCwgaXQncyB0aW1lIHRvIGRvIHRoZSBjb21taXQuIDxiPkNvbW1pdCA8L2I+aXMgdG8gcmVjb3JkIGNoYW5nZXMgdG8gdGhlIHJlcG9zaXRvcnkgb3IsIGluIG90aGVyIHdvcmRzLCB0byBjcmVhdGUgYSBzbmFwc2hvdCBvZiB0aGUgcHJlc2VudCBzdGF0ZSBvZiB0aGUgcmVwb3NpdG9yeS48YnIgLz48YnIgLz5UbyBjb21taXQsIHJ1biB0aGUgZm9sbG93aW5nIGNvbW1hbmQgYWRkaW5nIHJlbGV2YW50IG1lc3NhZ2VzIHRvIHlvdXIgY29tbWl0cyB3aWxsIGhlbHAgeW91LCBhbmQgb3RoZXIgcGVvcGxlLCBmaW5kIHRoZSByaWdodCBjb21taXQgd2hlbiByZXF1aXJlZDo8L2Rpdj48ZGl2PjxiciAvPjwvZGl2PjxkaXY+PHByZSBjbGFzcz0icHJldHR5cHJpbnQiPmdpdCBjb21taXQgLW0gIlR5cGUgbWVzc2FnZSBhYm91dCB0aGlzIGNvbW1pdCBoZXJlIjwvcHJlPjxiciAvPjwvZGl2PjxkaXY+PGltZyBjbGFzcz0ia2ItaW1hZ2UiIHNyYz0iaHR0cHM6Ly9OYW1lY2hlYXAuc2ltcGxla2IuY29tL1NpdGVDb250ZW50cy8yLTdDMjJENTIzNkE0NTQzRUI4MjdGM0JEODkzNkUxNTNFL21lZGlhL2hvd190b19kZWFsX3dpdGhfZ2l0XzgucG5nIiAvPjwvZGl2PjxiciAvPjxkaXY+PGJyIC8+PC9kaXY+PGRpdj48cD48YSBuYW1lPSJzdGVwXzQiPjxiPlN0ZXAgNC4gQ3JlYXRlIGEgcmVtb3RlIEdpdCByZXBvc2l0b3J5PC9iPjwvYT48L3A+PGJyIC8+MS4gQWNjZXNzIHlvdXIgaG9zdGluZyBhY2NvdW50IDxhIGhyZWY9Imh0dHBzOi8vd3d3Lm5hbWVjaGVhcC5jb20vc3VwcG9ydC9rbm93bGVkZ2ViYXNlL2FydGljbGUuYXNweC8xMDE2Lzg5L2hvdy10by1hY2Nlc3MtYS1ob3N0aW5nLWFjY291bnQtdmlhLXNzaCIgbGlua3RleHQ9InZpYSBTU0giIGxpbmt0eXBlPSJDdXN0b20iIHRhcmdldD0iX2JsYW5rIj52aWEgU1NIPC9hPi4gPGJyIC8+PGJyIC8+Mi4gTmF2aWdhdGUgdG8gdGhlIHdlYnNpdGUncyByb290IGZvbGRlci4gSWYgeW91IHdpc2ggdG8gY3JlYXRlIGEgcmVwb3NpdG9yeSBmb3IgeW91ciA8Yj5tYWluIGRvbWFpbjwvYj4sIG5hdmlnYXRlIHRvIDxpPi9wdWJsaWNfaHRtbDwvaT4gZm9sZGVyLiBJZiB5b3UgbmVlZCB0byBtYWtlIHNvbWUgY2hhbmdlcyB0byB0aGUgPGI+YWRkb24gZG9tYWluPC9iPiwgbW92ZSB0byB0aGUgZm9sZGVyIHNldCBmb3IgdGhlIGFkZG9uIGRvbWFpbiAodXN1YWxseSBpdCdzIDxpPi95b3VyYWRkb25kb21haW4uY29tPC9pPiBvciA8aT4vcHVibGljX2h0bWwveW91cmFkZG9uZG9tYWluLmNvbTwvaT4gZm9sZGVyKS4gPGJyIC8+PGJyIC8+My4gUnVuIHRoZSBmb2xsb3dpbmcgY29tbWFuZDo8YnIgLz48YnIgLz48cHJlIGNsYXNzPSJwcmV0dHlwcmludCI+Y2QgL3BhdGgvdG8vZm9sZGVyPC9wcmU+PGJyIC8+PC9kaXY+PGltZyBjbGFzcz0ia2ItaW1hZ2UiIHNyYz0iaHR0cHM6Ly9OYW1lY2hlYXAuc2ltcGxla2IuY29tL1NpdGVDb250ZW50cy8yLTdDMjJENTIzNkE0NTQzRUI4MjdGM0JEODkzNkUxNTNFL21lZGlhL2hvd190b19kZWFsX3dpdGhfZ2l0XzkucG5nIiAvPjxiciAvPjxkaXY+PGJyIC8+PC9kaXY+PGRpdj40LiBSdW4gPGk+PGI+Z2l0IGluaXQ8L2I+PC9pPiB0byBpbml0aWF0ZSBhIG5ldyBHaXQgcmVwb3NpdG9yeTo8YnIgLz48L2Rpdj48ZGl2PjxiciAvPjwvZGl2PjxpbWcgY2xhc3M9ImtiLWltYWdlIiBzcmM9Imh0dHBzOi8vTmFtZWNoZWFwLnNpbXBsZWtiLmNvbS9TaXRlQ29udGVudHMvMi03QzIyRDUyMzZBNDU0M0VCODI3RjNCRDg5MzZFMTUzRS9tZWRpYS9ob3dfdG9fZGVhbF93aXRoX2dpdF8xMC5wbmciIC8+PGJyIC8+PGRpdj48YnIgLz48L2Rpdj48ZGl2PlRoZSA8aT48Yj5naXQgaW5pdDwvYj48L2k+IGNvbW1hbmQgY3JlYXRlcyBhIG5vbi1iYXJlIHJlcG9zaXRvcnkuIEEgbm9uLWJhcmUgcmVwbyBjb250YWlucyBhIC5naXQgZm9sZGVyIGFuZCBoYXMgdGhlIGNoZWNrZWQtb3V0IHdvcmtpbmcgdHJlZSwgaS5lLiBhY3R1YWwgZmlsZXMuIEEgYmFyZSByZXBvc2l0b3J5IGlzIG5vdGhpbmcgYnV0IHRoZSA8aT4uZ2l0PC9pPiBmb2xkZXIgaXRzZWxmLiBUaGUgY29udGVudCBvZiBhIGJhcmUgcmVwb3NpdG9yeSBpcyB0aGUgc2FtZSBhcyB0aGUgY29udGVudCBvZiA8aT4uZ2l0PC9pPiBmb2xkZXIgaW5zaWRlIHlvdXIgbG9jYWwgd29ya2luZyByZXBvc2l0b3J5LiBUaGUgcHVycG9zZSBvZiBhIGJhcmUgcmVwb3NpdG9yeSBpcyB0byBhbGxvdyBtdWx0aXBsZSBjb250cmlidXRvcnMgdG8gcHVzaCB0aGVpciB3b3JrLjxiciAvPjxiciAvPkJ5IGRlZmF1bHQsIEdpdCByZWplY3RzIHB1c2hpbmcgdG8gdGhlIGN1cnJlbnRseSBjaGVja2VkLW91dCBicmFuY2ggb2YgYSBub24tYmFyZSByZXBvIChwdXNoaW5nIHRvIG90aGVyIGJyYW5jaGVzIGlzIG9rYXkpLiBZb3UgY2FuIGNoYW5nZSB0aGlzIGJ5IGVkaXRpbmcgYSBjb25maWcgaW4gdGhlIHNlcnZlciByZXBvc2l0b3J5IHdpdGggdGhpcyBjb21tYW5kOiA8YnIgLz48L2Rpdj48ZGl2PjxiciAvPjwvZGl2PjxkaXY+PHByZSBjbGFzcz0icHJldHR5cHJpbnQiPmdpdCBjb25maWcgcmVjZWl2ZS5kZW55Q3VycmVudEJyYW5jaCB1cGRhdGVJbnN0ZWFkPC9wcmU+PGJyIC8+PC9kaXY+PGltZyBjbGFzcz0ia2ItaW1hZ2UiIHNyYz0iaHR0cHM6Ly9OYW1lY2hlYXAuc2ltcGxla2IuY29tL1NpdGVDb250ZW50cy8yLTdDMjJENTIzNkE0NTQzRUI4MjdGM0JEODkzNkUxNTNFL21lZGlhL2hvd190b19kZWFsX3dpdGhfZ2l0XzExLnBuZyIgLz48YnIgLz48ZGl2PjxiciAvPjwvZGl2PjxkaXY+NS4gVGhlIGxhc3QgdGhpbmcgaW4gdGhpcyBzdGVwIGlzIHRvIGNvbm5lY3QgeW91ciBsb2NhbCByZXBvc2l0b3J5IHRvIHlvdXIgcmVtb3RlIG9uZS4gUmV0dXJuIHRvIHlvdXIgY29tbWFuZCBsaW5lL3Rlcm1pbmFsIHdpbmRvdyBvbiB5b3VyIGNvbXB1dGVyIGFuZCBtYWtlIHN1cmUgeW91IGFyZSBsb2NhdGVkIGluIHlvdXIgbG9jYWwgcmVwb3NpdG9yeS4gUnVuIHRoZSBmb2xsb3dpbmcgY29tbWFuZDo8L2Rpdj48ZGl2PjxiciAvPjwvZGl2PjxkaXY+PHByZSBjbGFzcz0icHJldHR5cHJpbnQiPmdpdCByZW1vdGUgYWRkIG9yaWdpbiBzc2g6Ly91c2VyQHNlcnZlci53ZWItaG9zdGluZy5jb206MjEwOTgvaG9tZS91c2VyL3BhdGhfdG9fZm9sZGVyPC9wcmU+PGJyIC8+PC9kaXY+PGltZyBjbGFzcz0ia2ItaW1hZ2UiIHNyYz0iaHR0cHM6Ly9OYW1lY2hlYXAuc2ltcGxla2IuY29tL1NpdGVDb250ZW50cy8yLTdDMjJENTIzNkE0NTQzRUI4MjdGM0JEODkzNkUxNTNFL21lZGlhL2hvd190b19kZWFsX3dpdGhfZ2l0XzEyLnBuZyIgLz48YnIgLz48ZGl2PjxiciAvPjwvZGl2PjxkaXY+d2hlcmU6PGJyIC8+PGJyIC8+PHVsPjxsaT48aT51c2VyIDwvaT5pcyB5b3VyIGNQYW5lbCB1c2VybmFtZTwvbGk+PGxpPjxpPnNlcnZlci53ZWItaG9zdGluZy5jb208L2k+IGlzIHRoZSBzZXJ2ZXJuYW1lIGZvciB5b3VyIGhvc3RpbmcgYWNjb3VudDwvbGk+PGxpPjxpPm9yaWdpbiA8L2k+aW5kaWNhdGVzIGEgbmV3IHBsYWNlIGZyb20gd2hpY2ggZmlsZXMgd2lsbCBvcmlnaW5hdGUuIFlvdSBjYW4gdXNlIGFueSB3b3JkLjwvbGk+PGxpPjxpPnJlbW90ZSA8L2k+aW5kaWNhdGVzIHRoZSBvcmlnaW4gaXMgbm90IG9uIHRoZSBjb21wdXRlciwgYnV0IG9uIGEgcmVtb3RlIHNlcnZlci48L2xpPjwvdWw+PGJyIC8+PGJyIC8+PHA+PGEgbmFtZT0ic3RlcF81Ij48Yj5TdGVwIDUuIFB1c2ggZmlsZXMgdG8gdGhlIHJlbW90ZSBzZXJ2ZXI8L2I+PC9hPjwvcD48YnIgLz5UbyB1cGxvYWQgYWxsIGZpbGVzIHdlIHByZXZpb3VzbHkgYWRkZWQgdG8gdGhlIGNvbW1pdCwgcnVuIHRoZSBmb2xsb3dpbmcgY29tbWFuZCBvbiB5b3VyIGxvY2FsIG1hY2hpbmUgKEdpdCB3aWxsIGFzayB5b3UgdG8gZW50ZXIgdGhlIHBhc3N3b3JkIGZvciB0aGUgaG9zdGluZyBhY2NvdW50KTo8L2Rpdj48ZGl2PjxiciAvPjwvZGl2PjxkaXY+PHByZSBjbGFzcz0icHJldHR5cHJpbnQiPmdpdCBwdXNoIG9yaWdpbiBtYXN0ZXI8L3ByZT48YnIgLz48L2Rpdj48aW1nIGNsYXNzPSJrYi1pbWFnZSIgc3JjPSJodHRwczovL05hbWVjaGVhcC5zaW1wbGVrYi5jb20vU2l0ZUNvbnRlbnRzLzItN0MyMkQ1MjM2QTQ1NDNFQjgyN0YzQkQ4OTM2RTE1M0UvbWVkaWEvaG93X3RvX2RlYWxfd2l0aF9naXRfMTMucG5nIiAvPjxiciAvPjxkaXY+PGJyIC8+PC9kaXY+PGRpdj53aGVyZSA8aT5tYXN0ZXIgPC9pPmlzIGEgbmFtZSBvZiB0aGUgYnJhbmNoIG9uIHdoaWNoIHRoZSBjaGFuZ2VzIHdpbGwgYmUgcHVzaGVkIChtYXN0ZXIgaXMgdGhlIGRlZmF1bHQgb25lKS48YnIgLz48YnIgLz5UaGUgdXBsb2FkIGlzIGRvbmUuIFlvdSBjYW4gZ28gdG8gPGI+Y1BhbmVsICZndDsmZ3Q7IEZpbGUgTWFuYWdlciAmZ3Q7Jmd0OzwvYj4gZG9tYWluJ3Mgcm9vdCBmb2xkZXIgKG9yIHJ1biBscyAtbGEgaW4gdGhlIGRvbWFpbnMgcm9vdCBmb2xkZXIgdmlhIFNTSCkgdG8gY2hlY2sgdGhhdCB0aGUgZmlsZXMgd2VyZSB1cGxvYWRlZC48YnIgLz48YnIgLz48YnIgLz48cD48YSBuYW1lPSJzdGVwXzYiPjxiPlN0ZXAgNi4gRnV0dXJlIGVkaXRzPC9iPjwvYT48L3A+PGJyIC8+SW4gY2FzZSB5b3UgZWRpdGVkIGEgZmlsZSBvbiB0aGUgc2VydmVyIG9yIGFkZGVkIGEgbmV3IG9uZSwgeW91IHdpbGwgbmVlZCB0byB1cGRhdGUgeW91ciBsb2NhbCByZXBvIGZyb20gdGhlIHJlbW90ZSBvbmUuIEdpdCB1c2VzIHRoZSA8Yj5wdWxsIDwvYj5jb21tYW5kIHRvIGdldCB1cGRhdGVzIGZyb20gb3RoZXIgcmVwb3MuIDxiciAvPjxiciAvPkZpcnN0LCBhZGQgdGhlIGVkaXRlZCBmaWxlIHRvIGNvbW1pdCBieSBydW5uaW5nIHRoZXNlIGNvbW1hbmRzIGluIHRoZSByZW1vdGUgR2l0IGZvbGRlcjogPGJyIC8+PC9kaXY+PGRpdj48YnIgLz48L2Rpdj48ZGl2PjxwcmUgY2xhc3M9InByZXR0eXByaW50Ij5naXQgYWRkIC4gKG9yIGdpdCBhZGQgbmFtZV9vZl9maWxlLmV4dCk8L3ByZT48L2Rpdj48ZGl2PjxiciAvPjwvZGl2PjxkaXY+VGhlbiwgY2hlY2sgd2hhdCBmaWxlcyB3aWxsIGJlIGNvbW1pdHRlZDo8L2Rpdj48ZGl2PjxiciAvPjwvZGl2PjxkaXY+PHByZSBjbGFzcz0icHJldHR5cHJpbnQiPmdpdCBzdGF0dXM8L3ByZT48YnIgLz48L2Rpdj48ZGl2PkFuZCBjb21taXQgdGhlIGZpbGU6PC9kaXY+PGRpdj48YnIgLz48L2Rpdj48ZGl2PjxwcmUgY2xhc3M9InByZXR0eXByaW50Ij5naXQgY29tbWl0IC1tICJZb3VyIG1lc3NhZ2UgKGUuZy4gbmV3IGZpbGUgbmFtZV9vZl9maWxlKSI8L3ByZT48YnIgLz5JbiB5b3VyIGxvY2FsIEdpdCBmb2xkZXIsIHJ1bjo8L2Rpdj48ZGl2PjxiciAvPjwvZGl2PjxkaXY+PHByZSBjbGFzcz0icHJldHR5cHJpbnQiPmdpdCBwdWxsIG9yaWdpbiBtYXN0ZXI8L3ByZT48YnIgLz48L2Rpdj48aW1nIGNsYXNzPSJrYi1pbWFnZSIgc3JjPSJodHRwczovL05hbWVjaGVhcC5zaW1wbGVrYi5jb20vU2l0ZUNvbnRlbnRzLzItN0MyMkQ1MjM2QTQ1NDNFQjgyN0YzQkQ4OTM2RTE1M0UvbWVkaWEvaG93X3RvX2RlYWxfd2l0aF9naXRfMTQucG5nIiAvPjxiciAvPjxkaXY+PGJyIC8+PC9kaXY+PGRpdj48YnIgLz48L2Rpdj48ZGl2PjxwPjxhIG5hbWU9InN0ZXBfNyI+PGI+U3RlcCA3LiBSZXN0b3JlIGEgdmVyc2lvbiBvZiBhIGZpbGUvZmlsZXMgZnJvbSBhIGNvbW1pdDwvYj48L2E+PC9wPjxiciAvPlRvIHJldHJpZXZlIGEgc3BlY2lmaWMgdmVyc2lvbiBvZiBhIGZpbGUgZnJvbSBhIGNvbW1pdCB1c2U6PC9kaXY+PGRpdj48YnIgLz48L2Rpdj48ZGl2PjxwcmUgY2xhc3M9InByZXR0eXByaW50Ij5naXQgY2hlY2tvdXQgJmx0O2NvbW1pdCBudW1iZXImZ3Q7ICZsdDtwYXRoL3RvL3RoZS9maWxlJmd0OzwvcHJlPjxiciAvPlRoZSA8aT48Yj5naXQgbG9nPC9iPjwvaT4gY29tbWFuZCBzaG93cyBpbmZvcm1hdGlvbiBhYm91dCBhbGwgY29tbWl0cy4gU3BlY2lmaWNhbGx5LCBjb21taXQgbnVtYmVyLCBhdXRob3IsIGRhdGUsIGFuZCB0aGUgbWVzc2FnZS48L2Rpdj48ZGl2PjxiciAvPjwvZGl2PjxkaXY+VG8gc2VlIGp1c3QgdGhlIGNvbW1pdCBudW1iZXJzIGFuZCB0aGUgbWVzc2FnZXMgdXNlOiA8aT48Yj5naXQgbG9nIC0tb25lbGluZTwvYj48L2k+PGJyIC8+PGJyIC8+RS5nLjogPGk+Z2l0IGNoZWNrb3V0IFhYWFhYWFggdGVzdC50eHQ8L2k+PGJyIC8+PGk+Z2l0IGNoZWNrb3V0IFhYWFhYWFg8L2k+IChmb3IgYWxsIGZpbGVzKTxiciAvPjwvZGl2PjxkaXY+PGJyIC8+PC9kaXY+PGltZyBjbGFzcz0ia2ItaW1hZ2UiIHNyYz0iaHR0cHM6Ly9OYW1lY2hlYXAuc2ltcGxla2IuY29tL1NpdGVDb250ZW50cy8yLTdDMjJENTIzNkE0NTQzRUI4MjdGM0JEODkzNkUxNTNFL21lZGlhL2hvd190b19kZWFsX3dpdGhfZ2l0XzE1LnBuZyIgLz48YnIgLz48ZGl2PjxiciAvPjwvZGl2PjxkaXY+SGVyZSwgd2XigJl2ZSBjb3ZlcmVkIGJhc2ljIEdpdCBjb21tYW5kcy4gR2l0IGlzIGEgcG93ZXJmdWwgdG9vbCBmb3IgY29sbGFib3JhdGl2ZSBkZXZlbG9wbWVudCB3aXRoIG1hbnkgb3RoZXIgYWR2YW5jZWQgZmVhdHVyZXMuIElmIHlvdSBhcmUgaW50ZXJlc3RlZCBpbiB1c2luZyBHaXQgbW9yZSBlZmZlY3RpdmVseSwgaGVyZSBhcmUgc29tZSByZXNvdXJjZXMgdG8gZ2V0IHN0YXJ0ZWQ6PGJyIC8+PHVsPjxsaT48YSBocmVmPSJodHRwczovL2dpdC1zY20uY29tL2RvYyIgbGlua3RleHQ9IkRvY3VtZW50YXRpb24gb24gb2ZmaWNpYWwgR2l0IHdlYnNpdGUiIGxpbmt0eXBlPSJDdXN0b20iIHRhcmdldD0iX2JsYW5rIj5Eb2N1bWVudGF0aW9uIG9uIG9mZmljaWFsIEdpdCB3ZWJzaXRlPC9hPjwvbGk+PGxpPjxhIGhyZWY9Imh0dHBzOi8vZ2l0aHViLmNvbS9hcnNsYW5iaWxhbC9naXQtY2hlYXQtc2hlZXQiIGxpbmt0ZXh0PSJHaXQgYW5kIEdpdCBGbG93IENoZWF0IFNoZWV0IiBsaW5rdHlwZT0iQ3VzdG9tIiB0YXJnZXQ9Il9ibGFuayI+R2l0IGFuZCBHaXQgRmxvdyBDaGVhdCBTaGVldDwvYT48L2xpPjxsaT48YSBocmVmPSJodHRwczovL3d3dy5hdGxhc3NpYW4uY29tL2dpdC90dXRvcmlhbHMvYWR2YW5jZWQtb3ZlcnZpZXciIGxpbmt0ZXh0PSJBZHZhbmNlZCBHaXQgdHV0b3JpYWxzIGZyb20gQXRsYXNzaWFuIiBsaW5rdHlwZT0iQ3VzdG9tIiB0YXJnZXQ9Il9ibGFuayI+QWR2YW5jZWQgR2l0IHR1dG9yaWFscyBmcm9tIEF0bGFzc2lhbjwvYT48L2xpPjwvdWw+PGJyIC8+R2xvc3Nhcnkgb2YgY29tbWFuZHMgdXNlZCBpbiB0aGlzIGd1aWRlOjxiciAvPjxiciAvPjx1bD48bGk+PGI+PGk+Z2l0IGluaXQ8L2k+PC9iPiB0byBpbml0aWF0ZSBub24tYmFyZSBHaXQgcmVwb3NpdG9yeTwvbGk+PGxpPjxpPjxiPmdpdCBjb25maWcgLS1nbG9iYWwgdXNlci5uYW1lICJZb3VyIE5hbWUiPC9iPjwvaT4gdG8gY29uZmlndXJlIHRoZSBuYW1lIHVzZWQgaW4gR2l0PC9saT48bGk+PGk+PGI+Z2l0IGNvbmZpZyAtLWdsb2JhbCB1c2VyLmVtYWlsIHlvdXJlbWFpbEBleGFtcGxlLmNvbTwvYj48L2k+IHRvIGNvbmZpZ3VyZSB0aGUgZW1haWwgYWRkcmVzcyB1c2VkIGluIEdpdDwvbGk+PGxpPjxpPjxiPmdpdCBzdGF0dXM8L2I+PC9pPiB0byBjaGVjayB3aGF0IGZpbGVzIEdpdCBzZWVzIGFzIG5ldy9tb2RpZmllZCwgd2hhdCBmaWxlcyB3aWxsIGJlIGNvbW1pdHRlZDwvbGk+PGxpPjxpPjxiPmdpdCBhZGQgLjwvYj48L2k+IHRvIGFkZCBmaWxlcyB0byBjb21taXQ8L2xpPjxsaT48aT48Yj5naXQgYWRkIGZpbGVfbmFtZS5leHQ8L2I+PC9pPiB0byBhZGQgYSBzcGVjaWZpYyBmaWxlIHRvIGNvbW1pdDwvbGk+PGxpPjxpPjxiPmdpdCBjb21taXQgLW0gIlR5cGUgbWVzc2FnZSBhYm91dCB0aGlzIGNvbW1pdCBoZXJlIjwvYj48L2k+IGNvbW1pdCBjaGFuZ2VzIHRvIHRoZSByZXBvc2l0b3J5PC9saT48bGk+PGk+PGI+Z2l0IGNvbmZpZyByZWNlaXZlLmRlbnlDdXJyZW50QnJhbmNoIHVwZGF0ZUluc3RlYWQ8L2I+PC9pPiB0byBhbGxvdyBwdXNoaW5nIHRvIHRoZSBjaGVja2VkIG91dCBicmFuY2ggb2YgYSBub24tYmFyZSByZXBvc2l0b3J5PC9saT48bGk+PGk+PGI+Z2l0IHJlbW90ZSBhZGQgb3JpZ2luIHNzaDovL3VzZXJAc2VydmVyLndlYi1ob3N0aW5nLmNvbToyMTA5OC9ob21lL3VzZXIvcGF0aF90b19mb2xkZXI8L2I+PC9pPiB0byBjb25uZWN0IHlvdXIgbG9jYWwgcmVwb3NpdG9yeSB0byB5b3VyIHJlbW90ZSBvbmU8L2xpPjxsaT48aT48Yj5naXQgcHVzaCBvcmlnaW4gbWFzdGVyPC9iPjwvaT4gdG8gcHVzaCB0aGUgbG9jYWwgcmVwb3NpdG9yeSB0byB0aGUgcmVtb3RlPC9saT48bGk+PGk+PGI+Z2l0IHB1bGwgb3JpZ2luIG1hc3RlcjwvYj48L2k+IHRvIHVwZGF0ZSB0aGUgbG9jYWwgcmVwb3NpdG9yeSB3aXRoIHRoZSBkYXRhIGZyb20gdGhlIHJlbW90ZSBvbmU8L2xpPjxsaT48aT48Yj5naXQgY2hlY2tvdXQgJmx0O2NvbW1pdCBudW1iZXImZ3Q7ICZsdDtwYXRoL3RvL3RoZS9maWxlJmd0OzwvYj48L2k+IHRvIHJldHJpZXZlIGEgc3BlY2lmaWMgdmVyc2lvbiBvZiBhIGZpbGUgZnJvbSBhIGNvbW1pdDwvbGk+PGxpPjxpPjxiPmdpdCBsb2cgLS1vbmVsaW5lPC9iPjwvaT4gdG8gZ2V0IGluZm9ybWF0aW9uIG9uIHByZXZpb3VzIGNvbW1pdHM8L2xpPjwvdWw+PGJyIC8+PC9kaXY+","NewTillDate":null,"FeaturedTillDate":null,"ModifiedDateTime":"2019-05-27T08:54:15.0000000","LiveDateTime":"1754-02-02T00:00:00.0000000","CreatedDateTime":"2015-07-30T07:53:47.0000000","ApprovalDatetime":"2019-05-27T08:44:44.0000000","RequestCount":56863,"MarkedAsNew":false,"MarkedAsFeatured":false,"RatingValue":3,"CategoryPaths":[{"__type":"Nc:SimpleKB:Abstractions:Dtos:CategoryPathDto","Level":1,"CategoryId":12,"CategoryName":"Hosting"},{"__type":"Nc:SimpleKB:Abstractions:Dtos:CategoryPathDto","Level":2,"CategoryId":89,"CategoryName":"SSH Access"}],"AssociatedCategories":[{"CategoryId":89,"CategoryName":"SSH Access","CategoryDisplayName":"HostingSSH Access"}],"AssociatedTags":[{"TagId":18755,"Tag":" ssh"},{"TagId":65318,"Tag":"git"},{"TagId":65319,"Tag":" repo"},{"TagId":65320,"Tag":" repository"},{"TagId":65321,"Tag":" committing"}],"RelatedArticles":[],"AssociatedMedias":[],"PreferredCategoryId":0,"RootParentCategoryName":"","RootParentCategoryId":0},"status":200,"statusText":"OK"},"/api/v1/ncpl/simplekb/getcategorybycategoryid:\"{\\\"categoryId\\\":89}\"":{"body":{"__type":"Nc:SimpleKB:Abstractions:Dtos:CategoryDto","Description":"VGhlc2UgYXJ0aWNsZXMgZGVzY3JpYmUgYmFzaWMgc3RlcHMgcmVxdWlyZWQgdG8gYWNjZXNzIHlvdXIgaG9zdGluZyBhY2NvdW50IHVzaW5nIHRoZSBzZWN1cmUgU1NIIGNvbm5lY3Rpb24uIEhlcmUgeW91IGNhbiBmaW5kIHRoZSBleGFtcGxlcyBvZiB1c2luZyB0aGUgbW9zdCB3aWRlbHkgdXNlZCBsaW51eCBjb21tYW5kcy48YnIgLz4=","ParentCategoryId":12,"Parent_Category_Name":"Hosting","FriendlyId":null,"ApprovedYN":true,"TreatAsTopicYN":false,"CreatedDateTime":"11/13/2010 09:44:40","CurrentCategoryPaths":[{"__type":"Nc:SimpleKB:Abstractions:Dtos:CategoryPathDto","Level":1,"CategoryId":12,"CategoryName":"Hosting"},{"__type":"Nc:SimpleKB:Abstractions:Dtos:CategoryPathDto","Level":2,"CategoryId":89,"CategoryName":"SSH Access"}],"RelatedCategories":[],"AssociatedArticles":[{"ArticleId":1015,"Title":"How to find information about commands","ArticleName":"How to find information about commands","LiveDateTime":"02/02/1754 00:00:00","NewTillDate":null,"FeaturedTillDate":null,"ModifiedDateTime":"03/26/2024"},{"ArticleId":10123,"Title":"Using CXS scan via SSH","ArticleName":"Using CXS scan via SSH","LiveDateTime":"02/02/1754 00:00:00","NewTillDate":null,"FeaturedTillDate":null,"ModifiedDateTime":"05/13/2026"},{"ArticleId":10200,"Title":"How to secure your SSH login","ArticleName":"How to secure your SSH login","LiveDateTime":"02/02/1754 00:00:00","NewTillDate":null,"FeaturedTillDate":null,"ModifiedDateTime":"04/26/2024"},{"ArticleId":1007,"Title":"What is SSH?","ArticleName":"What is SSH?","LiveDateTime":"02/02/1754 00:00:00","NewTillDate":null,"FeaturedTillDate":null,"ModifiedDateTime":"05/25/2016"},{"ArticleId":131,"Title":"Do you provide SSH? If yes, under what conditions?","ArticleName":"Do you provide SSH? If yes, under what conditions?","LiveDateTime":"02/02/1754 00:00:00","NewTillDate":null,"FeaturedTillDate":null,"ModifiedDateTime":"07/19/2024"},{"ArticleId":1022,"Title":"How to get an SSH client","ArticleName":"How to get an SSH client","LiveDateTime":"02/02/1754 00:00:00","NewTillDate":null,"FeaturedTillDate":null,"ModifiedDateTime":"09/05/2019"},{"ArticleId":1016,"Title":"How to access a hosting account via SSH","ArticleName":"How to access a hosting account via SSH","LiveDateTime":"02/02/1754 00:00:00","NewTillDate":null,"FeaturedTillDate":null,"ModifiedDateTime":"09/25/2024"},{"ArticleId":9428,"Title":"How to connect via SSH using keys","ArticleName":"How to connect via SSH using keys","LiveDateTime":"02/02/1754 00:00:00","NewTillDate":null,"FeaturedTillDate":null,"ModifiedDateTime":"05/09/2025"},{"ArticleId":1020,"Title":"How to create a new file","ArticleName":"How to create a new file","LiveDateTime":"02/02/1754 00:00:00","NewTillDate":null,"FeaturedTillDate":null,"ModifiedDateTime":"05/25/2016"},{"ArticleId":1021,"Title":"How to edit a file","ArticleName":"How to edit a file","LiveDateTime":"02/02/1754 00:00:00","NewTillDate":null,"FeaturedTillDate":null,"ModifiedDateTime":"05/25/2016"},{"ArticleId":9571,"Title":"How to download a file via SSH","ArticleName":"How to download a file via SSH","LiveDateTime":"02/02/1754 00:00:00","NewTillDate":null,"FeaturedTillDate":null,"ModifiedDateTime":"12/15/2021"},{"ArticleId":1012,"Title":"How to remove a file","ArticleName":"How to remove a file","LiveDateTime":"02/02/1754 00:00:00","NewTillDate":null,"FeaturedTillDate":null,"ModifiedDateTime":"05/25/2016"},{"ArticleId":1019,"Title":"How to create a new directory","ArticleName":"How to create a new directory","LiveDateTime":"02/02/1754 00:00:00","NewTillDate":null,"FeaturedTillDate":null,"ModifiedDateTime":"05/25/2016"},{"ArticleId":1018,"Title":"How to change a working directory","ArticleName":"How to change a working directory","LiveDateTime":"02/02/1754 00:00:00","NewTillDate":null,"FeaturedTillDate":null,"ModifiedDateTime":"05/25/2016"},{"ArticleId":1013,"Title":"How to remove a directory","ArticleName":"How to remove a directory","LiveDateTime":"02/02/1754 00:00:00","NewTillDate":null,"FeaturedTillDate":null,"ModifiedDateTime":"11/12/2015"},{"ArticleId":1010,"Title":"How to find a current working directory","ArticleName":"How to find a current working directory","LiveDateTime":"02/02/1754 00:00:00","NewTillDate":null,"FeaturedTillDate":null,"ModifiedDateTime":"05/25/2016"},{"ArticleId":1017,"Title":"How to get a list of files and directories","ArticleName":"How to get a list of files and directories","LiveDateTime":"02/02/1754 00:00:00","NewTillDate":null,"FeaturedTillDate":null,"ModifiedDateTime":"05/25/2016"},{"ArticleId":1011,"Title":"How to change permissions for files and directories","ArticleName":"How to change permissions for files and directories","LiveDateTime":"02/02/1754 00:00:00","NewTillDate":null,"FeaturedTillDate":null,"ModifiedDateTime":"09/25/2024"},{"ArticleId":9606,"Title":"How to create a backup of your files via SSH","ArticleName":"How to create a backup of your files via SSH","LiveDateTime":"02/02/1754 00:00:00","NewTillDate":null,"FeaturedTillDate":null,"ModifiedDateTime":"12/21/2021"},{"ArticleId":9184,"Title":"How to import and export a database via SSH","ArticleName":"How to import and export a database via SSH","LiveDateTime":"02/02/1754 00:00:00","NewTillDate":null,"FeaturedTillDate":null,"ModifiedDateTime":"03/31/2026"},{"ArticleId":1249,"Title":"How to remotely connect to a MySQL database located on our shared server","ArticleName":"How to remotely connect to a MySQL database located on our shared server","LiveDateTime":"02/02/1754 00:00:00","NewTillDate":null,"FeaturedTillDate":null,"ModifiedDateTime":"12/02/2021"},{"ArticleId":9586,"Title":"How to deal with Git on our Shared servers","ArticleName":"How to deal with Git on our Shared servers","LiveDateTime":"02/02/1754 00:00:00","NewTillDate":null,"FeaturedTillDate":null,"ModifiedDateTime":"05/27/2019"},{"ArticleId":1008,"Title":"SCP and SFTP - Secure File Transfer Using SSH","ArticleName":"SCP and SFTP - Secure File Transfer Using SSH","LiveDateTime":"02/02/1754 00:00:00","NewTillDate":null,"FeaturedTillDate":null,"ModifiedDateTime":"05/25/2016"}],"AssociatedTags":[],"CategoryId":89,"CategoryName":"SSH Access"},"status":200,"statusText":"OK"},"/api/v1/ncpl/simplekb/getcategories:\"{\\\"parentCategoryId\\\":0,\\\"getTree\\\":true}\"":{"body":[{"__type":"Nc:SimpleKB:Abstractions:Dtos:CategoryItemDto","ParentCategoryId":93,"TreatAsTopicYN":false,"Description":"","ImageUrl":"","ShortDesc":"","CategoryId":2216,"CategoryName":"Spam Protection"},{"__type":"Nc:SimpleKB:Abstractions:Dtos:CategoryItemDto","ParentCategoryId":14,"TreatAsTopicYN":false,"Description":"","ImageUrl":"","ShortDesc":"","CategoryId":2217,"CategoryName":"Renewal"},{"__type":"Nc:SimpleKB:Abstractions:Dtos:CategoryItemDto","ParentCategoryId":14,"TreatAsTopicYN":false,"Description":"","ImageUrl":"","ShortDesc":"","CategoryId":2218,"CategoryName":"cPanel SSL Plugin"},{"__type":"Nc:SimpleKB:Abstractions:Dtos:CategoryItemDto","ParentCategoryId":12,"TreatAsTopicYN":false,"Description":"","ImageUrl":"","ShortDesc":"","CategoryId":2219,"CategoryName":"PHP Configuration"},{"__type":"Nc:SimpleKB:Abstractions:Dtos:CategoryItemDto","ParentCategoryId":14,"TreatAsTopicYN":false,"Description":"","ImageUrl":"","ShortDesc":"","CategoryId":2221,"CategoryName":"Multi-Domain SSL Certificates"},{"__type":"Nc:SimpleKB:Abstractions:Dtos:CategoryItemDto","ParentCategoryId":14,"TreatAsTopicYN":false,"Description":"","ImageUrl":"","ShortDesc":"","CategoryId":2222,"CategoryName":"Cancellation"},{"__type":"Nc:SimpleKB:Abstractions:Dtos:CategoryItemDto","ParentCategoryId":14,"TreatAsTopicYN":false,"Description":"","ImageUrl":"","ShortDesc":"","CategoryId":2223,"CategoryName":"Browser errors"},{"__type":"Nc:SimpleKB:Abstractions:Dtos:CategoryItemDto","ParentCategoryId":14,"TreatAsTopicYN":false,"Description":"","ImageUrl":"","ShortDesc":"","CategoryId":2224,"CategoryName":"Site Seal, Logo"},{"__type":"Nc:SimpleKB:Abstractions:Dtos:CategoryItemDto","ParentCategoryId":12,"TreatAsTopicYN":false,"Description":"","ImageUrl":"","ShortDesc":"","CategoryId":2225,"CategoryName":"SEO"},{"__type":"Nc:SimpleKB:Abstractions:Dtos:CategoryItemDto","ParentCategoryId":93,"TreatAsTopicYN":false,"Description":"","ImageUrl":"","ShortDesc":"","CategoryId":2226,"CategoryName":"Email Migration"},{"__type":"Nc:SimpleKB:Abstractions:Dtos:CategoryItemDto","ParentCategoryId":2211,"TreatAsTopicYN":false,"Description":"","ImageUrl":"","ShortDesc":"","CategoryId":2227,"CategoryName":"SSL Resellers"},{"__type":"Nc:SimpleKB:Abstractions:Dtos:CategoryItemDto","ParentCategoryId":0,"TreatAsTopicYN":true,"Description":"","ImageUrl":"/assets/img/pictograms/150/cloud-red.png","ShortDesc":"","CategoryId":2228,"CategoryName":"Apps","SubCategories":[{"__type":"Nc:SimpleKB:Abstractions:Dtos:CategoryItemDto","ParentCategoryId":2228,"TreatAsTopicYN":false,"Description":"","ImageUrl":"","ShortDesc":"","CategoryId":2251,"CategoryName":"Supersonic CDN"},{"__type":"Nc:SimpleKB:Abstractions:Dtos:CategoryItemDto","ParentCategoryId":2228,"TreatAsTopicYN":false,"Description":"","ImageUrl":"","ShortDesc":"","CategoryId":2298,"CategoryName":"Site Maker"},{"__type":"Nc:SimpleKB:Abstractions:Dtos:CategoryItemDto","ParentCategoryId":2228,"TreatAsTopicYN":false,"Description":"","ImageUrl":"","ShortDesc":"","CategoryId":177,"CategoryName":"Google Workspace (formerly G Suite)"}]},{"__type":"Nc:SimpleKB:Abstractions:Dtos:CategoryItemDto","ParentCategoryId":2211,"TreatAsTopicYN":false,"Description":"","ImageUrl":"","ShortDesc":"","CategoryId":2229,"CategoryName":"Hosting Resellers"},{"__type":"Nc:SimpleKB:Abstractions:Dtos:CategoryItemDto","ParentCategoryId":34,"TreatAsTopicYN":false,"Description":"","ImageUrl":"","ShortDesc":"","CategoryId":2232,"CategoryName":"DNSSEC"},{"__type":"Nc:SimpleKB:Abstractions:Dtos:CategoryItemDto","ParentCategoryId":34,"TreatAsTopicYN":false,"Description":"","ImageUrl":"","ShortDesc":"","CategoryId":2234,"CategoryName":"Google Workspace (formerly G Suite)"},{"__type":"Nc:SimpleKB:Abstractions:Dtos:CategoryItemDto","ParentCategoryId":34,"TreatAsTopicYN":false,"Description":"","ImageUrl":"","ShortDesc":"","CategoryId":2237,"CategoryName":"Host records setup"},{"__type":"Nc:SimpleKB:Abstractions:Dtos:CategoryItemDto","ParentCategoryId":14,"TreatAsTopicYN":false,"Description":"","ImageUrl":"","ShortDesc":"","CategoryId":2238,"CategoryName":"SSL installation errors"},{"__type":"Nc:SimpleKB:Abstractions:Dtos:CategoryItemDto","ParentCategoryId":0,"TreatAsTopicYN":false,"Description":"","ImageUrl":"/assets/img/pictograms/150/easywp-red.png","ShortDesc":"","CategoryId":2239,"CategoryName":"EasyWP","SubCategories":[{"__type":"Nc:SimpleKB:Abstractions:Dtos:CategoryItemDto","ParentCategoryId":2239,"TreatAsTopicYN":false,"Description":"","ImageUrl":"","ShortDesc":"","CategoryId":2280,"CategoryName":"Getting Started"},{"__type":"Nc:SimpleKB:Abstractions:Dtos:CategoryItemDto","ParentCategoryId":2239,"TreatAsTopicYN":false,"Description":"","ImageUrl":"","ShortDesc":"","CategoryId":2279,"CategoryName":"General Information"},{"__type":"Nc:SimpleKB:Abstractions:Dtos:CategoryItemDto","ParentCategoryId":2239,"TreatAsTopicYN":false,"Description":"","ImageUrl":"","ShortDesc":"","CategoryId":2281,"CategoryName":"WordPress Migration"},{"__type":"Nc:SimpleKB:Abstractions:Dtos:CategoryItemDto","ParentCategoryId":2239,"TreatAsTopicYN":false,"Description":"","ImageUrl":"","ShortDesc":"","CategoryId":2282,"CategoryName":"Plugins and Themes"},{"__type":"Nc:SimpleKB:Abstractions:Dtos:CategoryItemDto","ParentCategoryId":2239,"TreatAsTopicYN":false,"Description":"","ImageUrl":"","ShortDesc":"","CategoryId":2284,"CategoryName":"WordPress Management"},{"__type":"Nc:SimpleKB:Abstractions:Dtos:CategoryItemDto","ParentCategoryId":2239,"TreatAsTopicYN":false,"Description":"","ImageUrl":"","ShortDesc":"","CategoryId":2285,"CategoryName":"SFTP and Database access"},{"__type":"Nc:SimpleKB:Abstractions:Dtos:CategoryItemDto","ParentCategoryId":2239,"TreatAsTopicYN":false,"Description":"","ImageUrl":"","ShortDesc":"","CategoryId":2286,"CategoryName":"Domains questions"},{"__type":"Nc:SimpleKB:Abstractions:Dtos:CategoryItemDto","ParentCategoryId":2239,"TreatAsTopicYN":false,"Description":"","ImageUrl":"","ShortDesc":"","CategoryId":2288,"CategoryName":"Billing questions"},{"__type":"Nc:SimpleKB:Abstractions:Dtos:CategoryItemDto","ParentCategoryId":2239,"TreatAsTopicYN":false,"Description":"","ImageUrl":"","ShortDesc":"","CategoryId":2287,"CategoryName":"SSL questions"}]},{"__type":"Nc:SimpleKB:Abstractions:Dtos:CategoryItemDto","ParentCategoryId":2228,"TreatAsTopicYN":false,"Description":"","ImageUrl":"","ShortDesc":"","CategoryId":2251,"CategoryName":"Supersonic CDN"},{"__type":"Nc:SimpleKB:Abstractions:Dtos:CategoryItemDto","ParentCategoryId":12,"TreatAsTopicYN":false,"Description":"","ImageUrl":"","ShortDesc":"","CategoryId":2252,"CategoryName":"InterWorx questions"},{"__type":"Nc:SimpleKB:Abstractions:Dtos:CategoryItemDto","ParentCategoryId":2253,"TreatAsTopicYN":false,"Description":"","ImageUrl":"","ShortDesc":"","CategoryId":2254,"CategoryName":"Domains How-To"},{"__type":"Nc:SimpleKB:Abstractions:Dtos:CategoryItemDto","ParentCategoryId":2253,"TreatAsTopicYN":false,"Description":"","ImageUrl":"","ShortDesc":"","CategoryId":2255,"CategoryName":"Hosting How-To"},{"__type":"Nc:SimpleKB:Abstractions:Dtos:CategoryItemDto","ParentCategoryId":2253,"TreatAsTopicYN":false,"Description":"","ImageUrl":"","ShortDesc":"","CategoryId":2257,"CategoryName":"Sales & Payments How-To"},{"__type":"Nc:SimpleKB:Abstractions:Dtos:CategoryItemDto","ParentCategoryId":2253,"TreatAsTopicYN":false,"Description":"","ImageUrl":"","ShortDesc":"","CategoryId":2258,"CategoryName":"cPanel Email How-To"},{"__type":"Nc:SimpleKB:Abstractions:Dtos:CategoryItemDto","ParentCategoryId":93,"TreatAsTopicYN":false,"Description":"","ImageUrl":"","ShortDesc":"","CategoryId":2260,"CategoryName":"Private Email Contacts and Calendars Setup"},{"__type":"Nc:SimpleKB:Abstractions:Dtos:CategoryItemDto","ParentCategoryId":2253,"TreatAsTopicYN":false,"Description":"","ImageUrl":"","ShortDesc":"","CategoryId":2262,"CategoryName":"EasyWP How-To"},{"__type":"Nc:SimpleKB:Abstractions:Dtos:CategoryItemDto","ParentCategoryId":0,"TreatAsTopicYN":false,"Description":"","ImageUrl":"https://download.namecheap.com/assets/img/domainvault-red@2x.png","ShortDesc":"","CategoryId":2289,"CategoryName":"Domain Vault","SubCategories":[]},{"__type":"Nc:SimpleKB:Abstractions:Dtos:CategoryItemDto","ParentCategoryId":14,"TreatAsTopicYN":false,"Description":"","ImageUrl":"","ShortDesc":"","CategoryId":2290,"CategoryName":"CSR code"},{"__type":"Nc:SimpleKB:Abstractions:Dtos:CategoryItemDto","ParentCategoryId":12,"TreatAsTopicYN":false,"Description":"","ImageUrl":"","ShortDesc":"","CategoryId":2291,"CategoryName":"Webuzo questions"},{"__type":"Nc:SimpleKB:Abstractions:Dtos:CategoryItemDto","ParentCategoryId":2265,"TreatAsTopicYN":false,"Description":"","ImageUrl":"","ShortDesc":"","CategoryId":2292,"CategoryName":"Browser Extensions"},{"__type":"Nc:SimpleKB:Abstractions:Dtos:CategoryItemDto","ParentCategoryId":14,"TreatAsTopicYN":false,"Description":"","ImageUrl":"","ShortDesc":"","CategoryId":2293,"CategoryName":"Automated SSL management"},{"__type":"Nc:SimpleKB:Abstractions:Dtos:CategoryItemDto","ParentCategoryId":2228,"TreatAsTopicYN":false,"Description":"","ImageUrl":"","ShortDesc":"","CategoryId":2298,"CategoryName":"Site Maker"},{"__type":"Nc:SimpleKB:Abstractions:Dtos:CategoryItemDto","ParentCategoryId":93,"TreatAsTopicYN":false,"Description":"","ImageUrl":"","ShortDesc":"","CategoryId":2306,"CategoryName":"New Private Email Platform"},{"__type":"Nc:SimpleKB:Abstractions:Dtos:CategoryItemDto","ParentCategoryId":12,"TreatAsTopicYN":false,"Description":"","ImageUrl":"","ShortDesc":"","CategoryId":27,"CategoryName":"Getting Started"},{"__type":"Nc:SimpleKB:Abstractions:Dtos:CategoryItemDto","ParentCategoryId":0,"TreatAsTopicYN":false,"Description":"","ImageUrl":"/assets/img/pictograms/150/support-red.png","ShortDesc":"","CategoryId":5,"CategoryName":"General & Support","SubCategories":[]},{"__type":"Nc:SimpleKB:Abstractions:Dtos:CategoryItemDto","ParentCategoryId":2200,"TreatAsTopicYN":false,"Description":"","ImageUrl":"","ShortDesc":"","CategoryId":7,"CategoryName":"Billing FAQ"},{"__type":"Nc:SimpleKB:Abstractions:Dtos:CategoryItemDto","ParentCategoryId":2209,"TreatAsTopicYN":false,"Description":"","ImageUrl":"","ShortDesc":"","CategoryId":8,"CategoryName":"Transfer Information"},{"__type":"Nc:SimpleKB:Abstractions:Dtos:CategoryItemDto","ParentCategoryId":12,"TreatAsTopicYN":false,"Description":"","ImageUrl":"","ShortDesc":"","CategoryId":22,"CategoryName":"Hosting Information"},{"__type":"Nc:SimpleKB:Abstractions:Dtos:CategoryItemDto","ParentCategoryId":14,"TreatAsTopicYN":false,"Description":"","ImageUrl":"","ShortDesc":"","CategoryId":38,"CategoryName":"SSL General"},{"__type":"Nc:SimpleKB:Abstractions:Dtos:CategoryItemDto","ParentCategoryId":9,"TreatAsTopicYN":false,"Description":"","ImageUrl":"","ShortDesc":"","CategoryId":45,"CategoryName":"Account Security"},{"__type":"Nc:SimpleKB:Abstractions:Dtos:CategoryItemDto","ParentCategoryId":34,"TreatAsTopicYN":false,"Description":"","ImageUrl":"","ShortDesc":"","CategoryId":46,"CategoryName":"Domain Management"},{"__type":"Nc:SimpleKB:Abstractions:Dtos:CategoryItemDto","ParentCategoryId":2211,"TreatAsTopicYN":false,"Description":"","ImageUrl":"","ShortDesc":"","CategoryId":63,"CategoryName":"Namecheap API"},{"__type":"Nc:SimpleKB:Abstractions:Dtos:CategoryItemDto","ParentCategoryId":2228,"TreatAsTopicYN":false,"Description":"","ImageUrl":"","ShortDesc":"","CategoryId":177,"CategoryName":"Google Workspace (formerly G Suite)"},{"__type":"Nc:SimpleKB:Abstractions:Dtos:CategoryItemDto","ParentCategoryId":93,"TreatAsTopicYN":false,"Description":"","ImageUrl":"","ShortDesc":"","CategoryId":2179,"CategoryName":"Private Email: General Information"},{"__type":"Nc:SimpleKB:Abstractions:Dtos:CategoryItemDto","ParentCategoryId":2265,"TreatAsTopicYN":false,"Description":"","ImageUrl":"","ShortDesc":"","CategoryId":2274,"CategoryName":"General"},{"__type":"Nc:SimpleKB:Abstractions:Dtos:CategoryItemDto","ParentCategoryId":2239,"TreatAsTopicYN":false,"Description":"","ImageUrl":"","ShortDesc":"","CategoryId":2280,"CategoryName":"Getting Started"},{"__type":"Nc:SimpleKB:Abstractions:Dtos:CategoryItemDto","ParentCategoryId":2239,"TreatAsTopicYN":false,"Description":"","ImageUrl":"","ShortDesc":"","CategoryId":2279,"CategoryName":"General Information"},{"__type":"Nc:SimpleKB:Abstractions:Dtos:CategoryItemDto","ParentCategoryId":93,"TreatAsTopicYN":false,"Description":"","ImageUrl":"","ShortDesc":"","CategoryId":2215,"CategoryName":"Private Email: Mailbox Management"},{"__type":"Nc:SimpleKB:Abstractions:Dtos:CategoryItemDto","ParentCategoryId":2211,"TreatAsTopicYN":false,"Description":"","ImageUrl":"","ShortDesc":"","CategoryId":2196,"CategoryName":"WHMCS module for SSL"},{"__type":"Nc:SimpleKB:Abstractions:Dtos:CategoryItemDto","ParentCategoryId":0,"TreatAsTopicYN":false,"Description":"","ImageUrl":"/assets/img/pictograms/150/savings-red.png","ShortDesc":"","CategoryId":2200,"CategoryName":"Checkout & Billing","SubCategories":[{"__type":"Nc:SimpleKB:Abstractions:Dtos:CategoryItemDto","ParentCategoryId":2200,"TreatAsTopicYN":false,"Description":"","ImageUrl":"","ShortDesc":"","CategoryId":7,"CategoryName":"Billing FAQ"},{"__type":"Nc:SimpleKB:Abstractions:Dtos:CategoryItemDto","ParentCategoryId":2200,"TreatAsTopicYN":false,"Description":"","ImageUrl":"","ShortDesc":"","CategoryId":2201,"CategoryName":"Domains Billing"},{"__type":"Nc:SimpleKB:Abstractions:Dtos:CategoryItemDto","ParentCategoryId":2200,"TreatAsTopicYN":false,"Description":"","ImageUrl":"","ShortDesc":"","CategoryId":21,"CategoryName":"Hosting Billing"},{"__type":"Nc:SimpleKB:Abstractions:Dtos:CategoryItemDto","ParentCategoryId":2200,"TreatAsTopicYN":false,"Description":"","ImageUrl":"","ShortDesc":"","CategoryId":71,"CategoryName":"SSL Certificates Billing"},{"__type":"Nc:SimpleKB:Abstractions:Dtos:CategoryItemDto","ParentCategoryId":2200,"TreatAsTopicYN":false,"Description":"","ImageUrl":"","ShortDesc":"","CategoryId":2177,"CategoryName":"Private Email"}]},{"__type":"Nc:SimpleKB:Abstractions:Dtos:CategoryItemDto","ParentCategoryId":2200,"TreatAsTopicYN":false,"Description":"","ImageUrl":"","ShortDesc":"","CategoryId":2201,"CategoryName":"Domains Billing"},{"__type":"Nc:SimpleKB:Abstractions:Dtos:CategoryItemDto","ParentCategoryId":14,"TreatAsTopicYN":false,"Description":"","ImageUrl":"","ShortDesc":"","CategoryId":67,"CategoryName":"Activation"},{"__type":"Nc:SimpleKB:Abstractions:Dtos:CategoryItemDto","ParentCategoryId":2209,"TreatAsTopicYN":false,"Description":"","ImageUrl":"","ShortDesc":"","CategoryId":83,"CategoryName":"Transfer to Namecheap"},{"__type":"Nc:SimpleKB:Abstractions:Dtos:CategoryItemDto","ParentCategoryId":9,"TreatAsTopicYN":false,"Description":"","ImageUrl":"","ShortDesc":"","CategoryId":43,"CategoryName":"Profile Management"},{"__type":"Nc:SimpleKB:Abstractions:Dtos:CategoryItemDto","ParentCategoryId":34,"TreatAsTopicYN":false,"Description":"","ImageUrl":"","ShortDesc":"","CategoryId":10,"CategoryName":"DNS Questions"},{"__type":"Nc:SimpleKB:Abstractions:Dtos:CategoryItemDto","ParentCategoryId":12,"TreatAsTopicYN":false,"Description":"","ImageUrl":"","ShortDesc":"","CategoryId":29,"CategoryName":"cPanel questions"},{"__type":"Nc:SimpleKB:Abstractions:Dtos:CategoryItemDto","ParentCategoryId":2200,"TreatAsTopicYN":false,"Description":"","ImageUrl":"","ShortDesc":"","CategoryId":21,"CategoryName":"Hosting Billing"},{"__type":"Nc:SimpleKB:Abstractions:Dtos:CategoryItemDto","ParentCategoryId":34,"TreatAsTopicYN":false,"Description":"","ImageUrl":"","ShortDesc":"","CategoryId":11,"CategoryName":"Dynamic DNS"},{"__type":"Nc:SimpleKB:Abstractions:Dtos:CategoryItemDto","ParentCategoryId":9,"TreatAsTopicYN":false,"Description":"","ImageUrl":"","ShortDesc":"","CategoryId":44,"CategoryName":"Account Access"},{"__type":"Nc:SimpleKB:Abstractions:Dtos:CategoryItemDto","ParentCategoryId":2209,"TreatAsTopicYN":false,"Description":"","ImageUrl":"","ShortDesc":"","CategoryId":84,"CategoryName":"Transfer to another provider"},{"__type":"Nc:SimpleKB:Abstractions:Dtos:CategoryItemDto","ParentCategoryId":14,"TreatAsTopicYN":false,"Description":"","ImageUrl":"","ShortDesc":"","CategoryId":68,"CategoryName":"Validation"},{"__type":"Nc:SimpleKB:Abstractions:Dtos:CategoryItemDto","ParentCategoryId":12,"TreatAsTopicYN":false,"Description":"","ImageUrl":"","ShortDesc":"","CategoryId":2182,"CategoryName":"cPanel: Software Management"},{"__type":"Nc:SimpleKB:Abstractions:Dtos:CategoryItemDto","ParentCategoryId":93,"TreatAsTopicYN":false,"Description":"","ImageUrl":"","ShortDesc":"","CategoryId":2214,"CategoryName":"Email Forwarding"},{"__type":"Nc:SimpleKB:Abstractions:Dtos:CategoryItemDto","ParentCategoryId":2265,"TreatAsTopicYN":false,"Description":"","ImageUrl":"","ShortDesc":"","CategoryId":2270,"CategoryName":"Routers"},{"__type":"Nc:SimpleKB:Abstractions:Dtos:CategoryItemDto","ParentCategoryId":2239,"TreatAsTopicYN":false,"Description":"","ImageUrl":"","ShortDesc":"","CategoryId":2281,"CategoryName":"WordPress Migration"},{"__type":"Nc:SimpleKB:Abstractions:Dtos:CategoryItemDto","ParentCategoryId":2239,"TreatAsTopicYN":false,"Description":"","ImageUrl":"","ShortDesc":"","CategoryId":2282,"CategoryName":"Plugins and Themes"},{"__type":"Nc:SimpleKB:Abstractions:Dtos:CategoryItemDto","ParentCategoryId":2265,"TreatAsTopicYN":false,"Description":"","ImageUrl":"","ShortDesc":"","CategoryId":2272,"CategoryName":"TV"},{"__type":"Nc:SimpleKB:Abstractions:Dtos:CategoryItemDto","ParentCategoryId":12,"TreatAsTopicYN":false,"Description":"","ImageUrl":"","ShortDesc":"","CategoryId":2187,"CategoryName":"cPanel: WordPress"},{"__type":"Nc:SimpleKB:Abstractions:Dtos:CategoryItemDto","ParentCategoryId":2209,"TreatAsTopicYN":false,"Description":"","ImageUrl":"","ShortDesc":"","CategoryId":219,"CategoryName":"Canceled Transfers"},{"__type":"Nc:SimpleKB:Abstractions:Dtos:CategoryItemDto","ParentCategoryId":2200,"TreatAsTopicYN":false,"Description":"","ImageUrl":"","ShortDesc":"","CategoryId":71,"CategoryName":"SSL Certificates Billing"},{"__type":"Nc:SimpleKB:Abstractions:Dtos:CategoryItemDto","ParentCategoryId":93,"TreatAsTopicYN":false,"Description":"","ImageUrl":"","ShortDesc":"","CategoryId":2176,"CategoryName":"Private Email: DNS Settings"},{"__type":"Nc:SimpleKB:Abstractions:Dtos:CategoryItemDto","ParentCategoryId":14,"TreatAsTopicYN":false,"Description":"","ImageUrl":"","ShortDesc":"","CategoryId":69,"CategoryName":"Installation"},{"__type":"Nc:SimpleKB:Abstractions:Dtos:CategoryItemDto","ParentCategoryId":0,"TreatAsTopicYN":false,"Description":"","ImageUrl":"/assets/img/pictograms/150/reseller-red.png","ShortDesc":"","CategoryId":34,"CategoryName":"Domains","SubCategories":[{"__type":"Nc:SimpleKB:Abstractions:Dtos:CategoryItemDto","ParentCategoryId":34,"TreatAsTopicYN":false,"Description":"","ImageUrl":"","ShortDesc":"","CategoryId":2232,"CategoryName":"DNSSEC"},{"__type":"Nc:SimpleKB:Abstractions:Dtos:CategoryItemDto","ParentCategoryId":34,"TreatAsTopicYN":false,"Description":"","ImageUrl":"","ShortDesc":"","CategoryId":2234,"CategoryName":"Google Workspace (formerly G Suite)"},{"__type":"Nc:SimpleKB:Abstractions:Dtos:CategoryItemDto","ParentCategoryId":34,"TreatAsTopicYN":false,"Description":"","ImageUrl":"","ShortDesc":"","CategoryId":2237,"CategoryName":"Host records setup"},{"__type":"Nc:SimpleKB:Abstractions:Dtos:CategoryItemDto","ParentCategoryId":34,"TreatAsTopicYN":false,"Description":"","ImageUrl":"","ShortDesc":"","CategoryId":46,"CategoryName":"Domain Management"},{"__type":"Nc:SimpleKB:Abstractions:Dtos:CategoryItemDto","ParentCategoryId":34,"TreatAsTopicYN":false,"Description":"","ImageUrl":"","ShortDesc":"","CategoryId":10,"CategoryName":"DNS Questions"},{"__type":"Nc:SimpleKB:Abstractions:Dtos:CategoryItemDto","ParentCategoryId":34,"TreatAsTopicYN":false,"Description":"","ImageUrl":"","ShortDesc":"","CategoryId":11,"CategoryName":"Dynamic DNS"},{"__type":"Nc:SimpleKB:Abstractions:Dtos:CategoryItemDto","ParentCategoryId":34,"TreatAsTopicYN":false,"Description":"","ImageUrl":"","ShortDesc":"","CategoryId":35,"CategoryName":"Registrations"},{"__type":"Nc:SimpleKB:Abstractions:Dtos:CategoryItemDto","ParentCategoryId":34,"TreatAsTopicYN":false,"Description":"","ImageUrl":"","ShortDesc":"","CategoryId":2207,"CategoryName":"Renewal questions"},{"__type":"Nc:SimpleKB:Abstractions:Dtos:CategoryItemDto","ParentCategoryId":34,"TreatAsTopicYN":false,"Description":"","ImageUrl":"","ShortDesc":"","CategoryId":36,"CategoryName":"Domains with extended attributes"},{"__type":"Nc:SimpleKB:Abstractions:Dtos:CategoryItemDto","ParentCategoryId":34,"TreatAsTopicYN":false,"Description":"","ImageUrl":"","ShortDesc":"","CategoryId":51,"CategoryName":"FreeDNS"},{"__type":"Nc:SimpleKB:Abstractions:Dtos:CategoryItemDto","ParentCategoryId":34,"TreatAsTopicYN":false,"Description":"","ImageUrl":"","ShortDesc":"","CategoryId":15,"CategoryName":"Namecheap Market"},{"__type":"Nc:SimpleKB:Abstractions:Dtos:CategoryItemDto","ParentCategoryId":34,"TreatAsTopicYN":false,"Description":"","ImageUrl":"","ShortDesc":"","CategoryId":2208,"CategoryName":"3rd Party Services Setup"},{"__type":"Nc:SimpleKB:Abstractions:Dtos:CategoryItemDto","ParentCategoryId":34,"TreatAsTopicYN":false,"Description":"","ImageUrl":"","ShortDesc":"","CategoryId":2278,"CategoryName":"Handshake TLDs"}]},{"__type":"Nc:SimpleKB:Abstractions:Dtos:CategoryItemDto","ParentCategoryId":34,"TreatAsTopicYN":false,"Description":"","ImageUrl":"","ShortDesc":"","CategoryId":35,"CategoryName":"Registrations"},{"__type":"Nc:SimpleKB:Abstractions:Dtos:CategoryItemDto","ParentCategoryId":14,"TreatAsTopicYN":false,"Description":"","ImageUrl":"","ShortDesc":"","CategoryId":70,"CategoryName":"Reissuance"},{"__type":"Nc:SimpleKB:Abstractions:Dtos:CategoryItemDto","ParentCategoryId":0,"TreatAsTopicYN":false,"Description":"","ImageUrl":"/assets/img/pictograms/150/protection-red.png","ShortDesc":"","CategoryId":37,"CategoryName":"Domain Privacy Protection","SubCategories":[]},{"__type":"Nc:SimpleKB:Abstractions:Dtos:CategoryItemDto","ParentCategoryId":2200,"TreatAsTopicYN":false,"Description":"","ImageUrl":"","ShortDesc":"","CategoryId":2177,"CategoryName":"Private Email"},{"__type":"Nc:SimpleKB:Abstractions:Dtos:CategoryItemDto","ParentCategoryId":93,"TreatAsTopicYN":false,"Description":"","ImageUrl":"","ShortDesc":"","CategoryId":2178,"CategoryName":"Private Email: Webmail Features"},{"__type":"Nc:SimpleKB:Abstractions:Dtos:CategoryItemDto","ParentCategoryId":34,"TreatAsTopicYN":false,"Description":"","ImageUrl":"","ShortDesc":"","CategoryId":2207,"CategoryName":"Renewal questions"},{"__type":"Nc:SimpleKB:Abstractions:Dtos:CategoryItemDto","ParentCategoryId":12,"TreatAsTopicYN":false,"Description":"","ImageUrl":"","ShortDesc":"","CategoryId":2210,"CategoryName":"cPanel Add-ons"},{"__type":"Nc:SimpleKB:Abstractions:Dtos:CategoryItemDto","ParentCategoryId":2265,"TreatAsTopicYN":false,"Description":"","ImageUrl":"","ShortDesc":"","CategoryId":2273,"CategoryName":"Gaming Consoles"},{"__type":"Nc:SimpleKB:Abstractions:Dtos:CategoryItemDto","ParentCategoryId":2239,"TreatAsTopicYN":false,"Description":"","ImageUrl":"","ShortDesc":"","CategoryId":2284,"CategoryName":"WordPress Management"},{"__type":"Nc:SimpleKB:Abstractions:Dtos:CategoryItemDto","ParentCategoryId":2239,"TreatAsTopicYN":false,"Description":"","ImageUrl":"","ShortDesc":"","CategoryId":2285,"CategoryName":"SFTP and Database access"},{"__type":"Nc:SimpleKB:Abstractions:Dtos:CategoryItemDto","ParentCategoryId":2265,"TreatAsTopicYN":false,"Description":"","ImageUrl":"","ShortDesc":"","CategoryId":2268,"CategoryName":"macOS"},{"__type":"Nc:SimpleKB:Abstractions:Dtos:CategoryItemDto","ParentCategoryId":93,"TreatAsTopicYN":false,"Description":"","ImageUrl":"","ShortDesc":"","CategoryId":2175,"CategoryName":"Private Email: Client Setup"},{"__type":"Nc:SimpleKB:Abstractions:Dtos:CategoryItemDto","ParentCategoryId":0,"TreatAsTopicYN":false,"Description":"","ImageUrl":"/assets/img/pictograms/150/status-red.png","ShortDesc":"","CategoryId":2209,"CategoryName":"Domain Transfers","SubCategories":[{"__type":"Nc:SimpleKB:Abstractions:Dtos:CategoryItemDto","ParentCategoryId":2209,"TreatAsTopicYN":false,"Description":"","ImageUrl":"","ShortDesc":"","CategoryId":8,"CategoryName":"Transfer Information"},{"__type":"Nc:SimpleKB:Abstractions:Dtos:CategoryItemDto","ParentCategoryId":2209,"TreatAsTopicYN":false,"Description":"","ImageUrl":"","ShortDesc":"","CategoryId":83,"CategoryName":"Transfer to Namecheap"},{"__type":"Nc:SimpleKB:Abstractions:Dtos:CategoryItemDto","ParentCategoryId":2209,"TreatAsTopicYN":false,"Description":"","ImageUrl":"","ShortDesc":"","CategoryId":84,"CategoryName":"Transfer to another provider"},{"__type":"Nc:SimpleKB:Abstractions:Dtos:CategoryItemDto","ParentCategoryId":2209,"TreatAsTopicYN":false,"Description":"","ImageUrl":"","ShortDesc":"","CategoryId":219,"CategoryName":"Canceled Transfers"}]},{"__type":"Nc:SimpleKB:Abstractions:Dtos:CategoryItemDto","ParentCategoryId":12,"TreatAsTopicYN":false,"Description":"","ImageUrl":"","ShortDesc":"","CategoryId":48,"CategoryName":"VPS"},{"__type":"Nc:SimpleKB:Abstractions:Dtos:CategoryItemDto","ParentCategoryId":34,"TreatAsTopicYN":false,"Description":"","ImageUrl":"","ShortDesc":"","CategoryId":36,"CategoryName":"Domains with extended attributes"},{"__type":"Nc:SimpleKB:Abstractions:Dtos:CategoryItemDto","ParentCategoryId":0,"TreatAsTopicYN":true,"Description":"","ImageUrl":"/assets/img/pictograms/150/server-red.png","ShortDesc":"","CategoryId":12,"CategoryName":"Hosting","SubCategories":[{"__type":"Nc:SimpleKB:Abstractions:Dtos:CategoryItemDto","ParentCategoryId":12,"TreatAsTopicYN":false,"Description":"","ImageUrl":"","ShortDesc":"","CategoryId":2219,"CategoryName":"PHP Configuration"},{"__type":"Nc:SimpleKB:Abstractions:Dtos:CategoryItemDto","ParentCategoryId":12,"TreatAsTopicYN":false,"Description":"","ImageUrl":"","ShortDesc":"","CategoryId":2225,"CategoryName":"SEO"},{"__type":"Nc:SimpleKB:Abstractions:Dtos:CategoryItemDto","ParentCategoryId":12,"TreatAsTopicYN":false,"Description":"","ImageUrl":"","ShortDesc":"","CategoryId":2252,"CategoryName":"InterWorx questions"},{"__type":"Nc:SimpleKB:Abstractions:Dtos:CategoryItemDto","ParentCategoryId":12,"TreatAsTopicYN":false,"Description":"","ImageUrl":"","ShortDesc":"","CategoryId":2291,"CategoryName":"Webuzo questions"},{"__type":"Nc:SimpleKB:Abstractions:Dtos:CategoryItemDto","ParentCategoryId":12,"TreatAsTopicYN":false,"Description":"","ImageUrl":"","ShortDesc":"","CategoryId":27,"CategoryName":"Getting Started"},{"__type":"Nc:SimpleKB:Abstractions:Dtos:CategoryItemDto","ParentCategoryId":12,"TreatAsTopicYN":false,"Description":"","ImageUrl":"","ShortDesc":"","CategoryId":22,"CategoryName":"Hosting Information"},{"__type":"Nc:SimpleKB:Abstractions:Dtos:CategoryItemDto","ParentCategoryId":12,"TreatAsTopicYN":false,"Description":"","ImageUrl":"","ShortDesc":"","CategoryId":29,"CategoryName":"cPanel questions"},{"__type":"Nc:SimpleKB:Abstractions:Dtos:CategoryItemDto","ParentCategoryId":12,"TreatAsTopicYN":false,"Description":"","ImageUrl":"","ShortDesc":"","CategoryId":2182,"CategoryName":"cPanel: Software Management"},{"__type":"Nc:SimpleKB:Abstractions:Dtos:CategoryItemDto","ParentCategoryId":12,"TreatAsTopicYN":false,"Description":"","ImageUrl":"","ShortDesc":"","CategoryId":2187,"CategoryName":"cPanel: WordPress"},{"__type":"Nc:SimpleKB:Abstractions:Dtos:CategoryItemDto","ParentCategoryId":12,"TreatAsTopicYN":false,"Description":"","ImageUrl":"","ShortDesc":"","CategoryId":2210,"CategoryName":"cPanel Add-ons"},{"__type":"Nc:SimpleKB:Abstractions:Dtos:CategoryItemDto","ParentCategoryId":12,"TreatAsTopicYN":false,"Description":"","ImageUrl":"","ShortDesc":"","CategoryId":48,"CategoryName":"VPS"},{"__type":"Nc:SimpleKB:Abstractions:Dtos:CategoryItemDto","ParentCategoryId":12,"TreatAsTopicYN":false,"Description":"","ImageUrl":"","ShortDesc":"","CategoryId":2188,"CategoryName":"Dedicated Server"},{"__type":"Nc:SimpleKB:Abstractions:Dtos:CategoryItemDto","ParentCategoryId":12,"TreatAsTopicYN":false,"Description":"","ImageUrl":"","ShortDesc":"","CategoryId":30,"CategoryName":"WHM questions"},{"__type":"Nc:SimpleKB:Abstractions:Dtos:CategoryItemDto","ParentCategoryId":12,"TreatAsTopicYN":false,"Description":"","ImageUrl":"","ShortDesc":"","CategoryId":32,"CategoryName":"DNS settings"},{"__type":"Nc:SimpleKB:Abstractions:Dtos:CategoryItemDto","ParentCategoryId":12,"TreatAsTopicYN":false,"Description":"","ImageUrl":"","ShortDesc":"","CategoryId":103,"CategoryName":"LVE (CloudLinux)"},{"__type":"Nc:SimpleKB:Abstractions:Dtos:CategoryItemDto","ParentCategoryId":12,"TreatAsTopicYN":false,"Description":"","ImageUrl":"","ShortDesc":"","CategoryId":89,"CategoryName":"SSH Access"},{"__type":"Nc:SimpleKB:Abstractions:Dtos:CategoryItemDto","ParentCategoryId":12,"TreatAsTopicYN":false,"Description":"","ImageUrl":"","ShortDesc":"","CategoryId":205,"CategoryName":"FTP questions"},{"__type":"Nc:SimpleKB:Abstractions:Dtos:CategoryItemDto","ParentCategoryId":12,"TreatAsTopicYN":false,"Description":"","ImageUrl":"","ShortDesc":"","CategoryId":2180,"CategoryName":"MySQL questions"},{"__type":"Nc:SimpleKB:Abstractions:Dtos:CategoryItemDto","ParentCategoryId":12,"TreatAsTopicYN":false,"Description":"","ImageUrl":"","ShortDesc":"","CategoryId":2199,"CategoryName":"Hosting Migration"},{"__type":"Nc:SimpleKB:Abstractions:Dtos:CategoryItemDto","ParentCategoryId":12,"TreatAsTopicYN":false,"Description":"","ImageUrl":"","ShortDesc":"","CategoryId":2194,"CategoryName":"Tips & Tricks"},{"__type":"Nc:SimpleKB:Abstractions:Dtos:CategoryItemDto","ParentCategoryId":12,"TreatAsTopicYN":false,"Description":"","ImageUrl":"","ShortDesc":"","CategoryId":239,"CategoryName":"WHMCS"},{"__type":"Nc:SimpleKB:Abstractions:Dtos:CategoryItemDto","ParentCategoryId":12,"TreatAsTopicYN":false,"Description":"","ImageUrl":"","ShortDesc":"","CategoryId":33,"CategoryName":"SSL Installation"}]},{"__type":"Nc:SimpleKB:Abstractions:Dtos:CategoryItemDto","ParentCategoryId":93,"TreatAsTopicYN":false,"Description":"","ImageUrl":"","ShortDesc":"","CategoryId":2171,"CategoryName":"Private Email: Active Sync (Exchange) Setup"},{"__type":"Nc:SimpleKB:Abstractions:Dtos:CategoryItemDto","ParentCategoryId":12,"TreatAsTopicYN":false,"Description":"","ImageUrl":"","ShortDesc":"","CategoryId":2188,"CategoryName":"Dedicated Server"},{"__type":"Nc:SimpleKB:Abstractions:Dtos:CategoryItemDto","ParentCategoryId":2265,"TreatAsTopicYN":false,"Description":"","ImageUrl":"","ShortDesc":"","CategoryId":2269,"CategoryName":"iOS"},{"__type":"Nc:SimpleKB:Abstractions:Dtos:CategoryItemDto","ParentCategoryId":2239,"TreatAsTopicYN":false,"Description":"","ImageUrl":"","ShortDesc":"","CategoryId":2286,"CategoryName":"Domains questions"},{"__type":"Nc:SimpleKB:Abstractions:Dtos:CategoryItemDto","ParentCategoryId":2239,"TreatAsTopicYN":false,"Description":"","ImageUrl":"","ShortDesc":"","CategoryId":2288,"CategoryName":"Billing questions"},{"__type":"Nc:SimpleKB:Abstractions:Dtos:CategoryItemDto","ParentCategoryId":2265,"TreatAsTopicYN":false,"Description":"","ImageUrl":"","ShortDesc":"","CategoryId":2271,"CategoryName":"Linux"},{"__type":"Nc:SimpleKB:Abstractions:Dtos:CategoryItemDto","ParentCategoryId":12,"TreatAsTopicYN":false,"Description":"","ImageUrl":"","ShortDesc":"","CategoryId":30,"CategoryName":"WHM questions"},{"__type":"Nc:SimpleKB:Abstractions:Dtos:CategoryItemDto","ParentCategoryId":93,"TreatAsTopicYN":false,"Description":"","ImageUrl":"","ShortDesc":"","CategoryId":31,"CategoryName":"cPanel Email FAQs"},{"__type":"Nc:SimpleKB:Abstractions:Dtos:CategoryItemDto","ParentCategoryId":34,"TreatAsTopicYN":false,"Description":"","ImageUrl":"","ShortDesc":"","CategoryId":51,"CategoryName":"FreeDNS"},{"__type":"Nc:SimpleKB:Abstractions:Dtos:CategoryItemDto","ParentCategoryId":0,"TreatAsTopicYN":false,"Description":"","ImageUrl":"/assets/img/pictograms/150/email-red.png","ShortDesc":"","CategoryId":93,"CategoryName":"Email service","SubCategories":[{"__type":"Nc:SimpleKB:Abstractions:Dtos:CategoryItemDto","ParentCategoryId":93,"TreatAsTopicYN":false,"Description":"","ImageUrl":"","ShortDesc":"","CategoryId":2216,"CategoryName":"Spam Protection"},{"__type":"Nc:SimpleKB:Abstractions:Dtos:CategoryItemDto","ParentCategoryId":93,"TreatAsTopicYN":false,"Description":"","ImageUrl":"","ShortDesc":"","CategoryId":2226,"CategoryName":"Email Migration"},{"__type":"Nc:SimpleKB:Abstractions:Dtos:CategoryItemDto","ParentCategoryId":93,"TreatAsTopicYN":false,"Description":"","ImageUrl":"","ShortDesc":"","CategoryId":2260,"CategoryName":"Private Email Contacts and Calendars Setup"},{"__type":"Nc:SimpleKB:Abstractions:Dtos:CategoryItemDto","ParentCategoryId":93,"TreatAsTopicYN":false,"Description":"","ImageUrl":"","ShortDesc":"","CategoryId":2306,"CategoryName":"New Private Email Platform"},{"__type":"Nc:SimpleKB:Abstractions:Dtos:CategoryItemDto","ParentCategoryId":93,"TreatAsTopicYN":false,"Description":"","ImageUrl":"","ShortDesc":"","CategoryId":2179,"CategoryName":"Private Email: General Information"},{"__type":"Nc:SimpleKB:Abstractions:Dtos:CategoryItemDto","ParentCategoryId":93,"TreatAsTopicYN":false,"Description":"","ImageUrl":"","ShortDesc":"","CategoryId":2215,"CategoryName":"Private Email: Mailbox Management"},{"__type":"Nc:SimpleKB:Abstractions:Dtos:CategoryItemDto","ParentCategoryId":93,"TreatAsTopicYN":false,"Description":"","ImageUrl":"","ShortDesc":"","CategoryId":2214,"CategoryName":"Email Forwarding"},{"__type":"Nc:SimpleKB:Abstractions:Dtos:CategoryItemDto","ParentCategoryId":93,"TreatAsTopicYN":false,"Description":"","ImageUrl":"","ShortDesc":"","CategoryId":2176,"CategoryName":"Private Email: DNS Settings"},{"__type":"Nc:SimpleKB:Abstractions:Dtos:CategoryItemDto","ParentCategoryId":93,"TreatAsTopicYN":false,"Description":"","ImageUrl":"","ShortDesc":"","CategoryId":2178,"CategoryName":"Private Email: Webmail Features"},{"__type":"Nc:SimpleKB:Abstractions:Dtos:CategoryItemDto","ParentCategoryId":93,"TreatAsTopicYN":false,"Description":"","ImageUrl":"","ShortDesc":"","CategoryId":2175,"CategoryName":"Private Email: Client Setup"},{"__type":"Nc:SimpleKB:Abstractions:Dtos:CategoryItemDto","ParentCategoryId":93,"TreatAsTopicYN":false,"Description":"","ImageUrl":"","ShortDesc":"","CategoryId":2171,"CategoryName":"Private Email: Active Sync (Exchange) Setup"},{"__type":"Nc:SimpleKB:Abstractions:Dtos:CategoryItemDto","ParentCategoryId":93,"TreatAsTopicYN":false,"Description":"","ImageUrl":"","ShortDesc":"","CategoryId":31,"CategoryName":"cPanel Email FAQs"},{"__type":"Nc:SimpleKB:Abstractions:Dtos:CategoryItemDto","ParentCategoryId":93,"TreatAsTopicYN":false,"Description":"","ImageUrl":"","ShortDesc":"","CategoryId":2186,"CategoryName":"cPanel Email: Client Setup"},{"__type":"Nc:SimpleKB:Abstractions:Dtos:CategoryItemDto","ParentCategoryId":93,"TreatAsTopicYN":false,"Description":"","ImageUrl":"","ShortDesc":"","CategoryId":2204,"CategoryName":"Private Email: Video Overview"}]},{"__type":"Nc:SimpleKB:Abstractions:Dtos:CategoryItemDto","ParentCategoryId":12,"TreatAsTopicYN":false,"Description":"","ImageUrl":"","ShortDesc":"","CategoryId":32,"CategoryName":"DNS settings"},{"__type":"Nc:SimpleKB:Abstractions:Dtos:CategoryItemDto","ParentCategoryId":34,"TreatAsTopicYN":false,"Description":"","ImageUrl":"","ShortDesc":"","CategoryId":15,"CategoryName":"Namecheap Market"},{"__type":"Nc:SimpleKB:Abstractions:Dtos:CategoryItemDto","ParentCategoryId":93,"TreatAsTopicYN":false,"Description":"","ImageUrl":"","ShortDesc":"","CategoryId":2186,"CategoryName":"cPanel Email: Client Setup"},{"__type":"Nc:SimpleKB:Abstractions:Dtos:CategoryItemDto","ParentCategoryId":2265,"TreatAsTopicYN":false,"Description":"","ImageUrl":"","ShortDesc":"","CategoryId":2266,"CategoryName":"Windows"},{"__type":"Nc:SimpleKB:Abstractions:Dtos:CategoryItemDto","ParentCategoryId":2239,"TreatAsTopicYN":false,"Description":"","ImageUrl":"","ShortDesc":"","CategoryId":2287,"CategoryName":"SSL questions"},{"__type":"Nc:SimpleKB:Abstractions:Dtos:CategoryItemDto","ParentCategoryId":2265,"TreatAsTopicYN":false,"Description":"","ImageUrl":"","ShortDesc":"","CategoryId":2267,"CategoryName":"Android"},{"__type":"Nc:SimpleKB:Abstractions:Dtos:CategoryItemDto","ParentCategoryId":34,"TreatAsTopicYN":false,"Description":"","ImageUrl":"","ShortDesc":"","CategoryId":2208,"CategoryName":"3rd Party Services Setup"},{"__type":"Nc:SimpleKB:Abstractions:Dtos:CategoryItemDto","ParentCategoryId":93,"TreatAsTopicYN":false,"Description":"","ImageUrl":"","ShortDesc":"","CategoryId":2204,"CategoryName":"Private Email: Video Overview"},{"__type":"Nc:SimpleKB:Abstractions:Dtos:CategoryItemDto","ParentCategoryId":0,"TreatAsTopicYN":false,"Description":"","ImageUrl":"/assets/img/pictograms/150/security-red.png","ShortDesc":"","CategoryId":14,"CategoryName":"SSL Certificates","SubCategories":[{"__type":"Nc:SimpleKB:Abstractions:Dtos:CategoryItemDto","ParentCategoryId":14,"TreatAsTopicYN":false,"Description":"","ImageUrl":"","ShortDesc":"","CategoryId":2217,"CategoryName":"Renewal"},{"__type":"Nc:SimpleKB:Abstractions:Dtos:CategoryItemDto","ParentCategoryId":14,"TreatAsTopicYN":false,"Description":"","ImageUrl":"","ShortDesc":"","CategoryId":2218,"CategoryName":"cPanel SSL Plugin"},{"__type":"Nc:SimpleKB:Abstractions:Dtos:CategoryItemDto","ParentCategoryId":14,"TreatAsTopicYN":false,"Description":"","ImageUrl":"","ShortDesc":"","CategoryId":2221,"CategoryName":"Multi-Domain SSL Certificates"},{"__type":"Nc:SimpleKB:Abstractions:Dtos:CategoryItemDto","ParentCategoryId":14,"TreatAsTopicYN":false,"Description":"","ImageUrl":"","ShortDesc":"","CategoryId":2222,"CategoryName":"Cancellation"},{"__type":"Nc:SimpleKB:Abstractions:Dtos:CategoryItemDto","ParentCategoryId":14,"TreatAsTopicYN":false,"Description":"","ImageUrl":"","ShortDesc":"","CategoryId":2223,"CategoryName":"Browser errors"},{"__type":"Nc:SimpleKB:Abstractions:Dtos:CategoryItemDto","ParentCategoryId":14,"TreatAsTopicYN":false,"Description":"","ImageUrl":"","ShortDesc":"","CategoryId":2224,"CategoryName":"Site Seal, Logo"},{"__type":"Nc:SimpleKB:Abstractions:Dtos:CategoryItemDto","ParentCategoryId":14,"TreatAsTopicYN":false,"Description":"","ImageUrl":"","ShortDesc":"","CategoryId":2238,"CategoryName":"SSL installation errors"},{"__type":"Nc:SimpleKB:Abstractions:Dtos:CategoryItemDto","ParentCategoryId":14,"TreatAsTopicYN":false,"Description":"","ImageUrl":"","ShortDesc":"","CategoryId":2290,"CategoryName":"CSR code"},{"__type":"Nc:SimpleKB:Abstractions:Dtos:CategoryItemDto","ParentCategoryId":14,"TreatAsTopicYN":false,"Description":"","ImageUrl":"","ShortDesc":"","CategoryId":2293,"CategoryName":"Automated SSL management"},{"__type":"Nc:SimpleKB:Abstractions:Dtos:CategoryItemDto","ParentCategoryId":14,"TreatAsTopicYN":false,"Description":"","ImageUrl":"","ShortDesc":"","CategoryId":38,"CategoryName":"SSL General"},{"__type":"Nc:SimpleKB:Abstractions:Dtos:CategoryItemDto","ParentCategoryId":14,"TreatAsTopicYN":false,"Description":"","ImageUrl":"","ShortDesc":"","CategoryId":67,"CategoryName":"Activation"},{"__type":"Nc:SimpleKB:Abstractions:Dtos:CategoryItemDto","ParentCategoryId":14,"TreatAsTopicYN":false,"Description":"","ImageUrl":"","ShortDesc":"","CategoryId":68,"CategoryName":"Validation"},{"__type":"Nc:SimpleKB:Abstractions:Dtos:CategoryItemDto","ParentCategoryId":14,"TreatAsTopicYN":false,"Description":"","ImageUrl":"","ShortDesc":"","CategoryId":69,"CategoryName":"Installation"},{"__type":"Nc:SimpleKB:Abstractions:Dtos:CategoryItemDto","ParentCategoryId":14,"TreatAsTopicYN":false,"Description":"","ImageUrl":"","ShortDesc":"","CategoryId":70,"CategoryName":"Reissuance"}]},{"__type":"Nc:SimpleKB:Abstractions:Dtos:CategoryItemDto","ParentCategoryId":0,"TreatAsTopicYN":true,"Description":"","ImageUrl":"/assets/img/pictograms/150/performance-red.png","ShortDesc":"","CategoryId":9,"CategoryName":"My Account","SubCategories":[{"__type":"Nc:SimpleKB:Abstractions:Dtos:CategoryItemDto","ParentCategoryId":9,"TreatAsTopicYN":false,"Description":"","ImageUrl":"","ShortDesc":"","CategoryId":45,"CategoryName":"Account Security"},{"__type":"Nc:SimpleKB:Abstractions:Dtos:CategoryItemDto","ParentCategoryId":9,"TreatAsTopicYN":false,"Description":"","ImageUrl":"","ShortDesc":"","CategoryId":43,"CategoryName":"Profile Management"},{"__type":"Nc:SimpleKB:Abstractions:Dtos:CategoryItemDto","ParentCategoryId":9,"TreatAsTopicYN":false,"Description":"","ImageUrl":"","ShortDesc":"","CategoryId":44,"CategoryName":"Account Access"}]},{"__type":"Nc:SimpleKB:Abstractions:Dtos:CategoryItemDto","ParentCategoryId":34,"TreatAsTopicYN":false,"Description":"","ImageUrl":"","ShortDesc":"","CategoryId":2278,"CategoryName":"Handshake TLDs"},{"__type":"Nc:SimpleKB:Abstractions:Dtos:CategoryItemDto","ParentCategoryId":12,"TreatAsTopicYN":false,"Description":"","ImageUrl":"","ShortDesc":"","CategoryId":103,"CategoryName":"LVE (CloudLinux)"},{"__type":"Nc:SimpleKB:Abstractions:Dtos:CategoryItemDto","ParentCategoryId":0,"TreatAsTopicYN":false,"Description":"","ImageUrl":"/assets/img/pictograms/150/affiliates-red.png","ShortDesc":"","CategoryId":55,"CategoryName":"Affiliates","SubCategories":[]},{"__type":"Nc:SimpleKB:Abstractions:Dtos:CategoryItemDto","ParentCategoryId":12,"TreatAsTopicYN":false,"Description":"","ImageUrl":"","ShortDesc":"","CategoryId":89,"CategoryName":"SSH Access"},{"__type":"Nc:SimpleKB:Abstractions:Dtos:CategoryItemDto","ParentCategoryId":0,"TreatAsTopicYN":false,"Description":"","ImageUrl":"/assets/img/pictograms/150/tools-red.png","ShortDesc":"","CategoryId":2211,"CategoryName":"API & Resellers","SubCategories":[{"__type":"Nc:SimpleKB:Abstractions:Dtos:CategoryItemDto","ParentCategoryId":2211,"TreatAsTopicYN":false,"Description":"","ImageUrl":"","ShortDesc":"","CategoryId":2227,"CategoryName":"SSL Resellers"},{"__type":"Nc:SimpleKB:Abstractions:Dtos:CategoryItemDto","ParentCategoryId":2211,"TreatAsTopicYN":false,"Description":"","ImageUrl":"","ShortDesc":"","CategoryId":2229,"CategoryName":"Hosting Resellers"},{"__type":"Nc:SimpleKB:Abstractions:Dtos:CategoryItemDto","ParentCategoryId":2211,"TreatAsTopicYN":false,"Description":"","ImageUrl":"","ShortDesc":"","CategoryId":63,"CategoryName":"Namecheap API"},{"__type":"Nc:SimpleKB:Abstractions:Dtos:CategoryItemDto","ParentCategoryId":2211,"TreatAsTopicYN":false,"Description":"","ImageUrl":"","ShortDesc":"","CategoryId":2196,"CategoryName":"WHMCS module for SSL"}]},{"__type":"Nc:SimpleKB:Abstractions:Dtos:CategoryItemDto","ParentCategoryId":0,"TreatAsTopicYN":false,"Description":"","ImageUrl":"/assets/img/pictograms/150/timer-red.png","ShortDesc":"","CategoryId":2212,"CategoryName":"Legacy Products","SubCategories":[]},{"__type":"Nc:SimpleKB:Abstractions:Dtos:CategoryItemDto","ParentCategoryId":12,"TreatAsTopicYN":false,"Description":"","ImageUrl":"","ShortDesc":"","CategoryId":205,"CategoryName":"FTP questions"},{"__type":"Nc:SimpleKB:Abstractions:Dtos:CategoryItemDto","ParentCategoryId":12,"TreatAsTopicYN":false,"Description":"","ImageUrl":"","ShortDesc":"","CategoryId":2180,"CategoryName":"MySQL questions"},{"__type":"Nc:SimpleKB:Abstractions:Dtos:CategoryItemDto","ParentCategoryId":12,"TreatAsTopicYN":false,"Description":"","ImageUrl":"","ShortDesc":"","CategoryId":2199,"CategoryName":"Hosting Migration"},{"__type":"Nc:SimpleKB:Abstractions:Dtos:CategoryItemDto","ParentCategoryId":0,"TreatAsTopicYN":false,"Description":"","ImageUrl":"/assets/img/pictograms/150/premiumdns-red.png","ShortDesc":"","CategoryId":2231,"CategoryName":"PremiumDNS","SubCategories":[]},{"__type":"Nc:SimpleKB:Abstractions:Dtos:CategoryItemDto","ParentCategoryId":12,"TreatAsTopicYN":false,"Description":"","ImageUrl":"","ShortDesc":"","CategoryId":2194,"CategoryName":"Tips & Tricks"},{"__type":"Nc:SimpleKB:Abstractions:Dtos:CategoryItemDto","ParentCategoryId":0,"TreatAsTopicYN":false,"Description":"","ImageUrl":"https://static.nc-img.com/live-resource/icons/knowledgebase/fastVPN_icon-150px.png","ShortDesc":"","CategoryId":2265,"CategoryName":"FastVPN","SubCategories":[{"__type":"Nc:SimpleKB:Abstractions:Dtos:CategoryItemDto","ParentCategoryId":2265,"TreatAsTopicYN":false,"Description":"","ImageUrl":"","ShortDesc":"","CategoryId":2292,"CategoryName":"Browser Extensions"},{"__type":"Nc:SimpleKB:Abstractions:Dtos:CategoryItemDto","ParentCategoryId":2265,"TreatAsTopicYN":false,"Description":"","ImageUrl":"","ShortDesc":"","CategoryId":2274,"CategoryName":"General"},{"__type":"Nc:SimpleKB:Abstractions:Dtos:CategoryItemDto","ParentCategoryId":2265,"TreatAsTopicYN":false,"Description":"","ImageUrl":"","ShortDesc":"","CategoryId":2270,"CategoryName":"Routers"},{"__type":"Nc:SimpleKB:Abstractions:Dtos:CategoryItemDto","ParentCategoryId":2265,"TreatAsTopicYN":false,"Description":"","ImageUrl":"","ShortDesc":"","CategoryId":2272,"CategoryName":"TV"},{"__type":"Nc:SimpleKB:Abstractions:Dtos:CategoryItemDto","ParentCategoryId":2265,"TreatAsTopicYN":false,"Description":"","ImageUrl":"","ShortDesc":"","CategoryId":2273,"CategoryName":"Gaming Consoles"},{"__type":"Nc:SimpleKB:Abstractions:Dtos:CategoryItemDto","ParentCategoryId":2265,"TreatAsTopicYN":false,"Description":"","ImageUrl":"","ShortDesc":"","CategoryId":2268,"CategoryName":"macOS"},{"__type":"Nc:SimpleKB:Abstractions:Dtos:CategoryItemDto","ParentCategoryId":2265,"TreatAsTopicYN":false,"Description":"","ImageUrl":"","ShortDesc":"","CategoryId":2269,"CategoryName":"iOS"},{"__type":"Nc:SimpleKB:Abstractions:Dtos:CategoryItemDto","ParentCategoryId":2265,"TreatAsTopicYN":false,"Description":"","ImageUrl":"","ShortDesc":"","CategoryId":2271,"CategoryName":"Linux"},{"__type":"Nc:SimpleKB:Abstractions:Dtos:CategoryItemDto","ParentCategoryId":2265,"TreatAsTopicYN":false,"Description":"","ImageUrl":"","ShortDesc":"","CategoryId":2266,"CategoryName":"Windows"},{"__type":"Nc:SimpleKB:Abstractions:Dtos:CategoryItemDto","ParentCategoryId":2265,"TreatAsTopicYN":false,"Description":"","ImageUrl":"","ShortDesc":"","CategoryId":2267,"CategoryName":"Android"}]},{"__type":"Nc:SimpleKB:Abstractions:Dtos:CategoryItemDto","ParentCategoryId":12,"TreatAsTopicYN":false,"Description":"","ImageUrl":"","ShortDesc":"","CategoryId":239,"CategoryName":"WHMCS"},{"__type":"Nc:SimpleKB:Abstractions:Dtos:CategoryItemDto","ParentCategoryId":12,"TreatAsTopicYN":false,"Description":"","ImageUrl":"","ShortDesc":"","CategoryId":33,"CategoryName":"SSL Installation"}],"status":200,"statusText":"OK"}}Step 2. Create a local Git repository
cd path\to\the\working\folder


git config --global user.name "Your Name"
git config --global user.email youremail@example.com


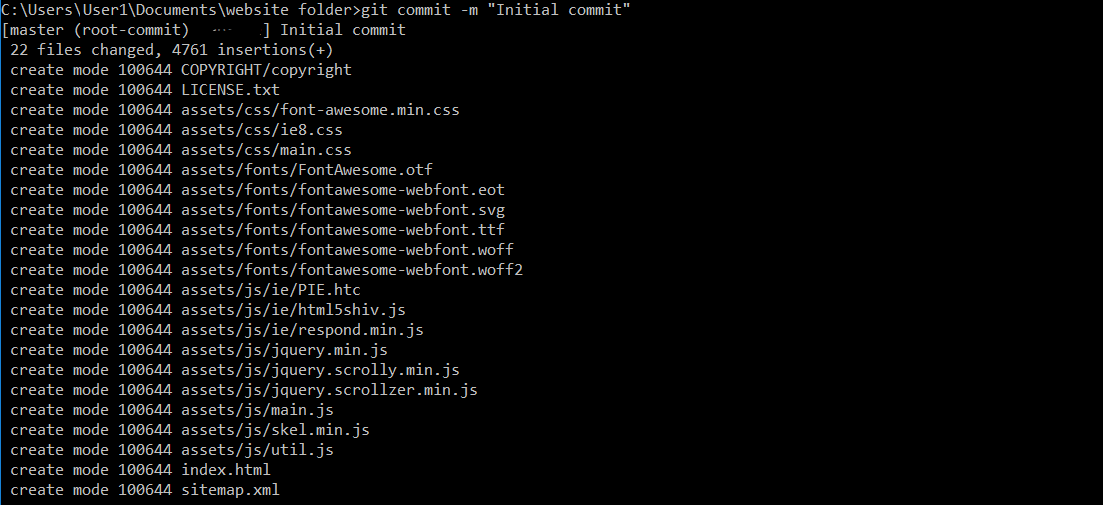
git commit -m "Type message about this commit here"
Step 4. Create a remote Git repository
cd /path/to/folder
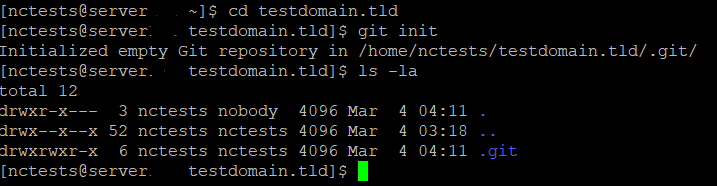

git config receive.denyCurrentBranch updateInstead

git remote add origin ssh://user@server.web-hosting.com:21098/home/user/path_to_folder

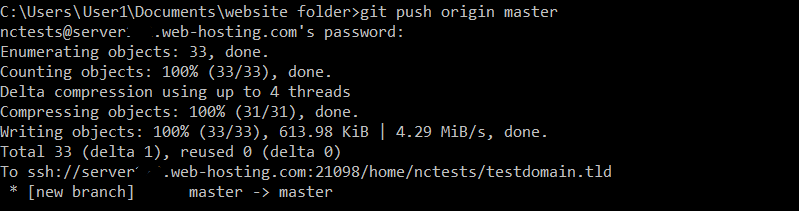
Step 5. Push files to the remote server
git push origin master
git add . (or git add name_of_file.ext)
git status
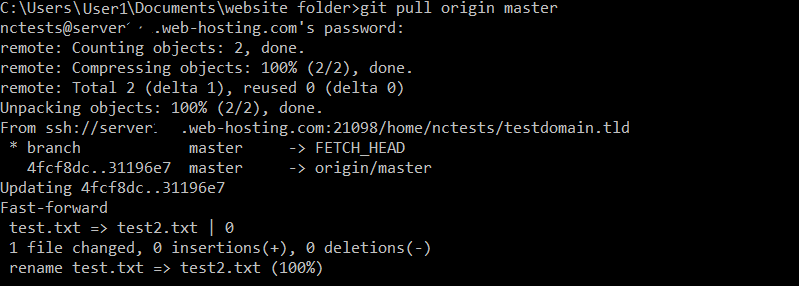
git commit -m "Your message (e.g. new file name_of_file)"
git pull origin master
Step 7. Restore a version of a file/files from a commit
git checkout <commit number> <path/to/the/file>

Need help? We're always here for you.