This article is valid for Private Email subscriptions purchased before June 2, 2026.
This article describes how to configure unified mail and sharing feature in Private Email webmail.
NOTE: Sharing calendars and contacts via link is possible with Starter, Pro and Ultimate, while sharing them with a certain group of people / a person is possible with Pro and Ultimate packages only.
1. Setting up unified mail
2. Sharing calendar
3. Sharing contacts
Setting up unified mail is basically the same as adding another email address into your
Webmail.
It is a very convenient solution for those who like having all email accounts in one place.
In order to add another email address, follow the instructions below:
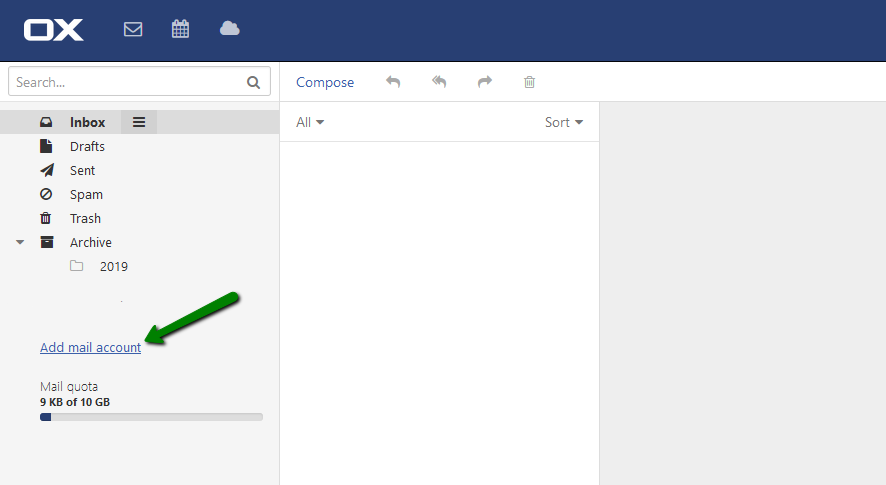
2. Click on Add mail account:
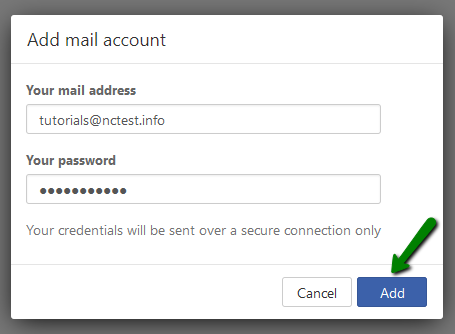
3. In the next pop-up window fill in Your mail address and Your password >> click Add:
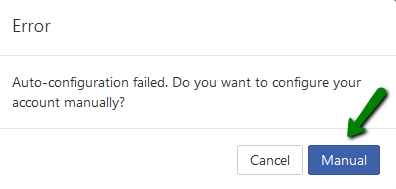
4. You may receive the following error message since the Mail Account should be added Manually with all the necessary settings. Click Manual to proceed:
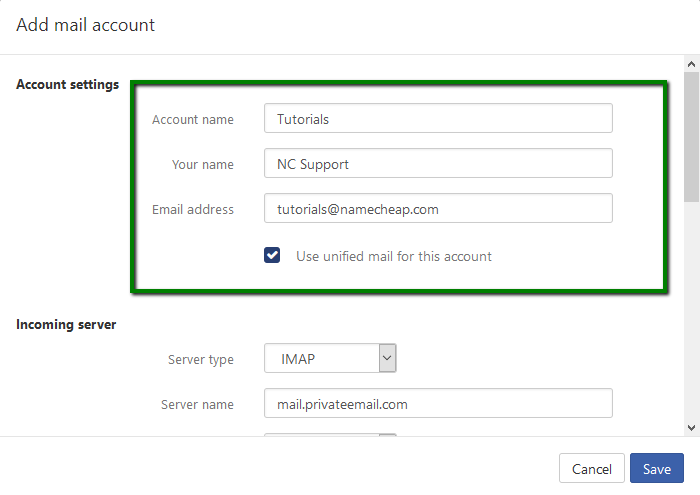
5. Start with the following Account settings:
- Account name: the name of your account
- Your name: your first and last names, or any other name
- Email address: full email address you are adding
- Use unified mail for this account: checked or unchecked
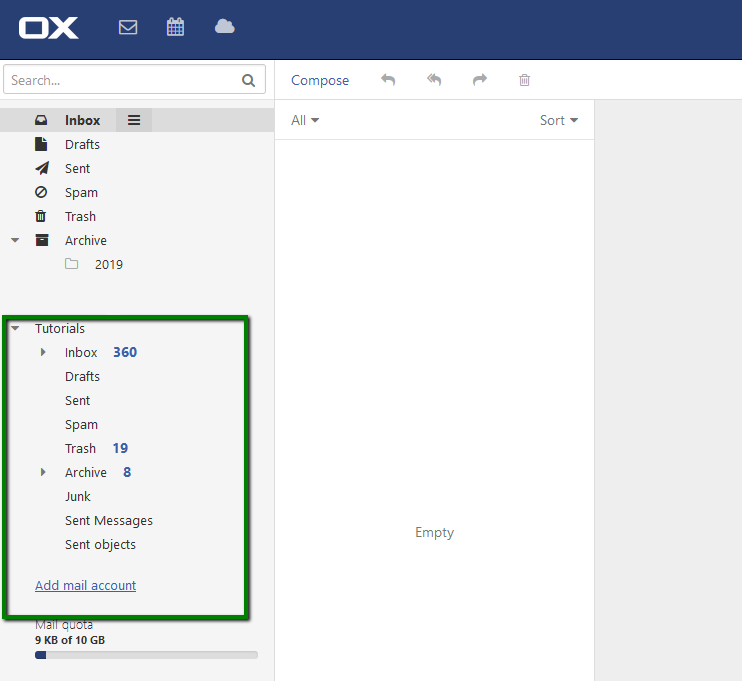
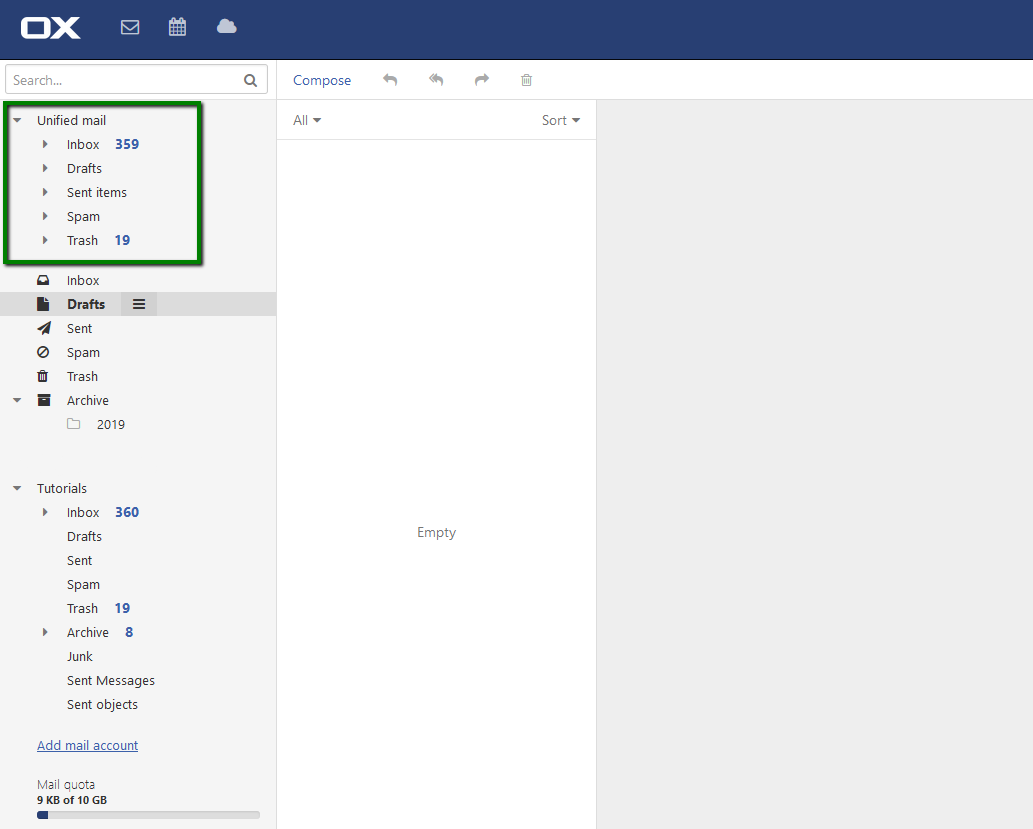
Unified mail means combining two or more email accounts into one, so that Inbox, Sent, Draft, Spam, Trash folders will be shared.
NOTE: Shared folders work only for added mailboxes, but the main one, to which additional mailboxes were added, will not sync its emails to these shared folders.
Below you can compare the folder structure in both cases:
When the Unified email address option is unchecked:
Or when the Unified email address option is checked:
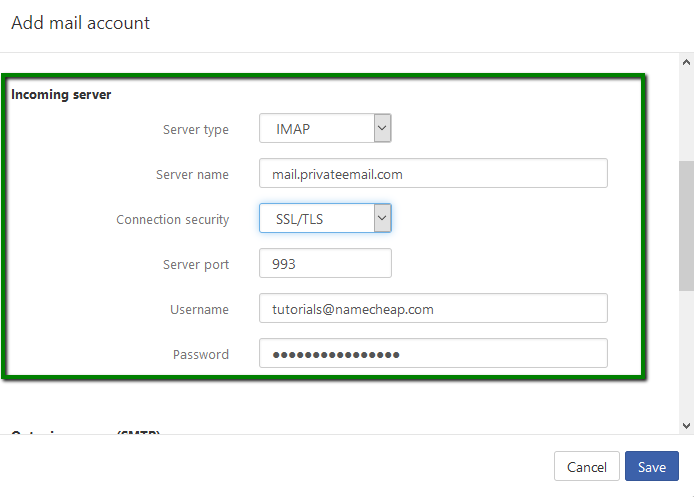
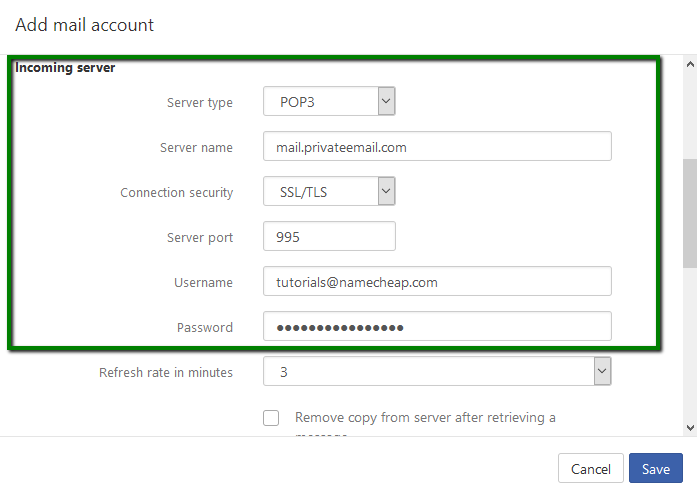
6. Enter Incoming server settings:
- Server type: IMAP
- Server name: mail.privateemail.com (if it’s not a
Private Email account, get in touch with your email provider for the
correct IMAP hostname)
- Server port: 993 port for SSL connection, 143 port for StartTLS/None connection
- Username: full email address
- Password: password for this email account
or:
- Server type: POP3
- Server name: mail.privateemail.com (if it’s not a
Private Email account, get in touch with your email provider for the
correct POP3 hostname)
- Server port: 995 port for SSL connection, 110 port for StartTLS/None connection
- Username: full email address
- Password: password for this email account
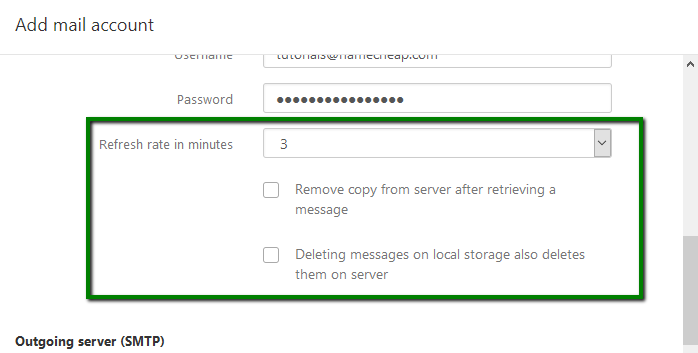
For POP3 connection you can also:
- Set up the Refresh rate in minutes, which means how frequently you will receive e-mails from server to your local storage
- Allow to remove copy from server after retrieving a message
- Allow to delete the messages from server, once you delete them from your local storage
NOTE: When you add a Unified account via POP3, the
Sent folder sync will not work.
7. Enter
Outgoing server (SMTP) settings:
- Server name: mail.privateemail.com (if it’s not a Private
Email account, get in touch with your email provider for the correct
SMTP hostname)
- Server port: 465 port for SSL, 587 port for StartTLS/None
- Authentication: As incoming mail server
- Username: full email address
- Password: password for this email account
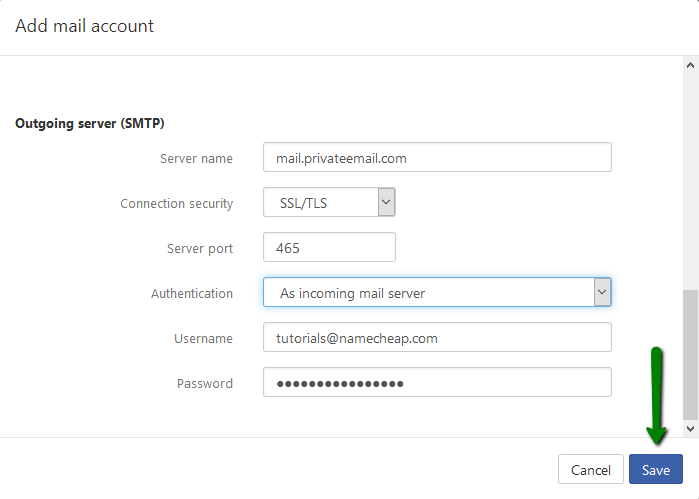
When all the settings are set, click Save button.
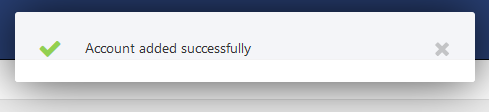
8. If the account has been properly configured, you will get the message Account added successfully:
Now the email account you have added can be managed from the Settings >> Accounts tab:
Sharing calendar
With Pro and Ultimate packages you will be able to share calendars using a special menu.
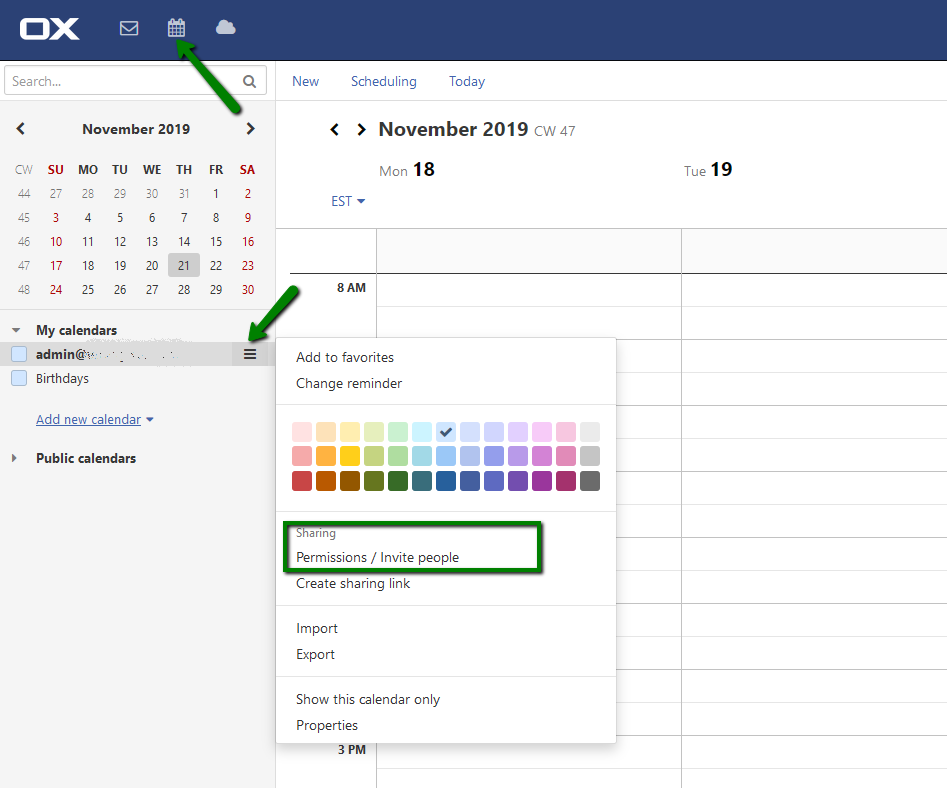
In order to share the calendar, do the following:
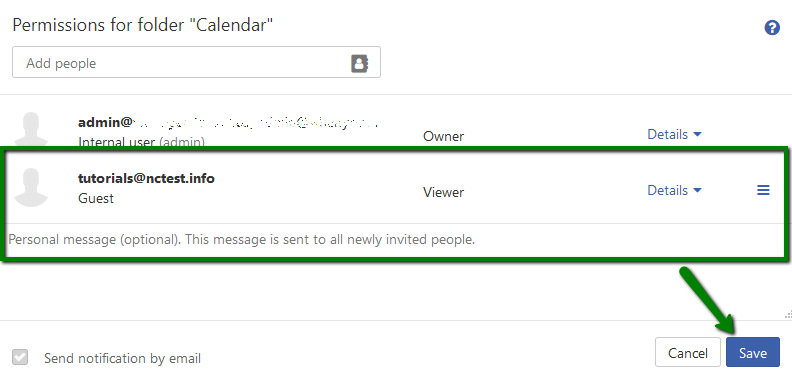
2. Click on Options (three stripes icon) next to the calendar in question >> Permissions / Invite people:
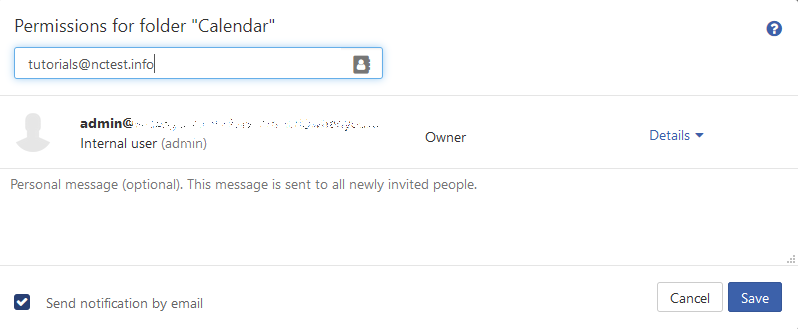
3. Enter the email address of the account you want to share the calendar with and click on it to add or press Enter:
4. Once the account is added, you can do the following once you click Details:
apply role (guest/viewer, reviewer, author)set folder permissions (view the folder, create objects, create objects and subfolders)set object permissions: to read (no read permissions, read own objects, read all objects)
to write (no edit permissions, edit own objects, edit all objects)
to delete (no delete permissions, delete own objects, delete all objects)
5. When all the settings are set, click on Save.
6. Once done, the corresponding icon will appear next to the folder of the shared calendar:

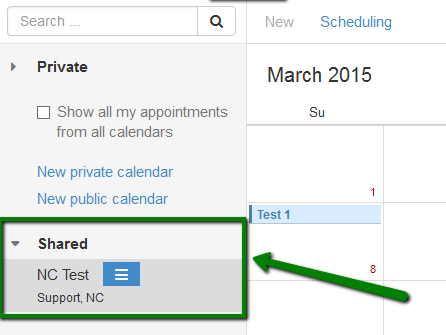
7. The other user you shared calendar with, will be able to see it in Webmail > Calendar > Shared section:
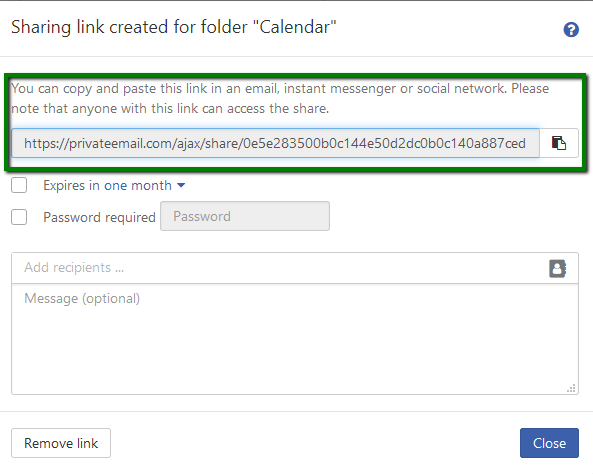
With all Private Email plans (Starter, Pro and Ultimate) you can share a calendar via a link. To generate the link right-click the three horizontal lines next to the calendar name > select Create sharing link:

You can then set a password, expiration date, add recipients and a message and copy the link:
Sharing contacts
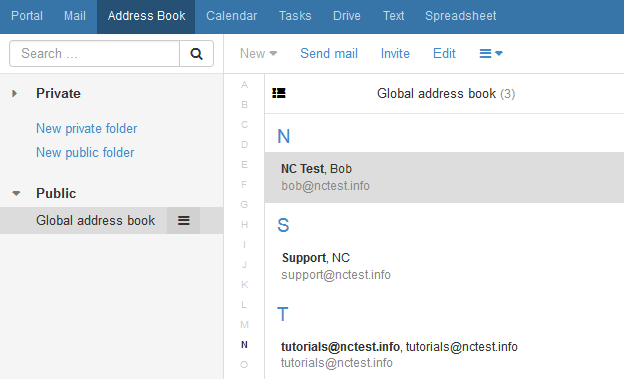
If you want all users under your Private Email subscription to be able to look up each other’s email addresses, there is no need to create and share contact items @yourdomain.com additionally, you can simply use Global address book feature in Address Book > Public section:
To share custom contacts, follow the steps below:
1. In your
Webmail click on
Address Book.
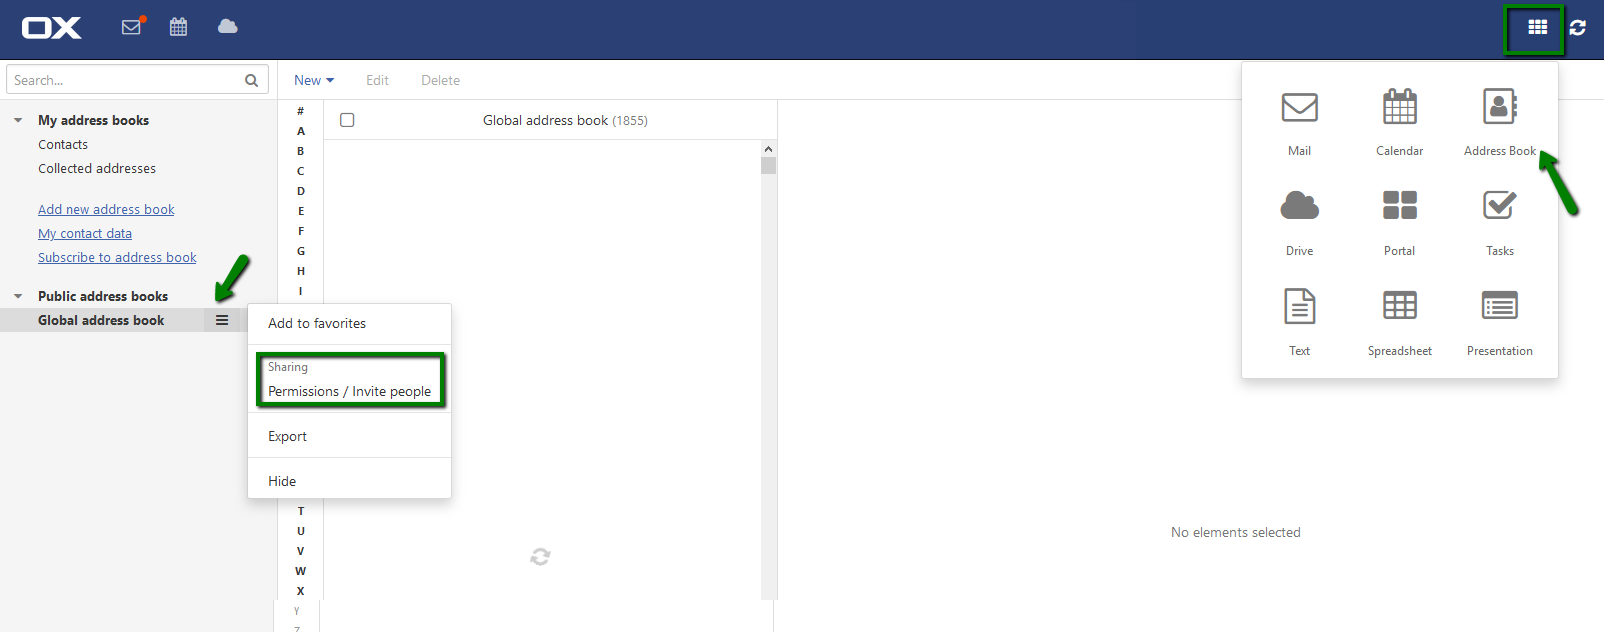
2. Click on Options (three stripes icon) next to the contacts folder in question > Permissions/Invite people:
3. Then insert the email address of the account you wish to share the contacts with and click Enter:
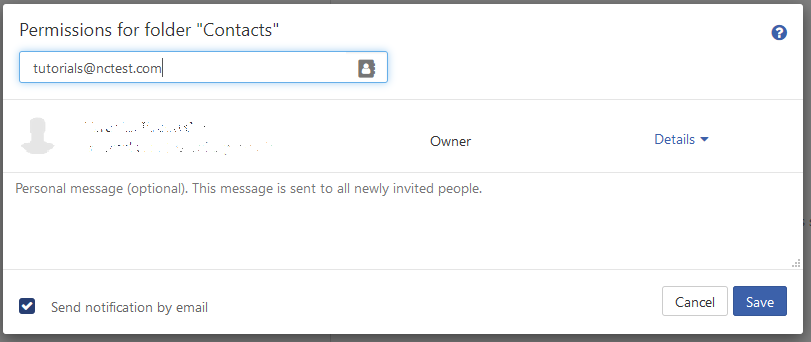
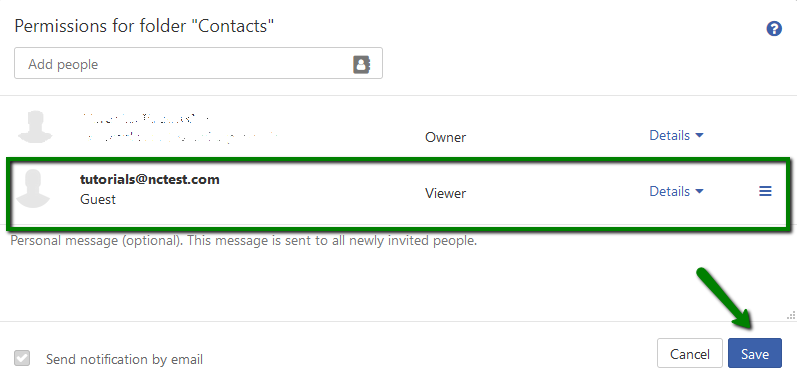
4. Once the account is added, you can do the following:
apply role (guest, author or administrator)set folder permissions (view the folder, create objects, create objects and subfolders)
set object permissions: to read (no read permissions, read own objects, read all objects)
to edit (no edit permissions, edit own objects, edit all objects)
to delete (no delete permissions, delete own objects, delete all objects)
5. When all the permissions are set, click on Save:
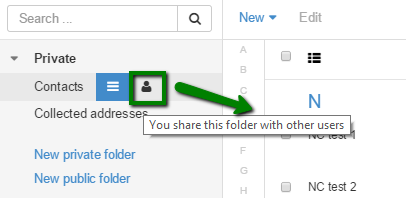
6. Once done, you will see that the contacts folder is shared with the user:
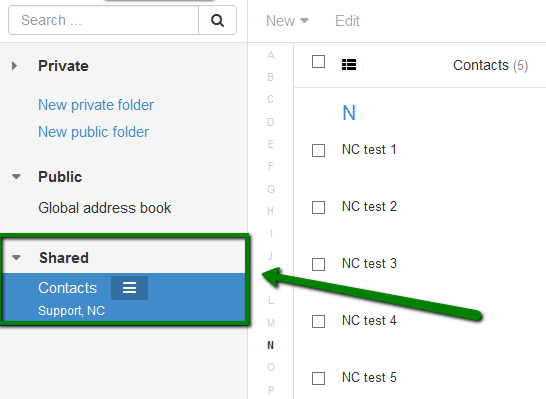
7. The user you have shared the contacts folder with can check it in Webmail > Address Book > Shared section:
That's it!
Need any help? Contact our HelpDesk