| Subtotal | $0.00 |
| Subtotal | $0.00 |
In this article you will find the instructions on how to synchronize calendar appointments of your Namecheap Private Email account with Thunderbird.
Before we start, make sure the mail account you want to sync Calendar with is already configured in Thunderbird.
To synchronize Calendar of your mail account with Thunderbird, do the following:
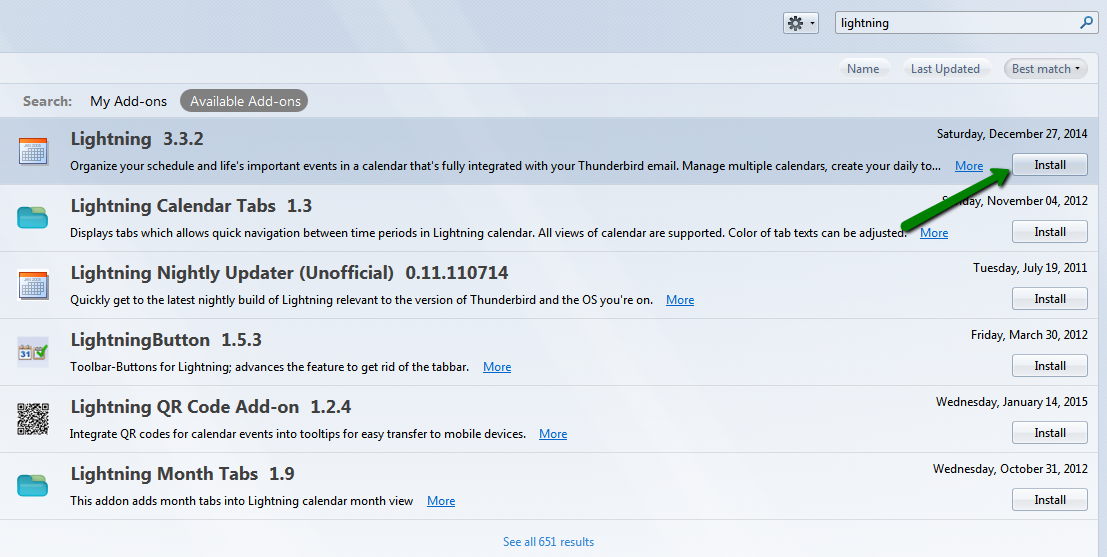
1.Install a compatible version of Lightning add-on in Menu > Add-ons and restart the mail client:
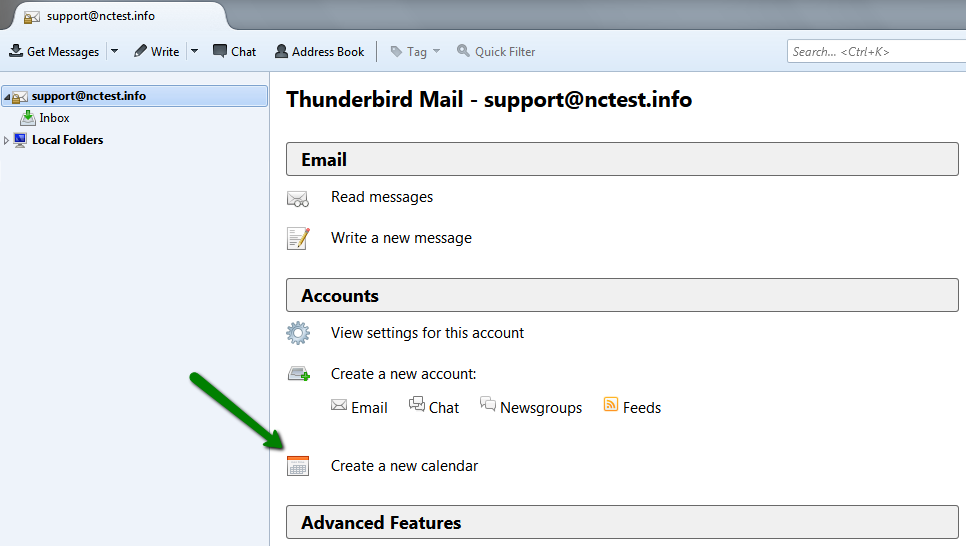
2. Go to home page and select Create a new calendar menu:
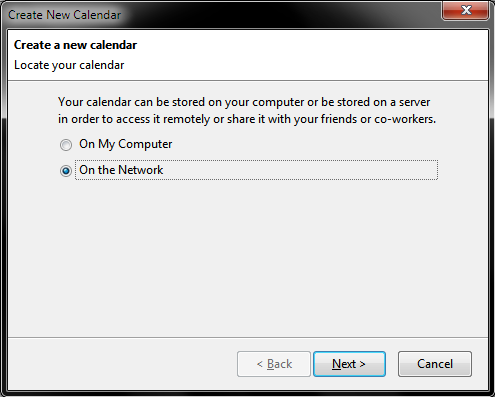
3. Check the option On the Network and click Next:
4. To proceed you need to go back to Webmail to obtain the Calendar URL:
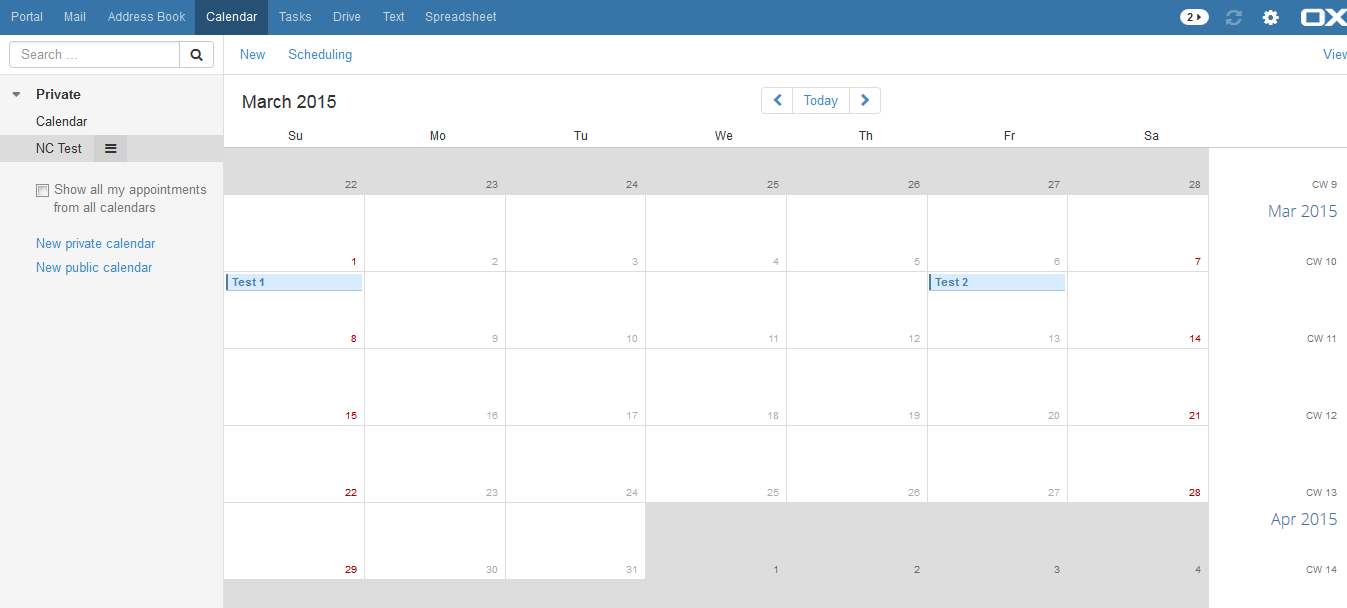
5. Click on three stripes icon next to the folder in question, select Properties and copy CalDAV URL:
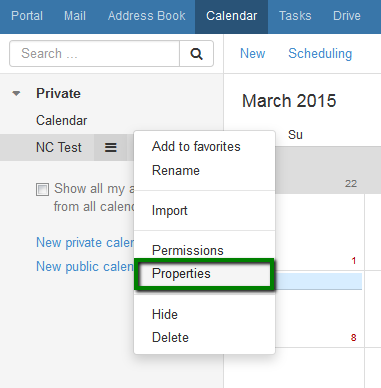
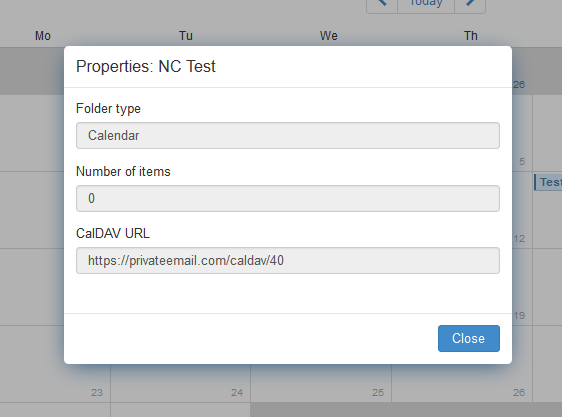
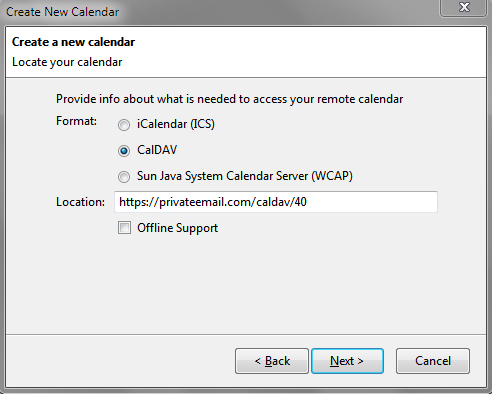
6. Go back to Thunderbird Calendar setup, check CalDAV and insert the URL into Location field, click on Next:
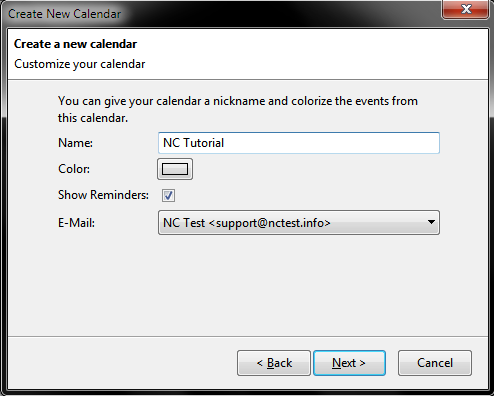
7. Fill out Name of your Calendar, select Color, checkmark Show Reminders option if required, and select corresponding mail account for E-Mail:
8. Pop-up window may appear asking you to provide your mail account username and password.
9. Now open Calendar tab (icon in upper right corner) to see the calendar added. Click on Synchronize button in bar above:
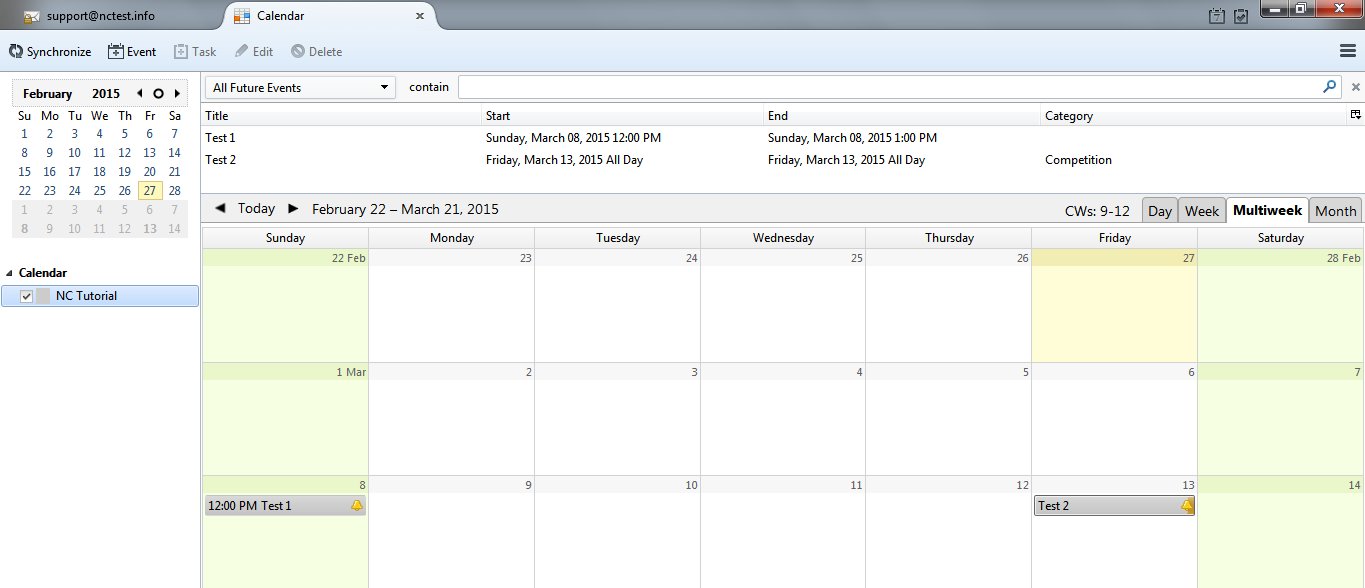
You should now be able to see your appointments synced.
That's it!
Need any help? Contact our HelpDesk
Need help? We're always here for you.