
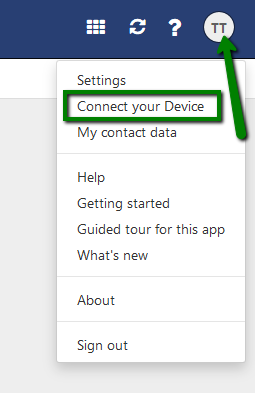

You can check the manual settings for your account by clicking on the User icon >> Connect Your Device section:
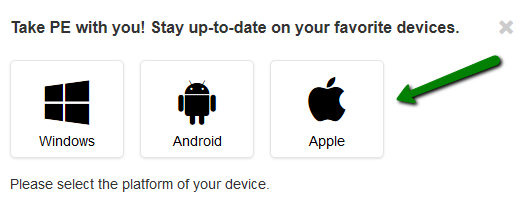
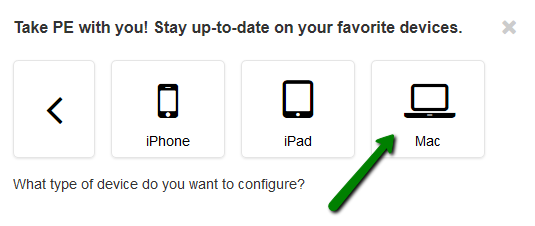
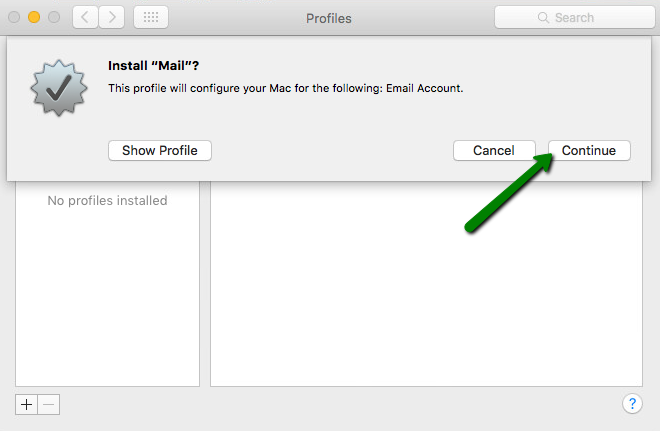
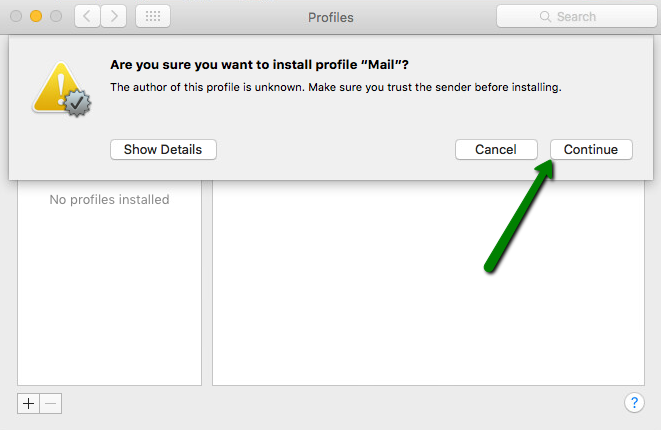
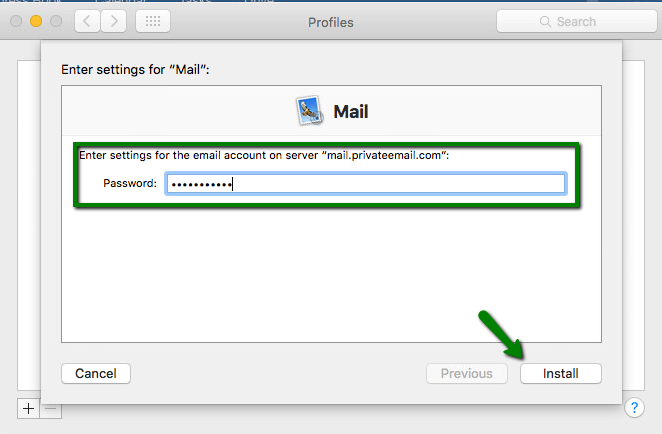
Click on the Apple tab >> Mac:
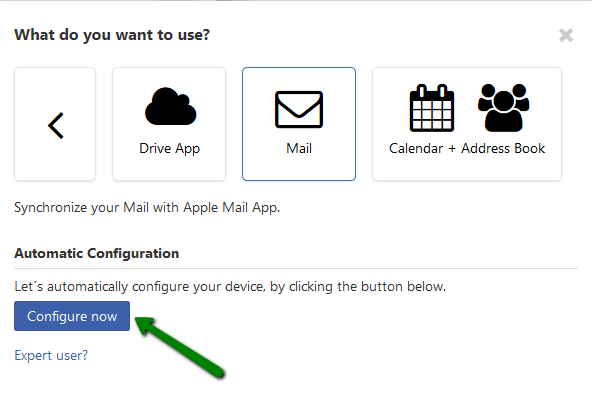
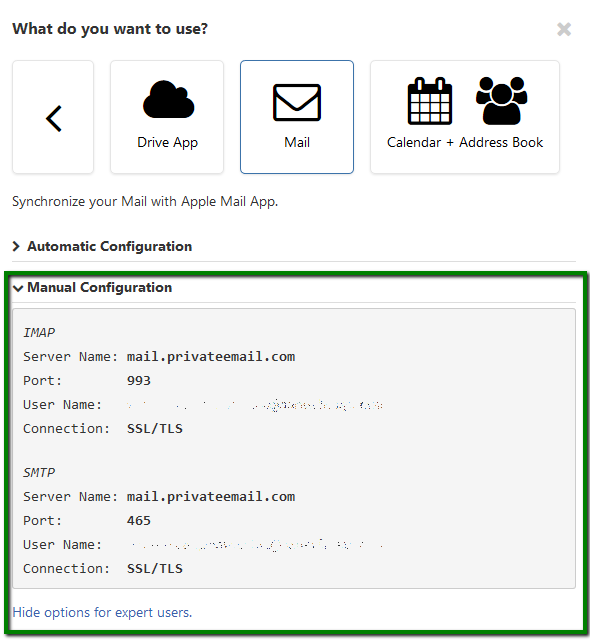
To check the settings for the Manual setup click on the Mail tab >> Expert User?:
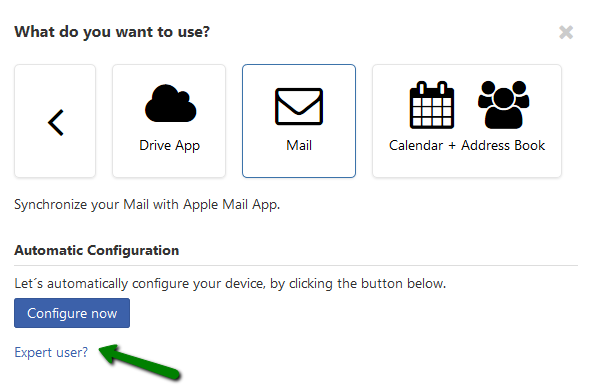
Now you will be able to check your individual settings:
To use these settings on your Mac follow the steps below:
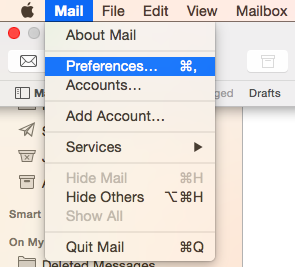
1. Select Preferences in Mail menu:
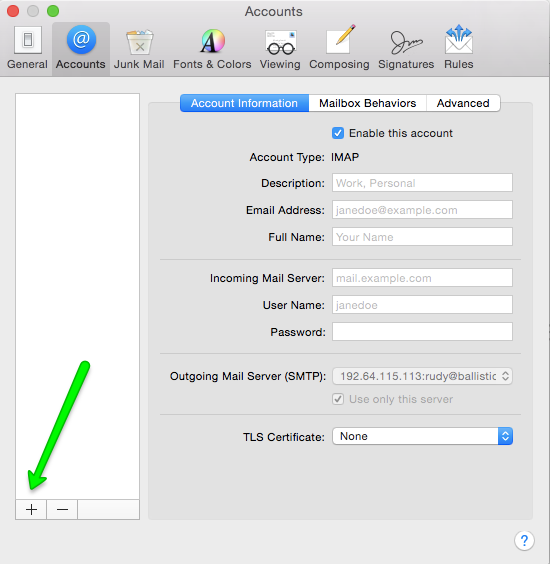
2. Go to Accounts tab, and click on + icon:
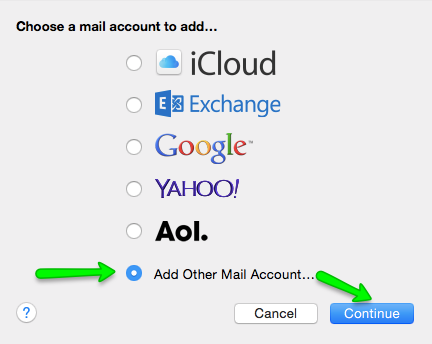
3. Select Add Other Mail Account option:
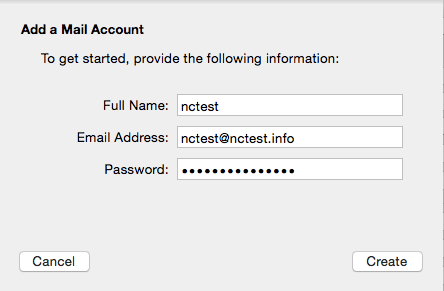
4. In Add a Mail Account window enter your full name, email address and email account password, then click on Create:
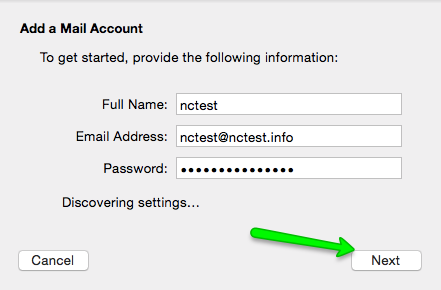
5. Application will try to detect the settings automatically. Disregard the result, click on Next:
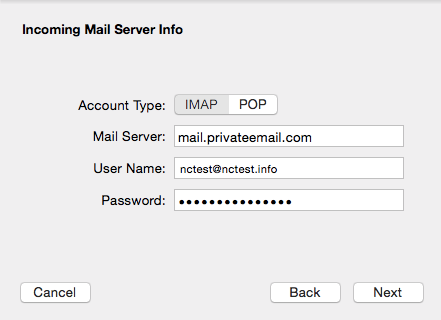
6. In the Incoming Mail Server screen select POP or IMAP protocol for Account Type, and enter your account details:
Mail Server: mail.privateemail.com (it should not be changed)
Username: full email address
Password: password for your email account
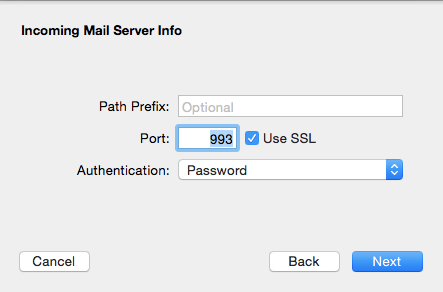
Click on Next once the details are filled:
7. Mac Mail may require specifying additional settings at this point:
IMAP Path Prefix: leave this field empty
Port: 993 with SSL enabled or 143 without SSL for IMAP protocol
995 with SSL enabled for POP3 protocol
Authentication: set to Password
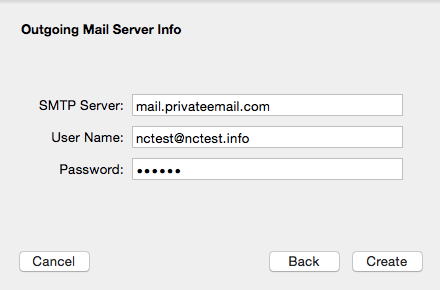
8. In Outgoing Mail Server window, fill out the details as follows:
SMTP Server: mail.privateemail.com (it should not be changed)
User Name: full email address
Password: password for your email account
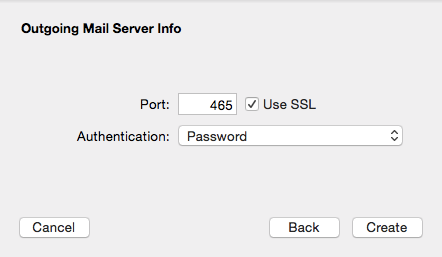
9. You might be prompted to configure additional settings on this stage. Details are to be as follows:
Port: 465 with SSL enabled
587 with SSL disabled
Authentication: set to Password
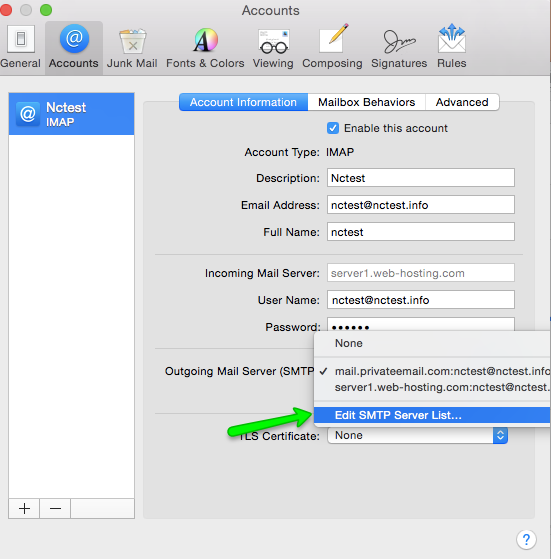
10. One last step is to configure Advanced Server Settings.
Go to Accounts and select the account in question. Then select Account Information tab and go to Outgoing Mail Server (SMTP) section, click on Edit SMTP Server List option:
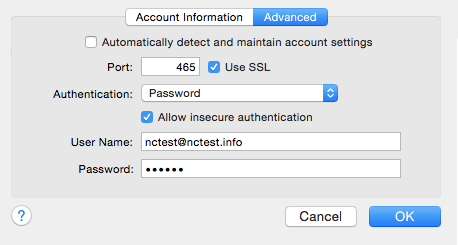
Verify that your settings are as follows:
Automatically detect and maintain account settings: should be switched off
Port: 465 with SSL enabled
587 with SSL disabled
Authentication: set to Password
Allow insecure authentication: should be switched on
User Name: full email address
Password: password for your email account
That's it!
Need any help? Contact our HelpDesk
Need help? We're always here for you.