Your SSH session can be authenticated either with the username and password or with a pair of private/public keys. It is recommended to use the latter, as it is considered to be a more secure and convenient solution.
Manage SSH Keys
Create a new pair of SSH keys
- Public and private keys generation
- Public key authorization
- Acquiring a key pair
Import of the existing keys
Use Putty and SSH key pair to connect
Manage SSH Keys
In cPanel you can manage SSH keys in the
SSH access menu:

Click on
Manage SSH keys:

On the next page, you can either import the existing pair of keys or generate a new one.
Create a new pair of SSH keys
To generate a new SSH key pair, click on the
Generate a new Key option:

On the generator page, specify the password (passphrase), Key Name, Key Type and Size.
The maximum allowed DSA key size is 1024 which is not enough to guarantee its security nowadays. That's why we suggest using only RSA with 2048 bits:

Once everything is set, click
Generate Key.
Now you should see both private and public keys you created.
To authorize SSH access to your hosting account by the private key you created, click on the
Manage option:

On the next page, click on the
Authorize button:

You can view and download keys you have in cPanel by clicking on the
View/Download button in the
Private Keys section:
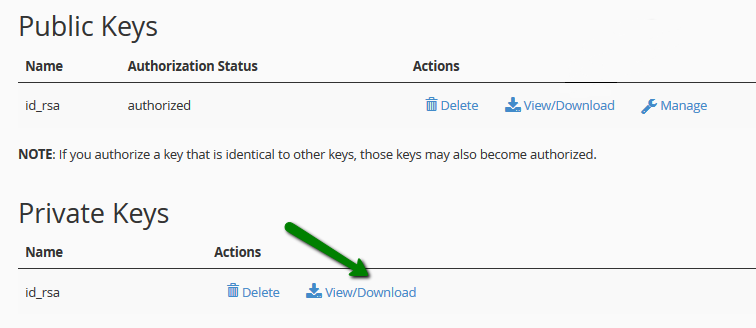
Click on
Download Key (it will be saved in a simple text document on your side) or just copy/paste the provided key if needed. You can also convert your key into PuTTY’s ppk format using the
Convert option:

The steps for generating keys via SSH can be found
here.
Import of the existing keys
If you already have a key pair generated by other means, you can import the public key using the Import Key option:

Next, fill in the required details:
- Choose a name for this key (defaults to id_dsa): type in id_rsa;
- Paste the Private Key into the following text box: leave it empty (this field is only used in cases, where you want to have SSH access from your cPanel account to other servers via the keys);
- Passphrase: input the passphrase;
- Paste the public key into the following text box: on your local computer open your public key file (e.g./User/name/.ssh/id_rsa.pub) > copy and paste the content of that file into the field;
- Click Import:

Once done, do not forget to authorize your imported public key in the same way as it is shown here.
Use Putty and SSH key pair to connect
In this example, we will use the PuTTY SSH client and key pair generated by cPanel to access the server via SSH:
- Download the Private key as it is shown here;
- In the PuTTY folder, run puttygen.exe to open the Putty GEN application;
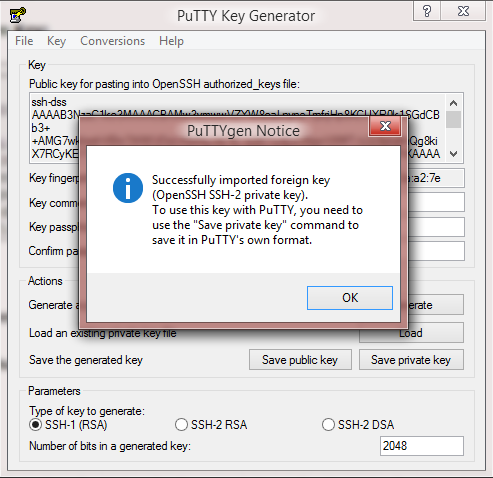
- In the top menu, select the File tab, click on Load private key and select the private key file from your local machine (make sure the All files (*.*) filter is used while searching for the file on your PC so you can see your downloaded private key file):

You will be asked for the passphrase you specified during the key generation. After entering it you should receive a successful import message:
In case you do not wish to set a passphrase for the key, you can empty the Key passphrase and Confirm passphrase fields.
Now click on Save private key and save your key as a .ppk file which will be needed later:

-
Run the PuTTY client (putty.exe), select Connection > SSH > Auth > Credentials to authenticate with. Under the Private key file for authentication field, click on the "Browse" button to select the saved .ppk file:

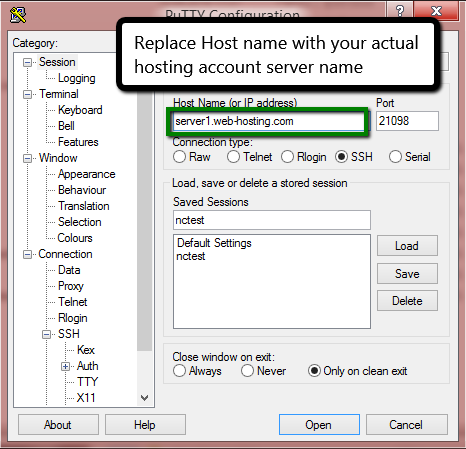
- Once done, get back to the Session section and input the server name (IP address), specify the SSH port (it should be 21098 for all shared servers accounts) and click Open:
- In the console window, you will be asked for the login and passphrase:

That's it!
Need any help? Contact our HelpDesk