If you have a
VPS/
Dedicated server with us, on your first login to WHM you will be prompted to specify initial WHM settings in Setup Wizard. All these settings can be changed later in WHM if required.
This guide will provide you with the basic information needed to complete the initial WHM setup and start working with your server.
Step 1. Agreement
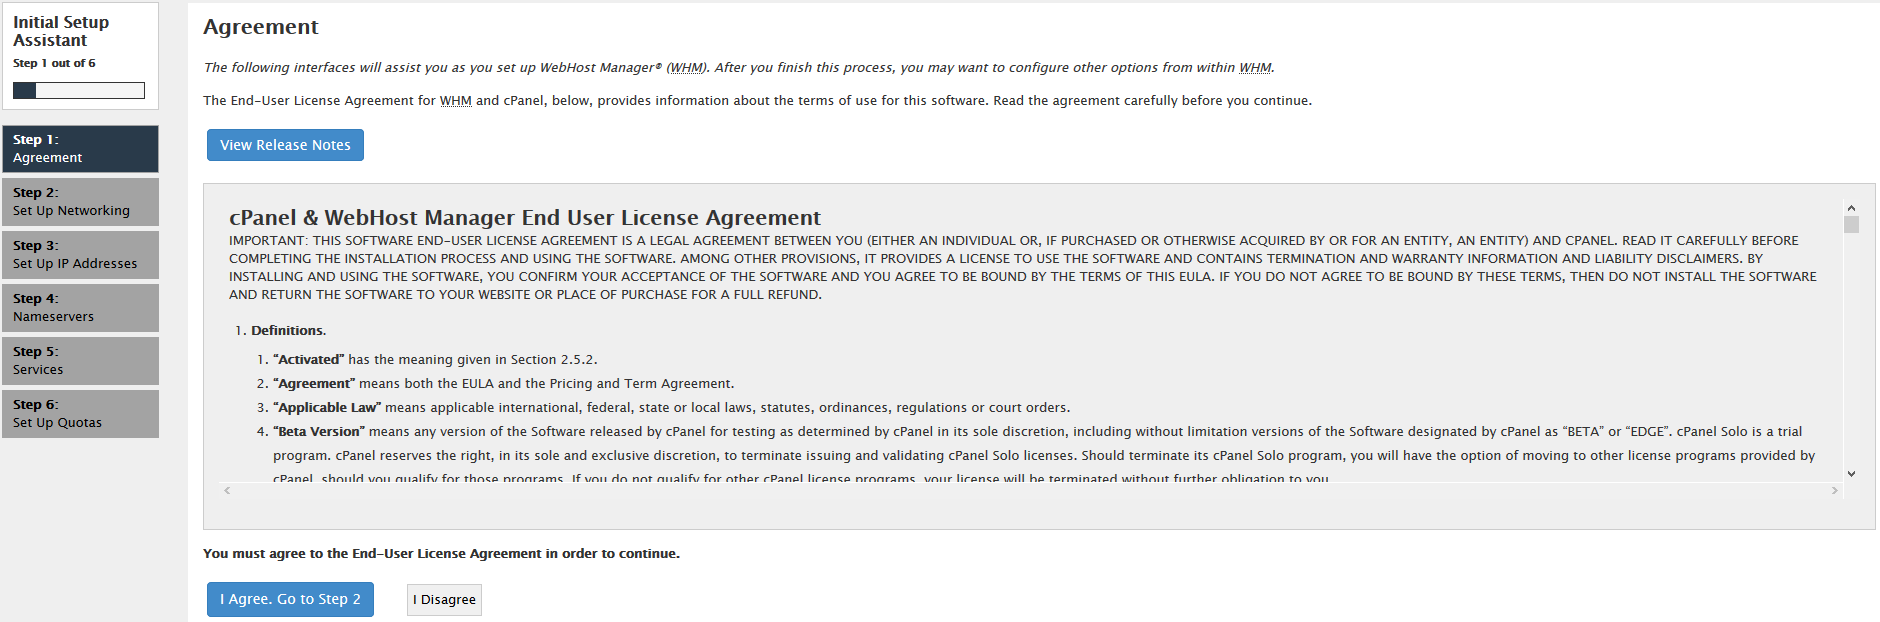
Carefully check the license agreement provided by cPanel and click the I agree. Go to Step 2 button.
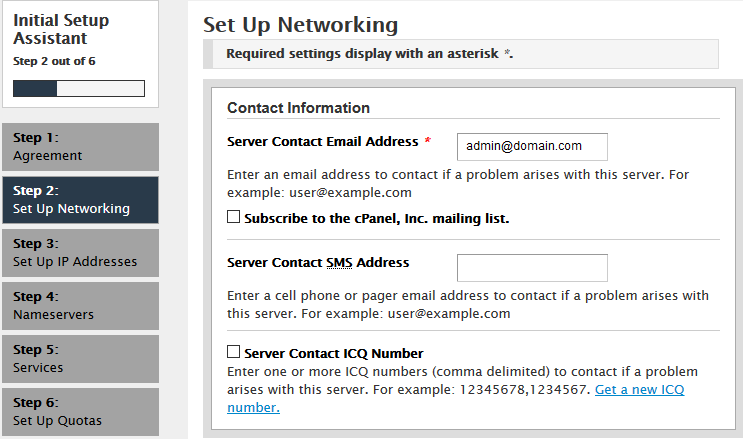
Step 2. Set Up Networking
In the Contact Information section you can specify the means of alerting you about the server status. We recommend setting up a non-local email account in the Server Contact Email Address field and enabling at least one of the optional communication methods:
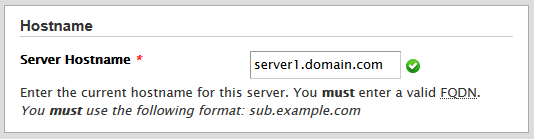
In the Server Hostname section you can specify the hostname of your VPS/Dedicated server.
cPanel requires the hostname to be in the format name.domain.tld:
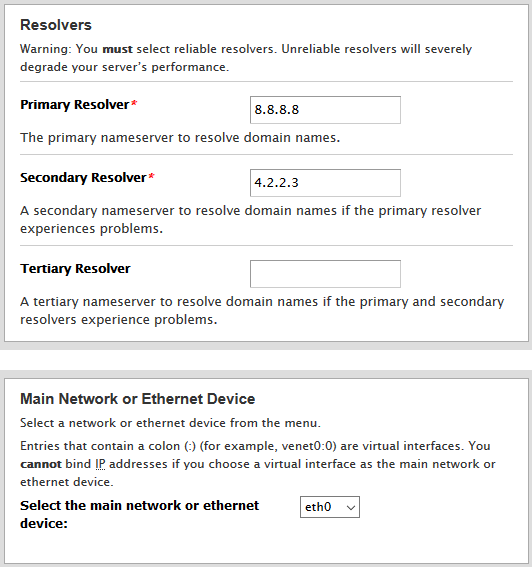
In the Resolvers section you can specify DNS resolvers which will be used for outgoing DNS queries by your server.
It is recommended to keep default addresses for primary and secondary resolvers.
For the third resolver, you can specify one of free public DNS services of your choosing, for example, the IP address of Google Public DNS server.
In the Main Network or Ethernet Device section, it is recommended to use the device suggested by default:
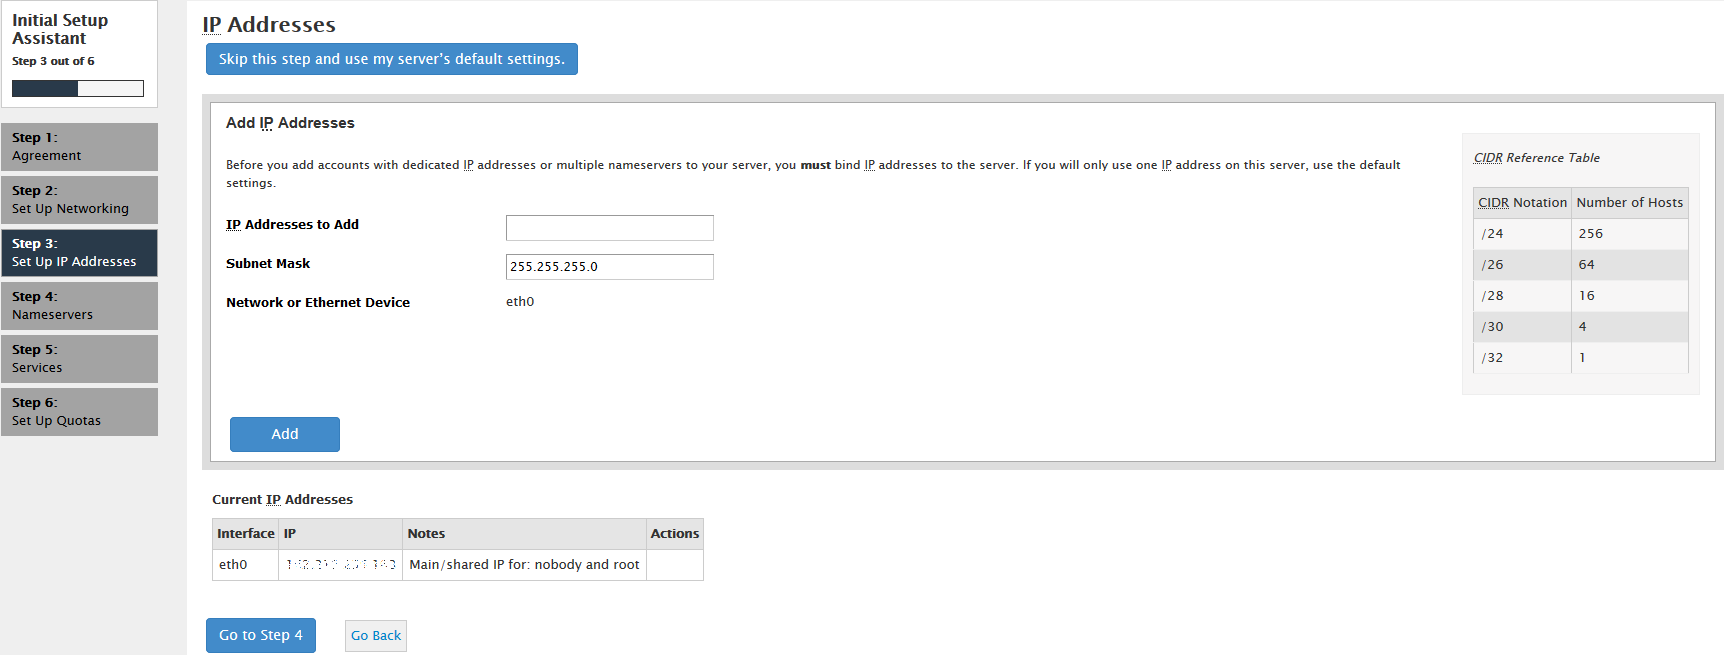
Step 3. IP Addresses
Click on Skip this step and use my server's default settings and proceed to Step 4:
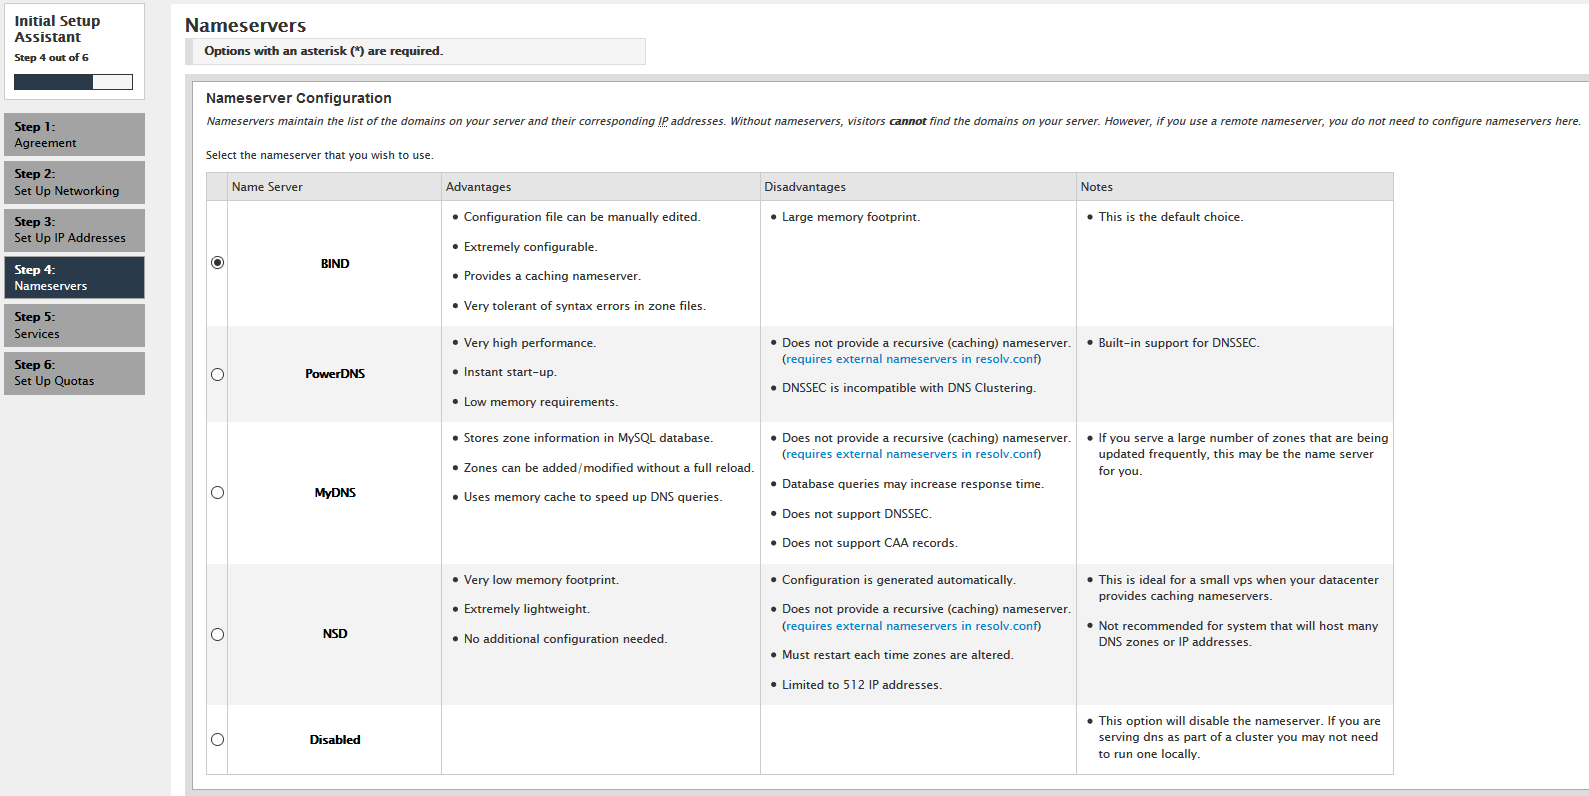
Step 4. Nameservers
Here you need to specify the nameserver configuration which will be used on your server, you can refer to cPanel recommendations to choose the nameserver configuration most suitable to your needs.
The default option BIND works for most users, so if you are unsure which option to choose, pick this one:
In the next section, input your private nameservers you would like to use:
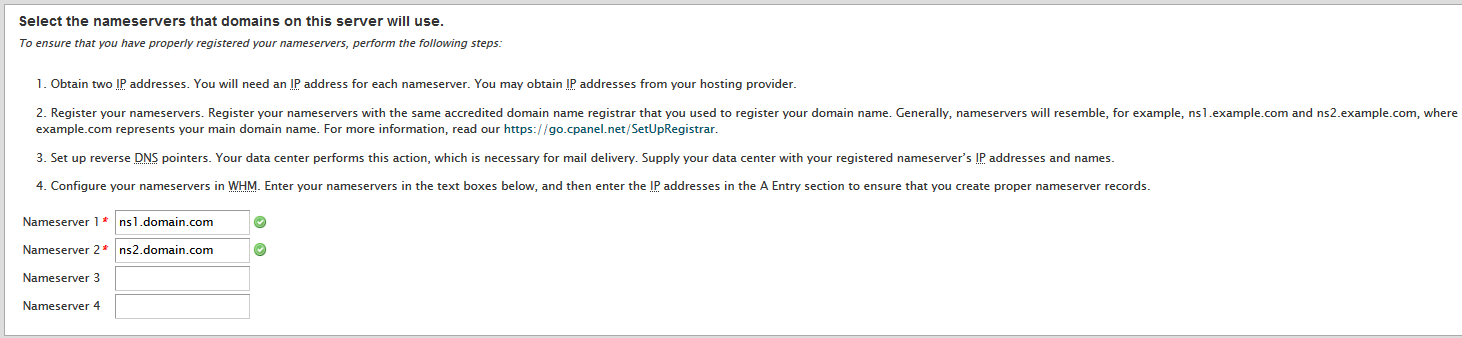
In the last section, input IP addresses for your private nameservers which were provided in the welcome email.
NOTE 1: You can use a single IP address for both nameservers as well, however, it is always recommended to use different IP addresses if possible.
NOTE 2: In order to make these nameservers operate, you also need to register them at your current registrar's side with the same IP addresses. If your domain is registered with us, please follow this guide.
In the Add Hostname A records menu input your server main IP address and save the changes:
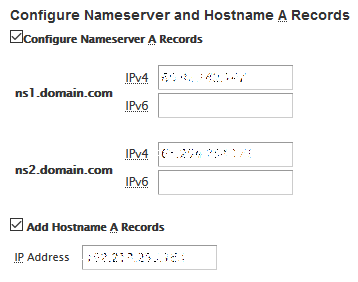
Wait till WHM configures your nameservers and takes you to Step 5.
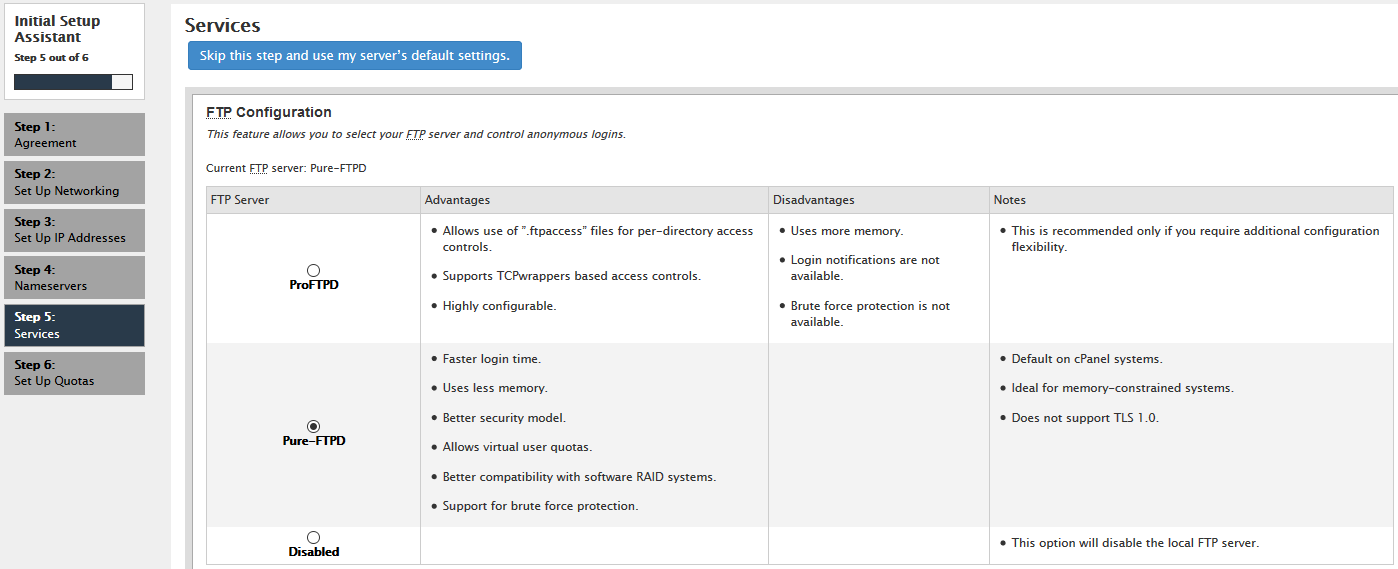
Step 5. Services
In this section you can select FTP configuration and enable the cPHulk module.
We recommend using a default Pure-FTPD selection for the FTP configuration.
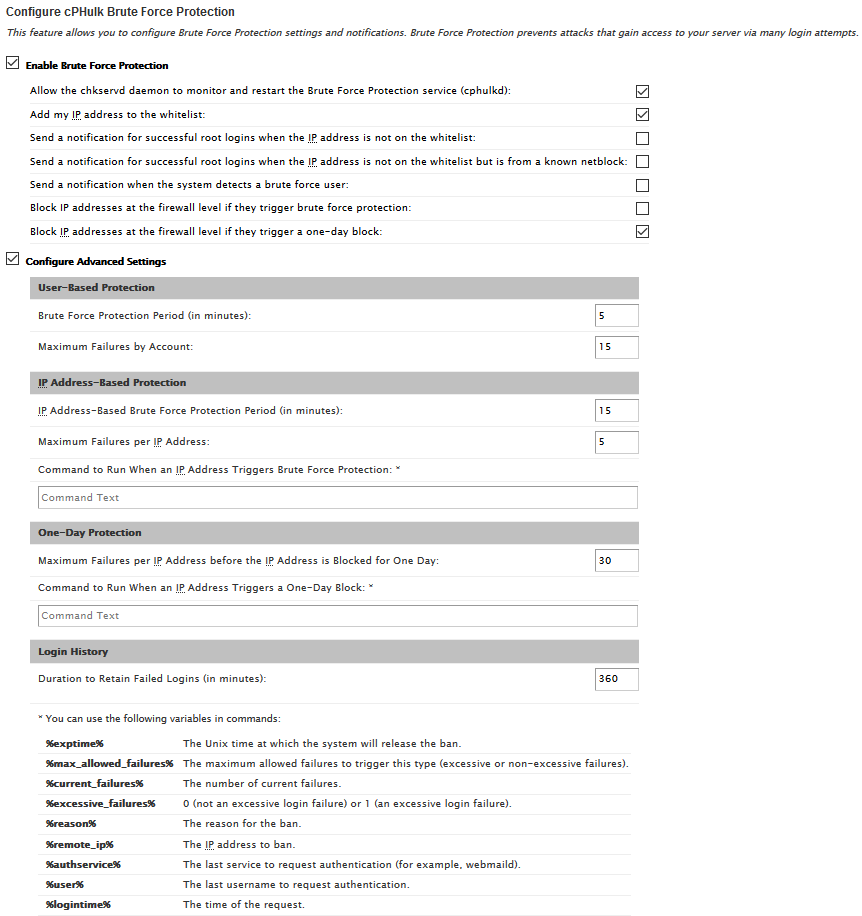
cPHulk is a basic protection tool for your server protecting you from bruteforce attacks (password guessing attacks), so we recommend enabling it.
In the advanced settings you can specify time periods for temporary blocks and other cPHulk settings.
You may refer to the official cPanel documentation for more information regarding the cPHulk configuration here.
Keep these options unchecked if you are not planning to use cPHulk:
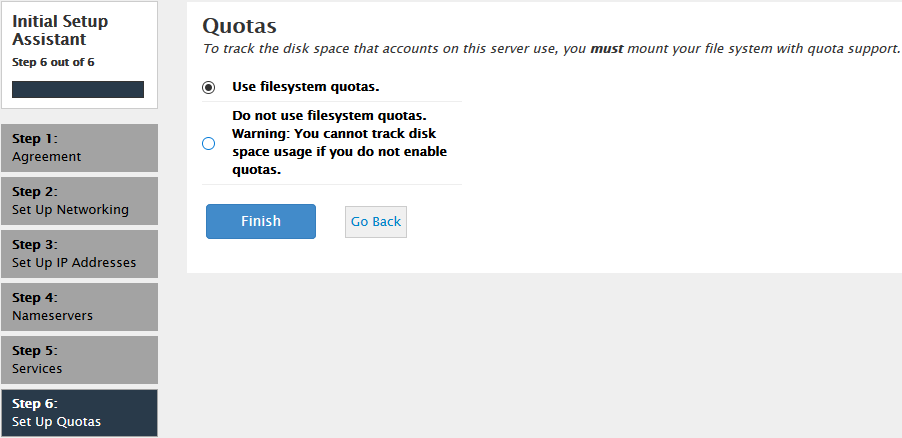
Step 6. Quotas
At the final stage you can install a disk space tracking system used for cPanel accounts disk space usage monitoring.
We recommend leaving this option checked.
Once done, click Finish which will redirect you to WHM main menu:
You can check official cPanel notes here for more information about the WHM Wizard setup process.
That's it!
Need any help? Contact our HelpDesk
