In order to transfer your hosting account from another hosting provider to Namecheap, you will need to perform two important steps:
- Transfer your files/databases to your Namecheap hosting account Point your domain name to Namecheap hosting servers
- Backing Up and Migrating Files
Backing Up and Migrating Files
If your current hosting account does not have cPanel, you will need to create backups for every part of your account (databases, website files, emails, etc.) using the tools available in your current hosting account’s control panel:
- Back up and download the content of your website(s) to your PC
- Back up and download all your website-related databases (if the phpMyAdmin tool is installed on your current provider’s server, you can export the database using this guide)
- Upload the saved content of that old account to the root directory for the domain name in your Namecheap hosting account (/home/user/public_html - folder for the main domain name; /home/user/public_html/addondomain.tld - for the addon domain name)
If you wish to use FTP to upload, you can connect to the hosting server’s IP address and log in with your new cPanel username and password provided by Namecheap. If you need guidance in how to properly upload files, you may find it here.
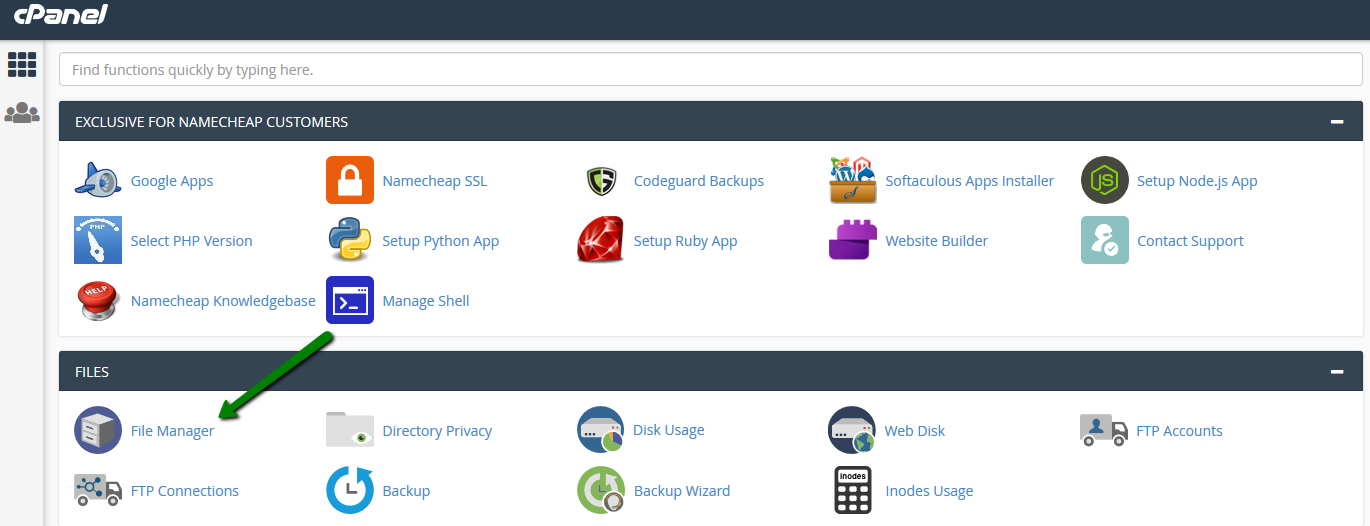
You can also use cPanel > File Manager tool if you have a backup of your content.
- Log in to cPanel and locate File Manager:
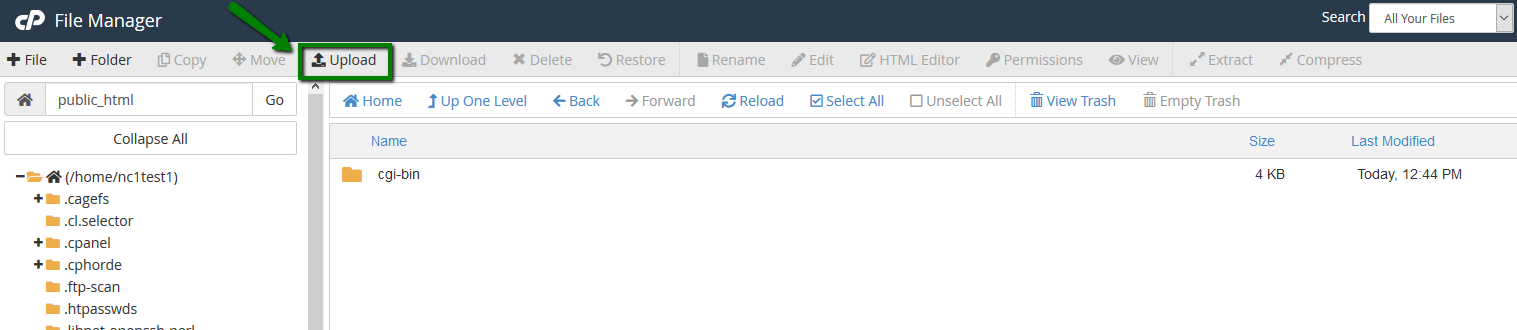
- Select the Upload option to upload your archive:
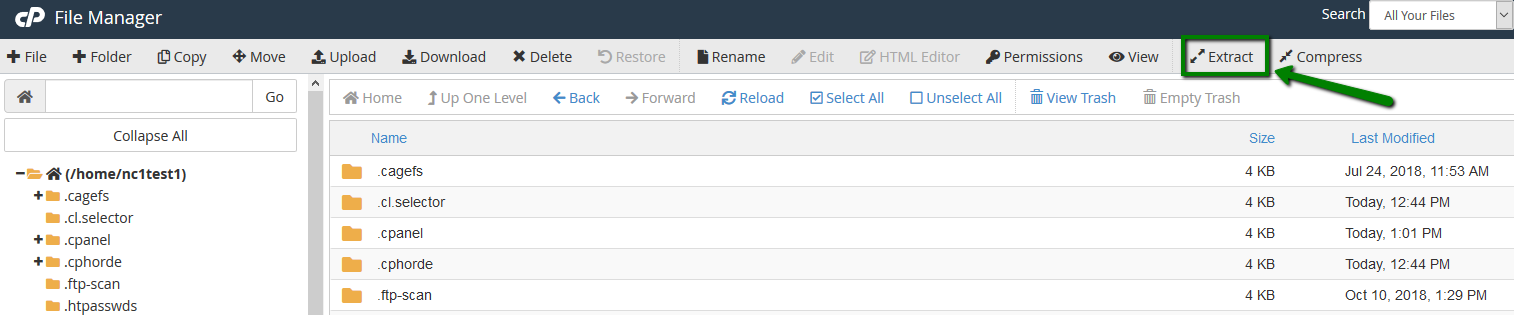
- Then restore it, using the Extract tool located in File Manager:
If you only have files without connected databases (e.g. an HTML website), you are officially finished with the process.
Restoring MySQL Databases
However, if you have a database already associated with your website, you will need to import it to Namecheap. To do this, please follow the steps listed below:
- Create a new database and a database user in your Namecheap cPanel, then assign the user to that database. This handy tutorial will help to guide you along.
- Now you will need to import the database dump (.sql backup file downloaded from the previous server) via the phpMyAdmin tool. Please refer to this guide for more detailed instructions.
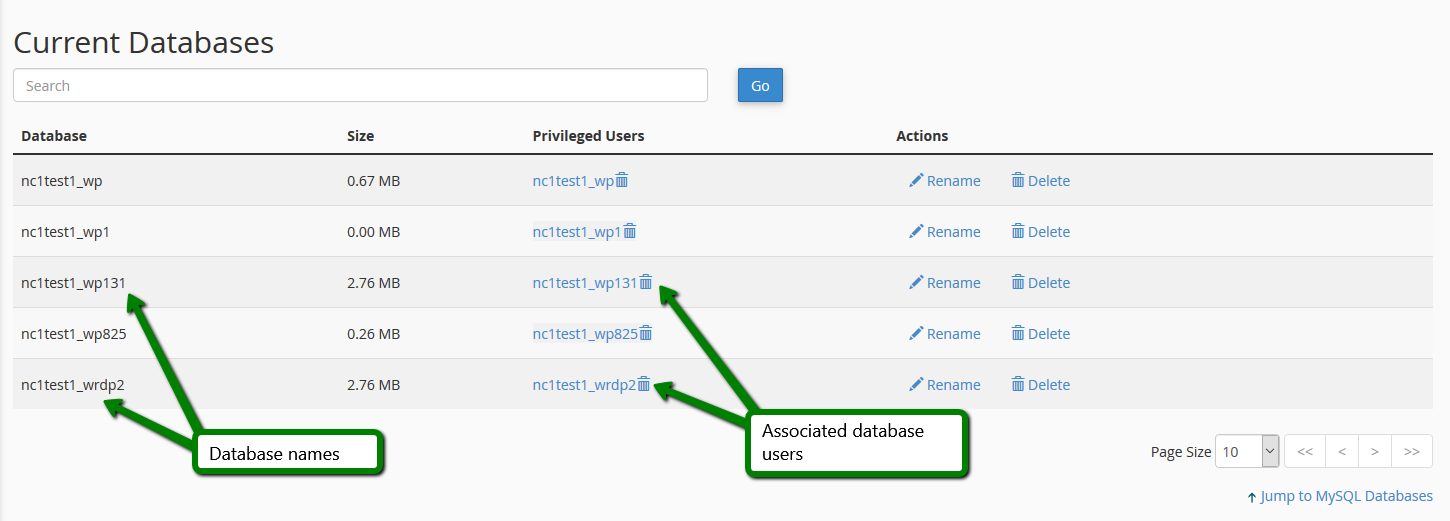
- Once you have completed the previous steps, you will need to enter in the new database connection credentials in the configuration files of your website (e.g. for a WordPress website this is wp-config.php file; for Joomla - configuration.php; for Drupal - settings.php). Please use the proper database name and username as they have their prefixes changed. In order to make sure you are using the correct ones, please navigate to cPanel > MySQL Databases:
Here is how the database information looks in the Wordpress configuration file - wp-config.php:
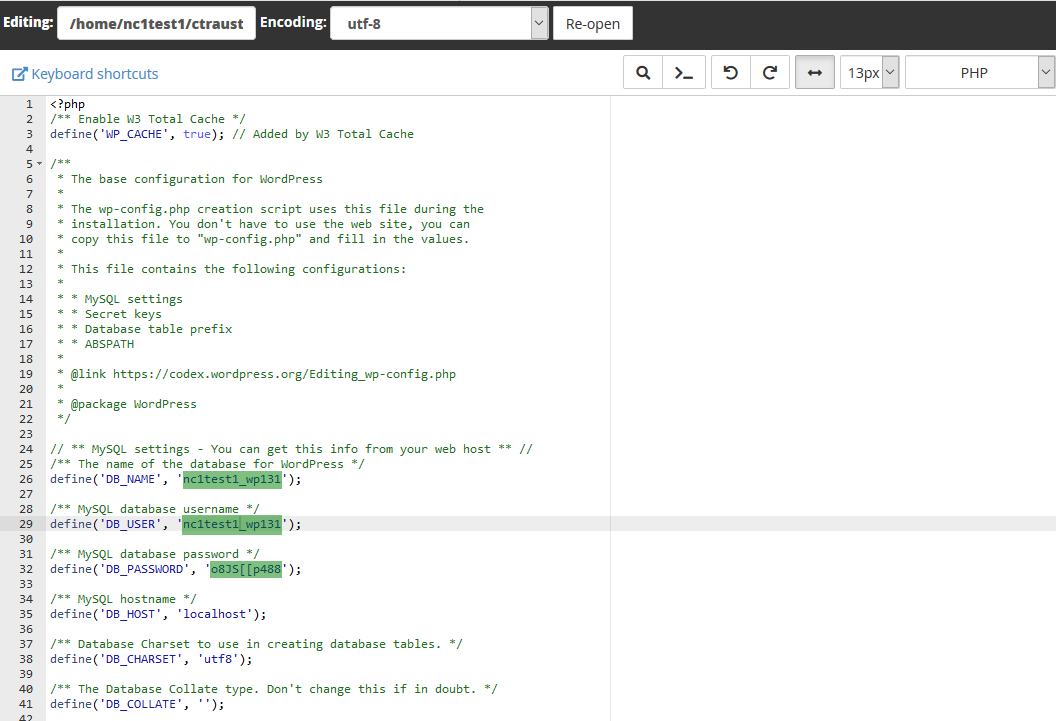
NOTE: You should update your password to the one that was entered when creating your database user. If you prefer, you can also change this password to the one listed in the configuration file. This can be done in
MySQL Databases cPanel menu. Also, keep in mind that ‘DB_HOST’ should always be ‘
localhost’ on our servers. If you notice any other inputted value, please ensure you update accordingly.
Good news! The migration of your website is almost finished. To connect your domain name with your website on the new server, you must point this domain name to
Namecheap Hosting DNS. If you already have a Shared Hosting plan with Namecheap, please refer to
this guide.
However, before switching your domain name to Namecheap Hosting DNS, we recommend that you
check how your website looks on our hosting servers.
If you need to transfer your email accounts to your Namecheap cPanel, you’ll find all the necessary information on how to do so
here. Scroll down to the last three articles and depending on which mail client you use (Outlook, Thunderbird or MacMail), follow the steps that are clearly provided.