Our Namecheap Private Email service includes ActiveSync feature that allows to synchronize contacts, calendar appointments and tasks with different email clients. However it is also possible to set up calendars and contacts synchronizations separately on devices that support Caldav and Carddav configuration.
NOTE: Before setting up email account this way, make sure you already have required DNS records and mailbox created.
NOTE: If you've set up a Two Factor Authentication (2FA) for your mailbox and wish to set up CalDav and/or CardDav, you will need to set up an Application Specific Password. Please refer to this article for more information.
In order to configure
Caldav account on Mac, follow the instructions below:
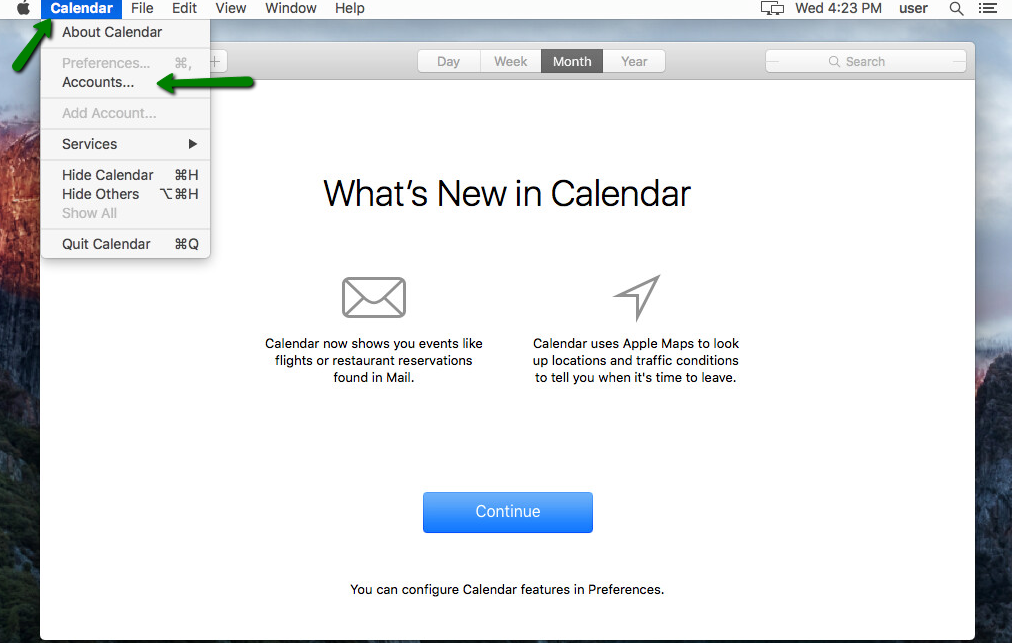
1. Run the Calendar application, then click the on Calendar menu.
2. If you have no account added previously, choose Accounts:
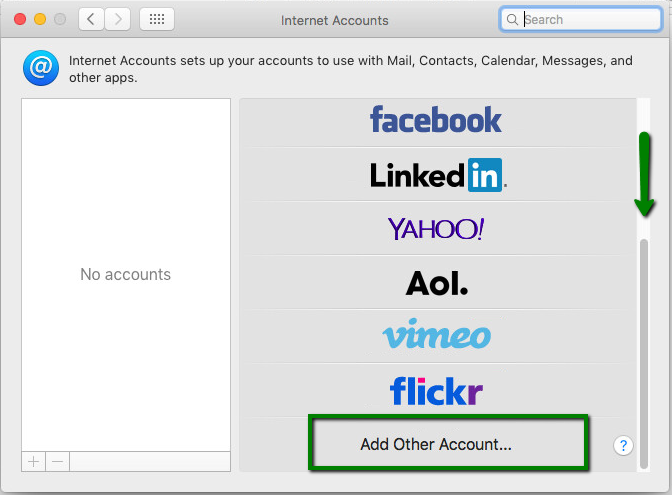
Scroll down to the Add Other Account icon, click on it and choose CalDav account:
In case you already have some account added, choose Preferences and navigate to the Accounts tab >> click on the + button >> Other CalDav Account:

3. In the next pop-up window, indicate the following information:
- Account type: Manual
- User Name: full Namecheap Private Email email address
- Password: the password for this mail account
- Server Address: dav.privateemail.com
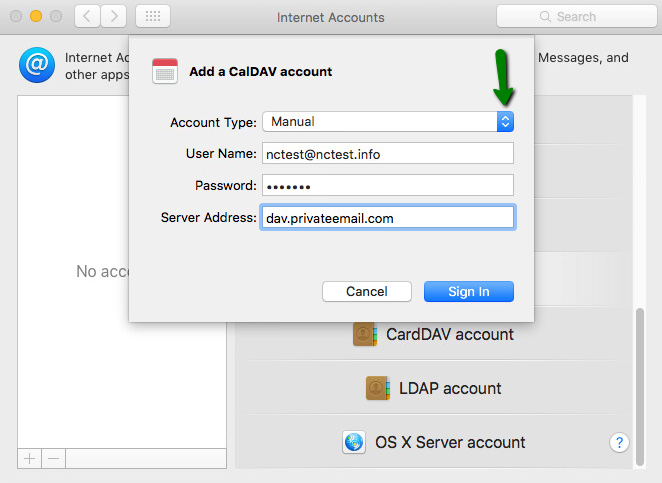
Once done, click on the Sign In button.
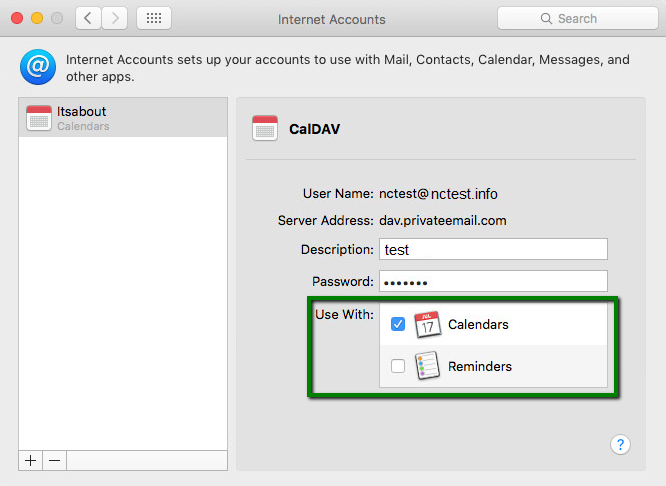
4. In the next window you will be able to change description, password and choose applications to use for this calendar:
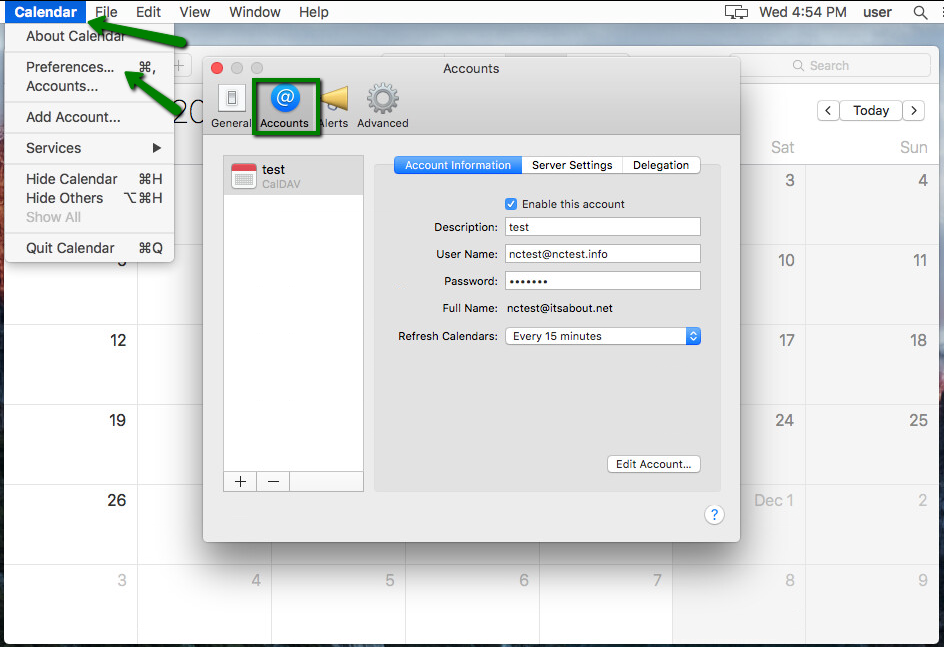
5. Go back to the
Calendar >> Preferences >> Accounts >> Account Information to check/edit such settings:
- Description: can be anything you like
- User Name: full Namecheap Private Email email address
- Password: password for this email account
- Refresh Calendar: frequency to sync the calendar with the server
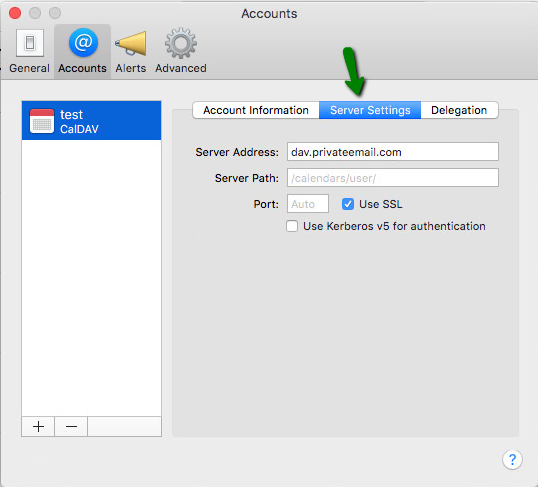
6. Once done, navigate to Server Settings and verify the following settings:
- Internal Server: dav.privateemail.com
- Server Path: should be blank
- Port: should be blank
- Use SSL: should be ticked
Now navigate back to your Calendar application and check if all the Namecheap Private Email calendar appointments and tasks were successfully synchronized.
In order to configure Carddav account, follow the instructions below:
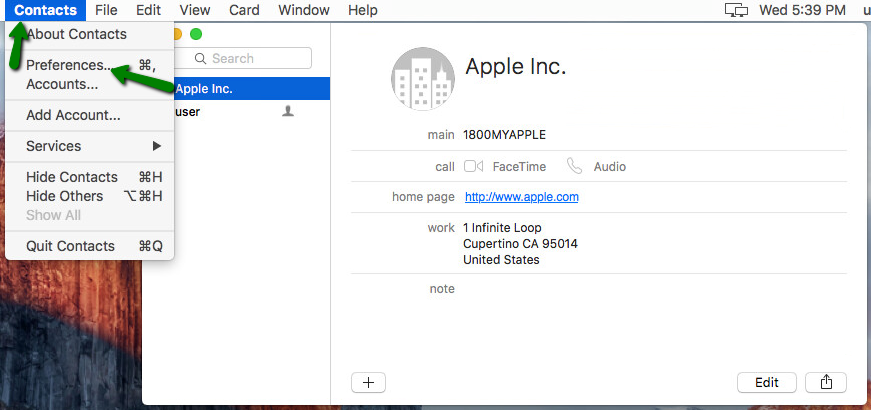
1. Open the Contacts application, then click on Contacts menu and choose Preferences:
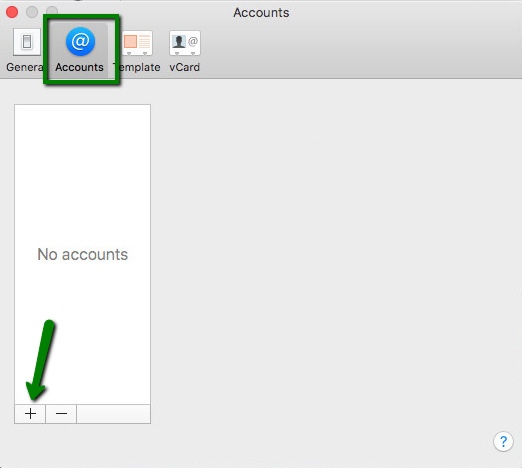
Then, navigate to Accounts >> the + button >> Other Contacts Account:
2. In the next window, fill out the following information:
- Service: CardDAV
- Account Type: Manual
- User Name: full Namecheap Private Email email address
- Password: the password for this email address
- Server Address: dav.privateemail.com
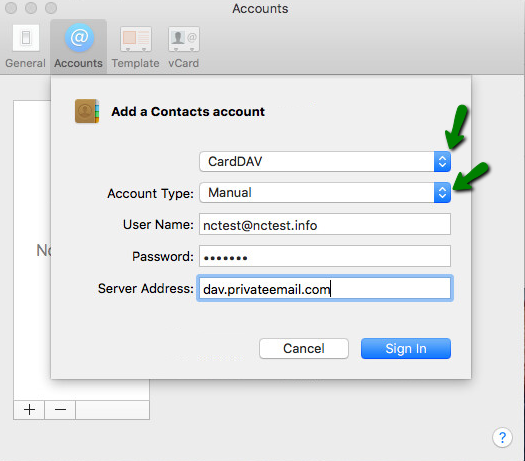
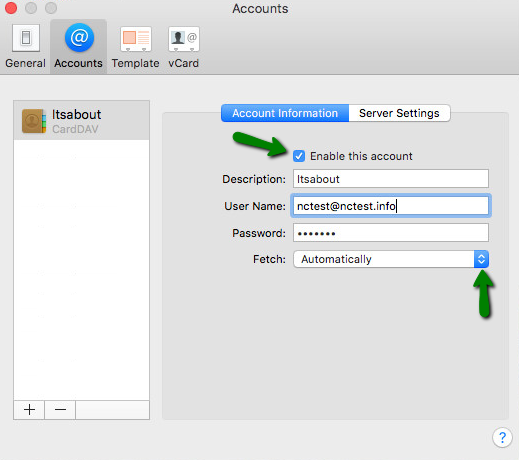
3. Then click on Sign In button and make sure to have the following information in the next window:
- Enable this account: should be checked
- Description: can be anything you like
- User Name: full email address
- Password: the password for this email account
- Fetch: automatically
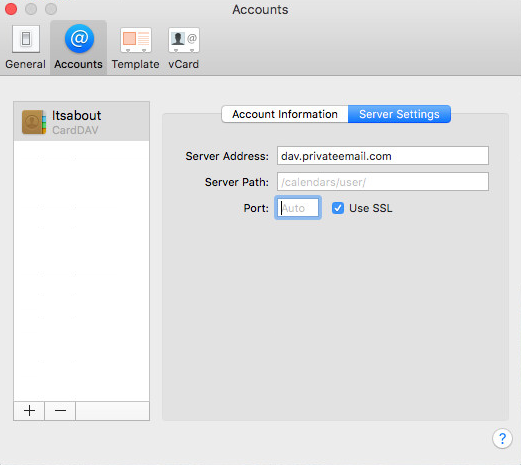
4. Once all the needed information is filled out, navigate to Server Settings tab and type in the following:
- Server Address: dav.privateemail.com
- Server Path: should be blank
- Port: should be blank
- Use SSL:
should be ticked
Now you can open your Address Book application and check if all the Namecheap Private Email contacts were synchronized successfully.
That's it!
Need any help? Contact our HelpDesk
