
This tutorial will show you how to set up Namecheap Private Email ActiveSync for Evolution CalDavCalendar. We will use a test email account example@ncsupport.info.
NOTE: Before setting up your email account this way, make sure that you already have the required DNS records and mailbox created.
NOTE: If you've set up a Two Factor Authentication (2FA) for your mailbox and wish to set up CalDav and/or CardDav, you will need to set up an Application Specific Password. Please refer to this article for more information.
How to configure Calendar/Caldav
How to configure Address Book/Carddav
In order to configure Caldav account on Linux, follow the instructions below:
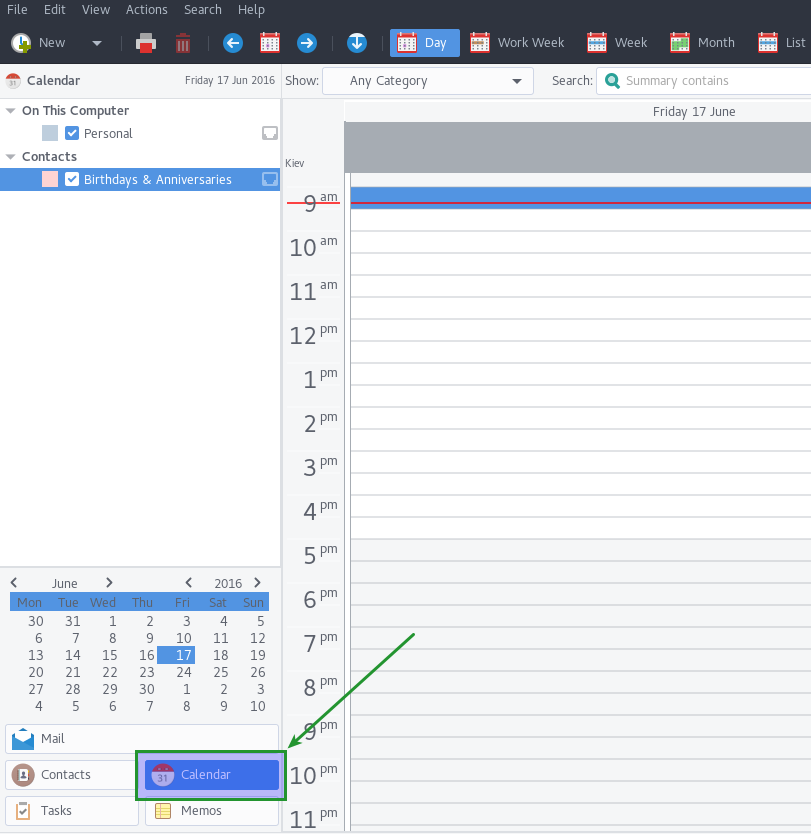
1. Open your CalDav Calendar and click on Calendar button:
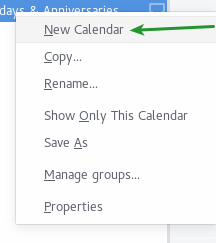
2. Then right click on the left column as indicated in the screenshot and select New Calendar option:
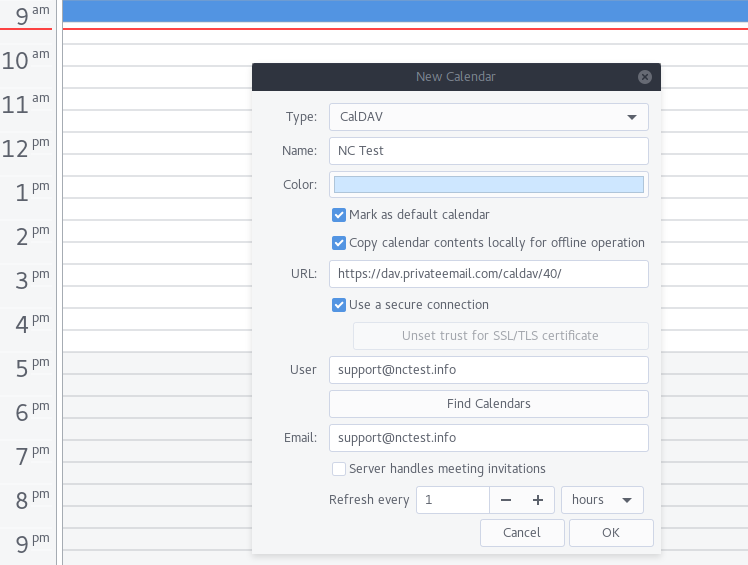
3. In the new window, select CalDAV, check Use a secure connection and type in email account details into the corresponding fields:
Type: CalDAV
Name: you can set name of the calendar here
URL: https://dav.privateemail.com/caldav
User: your full email address
Email: your full email address
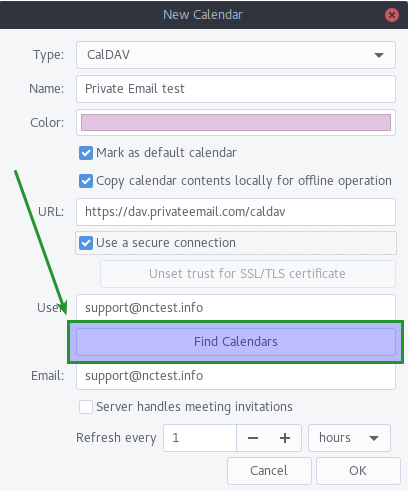
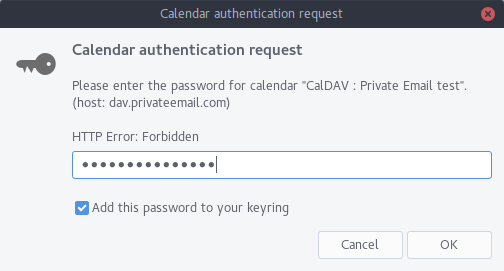
4. Click on Find Calendars and type in your email account password into the new pop-up:
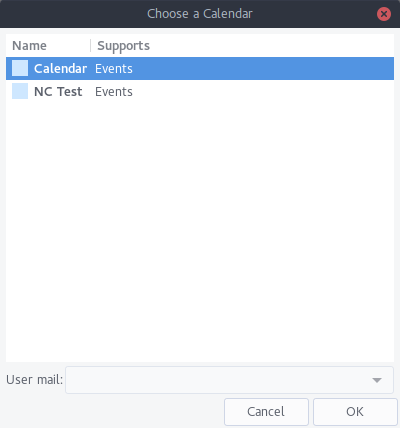
5. After that select calendar you would like to synchronize with and hit OK:
6. Check the settings and click Apply:
7. Now you can create an event in your calendar. To do so, click on the date with right button and choose New Meeting. You can add participants using Add button to create one:
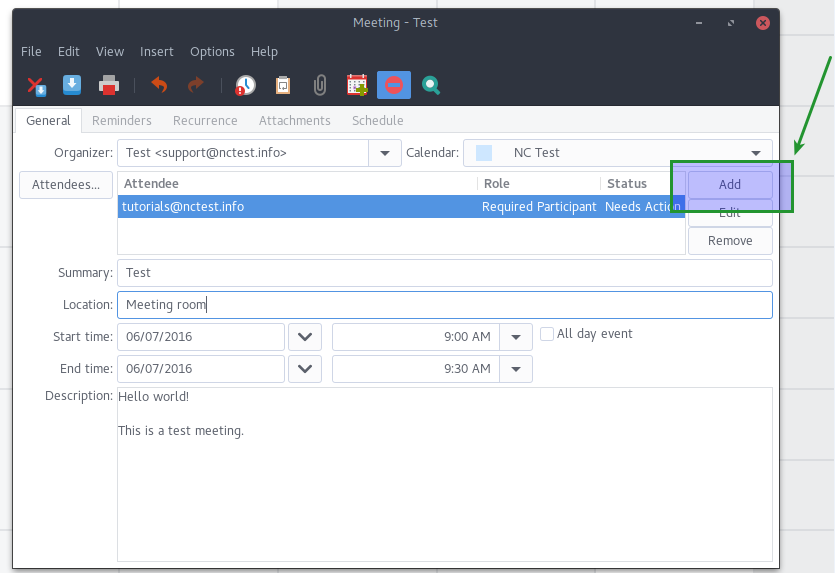
Notifications will be sent to specified recipients.
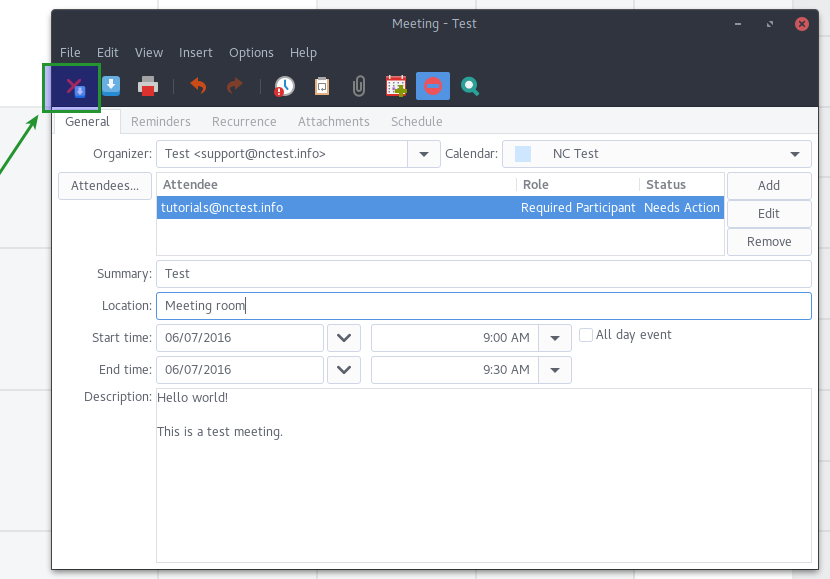
8. You can also change the following settings:
9. Once done, check participants and other settings, then hit Save button:
Here is the list of the supported features available for Evolution CalDav Calendar:
In order to configure Carddav account on Linux, follow the instructions below:
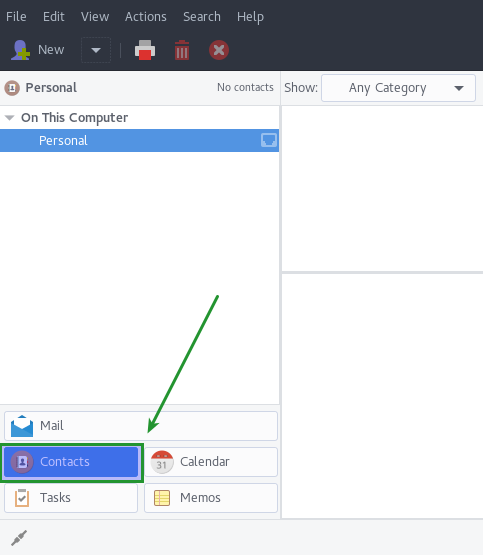
1. Open Evolution application and click on Contacts button in the left down corner:
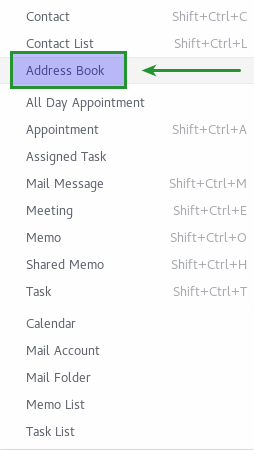
2. Then click on the arrow down near New button and choose Address Book. In the pop-up window you need to choose WebDAV:
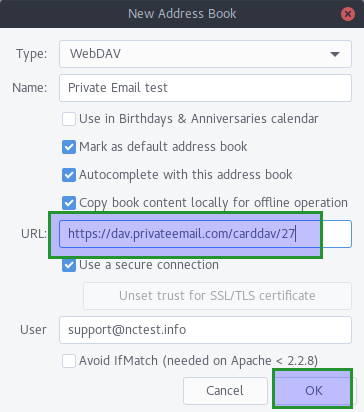
3. In the next Add Account window, fill out the following information:
Type: WebDAV
Name: you can choose any name you wish
User Name: full Namecheap Private Email email address
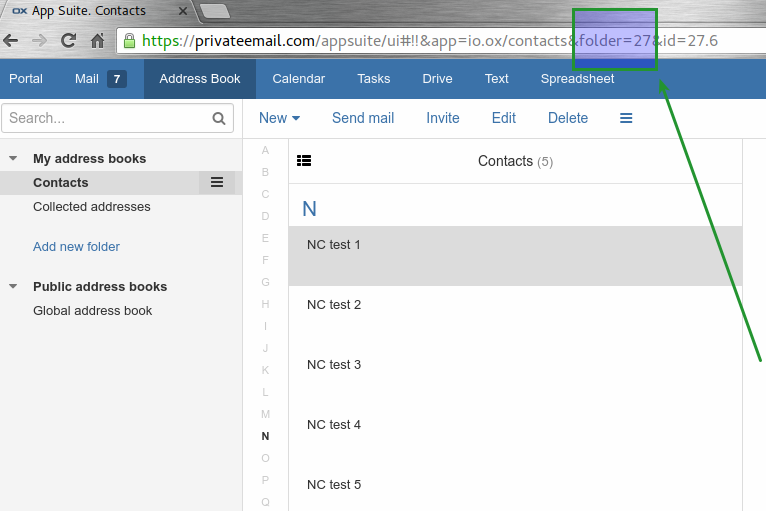
4. Now you need to find out the correct URL in order to synchronize your contacts from Private Email to a local email client (Evolution in this case).
First of all, you need to navigate to https://privateemail.com in the browser and access Address Book section.
In order to add your contacts to the email client you need to use the following link with your personal Contacts ID number:
https://dav.privateemail.com/carddav/{personal_contacts_ID}
You can find the ID from the link in the address bar of your browser. We have 27 for our test address book. So the correct link in our case should look like:
https://dav.privateemail.com/carddav/27
NOTE: Do not forget that you will need to use your own ID instead of 27 mentioned in this guide.
5. Now you need to fill in the URL field and click OK button:
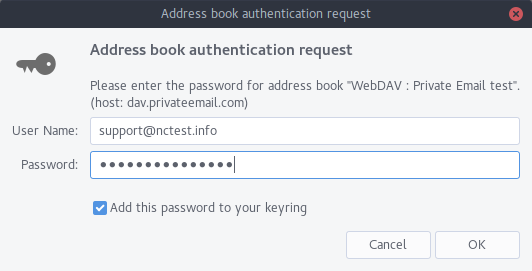
6. Then you will be prompted to a pop-up window where the password for your email account should be filled in:
7. Now you can open your Address Book application and check if all Namecheap Private Email contacts have been synchronized successfully.
That's it!
Need any help? Contact our HelpDesk
Need help? We're always here for you.