
If your domain is not pointed to your Namecheap Shared or Reseller Hosting nameservers (for example, it uses Namecheap BasicDNS/PremiumDNS/FreeDNS, or another DNS provider), you can still use the cPanel Email service included with your hosting plan.
To do this, you will need to configure the required email DNS records at your DNS provider and make sure Email Routing is set correctly in cPanel.
This guide covers the following steps:
Configure the DNS records below at your DNS provider.
If your domain uses Namecheap BasicDNS/PremiumDNS/FreeDNS, add the records in your Namecheap account as described in the "How do I set up host records for a domain?" guide. If your domain uses a third-party DNS provider, add the records through that provider instead.
Choose one of the following options:
Jellyfish is our email filtering system that provides spam protection and additional email management features:
| Type | Host | Value | Priority |
|---|---|---|---|
| MX | @ | mx1-hosting.jellyfish.systems | 5 |
| MX | @ | mx2-hosting.jellyfish.systems | 10 |
| MX | @ | mx3-hosting.jellyfish.systems | 20 |
Alternatively, you can route emails with these records:
| Type | Host | Value | Priority |
|---|---|---|---|
| MX | @ | mail.yourdomain.tld | 10 |
| A | 11.11.11.11 | - |
Replace yourdomain.tld with your actual domain name and 11.11.11.11 with your actual hosting IP address. You can find your IP address in the Your Hosting Account Details for yourdomain.tld welcome email.
NOTE: If your DNS provider supports proxying DNS records (for example, Cloudflare), make sure the mail record is unproxied. Email traffic cannot be routed through proxy services.
To improve email deliverability and help prevent messages from being marked as spam, configure the following records:
| Record | Purpose |
|---|---|
| SPF | Authorizes sending servers |
| DKIM | Digitally signs outgoing messages |
| DMARC | Defines how receiving servers handle authentication failures |
The required values are available in cPanel >> Email section >> Email Deliverability >> Manage.
For detailed information, see cPanel Email Deliverability Tool – SPF, DKIM, and DMARC Records.
The records below enable additional email-related features. They are optional and are not required for email delivery. The required values are available in cPanel >> Domains section >> Zone Editor >> Manage, where they can be copied directly.
Allows access to Webmail via https://webmail.yourdomain.tld:

Notes:
The webmail subdomain is not secured with an SSL certificate by default and may display a certificate warning in your browser.
If your DNS provider supports proxying (for example, Cloudflare), the webmail record should be configured as unproxied.
Allows supported email clients to configure mailbox settings automatically:


Enables synchronization of contacts and calendars between your cPanel account and supported email or calendar applications using CardDAV and CalDAV.


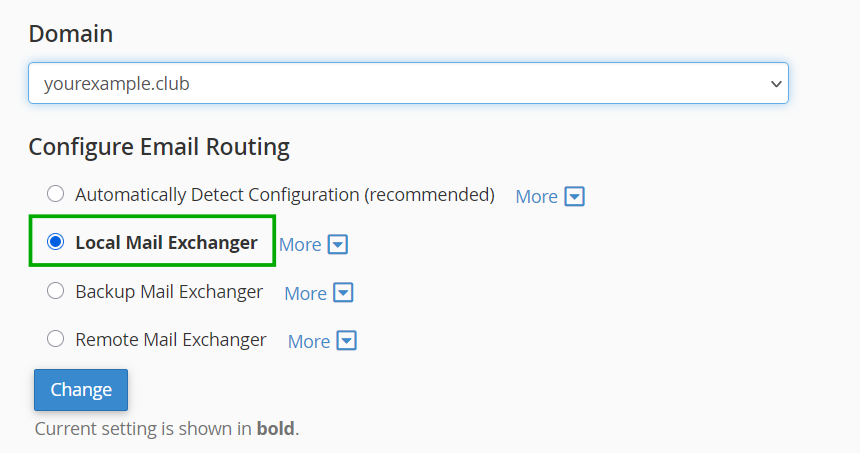
Once the DNS records are configured, make sure Email Routing is set correctly in cPanel >> Email section >> Email Routing by selecting Local Mail Exchanger. This ensures that incoming emails are delivered to the mailboxes hosted on your cPanel account.
For illustrated instructions, check here.
That is it! Once the configuration is complete, allow time for the DNS changes to propagate. DNS propagation usually takes 30-60 minutes, although in some cases it may take up to 24-48 hours to complete.
To verify that your email DNS records are resolving correctly, you can use online DNS lookup tools such as MXToolbox.
Need help? We're always here for you.