
Email aliases are virtual email addresses that forward all incoming messages to the mailbox they’re associated with. It is also possible to send emails using these aliases.
For instance, if we want the support@nctest.info email address to receive mail sent to test@nctest.info as well, we need to create the alias test@nctest.info. As a result, mail sent to either address then appears in the support@nctest.info inbox. The same scheme works for other aliases created for support@nctest.info.
Every alias you create for the particular mailbox must be unique for all mailboxes within the subscription. For example, it is impossible to create an alias test for both support@nctest.info and tutorials@nctest.info mailboxes at the same time.
To create an alias for the Namecheap Private Email mailbox, follow the instructions below:
1. Sign in to your Namecheap account.
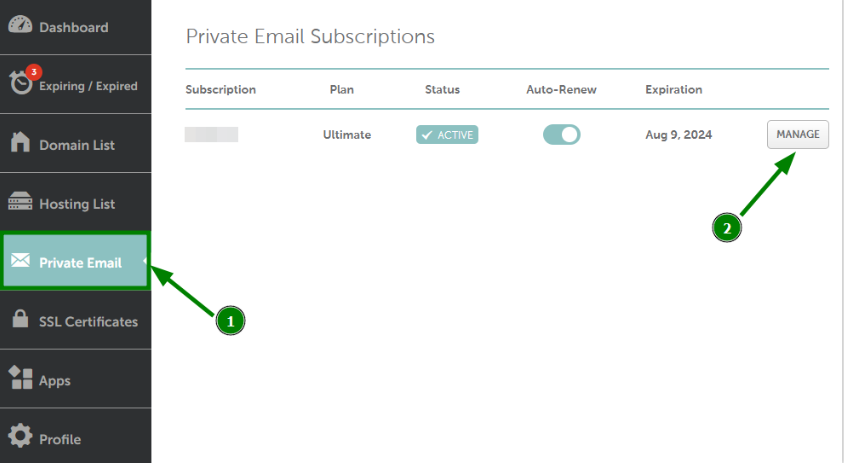
2. Go to the Private Email menu on your left, and then click Manage next to the needed subscription:
3. Scroll down to the mailboxes management section.
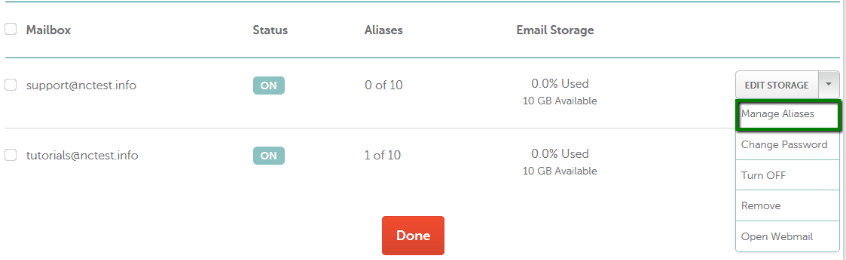
4. Select Manage Aliases from the drop-down menu next to the email account in question:
5. Click on Add Alias to proceed to the next step:

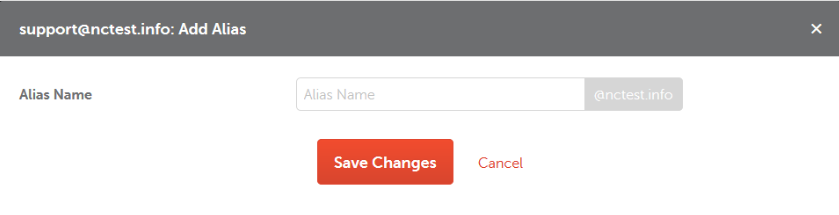
6. Enter the name of the alias and click on Save Changes:
Depending on the type of email subscription you have, it is possible to create a different number of aliases:
When you set up an alias, all messages are delivered to the main mailbox, meaning the mailbox the alias was created for. While you can’t use an alias for login and it does not presuppose a separate mailbox, you can use it for both receiving and sending emails.
If you need more aliases, you can set up a catch-all option for the mailbox. The catch-all mailbox will be 'catching' all the emails sent to invalid or non-existent address @yourdomain.com, and forwarding such emails to the specific mailbox. It is a useful option for those who wish to avoid losing important emails due to misspelling.
However, the catch-all has its own drawbacks: it may cause SPAM abuse forwarded to your mailbox, as spammers can generate any random email addresses connected to your domain. All emails sent to any of these addresses will go directly to your primary mailbox.
In order to set up a catch-all in Namecheap Private email, follow this guide.
Sending emails from an alias via Private Email
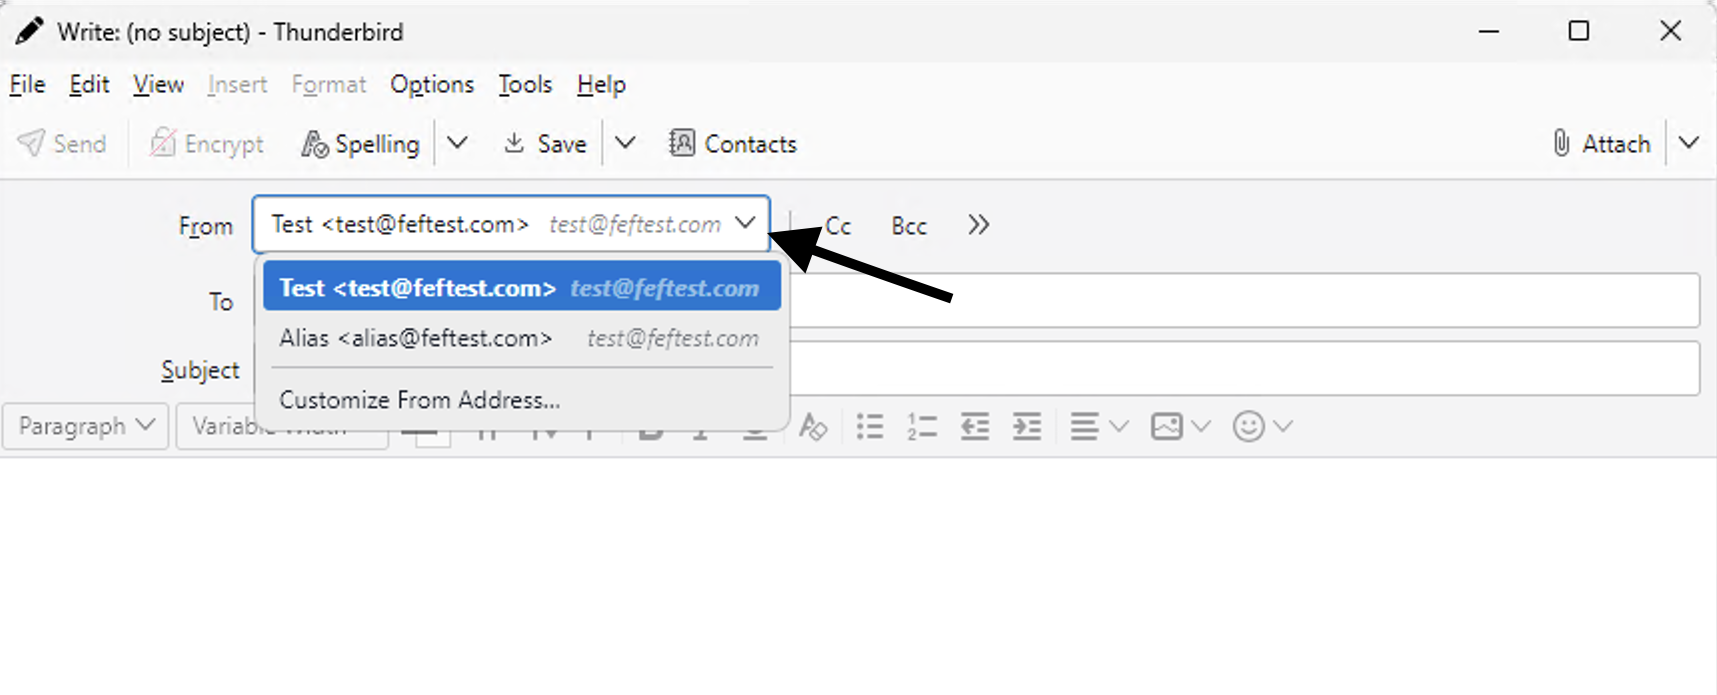
You can send emails from your alias using webmail or an email client such as Apple Mail or Thunderbird.
To send an email from an alias via webmail:
1. Open Compose to create a new email.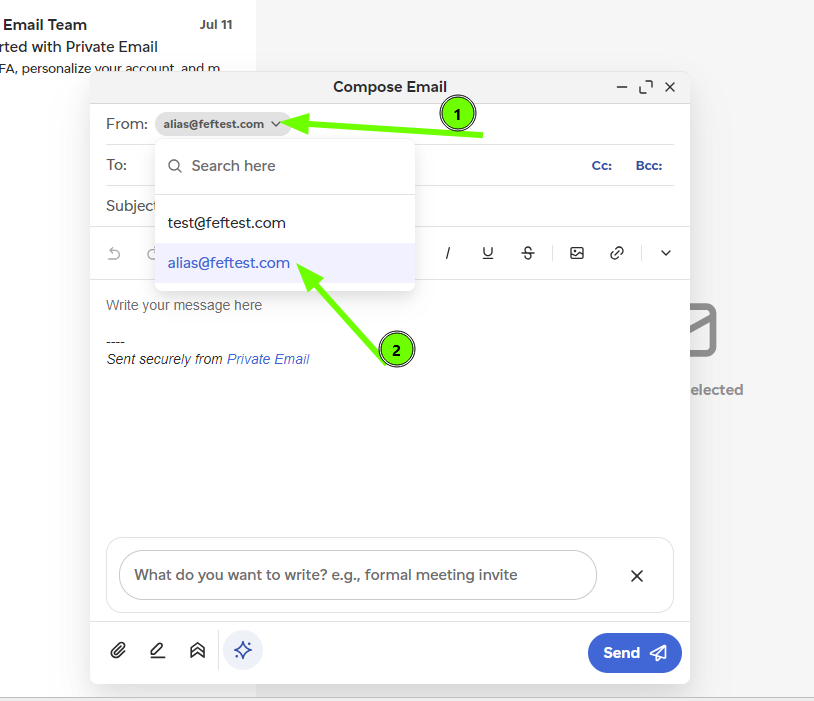
Sending emails from an alias with Apple Mail
To send emails from an alias using Apple Mail on your Mac, follow these steps:
1. Open Mail settings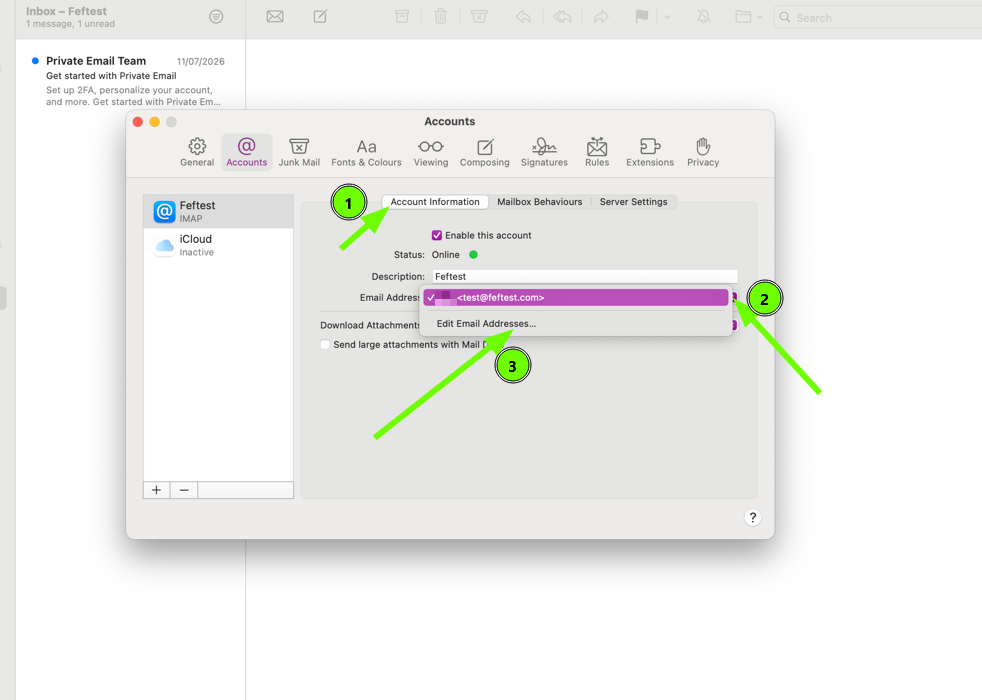
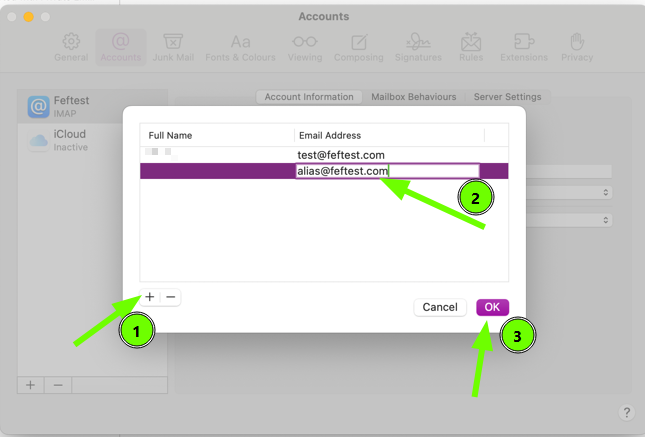
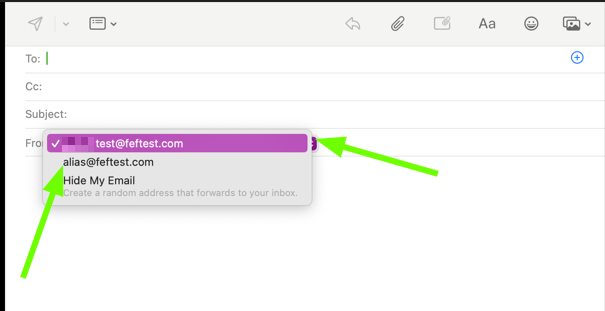
Sending emails from an alias with Thunderbird
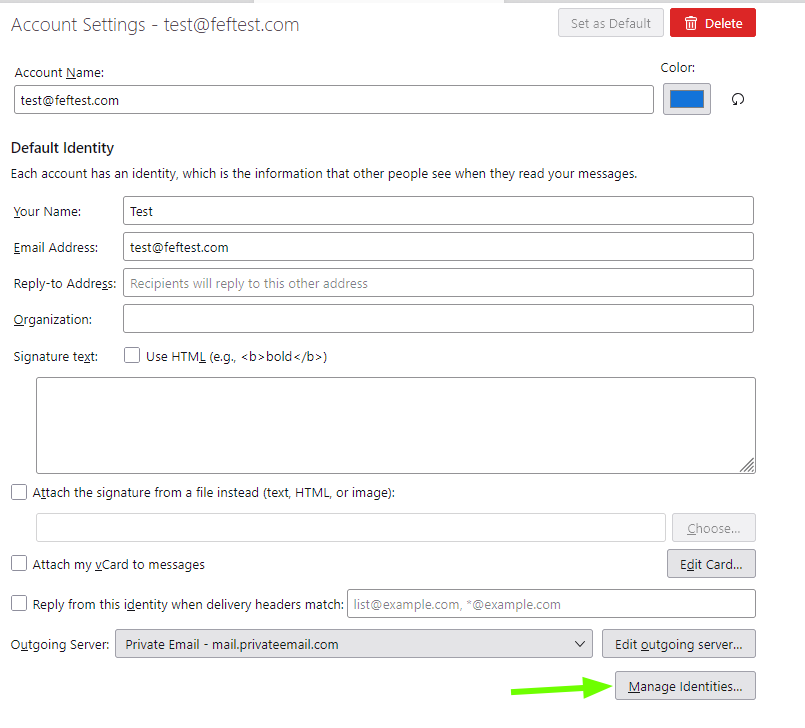
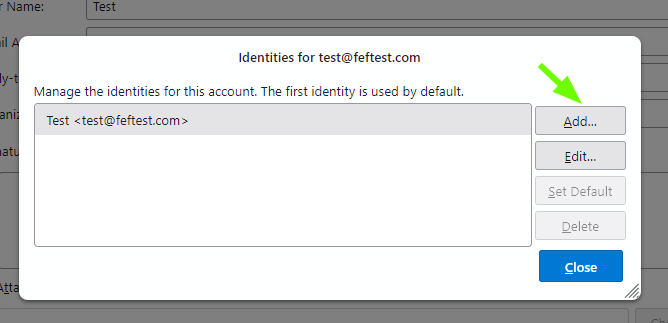
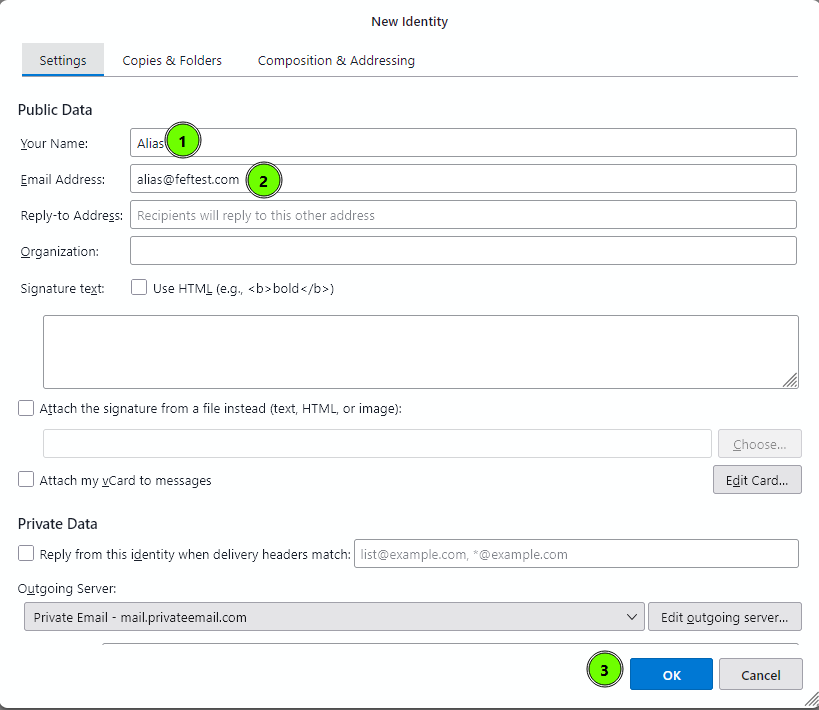
To send emails from an alias using Thunderbird, follow these steps:
1. Open Account Settings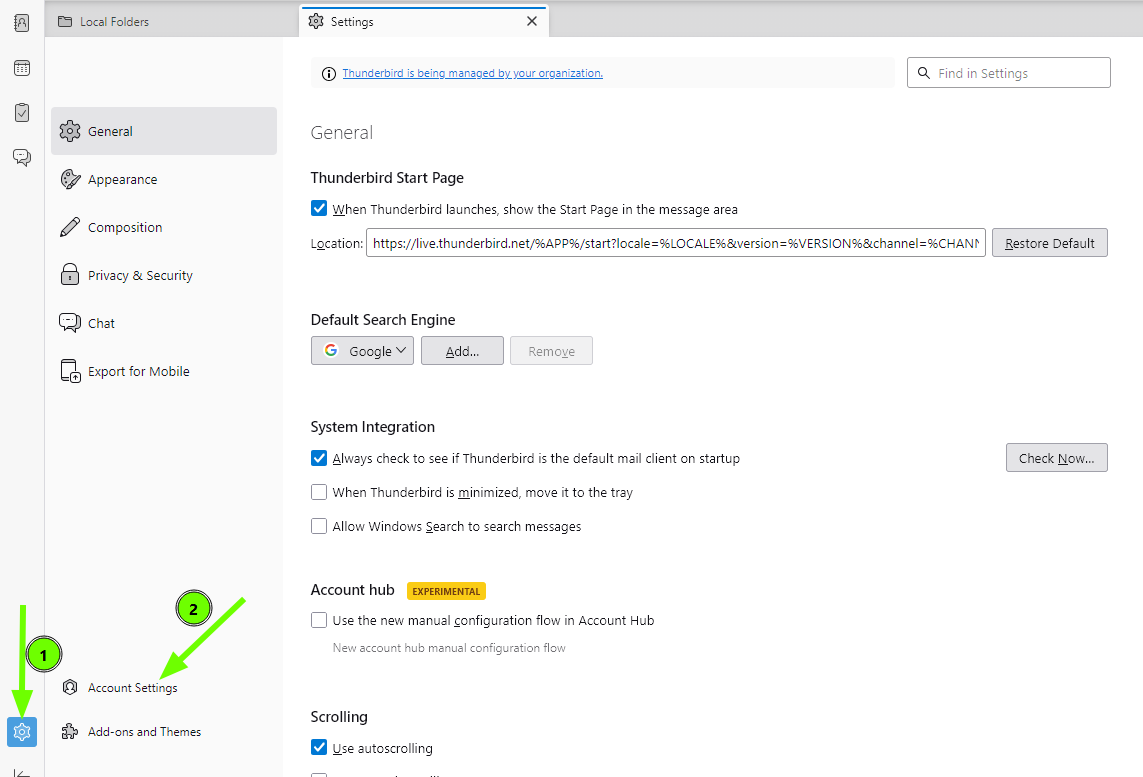
Need help? We're always here for you.