This article is valid for Private Email subscriptions purchased before June 2, 2026.
Namecheap’s Private Email has lots of features to help you manage and organize your emails. One is the ability to add custom category tabs to your inbox, so you can sort emails. This makes messages easier to find in a sea of incoming mail.
Let’s take a look at how to manage emails using the Inbox tabs (categories) feature.
What is Inbox tabs?
In the Webmail interface for Private Email, you should see the following tabs:
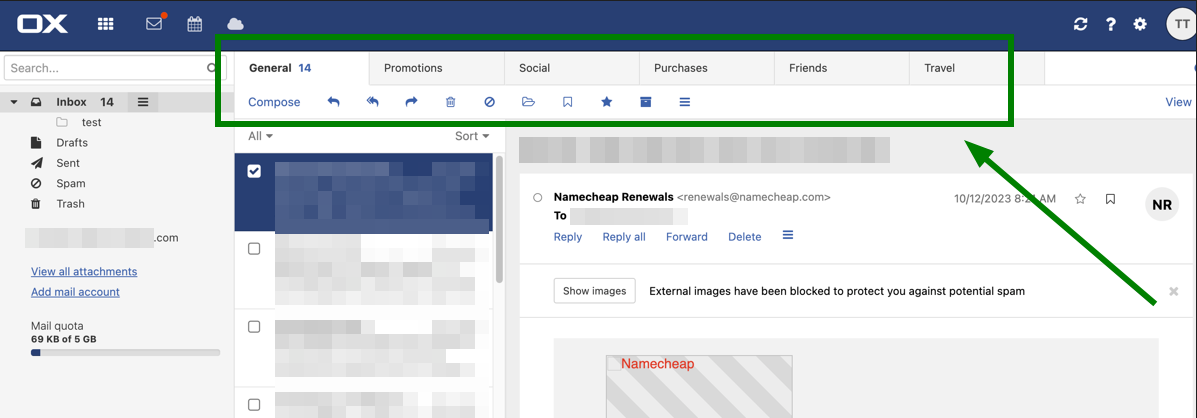
It is similar to the tabs in Gmail:

These tabs allow you to save incoming email messages in the Inbox folder separated by senders, and also provide an easy way of keeping the Inbox folder neat.
Promotions, Social and Purchases inbox tabs are default ones and cannot be changed. However, you can set additional inbox tabs to meet your needs. In this particular case, Friends and Travel tabs were created manually and can be modified if needed.
NOTE: The inbox tabs can only be used in the Inbox folder.
How does categorization work?
Emails are placed in particular tabs depending on the sender and the content of the email itself:
- General: This is your Inbox that shows all the uncategorized incoming messages (all emails that haven't been placed in folders or filtered into one of the categories);
- Promotions: Deals, offers, generally termed marketing materials, and other promotional emails;
- Social: Messages from social networks and media-sharing sites;
- Purchases: Order, shipping, receipts, invoices, bills, and statements.
The categorization for the default tabs happens automatically. As for the self-created tabs, emails should be moved there manually to train the system.
NOTE: For well-known resources like Facebook, YouTube, Amazon, etc, the categories in Private Email will work automatically as they are already pre-defined. But at the same time, you may have messages that come from domains using local TLDs for the same resources (like amazon.de). These messages will not be placed automatically into the right categories. You will need to place them manually in order to train the system (using our example, you might place emails from amazon.de into the Purchases category).
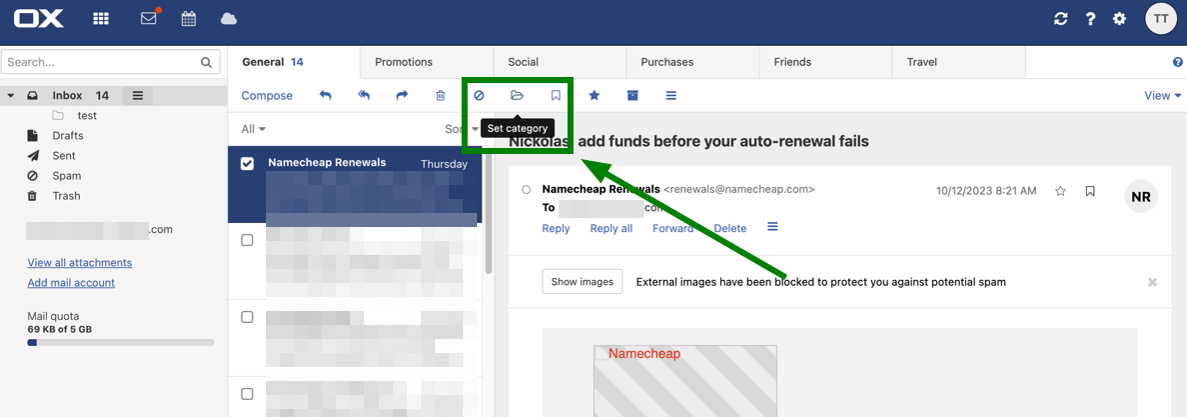
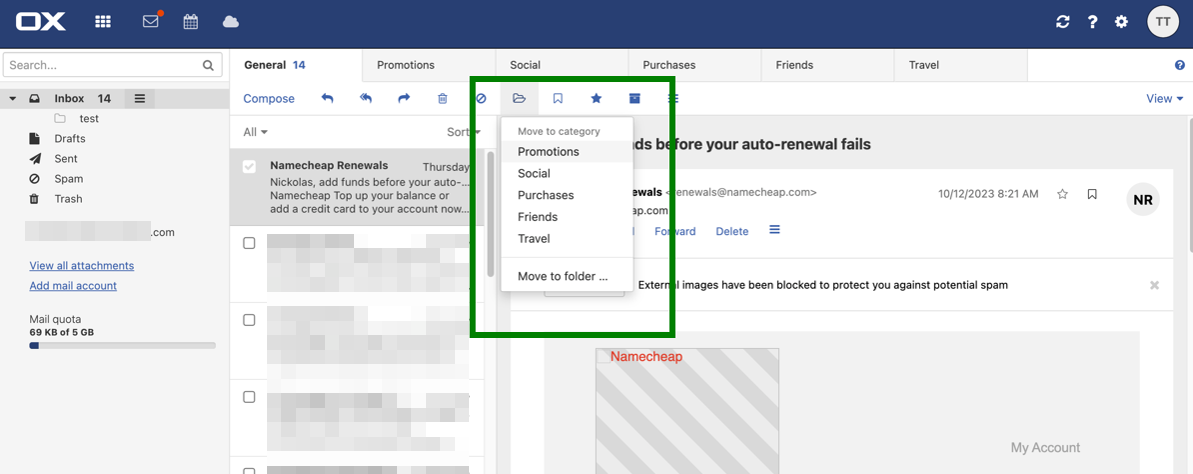
Assigning an inbox tab
Assign a category to an email by selecting the Inbox folder in the folder view. Emails that have not been assigned to an inbox category yet will be in the General tab. Simply drag and drop the email into your preferred category. The system will remember your preference, and emails from this sender will now go into the chosen category by default:

Alternatively, you can select an email >> click the Set category icon in the toolbar >> select a tab from the menu:
In both ways, the following message will appear:
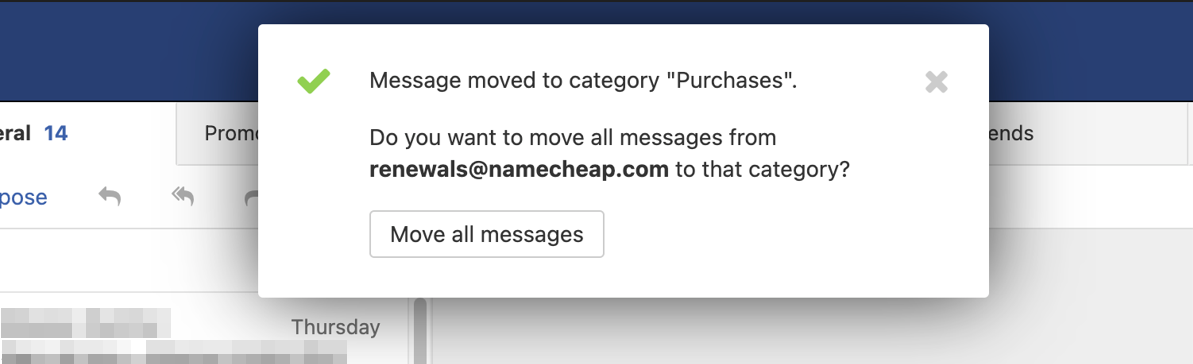
In order to move all the existing and future incoming email messages from this sender to the tab, click on Move all messages.
Enabling/disabling inbox tabs
It’s also possible to enable or disable the usage of inbox tabs.
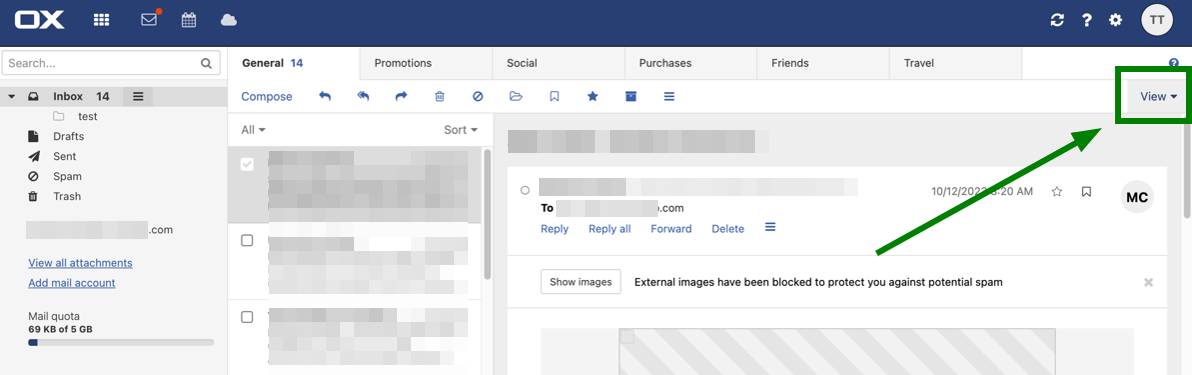
1. Click on View in the toolbar on the right:
2. Enable or disable the Use categories checkbox under Inbox:
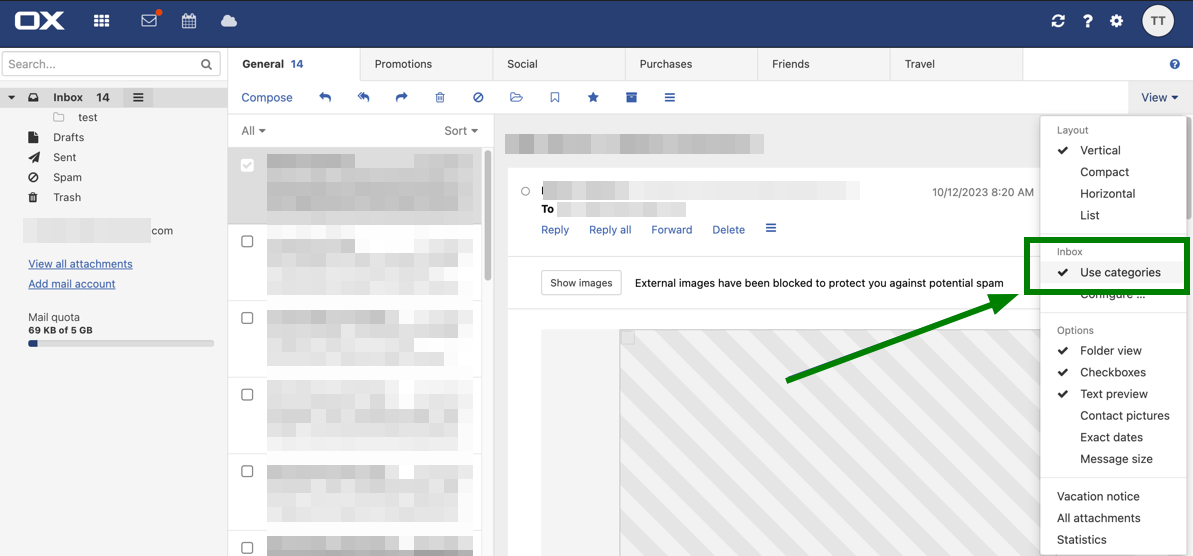
Once the tick is removed, the tabs with categories will disappear.
Editing tabs view
You can edit which tabs show, and the names of the customizable tabs as follows:
1. Click on View in the toolbar, then Configure ... under Inbox:
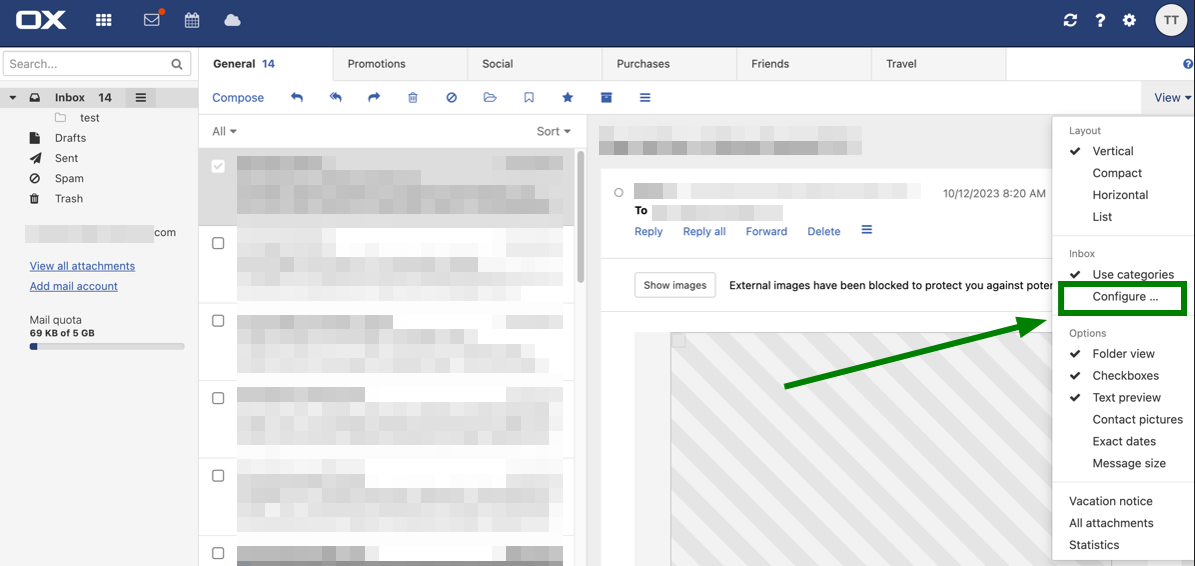
Alternatively, you can double-click or right-click on a category in the categories bar. The Configure categories window opens:
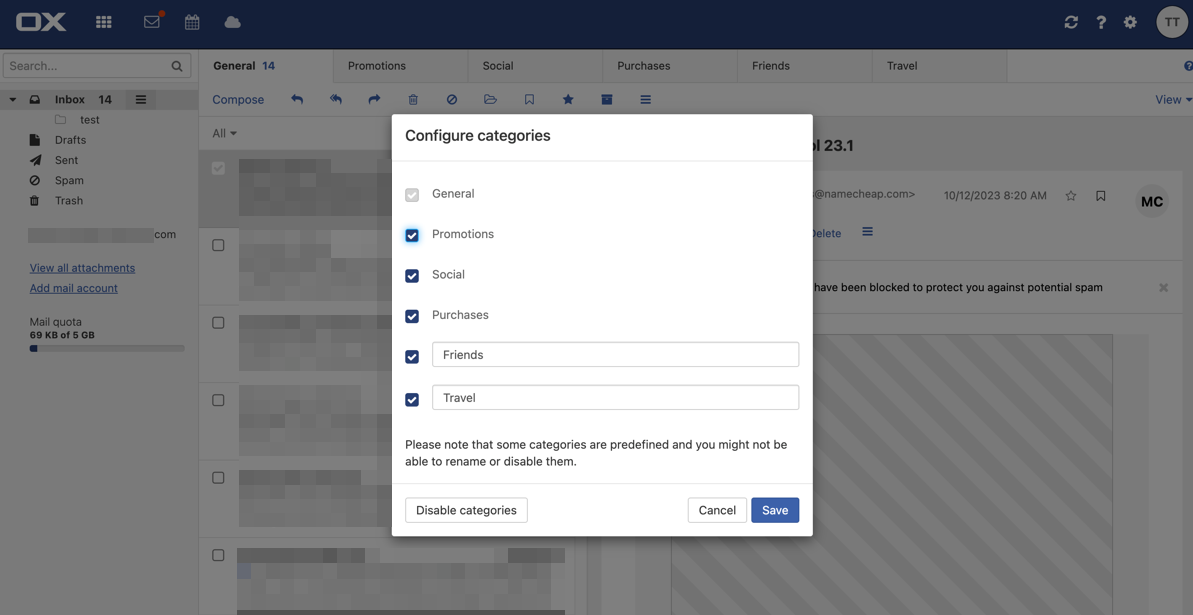
2. Enable or disable a tab using the respective checkbox. To rename a tab, edit the textbox.
3. In order to hide the categories bar, click on Disable categories.
4. Click on Save.
That’s it!