$ U.S. Dollar€ Euro£ British PoundC$ Canadian DollarsA$ Australian DollarsRs Indian Rupees¥ China Yuan RMBMore Info
EasyWP: How to manually add an admin user to the WordPress database via phpMyAdmin
Follow these steps in order to manually create an admin user in WordPress Database via phpMyAdmin:
NOTE: We recommend making a backup of your website before proceeding with any changes.
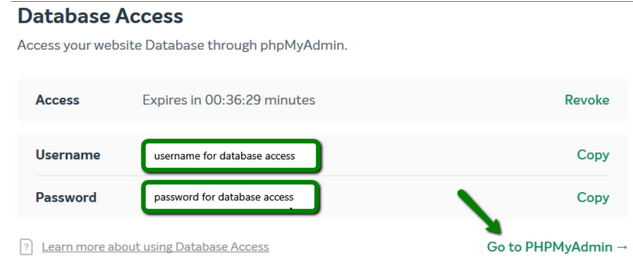
The first step is to locate the details of the database associated with your website. Go to your EasyWP Dashboard directly or use your Namecheap account > Apps section > click on the EasyWP icon > Manage option > Files and Database:
(Second option: From within your EasyWP Dashboard, select the website to which you plan to access, choose the Files & Database tab, navigate to the Database Access section and click on the Access Database button:)
NOTE: For added security, you can select an expiration for the password for database access. By setting an automatic expiration, you will ensure that your database account remains active only for the time necessary to work on your website. If you need to, you can also revoke a password at any time using the Revoke button.
Click Go to PHPMyAdmin to be redirected to the PHPMyAdmin login page:
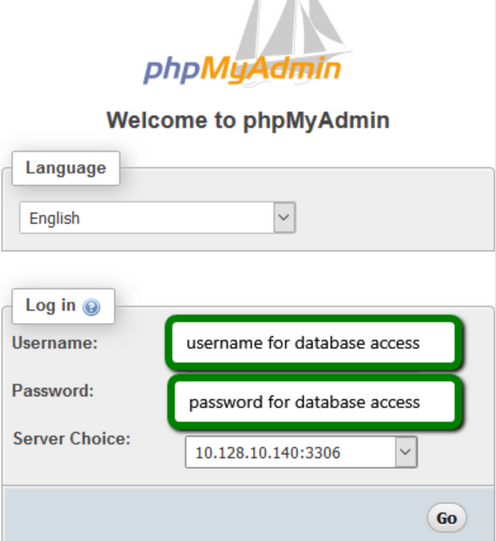
On the next PHPMyAdmin login page you can choose the desired language and enter login details generated in the Database Access section:
As soon as the login details are entered, click Go and you will be redirected to the PHPMyAdmin page.
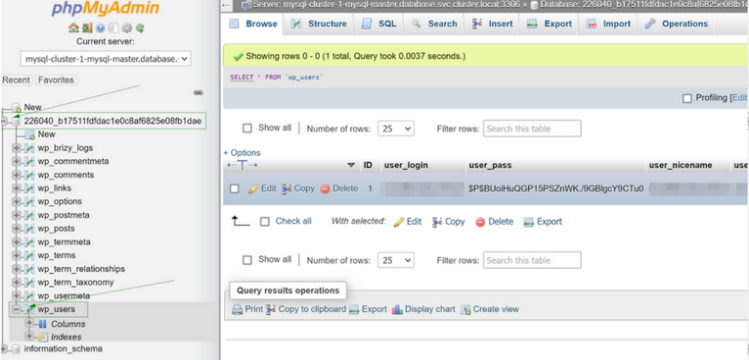
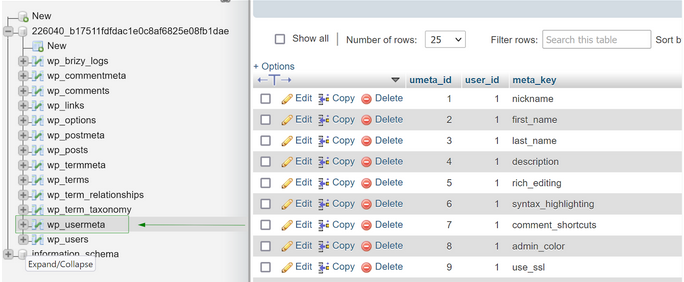
Click on the name of your database to expand the list of the tables and select wp_users table:
Go to the Insert tab:
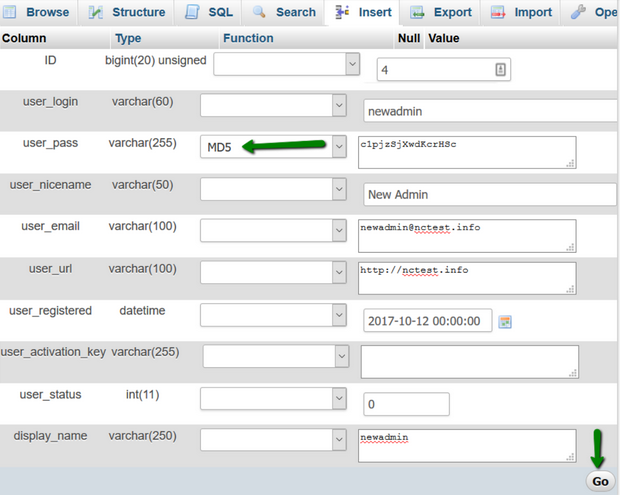
Fill in the following information:
ID - any number you wish to assign to the user; user_login - username you want to use; user_pass - password for this user to access WordPress admin dashboard. You need to select MD5 from the drop-down menu in the Function column; user_nicename - you can set a nickname here; user_email - contact email of the new user; user_url - your website URL; user_registered - date and time for when this user is registered; user_status - set this to 0; display_name - name, that will be displayed on the website.
Once all the fields are filled in, click the Go button:
Now, go to the wp_usermeta table:
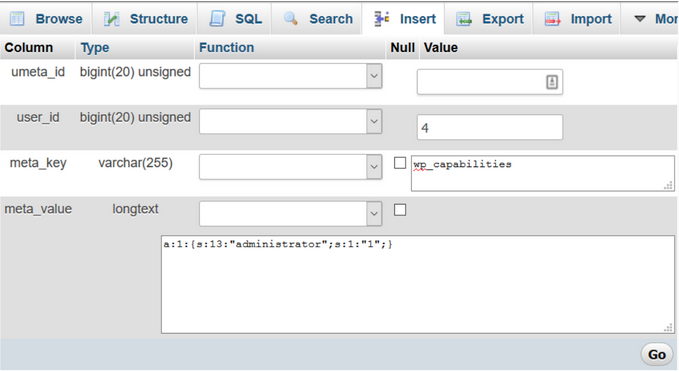
In the first form, fill in the following information:
unmeta_id - leave this blank (it will be auto-generated); user_id - ID you used for the user while adding it to the wp_users table; meta_key - set it to wp_capabilities; meta_value - put the following:
a:1:{s:13:"administrator";s:1:"1";}
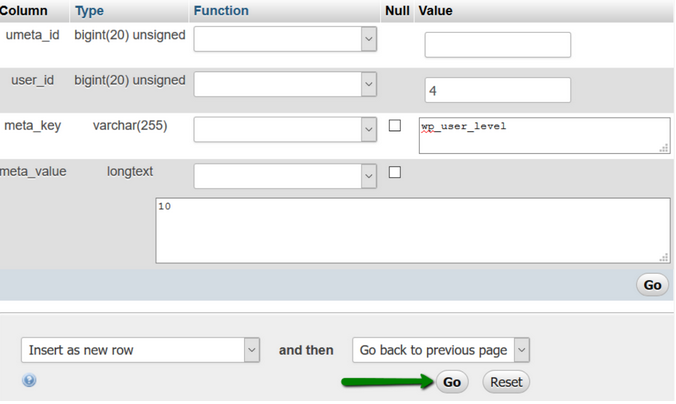
Fill the form below with the following details:
unmeta_id - leave this blank (it will be auto-generated); user_id - ID you used for the user while adding it to the wp_users table; meta_key - input following: wp_user_level; meta_value - insert following: 10.
Once all the fields are filled in, click the Go button at the bottom:
Now, you can access your WordPress admin dashboard using these new user details.