
AutoSSL is a feature available in WHM on our VPS and Dedicated server plans. It installs free SSL certificates for specific websites hosted in corresponding WHM.
With User-responsible and Basic hosting plans, you can enable AutoSSL for your websites through WHM.
Note: This option is not available on Complete plans, as it doesn't have the root access enabled, which is required to manage the AutoSSL.
If you don’t want to go through the hassle of enabling AutoSSL yourself, you can initiate a chat here, and our SSL team can assist you with the process.
Note: if you have any issues with enabling AutoSSL on a User-responsible hosting plan, an extra fee is required for our support team to check the issue.
The AutoSSL feature can be added to the "Feature list" created in WHM. The Feature list is a list of features that will be added to the user’s cPanel. If AutoSSL was not initially included, it is possible to edit a "Feature list" to add it later. Here is a helpful guide on managing Features in WHM.
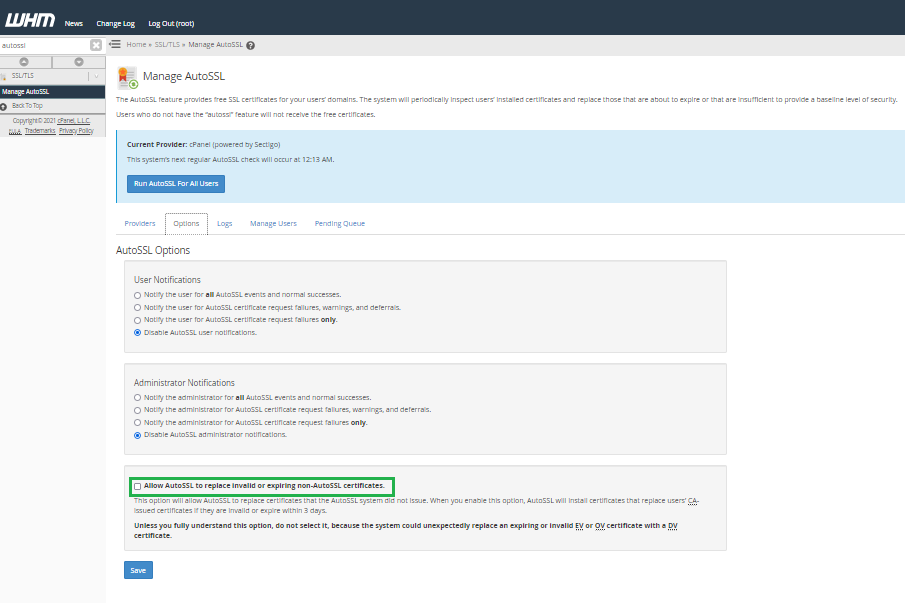
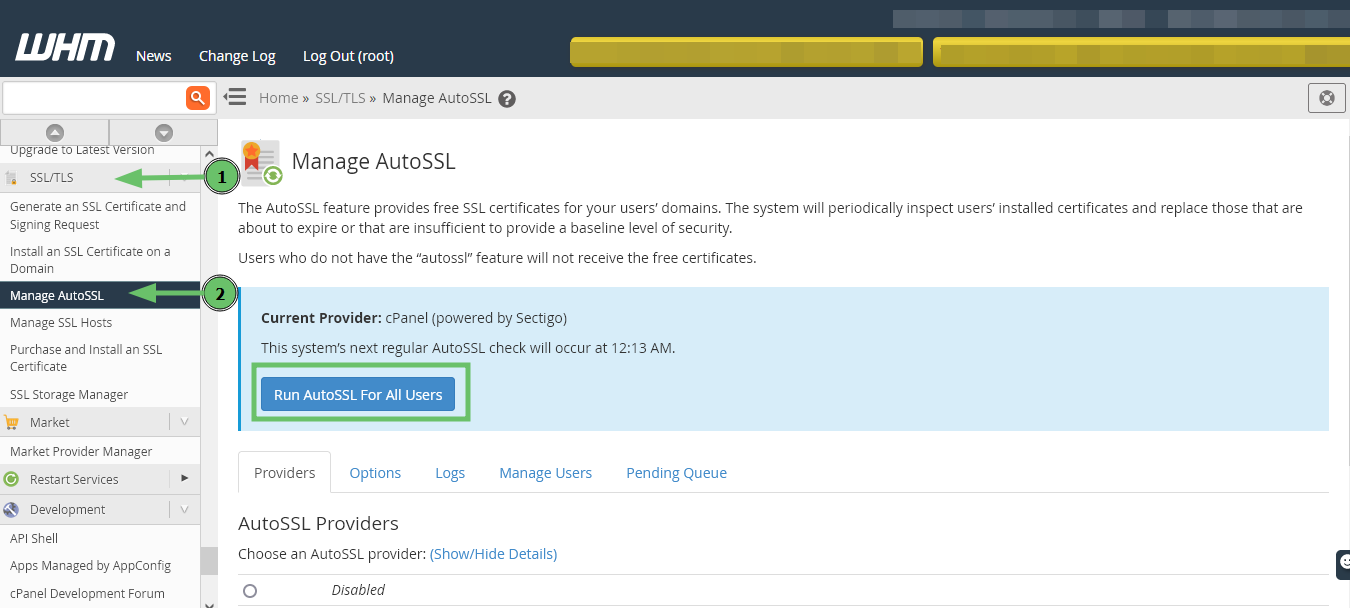
Once the AutoSSL feature is added, it can be managed on the "Manage AutoSSL" page in WHM’s SSL/TLS section.
There are several tabs on the "Manage AutoSSL" page.

Note: Since cPanel & WHM version 120, the option to use the Sectigo AutoSSL provider was disabled. All the users, who used Sectigo as their AutoSSL provider, were automatically switched to Let's Encrypt™. For more details, please refer to the official cPanel documentation.
Here you can choose your preferred SSL provider and click "Save" to use an SSL certificate from that specific provider.
Note, if you enable the "Allow AutoSSL to replace invalid or expiring non-AutoSSL certificates" option, the AutoSSL certificate will replace any expired, due to expire, or invalid non-AutoSSL certificate already set up for the selected domain or subdomain. If you would like to have some domains with AutoSSL certificate and some domains without it, please make sure this option is disabled.
To enable the AutoSSL feature for specific websites, follow the steps below:
OR
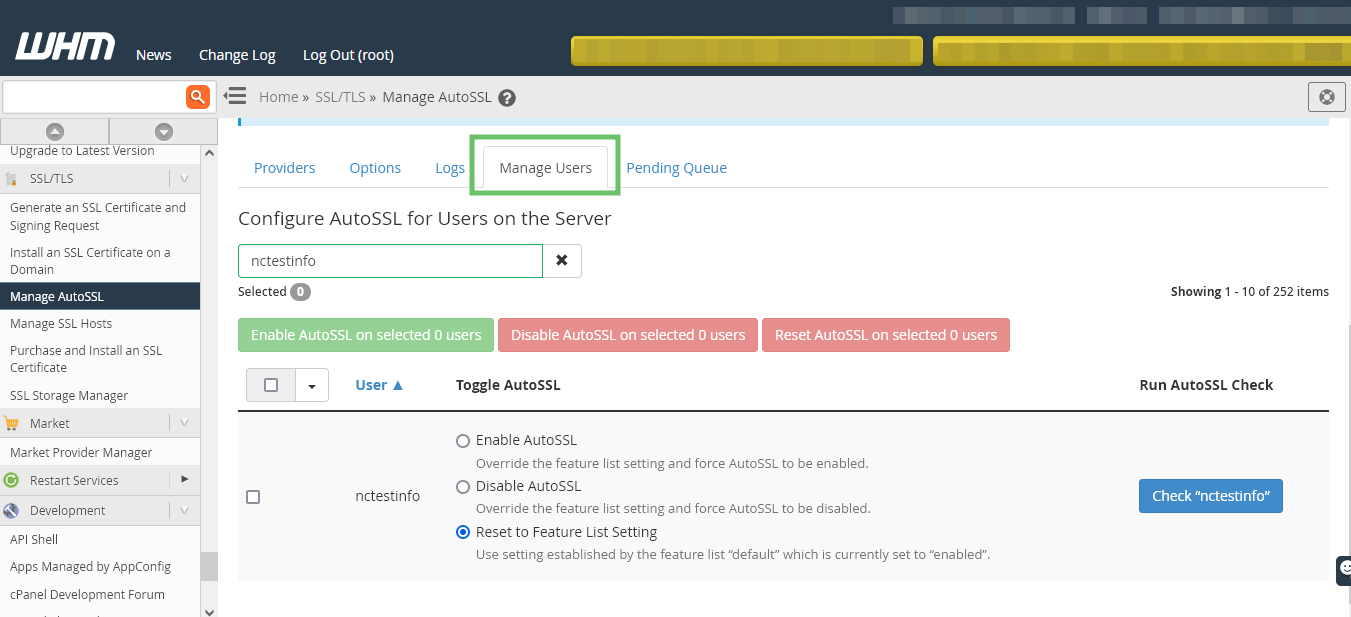
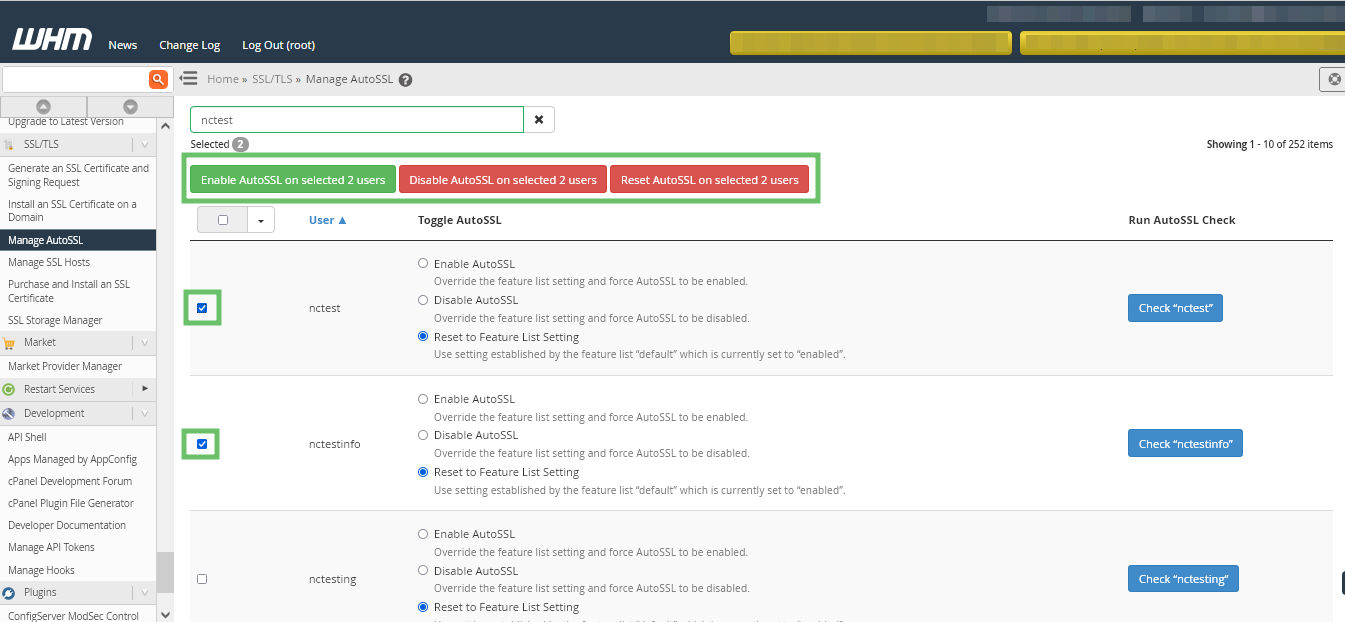
You can also enable AutoSSL for several specific users. To choose the exact users, just tick their names in the list. Then, you can use the buttons above the user list to enable, disable or reset to the default settings.
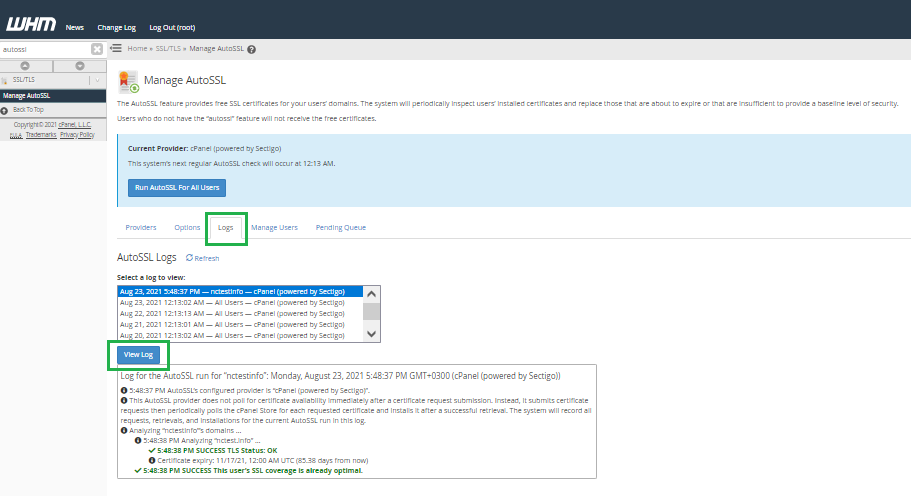
If there are issues with the AutoSSL setup, you can check the issue on the "Logs" tab by choosing the specific log and clicking "view log".
If the "Allow AutoSSL to replace invalid or expiring non-AutoSSL certificates" option is enabled in WHM, the SSL certificate will be installed in cPanel automatically.
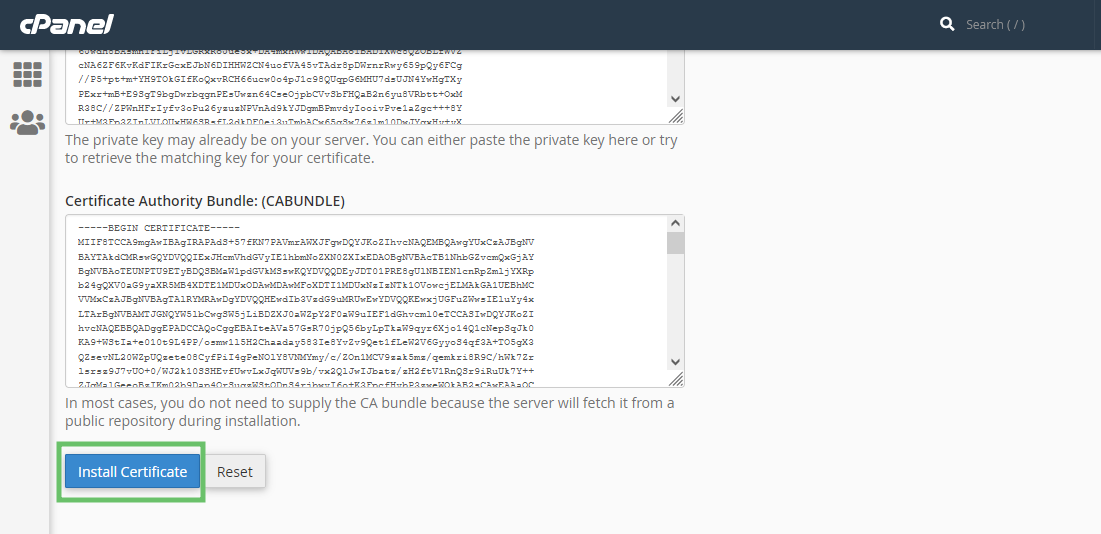
If this option is disabled, the added SSL certificate should be installed manually by following the simple steps below:

On the "Wizard" tab, you will see a list of all the domains and subdomains in cPanel along with their SSL certificates.


After this, an SSL certificate will be installed for your domain.
OR

To check the installed SSL certificates in cPanel, do the following:

Use the "Uninstall" option to remove the certificate. This will disable the certificate, but it will still be stored in cPanel.
If you ever need to enable the SSL again, you can install it via the "Installations" tab in the "SSL/TLS certificates" section by clicking the "Install" button beside the required certificate.
You can also check if the certificate is installed correctly by using this tool. Simply enter the domain or subdomain into the correspondent field and click "Check".
If you prefer using the command line to manage your server settings, AutoSSL can also be managed through SSH.
To do so, connect to your server via SSH.
Next, run this command to check the AutoSSL status:
/usr/local/cpanel/bin/autossl_check
You can check the AutoSSL status for a specific cPanel account using the " --user" parameter:
/usr/local/cpanel/bin/autossl_check --user=username
To check the SSL certificates for all domains in cPanel, run the following command:
/usr/local/cpanel/bin/autossl_check --all
Once AutoSSL is enabled and SSL installation is completed, the website will be accessible via both the secured https:// and not-secured http:// connection.
If you would like to make the website accessible via https:// only, you can set up an https:// redirect in cPanel by following this guide.
Need help? We're always here for you.