This article describes how to create and manage blocklist and acceptlist rules through the Jellyfish spam filter.
Jellyfish is a smart anti-spam filter with a spam management interface. The interface is available for Private Email and Shared Hosting users and right now it’s possible to create, edit, delete, turn on/off (by one and in bulk) blocklist & acceptlist rules and turn on/off the filtration.
The blocklist feature allows you to add individual rules for blocking specific emails, domains and subjects you don't want to receive in your inbox. As for acceptlist, think of it as an inverted blocklist. It allows you to accept some specific emails, domains and subjects in order to make sure you always receive them even if the filtration system could potentially flag such an email as spam after analyzing a number of factors.
To create a new rule, it is necessary to navigate to the
Blocklist or
Acceptlist tab and click
Create a new rule button:
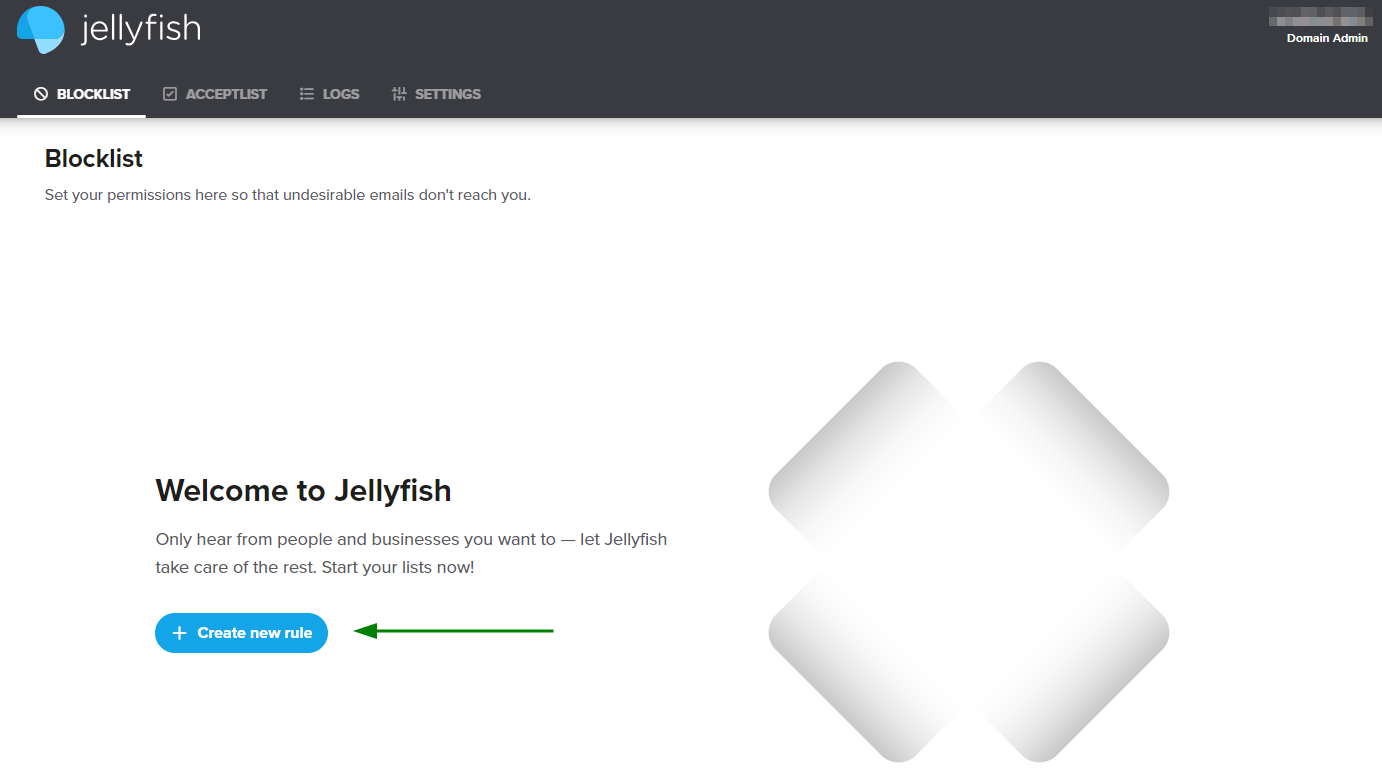
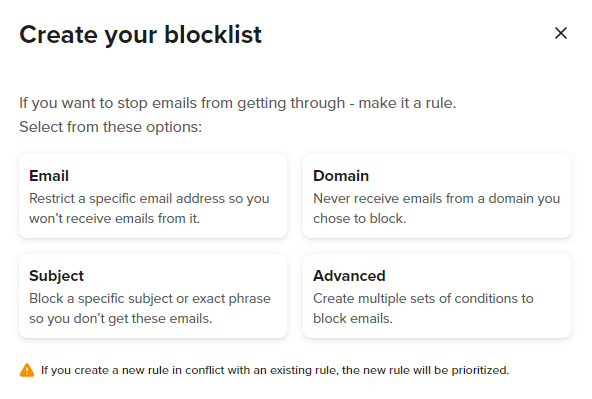
Once done, a pop-up window with the types of rules to the blocklist/acceptlist will appear. Below we will describe all these types of rules in detail.
-
Email rule: if you need to restrict (add to the blocklist) or make sure to receive (add to the acceptlist) a specific email address, select the Email option.
NOTE: If you receive “The email address is not valid. Please enter again.”, double-check that the email address you entered is correct and make sure there are no invalid symbols or special characters.
It is possible to choose whether you want to apply a blocklist/acceptlist rule to all your mailboxes or to some particular ones only. Click "Selected mailbox only" to insert the particular mailbox(es) you want the rule to apply to.

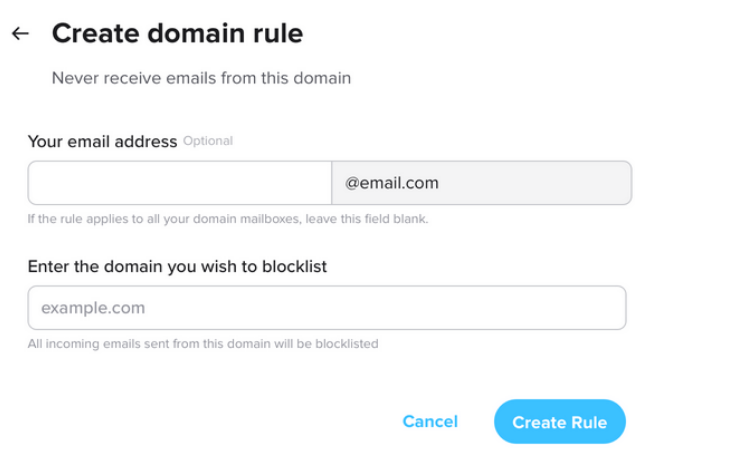
- Domain rule: if you need to block or accept a specific domain (all mailboxes existing for it) the emails are coming from, select the Domain option. If you choose this option, it means that emails from all mailboxes existing for this specific domain will be blocked/accepted.
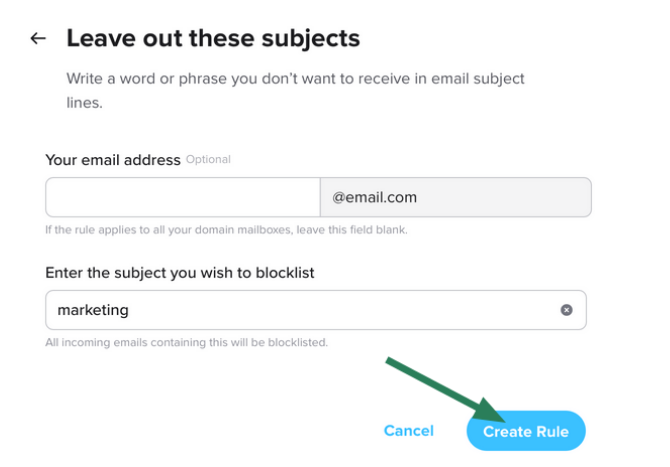
- Subject rule: If you want to block emails with certain subjects choose the Subject option.
Please note:
- If you create a new rule in conflict with an existing rule, the new rule will be prioritized. For example, you first create a blocklist rule to block all subjects containing ‘deals’. Then you create an acceptlist rule to accept all subjects containing ‘deals’. In this case, the acceptlist rule will be working (as it’s a new one here) and the blocklist one will not work.
- If you need to add two or more different subjects, domains or emails to your acceptlist/blocklist, please create several separate rules. For example, if you want to block subjects that contain such phrases as ‘Earn $’ and ‘Make money’, you will need to create two separate rules.
If you need to create a rule with multiple different types of conditions, you can do so by selecting the
Advanced option. This is helpful, for example, for combining email and subject types if you don't want to receive specific subjects from some email address and not all emails from that email address.
More information on advanced rules creation can be checked
here.
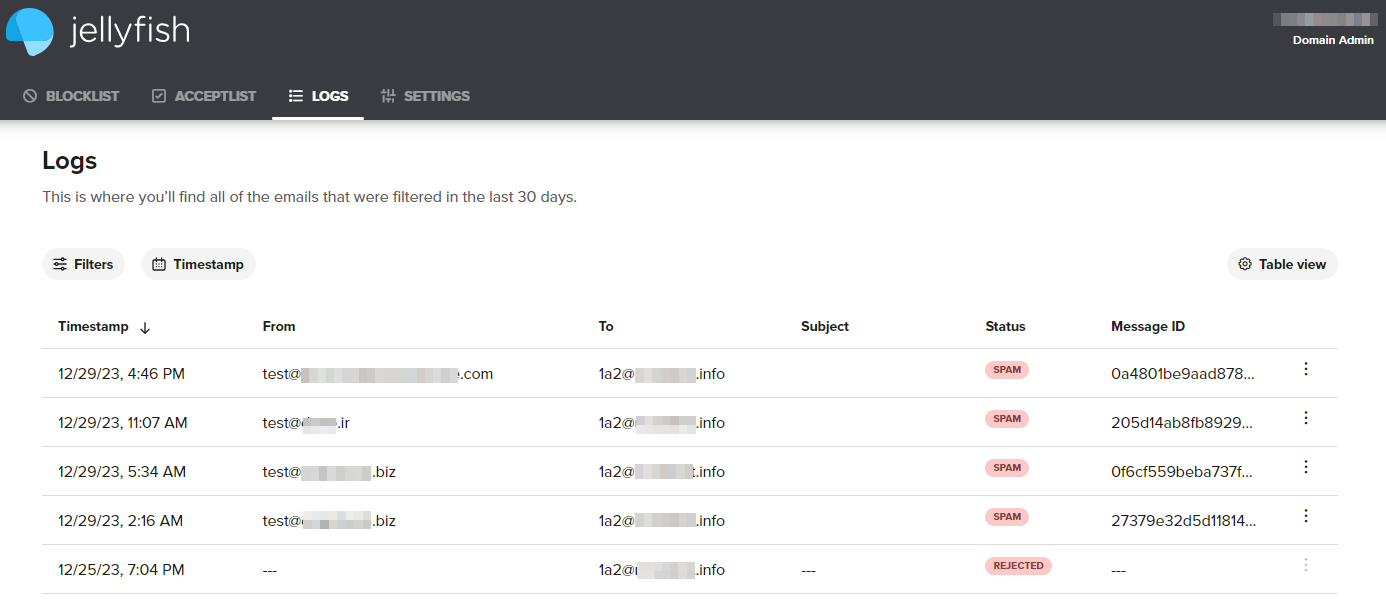
Logs option allows you to check incoming logs for your mailbox:
-
Timestamp: the date and time adapts to your local time;
-
From/To, Subject;
-
Status:
- Delayed - Email cannot be delivered right now, please wait.
- Delivered - Email isn’t spam and was successfully delivered.
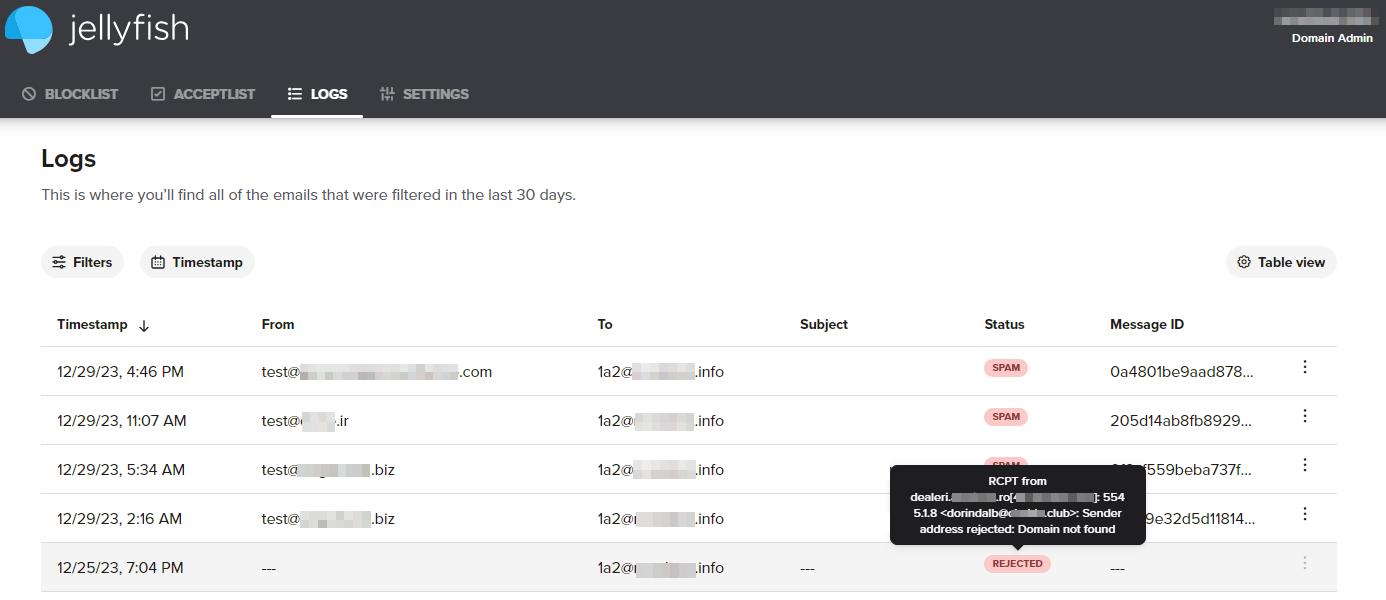
- Spam (previously named as Rejected due to high probability of spam) - Email was rejected as it’s highly likely to be spam. The reject reason is now displayed in Logs for Rejected status (upon hovering on the status):
- Rejected - Email isn’t spam, but cannot be delivered.
-
Message ID: a unique identifier that is generated by the sender's server.
Also, there are a few more options that you may find useful:
-
Filters: It's possible to filter the emails in your Inbox by From/To email address, email Subject, Status, and Message ID.
-
Timestamp filter: You can see logs no older than 30 days in the interface. By default, the Logs tab is set to display data for the past 24 hours upon opening the page. If you need to check older ones use the timestamp filter.
-
Table view: You can choose which columns are shown in the table.
-
Split view: When you click on a log record, there will be a window with full entries of the raw. It's also possible to either add the sender to the blocklist or acceptlist from there.
-
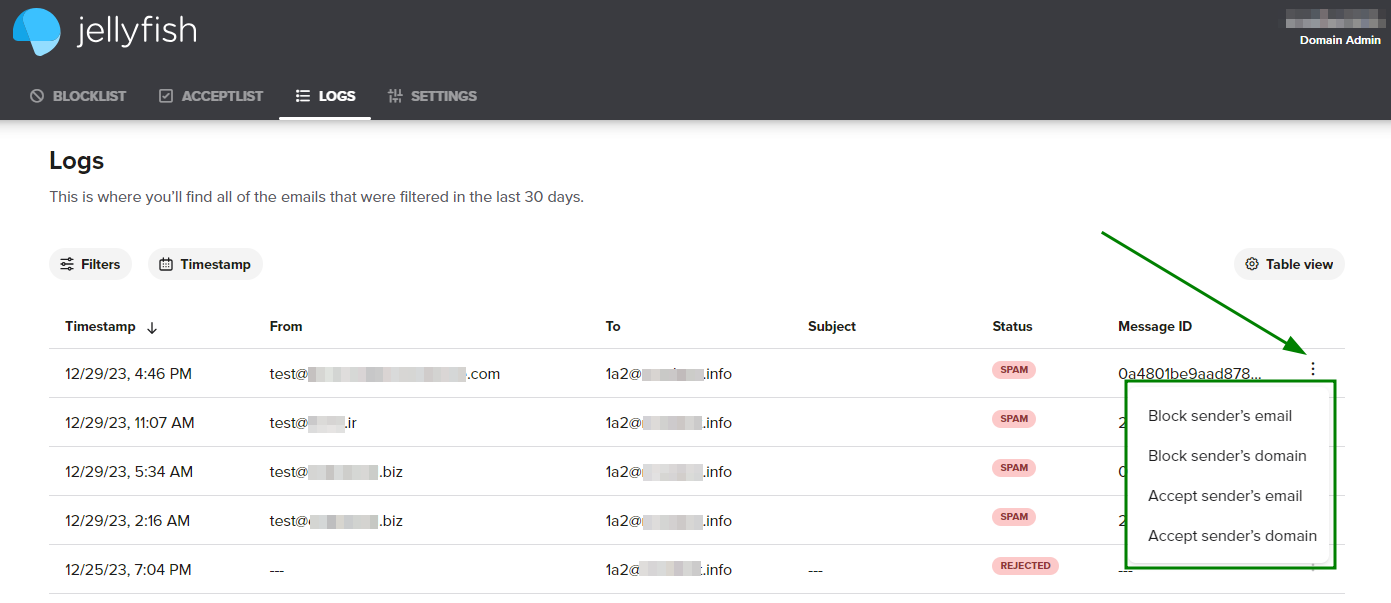
A domain rule: There is an option to block all the emails that may come from the entire sender's domain and not only a particular mailbox. To do it, click on the three dots on the left of the needed email and choose the preferable option:
This type of blocklist/acceptlist rule applies to subdomains as well, not just the domain itself. It will help to prevent spam from reaching the inbox since spammers often use different mailboxes and/or subdomains with the same domain to send unwanted emails.
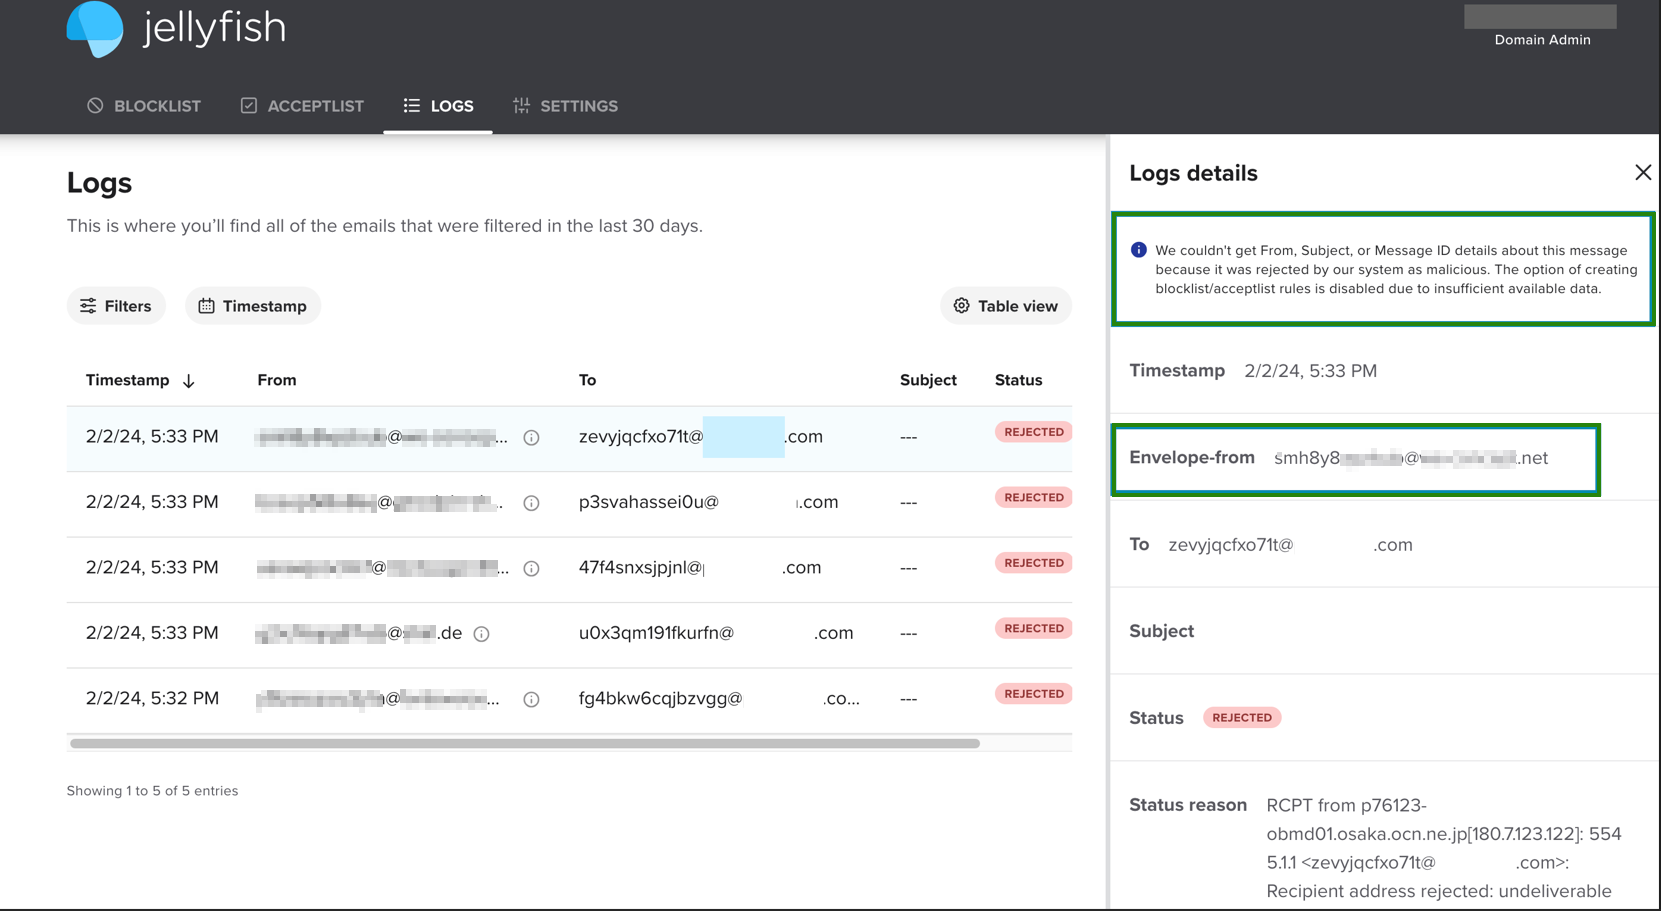
In some cases, incoming emails may be rejected before entering the Jellyfish system (e.g. if the IP address of the sender is blacklisted). In such situations, the Logs option will show only limited information about the email:
That's it!