To link your existing domain to your WordPress.com site, simply follow these steps:
1. Before configuring your Namecheap settings, you’ll first need to add your domain to your account on WordPress.com. This is called domain mapping.
2. Sign in to your Namecheap account.
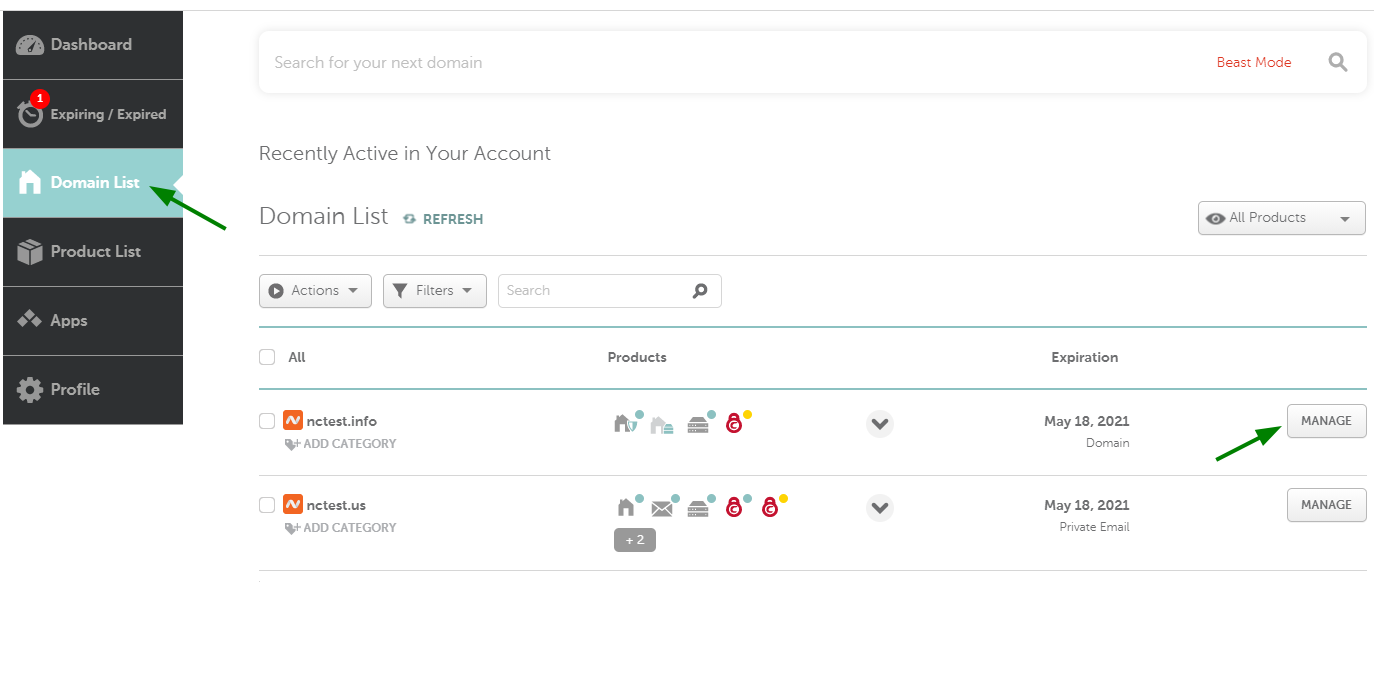
3. Select Domain List from the left sidebar, then click the Manage button next to your domain name:
4. Select the
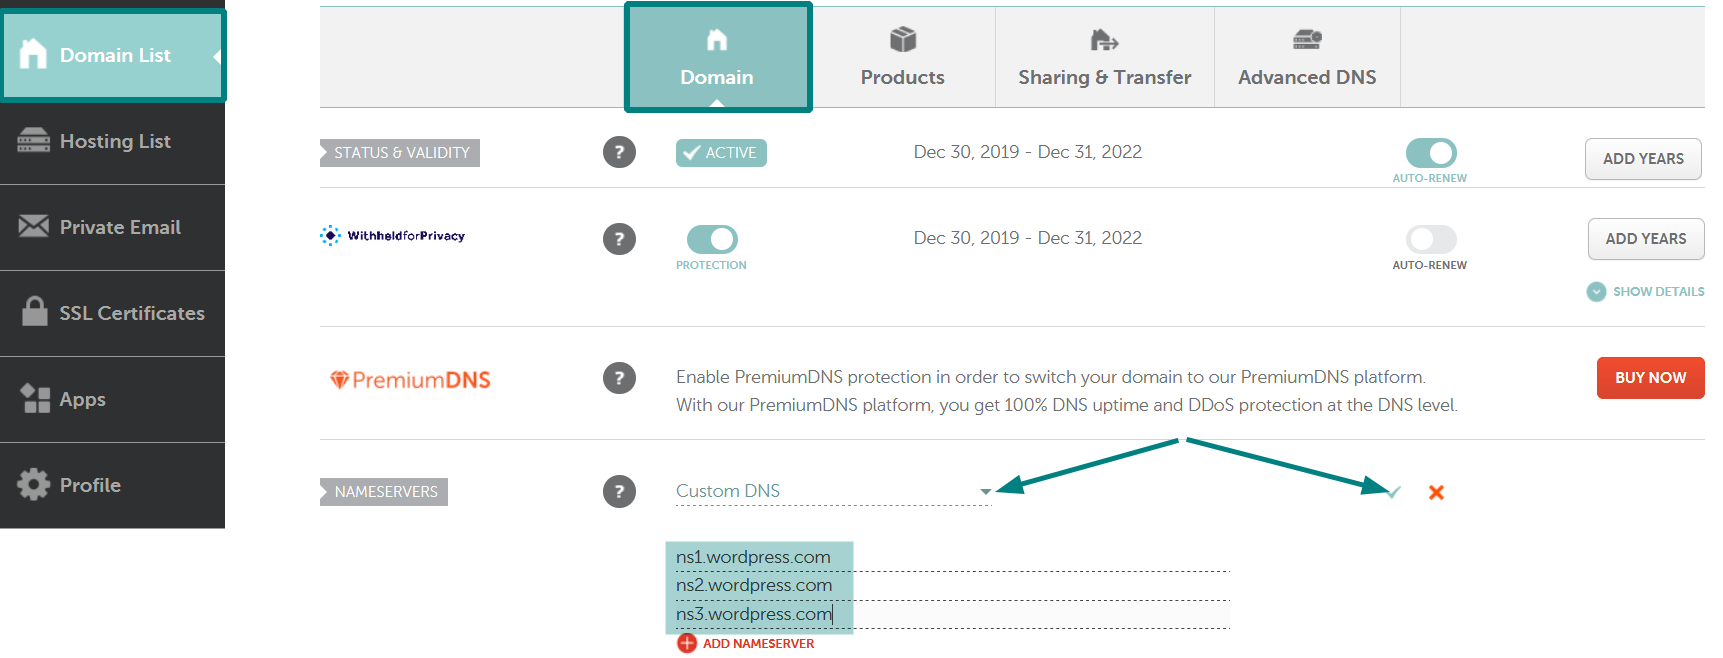
Custom DNS option from the
Nameservers drop-down menu, and enter the following nameservers:
- ns1.wordpress.com
- ns2.wordpress.com
- ns3.wordpress.com
Once done, click on the green checkmark to save your changes:

Note: it may take
24-48 hours for the Domain Name Server (DNS) changes to take effect.
If you have other services connected to your domain, such as email or subdomains, you will also need to
configure the DNS settings on the WordPress.com platform.

