|
Note: Before you begin, ensure you’re all set with the prerequisites. |
Installation steps
-
Installation check
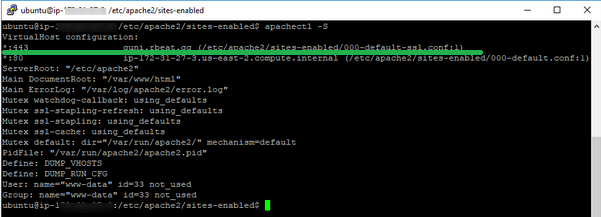
First, we will check the exact location of the current configuration file for HTTP websites. For that, run the following command:
sudo apachectl -S
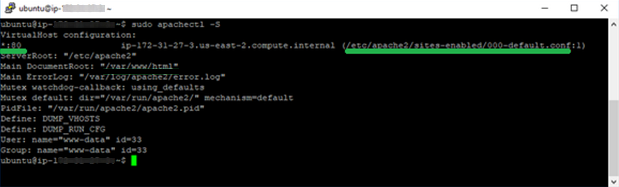
We can see the website configuration file (the one for non-secured HTTP connections via port 80) in the output. It is usually called "000-default.conf".
The default folder for such a file location is /etc/apache2/sites-enabled.
In this guide, we will show in detail how to add the settings for HTTPS port 443 into the same configuration file. However, we also recommend reviewing all possible ways to proceed - like separate configuration file creation in the /etc/apache2/sites-available or /etc/apache2/sites-enabled folder - here
in the 'Tips and troubleshootings' part of this guide.
-
Enabling SSL/TLS support on Apache
Before we proceed any further, we will need to make sure that SSL/TLS support is enabled on the webserver. For that, we will need to run the following command:
sudo a2enmod ssl
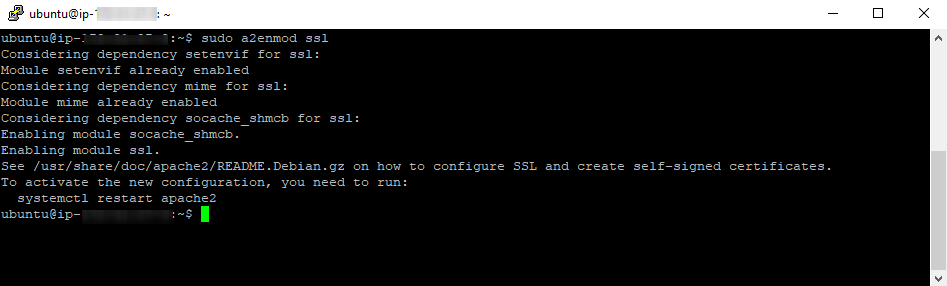
If the command responds with “Module ssl already enabled”, then the module has already been enabled
If the module was not yet enabled, the command will respond with ‘Enabling module ssl’ and will complete the module enabling.
After that, reboot the webserver so that the module can be applied to Apache. The service can be restarted by entering the following command:
sudo service apache2 restart
-
Configuring the webserver
Now, configure the website to work with the SSL certificate.
- If there were no SSLs installed on the webserver previously, check the configuration file name for the HTTP port 80 and open it in your text editor of choice (nano, vi, etc.).
The configuration file name can be checked using the command: apachectl -S
It is usually located in the /etc/apache2/sites-enabled folder.
Note: If you are following another way from these ones, then keep in mind that your file name will be different, and you need to open your configuration file instead of the default one.

Then open the configuration file and paste the following code at the very bottom of it:
<VirtualHost *:443>
ServerName (DOMAIN NAME OF THE WEBSITE)
DocumentRoot (ROOT FOLDER OF THE WEBSITE)


SSLEngine on
SSLCertificateFile (Certificate PATH)
SSLCertificateKeyFile (Private key PATH)
SSLCertificateChainFile (CA Bundle PATH)
</VirtualHost>
Make sure to replace the command values in brackets with the valid information for your domain name or website.
In our case, it is as follows:
<VirtualHost *:443>
ServerName example.com
DocumentRoot /var/www/html


SSLEngine on
SSLCertificateFile /etc/ssl/1.crt
SSLCertificateKeyFile /etc/ssl/1.key
SSLCertificateChainFile /etc/ssl/1.ca-bundle
</VirtualHost>
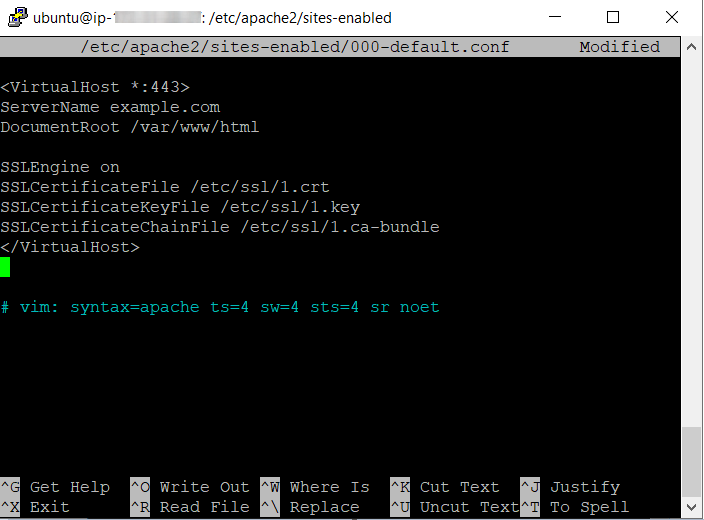
After that, save the file.
- If the SSL certificate was already installed on the webserver, check the configuration file name for port 443 and open it in the text editor.
The configuration file name can be checked using the command: apachectl -S

Then, make sure to replace the paths of the certificate files in the following sections:
SSLCertificateFile
SSLCertificateKeyFile
SSLCertificateChainFile
Enter the full paths to the SSL certificate, Private key and CA bundle files respectively uploaded or located on the server. After that, make sure to save the configuration file.
-
Checking the configuration file and restarting the webserver
Now, make sure to check the file syntax by running this command:
apachectl -t
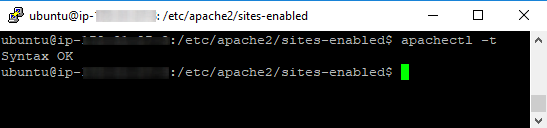
If the command responds with “Syntax OK”, you can reboot the webserver. To do that, run the command:
sudo service apache2 restart
The configuration file should be listed in the Apache configuration files list (it can be checked by running apachectl -S once again):
Done! The website is now secured. The installation can be checked here.
There are no further obligatory actions for securing your domain name, however, you might wish to set up a HTTPS redirect for the website to be switched to a secured version automatically without entering https:// manually into the browser address bar. For a more detailed explanation about setting up the redirect, check this page.
If there are issues with the installation, make sure to double-check this guide step-by-step to avoid mistakes. You can also check the next part of this guide as well.
Tips and troubleshooters
If you face any SSL-related issues with your Apache-based website, here is how to troubleshoot the most known errors that might occur during the restart:
Here are some more useful tips about the process:
- If you face a ‘permission denied’ error when running a command, try adding the ‘sudo’ parameter before the command and run it once again.
For instance, if nano ssl.conf results in Permission denied, you can try running sudo nano ssl.conf instead.
Adding sudo will grant you ‘superuser’ permissions and the ability to perform some actions that require root user access without real root access.
Please keep in mind that you may need to enter a password for the sudo user during this operation. Its symbols might not be shown when entering (for security reasons), however, the password will be accepted if entered properly. This password may have been given to you by your server admin or hosting provider support team, so if you don’t know the password, we suggest contacting them for further assistance.
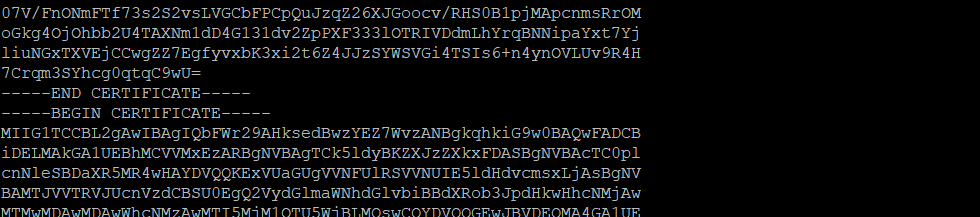
- If you see that the SSL has been installed without the CA bundle, it is possible to add the CA bundle without any significant changes to the configuration settings.
In this case, please find the SSL configuration file on your server by following the steps in the guide for apache2 or httpd. Locate the path to the SSLCertificateFile in the configuration file, and open the file via that path for editing. You will see one block of code there (which is the SSL itself). You can download the CA bundle file from your Namecheap account (it is downloaded in the same archive with the SSL certificate) or from this page and copy the whole .ca-bundle file contents to the opened SSLCertificateFile.
The new CA bundle codes should be entered from the new line after the SSL code which is already present there, without adding any new lines between them, like this:
- As for
apache2, there are several ways to manage the configuration settings for the 443 HTTPS port.
It is possible to add the HTTPS settings block to the same configuration file that determines the 80 HTTP port connections (usually it is called 000-default.conf). This method was outlined in the guide previously. The pros of this method are that all the settings for the website are managed in the same file and can be located and modified quickly. The cons are that the SSL files could get lost among other codes in the big configuration file, and could be difficult to locate for modifications or removal.
An alternative method is to create a separate configuration file within the same folder as the default file for HTTP connections. If the folder is /etc/apache2/sites-enabled, no further special actions should be needed to accept and use the configuration file. Just follow the steps from the guide regarding adding a block of code, syntax checks, and Apache service restart.
And if the new file is created within /etc/apache2/sites-available folder, you will need to to run the following command after the file is created and the necessary code is saved in it:
sudo a2ensite your_ssl_config_name
After that, please proceed with the syntax check and the Apache service restart to finalize the installation process.
Back to the main guide > >
