Every web hosting Control Panel needs to establish a strong security environment for secure operation. In this article, we will talk about obtaining and installing a trusted SSL certificate in a SiteWorx account.
For the SSL installation, there are three essential things needed:
- Private key
- SSL Certificate
- CA Bundle file
The Private key (file with the ‘.key’ extension) must be always kept in a safe place – the best practice is generating it at the hosting server directly so that you don’t transmit it over the Internet and risking its exposure.
The
SSL Certificate (‘your_domain.crt’) and the
CA Bundle (‘your_domain.ca-bundle’) files are provided by the trusted Certification Authorities like Sectigo (also known by its former brand Comodo), these files
can be downloaded in your Namecheap account.
To obtain the SSL and the CA Bundle, you need to submit a specific Certificate Signing Request (CSR) code to your SSL vendor and then complete a certain validation procedure.
Note: If you already have the Private Key, SSL Certificate, and the CA bundle provided from a third-party vendor, you will just need to upload and install them one-by-one at the SSL Files page. The "Certificate Signing Request (CSR)" option can be ignored, CSR is only used for SSL activation and it is not needed for SSL installation at the server.
Note: The CSR code is always generated on the base of an existing Private Key.
We will go through each step one-by-one:
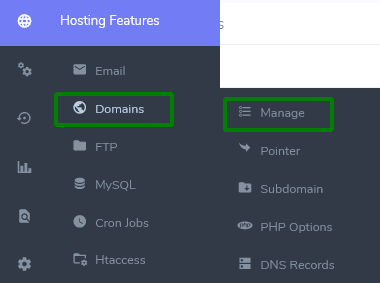
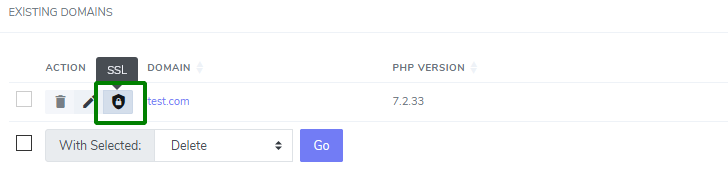
1. Login to your SiteWorx account and navigate to the Hosting Features >> Domains >> SSL.
Old version:
Hosting Features >> Domains >> Manage in the New version:
On the next page, choose the SSL icon.
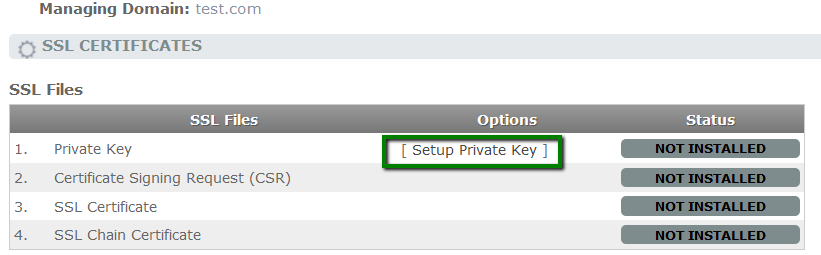
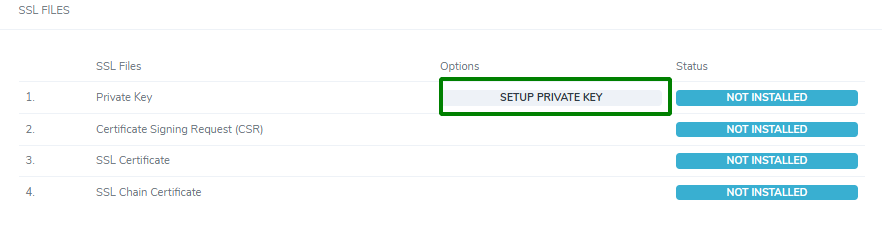
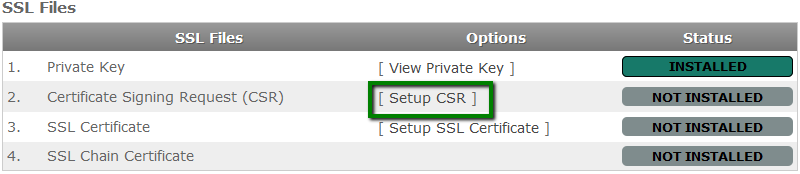
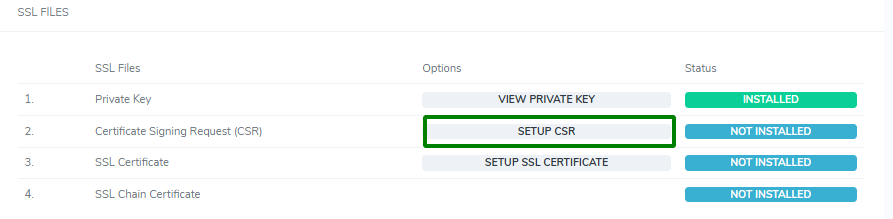
2. You'll be taken to the SSL Files page where you can click Setup Private Key to initiate the Private key code generation.
Old version:
New version:
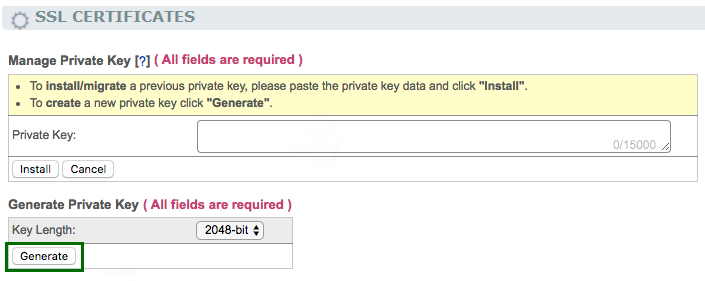
3. Click Generate in the Generate Private Key section:
Old version:
New version:
Note: The default set value is 2048-bit - this is the modern standard for key length which meets all modern security requirements. If you wish, you can select higher length, but note that using bigger keys, mathematically, increases server resource consumption (although hardly noticeably). Considering that all the presented options are secure enough, having >2048-bit keys may be seen as an excessive security measure.
4. You will be redirected to the SSL Files page. From here, click Setup CSR:
Old version:
New version:
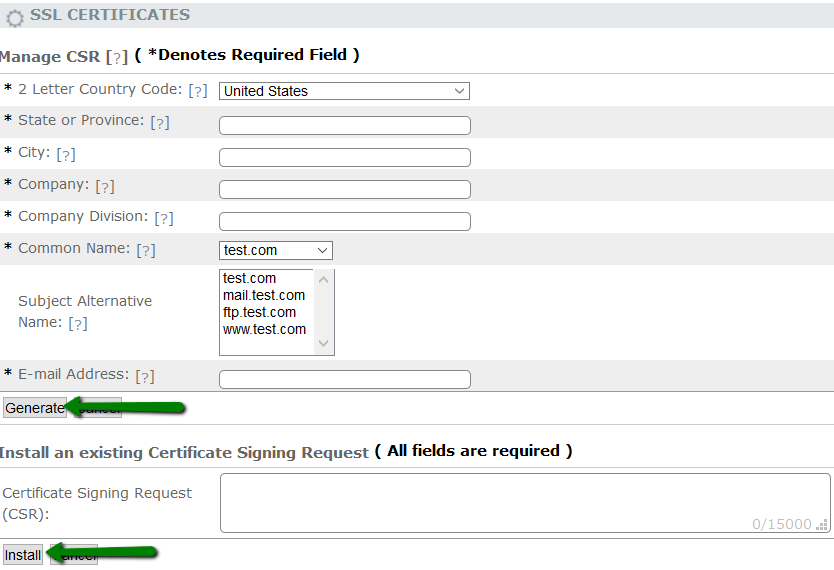
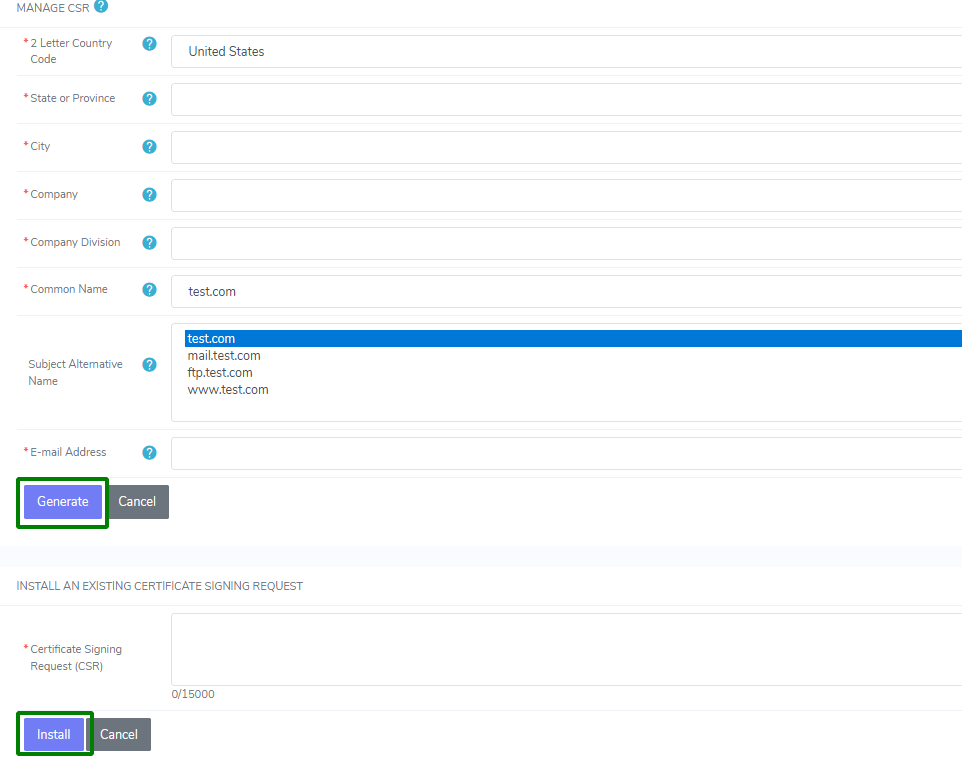
5. You will get the option to
generate your own CSR (Certificate Signing Request) by filling out the required fields.
- 2 Letter Country Code - the two-letter code of the country where the company or the certificate applicant is located (e.g. US).
- State or Province - the state, county or region the company or applicant is located in (e.g. California). This parameter should not be abbreviated.
- City - the city where the company or applicant is located (e.g. Los Angeles).
- Company - the official name of the organization that applies for the certificate (e.g. Namecheap Inc.). For Domain Validation SSLs, the information in this field is not critical (you can put NA there) and the details will not be listed on the issued certificate, however it should be filled in.
For Organization Validation and Extended Validation certificates, Certificate Authorities will be verifying the submitted organization. - Company Division - the name of the department or division within the organization (e.g. IT).
- Common name - the primary domain of the certificate, the fully qualified domain name for which the SSL will be issued (e.g. example.com). If you have a wildcard SSL certificate, the domain must have the asterisk in front — it indicates the subdomain level to secure (e.g. *.example.com).
- Subject Alternative Name - additional domain names that should be included into the certificate. This value will be ignored when activating a single-domain or wildcard SSL, but can be included in case of a multi-domain SSL.
- E-mail Address - an email address of the company or the applicant. This field is optional.
Old version:
New version:
After generating, click View CSR and copy the code with -----BEGIN CERTIFICATE REQUEST----- and ------END CERTIFICATE REQUEST----- tags included.
Next, go and
activate your SSL certificate. You’ll be then prompted to
complete the DCV process
before you receive your trusted certificate. The issued
certificate can be downloaded
right inside your Namecheap account. Now, having your SSL certificate (.crt), CA Chain (.ca-bundle) and Private key files, you can proceed with the SSL installation as described below.
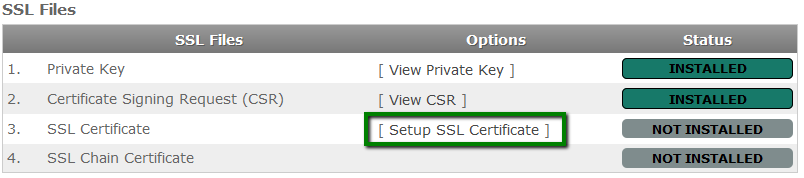
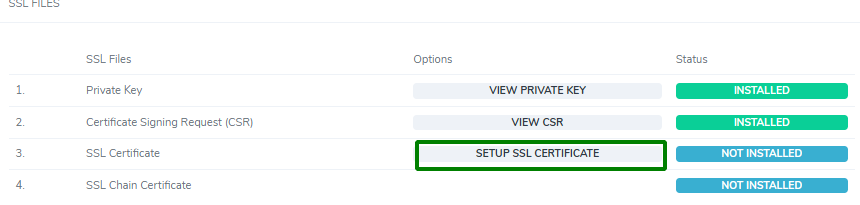
6. The next step will be to install the files. Private Key and CSR are stored in your SiteWorx panel. To upload your certificate, use the
Setup SSL Certificate option.
Old version:
New version:
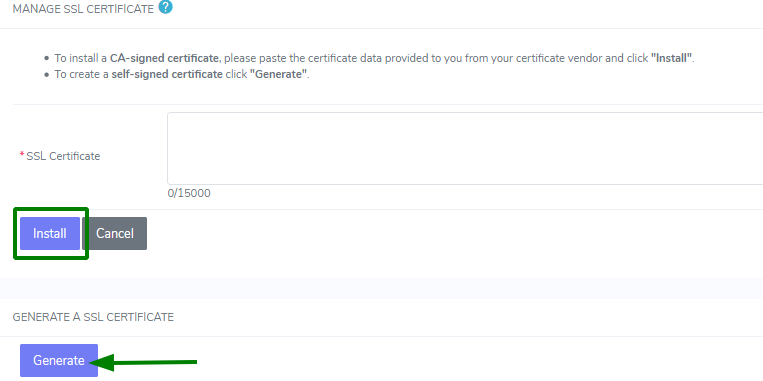
 7. Copy and paste your SSL certificate (text code from the .crt file) into the SSL Certificate field and click Install.
Old version:
New version:
There will be a Certificate installed successfully massage on your screen.
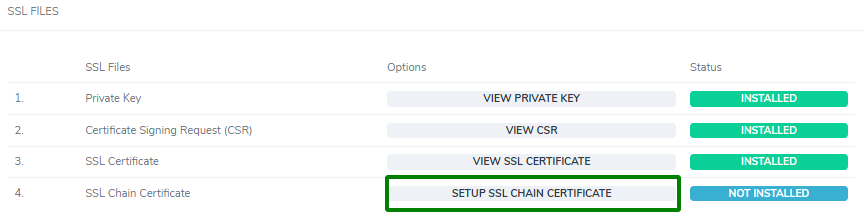
8. The final step in the SSL certificate installation is to setup SSL Chain Certificate to avoid security warnings.
Old version:
New version:
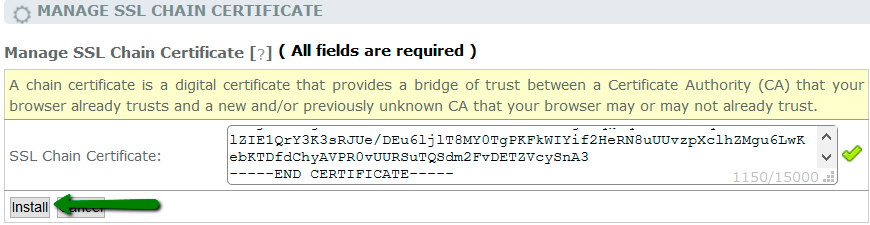
9. Paste the SSL Chain Certificate (it is a code from the file with .ca-bundle extension, also called CA Bundle) into the field and click Install.
Old version:
New version:
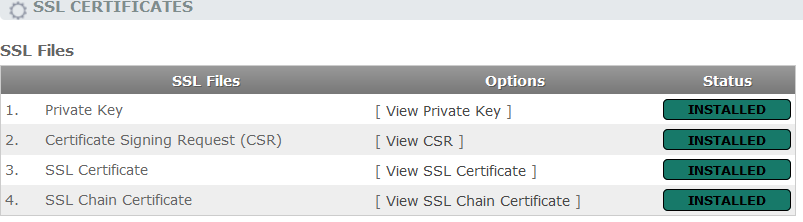
10. After all the required steps are done and all SSL files are installed, your SSL certificate will be activated for your domain.
Old version:
New version:
Please allow about 20-30 minutes for the changes to be updated, you can then check your SSL installation via
this online tool.
That’s it!