This article is valid for Private Email subscriptions purchased before June 2, 2026.
ActiveSync (Exchange) is a protocol that allows to synchronize emails, contacts and calendar appointments from a server to mobile devices. This article will show how to configure ActiveSync (Exchange) account on your Android device. We will use a test email account tutorials@nctest.info to show you how to configure synchronization.
NOTE: before setting up email account as ActiveSync (Exchange), make sure you already have required
DNS records and mailbox created.
NOTE1: If you've set up a Two Factor Authentication (2FA) for your mailbox and wish to use Exchange (ActiveSync) connection, you will need to set up an Application Specific Password.
This guide should be useful.
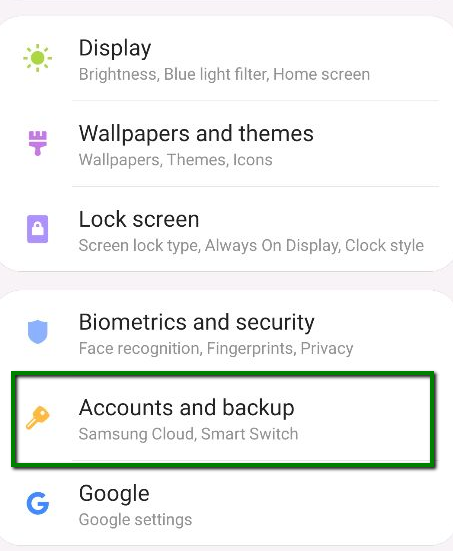
1. Open your Android device Settings and tap Accounts and Backup menu (depending on the phone, this menu can be called Accounts or Cloud and Accounts):
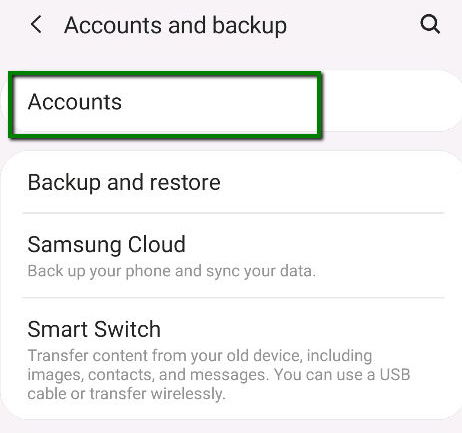
2. Choose the Accounts tab:
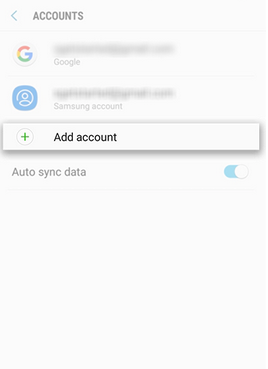
3.Scroll down the screen and tap the Add Account option:
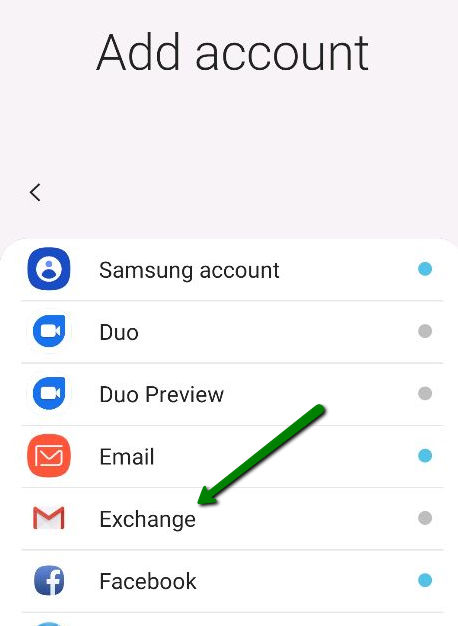
4.On the next screen choose the Exchange option:
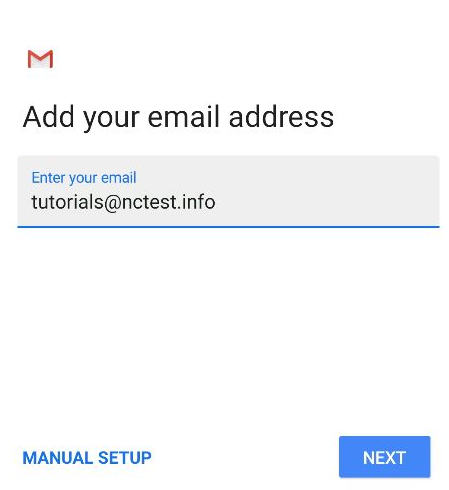
5. The next screen will prompt you to enter your email address. Type your full Private Email address (tutorials@nctest.info in our example):
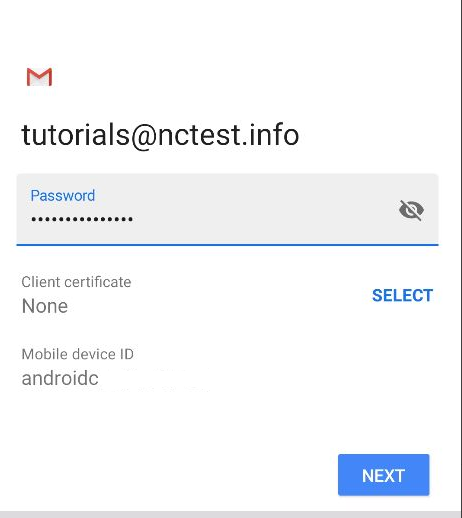
6.Once ready, tap Next to proceed to the next step. You will need to indicate a valid password for the mailbox:
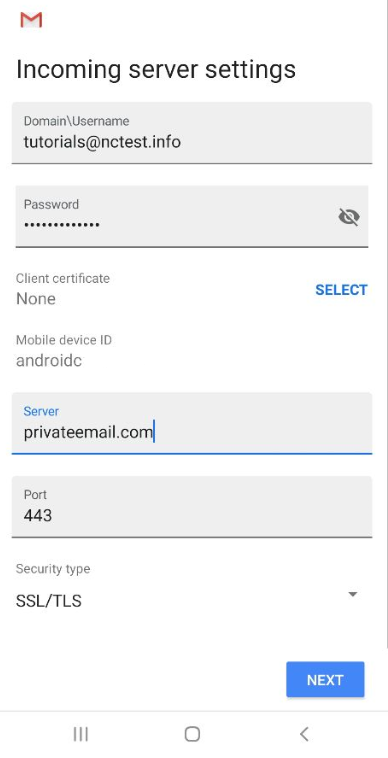
7.When the password is indicated, tap Next. Here you will need to fill in the correct Exchange server settings.
Make sure to use the following settings for your account:
Domain/Username: your full email address
Password: your password for the mailbox
Server: privateemail.com
Port: 443
Security Type: SSL/TLS
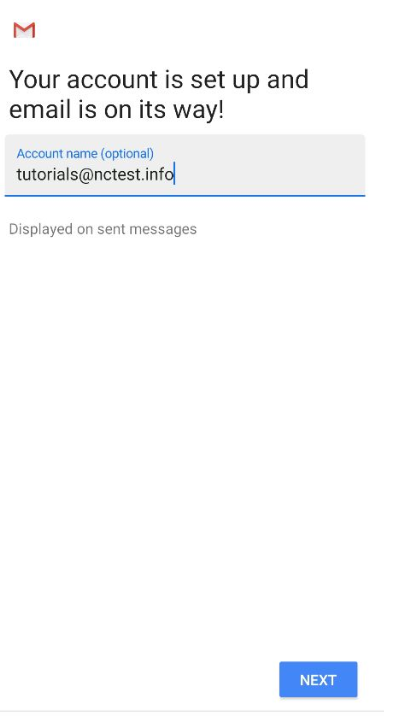
8.When all settings are indicated correctly, fill in the Name for the newly added email account in the email application and tap Next to finish the setup:
That’s it!
If you have any additional questions, feel to contact our
Support Team.