If you would like to link your domain that is hosted with Namecheap to your Zoho Mail – this article is just for you!
Zoho Mail Suite provides enterprise Email Hosting features, which suit the requirements of organizations of different types and sizes. The entire process is simple, and you can get a custom domain-based email address for all the members of the organization with no downtime.
To set up Zoho Mail:
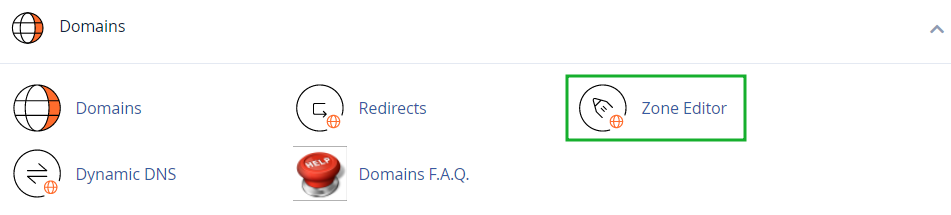
1. Log in to your cPanel account and navigate to the Zone Editor menu:
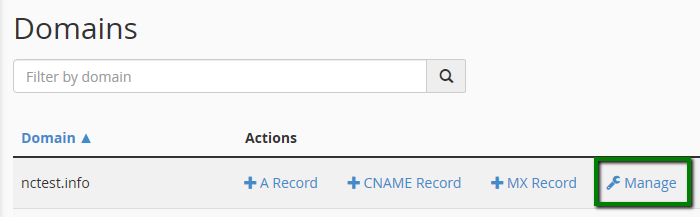
Once there, click on the Manage button next to the domain you want to set up Zoho Mail for:
Zoho Mail uses CNAME and a TXT record for domain validation.
Depending on the domain validation method, please follow the steps below:
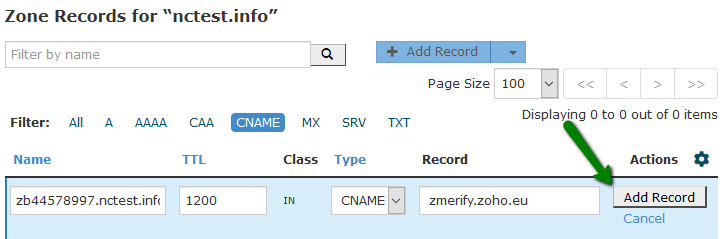
Click on Add Record >> the CNAME type and paste the code zb******** generated in the Zoho Control Panel into the Name field. In the Record field, enter the value provided by Zoho, e.g., zmverify.zoho.eu, and add the record:
Press
Add Record >> the
TXT type and paste the generated TXT value from the Zoho Control Panel in the
Value field.
You can use the bare domain name used in the
Name field:

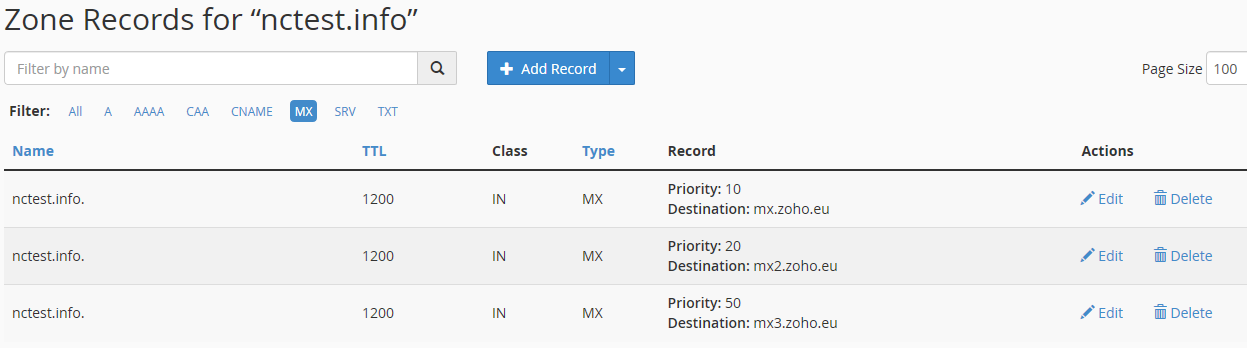
After the domain is verified, it is required to create MX Records for it in order to link the domain to the mail service itself.
In the same Zone Editor menu, click on the Add Record button and choose MX records type.
Add the following records:
Name Priority Destination
domain.com 10 mx.zoho.eu
domain.com 20 mx2.zoho.eu
domain.com 50 mx3.zoho.eu
NOTE: Based on the datacenter (US/UK/CN), the MX record values will differ for your domain. The correct MX records specific for your domain will be available in
this section in Admin Control Panel.
The Changes usually take about 30 minutes to take effect.
NOTE: The MX values given above are based on the generic
configuration information. For more specific configuration particular
for your domain refer to your
Admin Control Panel.
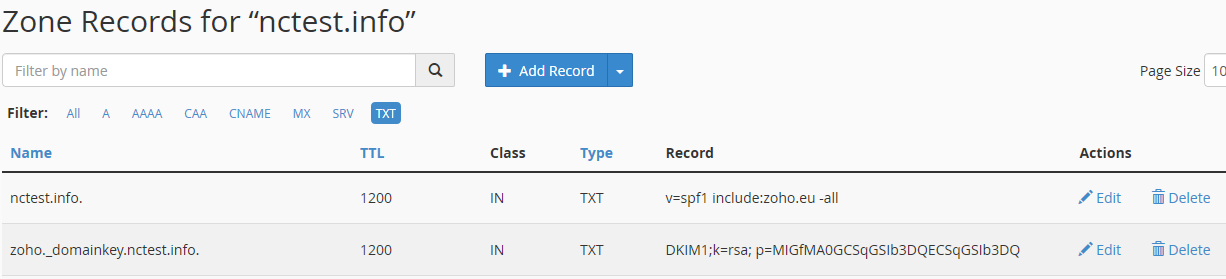
You may also need to configure the
DKIM and
SPF record as well which could be checked in your Zoho Control Panel.
To add these records, choose
TXT record as the record type, paste your domain name in the
Name field and enter
v=spf1 include:zoho.eu -all into the
Record field.
Click on the
Add Record >>
TXT type once again, enter
zoho._domainkey.domain.eu into the
Name field (if zoho was entered as the selector in Zoho Control Panel) and enter the corresponding value of the DKIM record, the one that was copied from the TXT record value field in your Zoho account, into the
Record field:
These changes will take effect within 30 minutes.
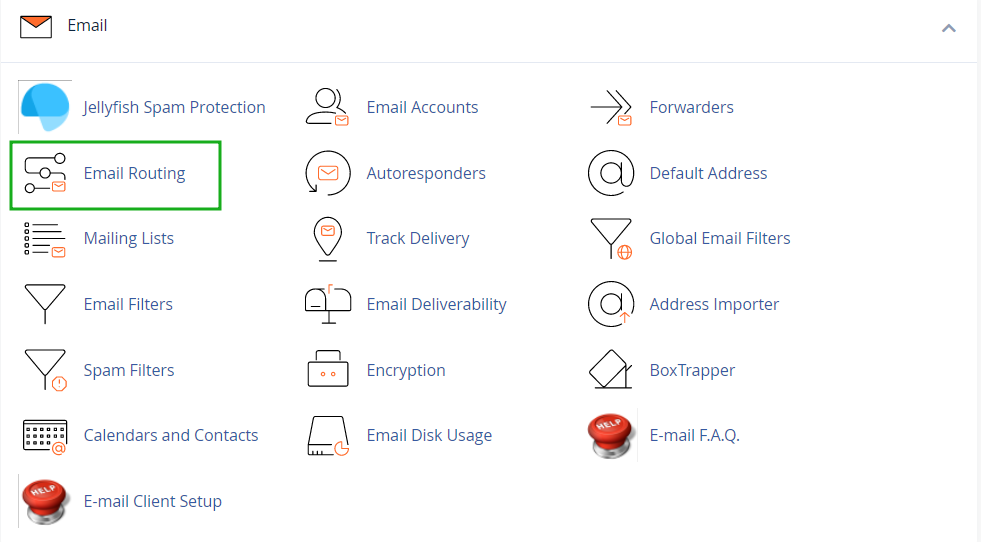
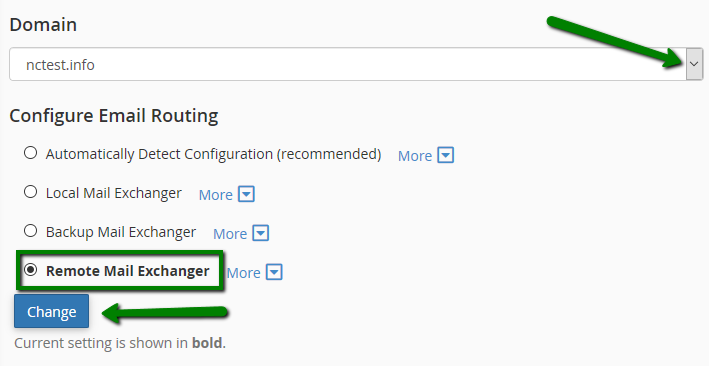
To complete Zoho mail setup, the Email Exchanger should be changed for the domain in question. From within your cPanel account go to the Email Routing menu under Email section:
Select your domain from the drop-down menu, choose Remote Mail Exchanger option and click the Change button:
That's it!
Need any help? Contact our
HelpDesk.