ConfigServer Exploit Scanner (CXS) is a server antivirus system that can be purchased and installed on VPS and Dedicated Servers to detect and mitigate various types of malware. This is done by cxswatch daemon for all files uploaded to the respective server, but you can also use it to actively scan files in real time.
While reading this guide, please keep in mind the following:
- CXS is designed as a command-line utility. Most of its functionality is available via the WHM plugin, but we will keep the focus only on the Command Line Interface (CLI) usage.
- All text that appears in bold should be replaced with your own data.
- The purpose of CXS is to stop unprivileged user-level threats and viruses. It is not a rootkit scanner and it will not detect or combat malware that was able to gain root access to the system.
- Scanning system folders, beyond your home folder, is not recommended as it can result in false-positive results. Doing so with options like --quarantine may put the system into an unrecoverable state.
- The constantly-evolving nature of malware makes it impossible to give specific steps on how to evaluate whether or not a file is malicious. Before making any final judgements, make sure to do all the necessary research on your own.
Important locations and configurations
Configured and quarantined files are stored in the specified locations below:
| Location | Explanation |
|---|
| /etc/cxs | Main directory; most files to work with are located here.
|
|
/etc/cxs/cxs.fp
|
Fingerprint database.
|
|
/etc/cxs/cxs.db
|
Report and counter storage.
|
|
/etc/cxs/default
|
Examples of configuration files/crons.
|
|
/etc/cxs/cxs.ignore*
|
Ignore lists for different types of scans.
|
/etc/cxs/cxscgi.sh
/etc/cxs/cxsdaily.sh
/etc/cxs/cxsftp.sh
| Sets of options used for corresponding scans.
|
|
/opt/cxs/quarantine
|
CXS quarantine.
|
|
/var/log/cxswatch.log
|
Main log of the cxswatch system daemon.
|
/etc/cxs/cxswatch.sh
| File launched by cxswatch daemon. With options provided in it CXS runs in mode that scans files uploaded to the server.
If you supply --mail option here, it will send reports of all cxswatch scans to that mailbox.
|
CXS SSH one-line commands
One-line commands below can be used to scan single locations or home folders of a particular user. To make it easier for you to interact with the commands, some additional parameters were added.
| Command | Explanation |
|---|
cxs --user user
or
cxs /path_to_file_or_folder
| Location to scan. It can be a user's home folder, a file or a folder and all its recursive contents.
|
cxs --user user --dbreport --report /home/user/cxs_scan-$(date +%b_%d_%Y_%Hh%Mm)
| Scan the user's home folder with plain text and create a database report.
|
cxs --user user --report "/home/user/report-$(date +%b_%d_%Y_%Hh%Mm).txt" -B --mail email@domain.com
| Run a full scan of one cPanel account in the background, save the report to the user’s home folder, and send email to the specified mailbox.
|
cxs --force /path_to_system_folder
| Scan file in system folders (use with caution).
|
The full list of the common additional CXS parameters can be found below:
| Command | Explanation |
|---|
| --report /path_to_cxs_report | Save a detailed scan report to the provided location. |
| -B, --background
| Launch the scan in the background. Best used together with the --report option. |
| --mail admin@example.com | Send report to email once the scan is over. |
| -T, --throttle [num] | Put scan in sleep mode if the server load is greater than [num]. |
| --force | Scan the file(s) in system folders (/usr /var /bin /lib /lib64 /boot /etc /proc /sys /opt). |
| --deep | A deep scan that searches for all known exploits in all scanned files. It takes significantly longer than a normal scan but can be helpful when basic scans are not able to locate viruses/pattern matches. |
| --quarantine /path_to_quarantine | Put all files that trigger any matches during the scans to quarantine. Use with caution as it may break production websites. |
| --qview /path/to/quarantine/cxsuser/user/file | View quarantined file. |
| --qrestore /path/to/quarantine/cxsuser/user/file | Restore quarantined file. |
| --filemax [num] | Maximum amount of files to scan per directory. The default is 10,000. Useful when scanning massive mail folders. |
CXS supports many other parameters that can be checked by running the following commands:
cxs --help
Or
cxs --help | less -R
They provide a full list of possible options as well as a detailed description of each.
Scanning the whole server
Before starting the scan for the whole server, first adjust the CXS ignore list, since there are some standard cPanel files located in
/home folder that will trigger false-positive results. To do this, run the following command:
cat > ~/ignorelist <<EOF
/home/virtfs
/home/.cpcpan
/home/cPanelInstall
/home/.cpan
/home/.cpanm
/home/cpeasyapache
/home/latest
EOF
Now you can start the scan.
In order to run it in the background, save the report to the
/root//full_server_scan file and send as an email to yourself once it’s over, use the following command:
cxs /home -B --report /root/full_server_scan --ignore ~/ignorelist --mail email@domain.com
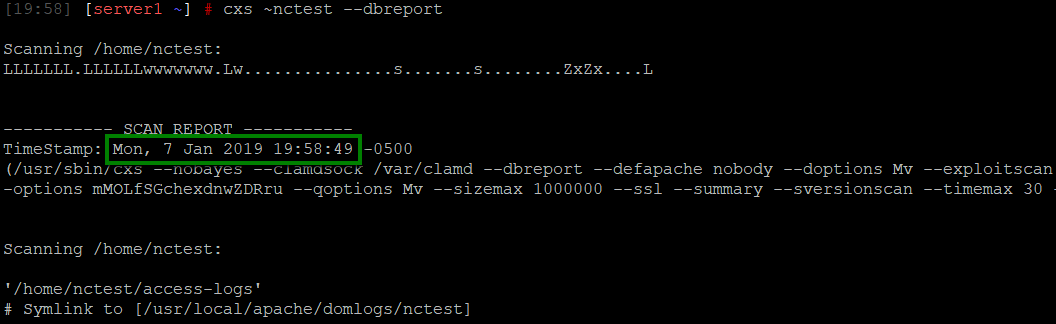
Storing scan reports in the database
You can run scans with the
--dbreport option to store the results in the database located at
/etc/cxs/cxs.db. It has its downsides, like the way timestamps are handled and the more rarified format of the database (SQLite), but it still might come in handy.
The detailed instructions on how to use it can be found below.
1. Find the timestamp (epoch format) of the scan start:
date -d 'your timestamp' +%s

2. Check the scan time in the summary and add to it to the start moment:
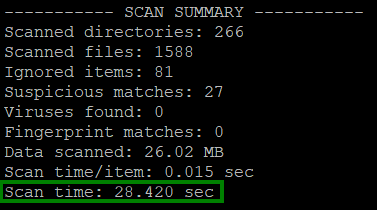
echo $((timestamp + scan_time))

3. Enter the database:
sqlite3 /etc/cxs/cxs.db
4. Locate the report:
SELECT * FROM reports WHERE timestamp = 'timestamp';
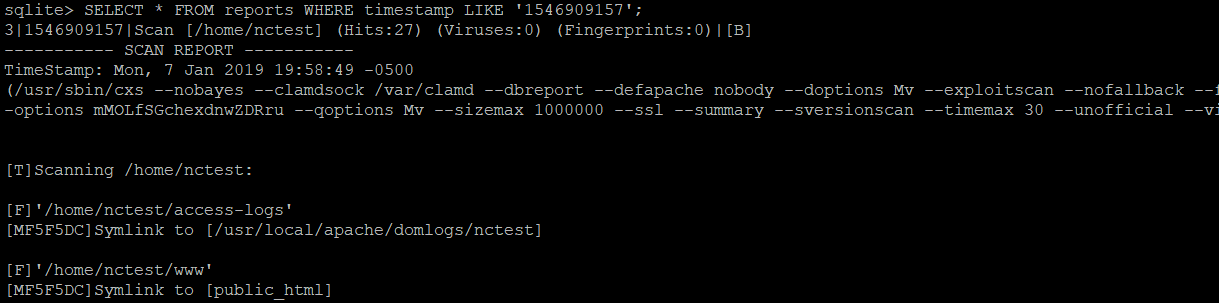
Sometimes, the timestamp of the scan is off by a second depending on the exact start time of the scan. You can locate it by checking the closest timestamp available:
SELECT timestamp FROM reports;
Working with quarantined files and false-positive results
After performing a scan, you may notice that the CXS quarantined files are not malicious. In this case, it’s necessary to closely examine the files’ contents and decide whether or not you should modify, whitelist, or keep them quarantined.
Standard text viewing/editing tools (cat, less/more, etc.) allows you to view/edit contents of the file, but in order to safely view a quarantined file, we recommend using the following command:
cxs --qview /path/to/quarantine/cxsuser/user/malicious_file

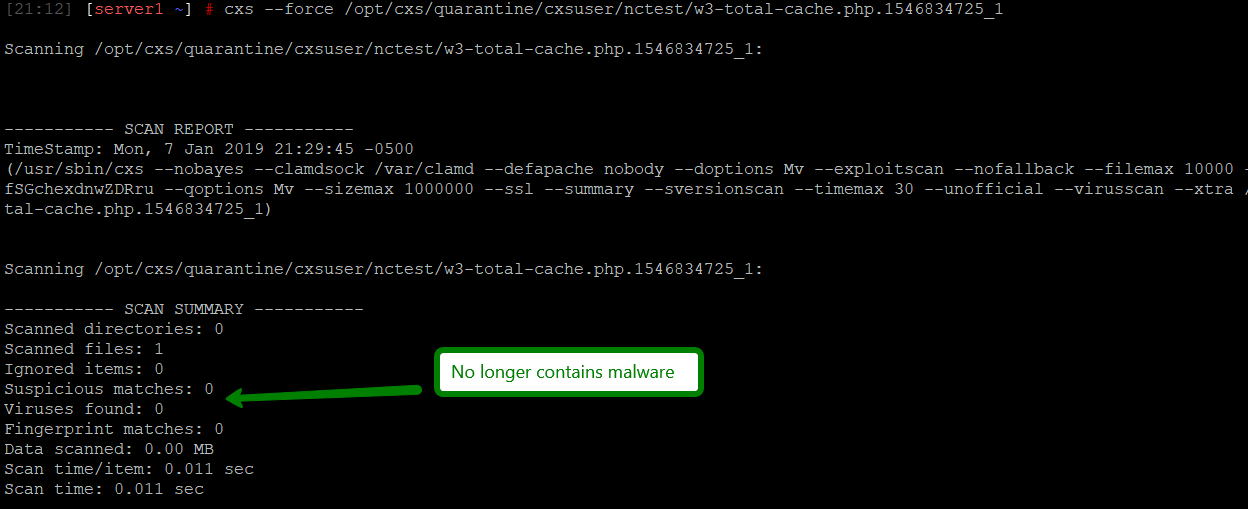
If the file is located in a system folder (e.g., /opt, /etc, etc.), you will need to use --force option to be able to scan it:
cxs --force /path/to/quarantine/cxsuser/user/malicious_file
As a result, you will see the output that looks as follows:

In our example, it’s easy to detect the malicious code; it stood out from the normal PHP code and we had access to the clean master version (since the file is a part of popular WordPress plugin).
Generally-speaking, however, this is the hardest part as malicious code is often obfuscated, encoded or otherwise not readable by humans. Due to the diverse nature of these exploits, it’s impossible to cover all. Therefore, we can only advise you to:
- Never restore/whitelist files if you are not sure what harm they can do.
- Whitelist only md5 checksums, not files or folders. This way only one specific state of the file will be whitelisted and further modifications will trigger CXS checks one more time. Otherwise, users will be able to put something that affects the whole server in that location, either by mistake or intentionally, and antivirus will ignore it completely.
If you have detected and removed the malware part of the file, you must proceed with the required steps:
1. Run an extra scan to make sure that file is now safe:
cxs --force /path/to/quarantine/cxsuser/user/malicious_file
2. Restore it:
cxs --qrestore /path/to/quarantine/cxsuser/user/malicious_file

If it’s not possible to determine why the CXS treated the file as malicious, but you are sure that it is safe to use it, follow the next steps:
1. Find out MD5 sum of the file.
md5sum /path/to/quarantine/cxsuser/user/malicious_file

2. Add md5sum to whitelist:
echo “md5sum:md5sum_from_previous_command” >> /etc/cxs/cxs.ignore.user

3. Restore the file:
cxs --qrestore /path/to/quarantine/cxsuser/user/malicious_file
4. Restart CXS:
service cxswatch restart
or
systemctl restart cxswatch.service

Congrats! Now you know how powerful the ConfigServer Exploit Scanner (CXS) tool can be, helping you to effectively secure your server.

