Moodle is a learning platform designed to provide educators, administrators, and learners with a robust, secure, and integrated system to create personalized learning environments. With over 10 years of development, guided by social constructionist pedagogy, Moodle delivers a powerful set of learner-centric tools and collaborative learning environments that empower both teaching and learning. A simple interface, drag-and-drop features, and well-documented resources, along with ongoing usability improvements, make Moodle easy to use and learn from.
There are two ways to install Moodle:
1) installation via Secure Socket Shell (SSH);
2) web-based installation.
This article features a web-based installation.
Step 1 - Placing the installation files
First and foremost, you need to download the necessary installation files from the
Moodle website.
NOTE: In this article, we install Moodle version 3.5.1. You are free to use any other version; however, it may require you to take different steps to correctly install Moodle.
Once you’ve downloaded the necessary archive, you will need to upload it to the domain root directory so your version of Moodle can be installed. In our case, we’re installing Moodle on
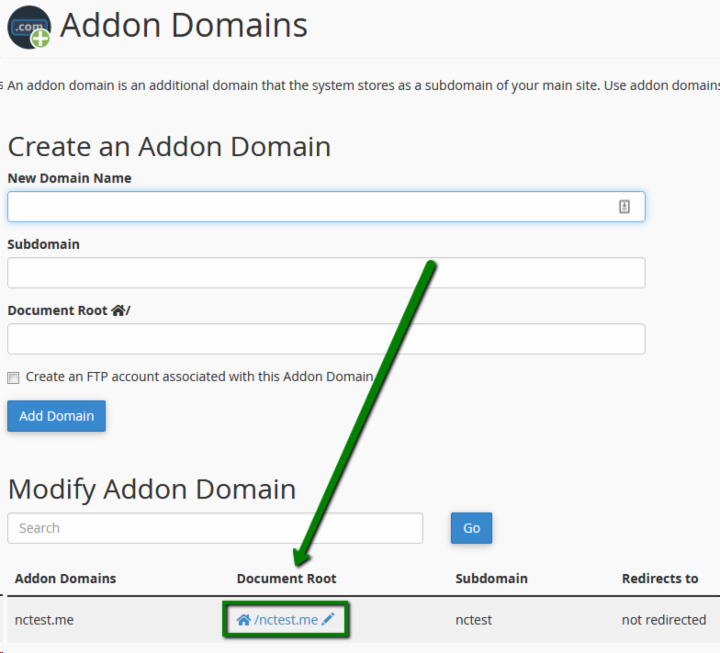
nctest.info, which is the main domain of the hosting account. If you would like to install it with an addon domain, check the domain’s root directory here:
cPanel >> the
Domains section
>> the
Addon Domains menu. See below:
If the domain you wish to use has not been added, use the
guide to do so.
When you know the root directory of your domain name, you can upload the archive via
cPanel >> File manager >> Upload or via an
FTP client as described
here.
The next step? Extracting the files.
1. Navigate to
cPanel >> the
Files section
>> File manager.
You’ll be automatically taken to the home directory.
2. Open the folder you previously uploaded the archive into.
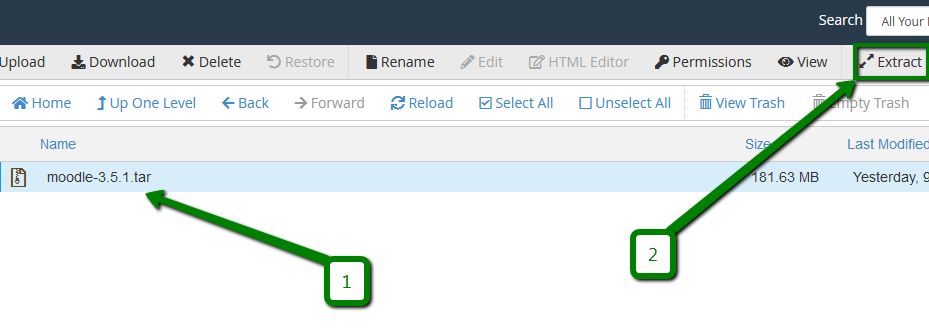
3. Click on the archive to select it and click the Extract button located on the top navigation panel.
4. In the pop-up window, click the Extract File(s) button. By default, files are extracted into the folder where the archive is located, so there is no need to change anything.
5. Once these files are extracted, you will see a new pop-up window with the extraction results. Click the Close button.
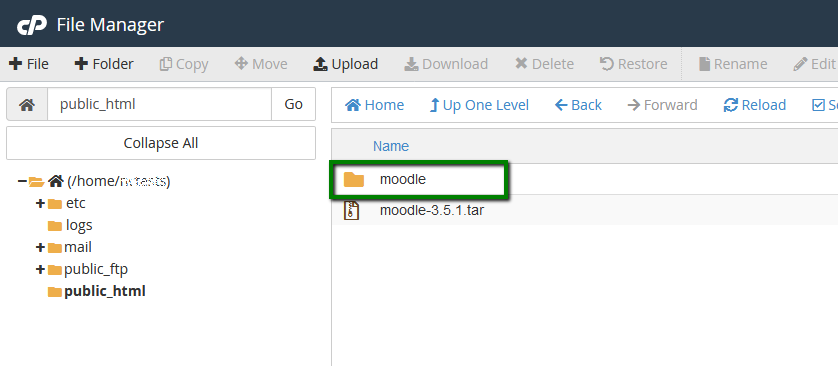
The files of this archive are extracted as a folder; this means that the files are located not in the root directory of the domain, but in the subdirectory. See below:
6. Now you need to remove files from the /moodle folder into the folder you are currently in. To do this, click on the /moodle folder, select all the files and click the Move button on the top navigation panel. See below:
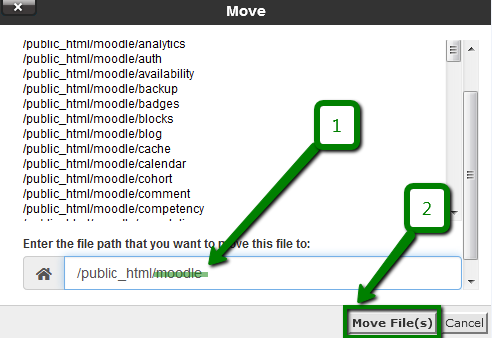
7. In the pop-up window that appears after clicking the Move button, delete the name of the folder "moodle" from the path and click on the Move File(s) button:
If the files were successfully moved, you should see an empty folder.
To check that the files are now there, go back to the domain’s root folder.
Step 2 - Configuring the Environment
Each file and folder located in your account has certain permissions assigned to them. They define who is authorized to write, read, or execute that file. On our servers, to properly display the browser’s files, use permissions 644, folders - with 755.
To make sure that the files you have uploaded contain the correct permissions, follow
this procedure.
With the permissions in place, it’s time to configure PHP environment for the installation.
1. Navigate to
cPanel >> the
Software section
>> Select PHP Version menu. See below:
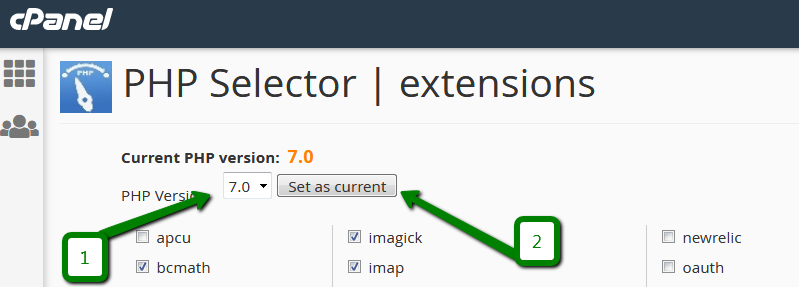
2. Moodle 3.5.1 requires PHP version 7.0, so select it using the drop-down menu and the Set as current button. See below:
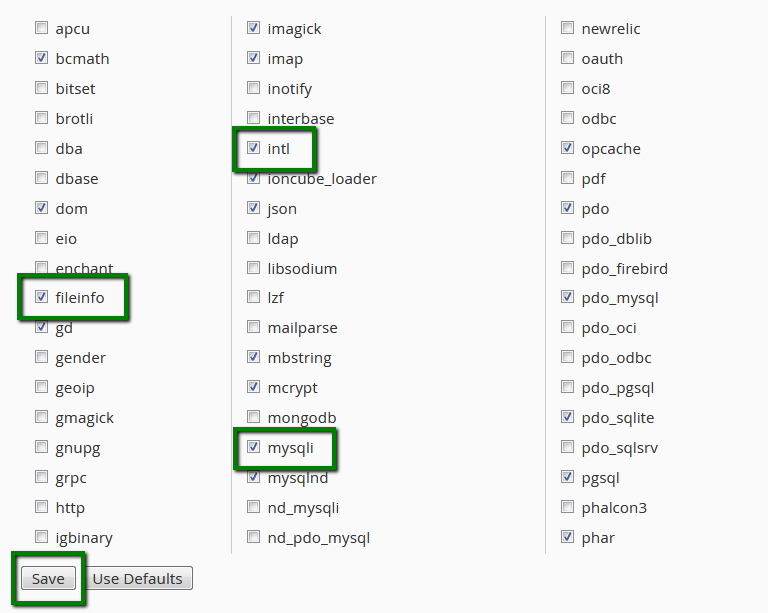
3. This version also requires the following PHP extensions:
If they are not already enabled, take a look at the list below to check. Click the Save button when you’ve done so. See below:
Step 3 - Creating the Database
You need to create a database for your installation, remembering the following details:
Database name
Database user
Database user password
All the related instructions can be found in the
guide.
Step 4 - Installing
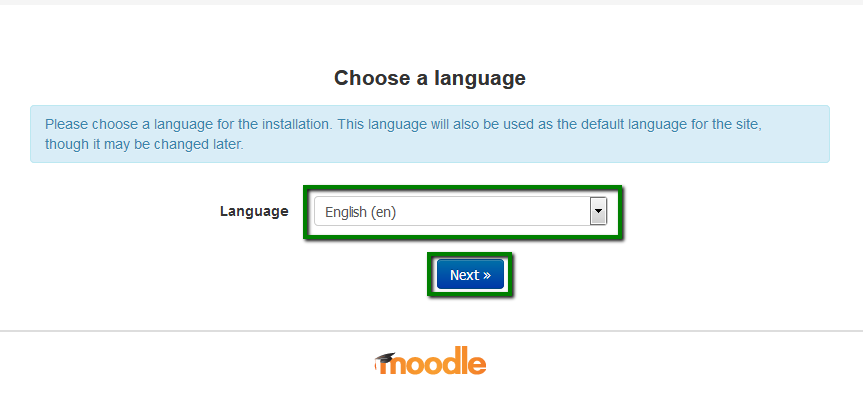
1. In a new browser, open the domain name you have chosen for the installation. You should see the Moodle installation start page. Choose your respective language and click the
Next button. See below:
2. On the Confirm Paths page, you will be asked to specify the folders where your Moodle files will be stored. You can leave the default values and click the Next button. See below:
3. On the Choose Database Driver page, choose MariaDB (native/mariadb) and click the Next button. See below:
4. On the Database Settings page, enter the database details you already created on Step #3, leaving the other values untouched and click the Next button. See below:
Keep in mind it may take a few minutes for the database setup to finish.
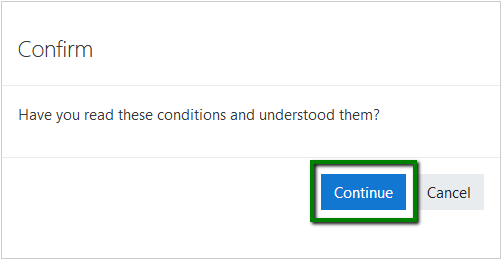
5. Once everything is done, you should be redirected to the Copyright Notice page where you need to confirm the conditions and click the Continue button. See below:
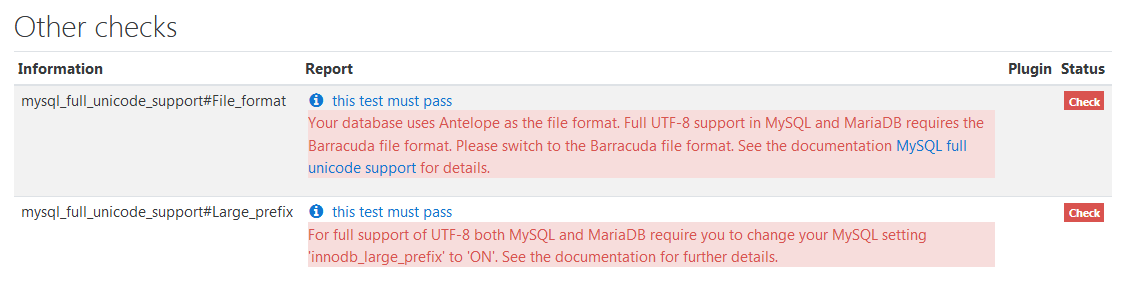
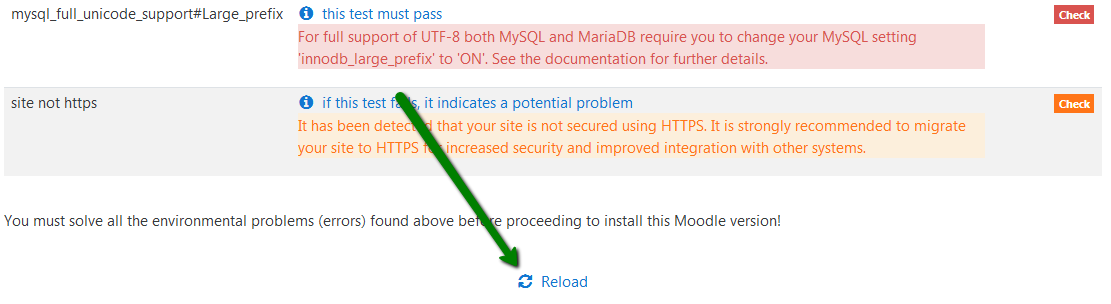
On the next page, you will see a list of server requirements. All of them should be fulfilled, except for the following. See below:
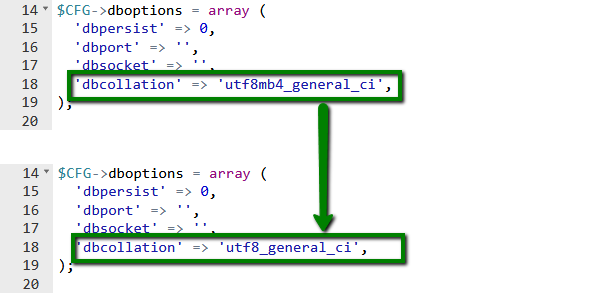
6. Return to your domain’s root directory using the File Manager to edit the config.php file.
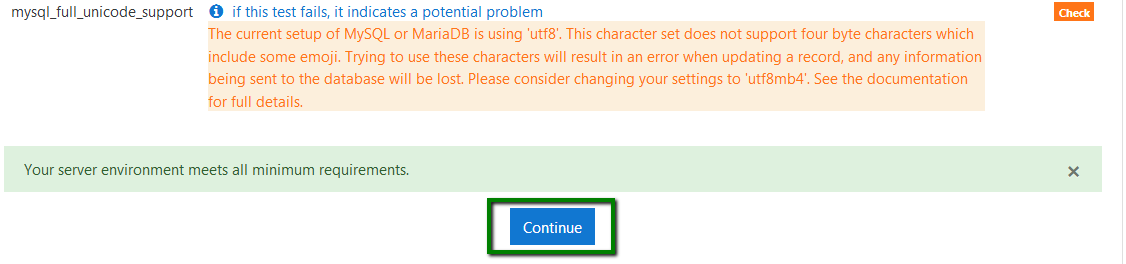
7. Right-click on the file and choose Edit in the pop-up window. You will then be redirected to a code editor where you need to change the following line:
'dbcollation' => 'utf8mb4_general_ci',
to
'dbcollation' => 'utf8_general_ci',
Make sure you save your changes.
8. Return to the installation page and click the Reload button to perform the server check. See below:
9. If the file was correctly modified, you should see the "Your server environment meets all minimum requirements" message. Click the Continue button. See below:
10. It will take a few minutes for the installation of modules to finish. Scroll down the page and click the Continue button to proceed further.
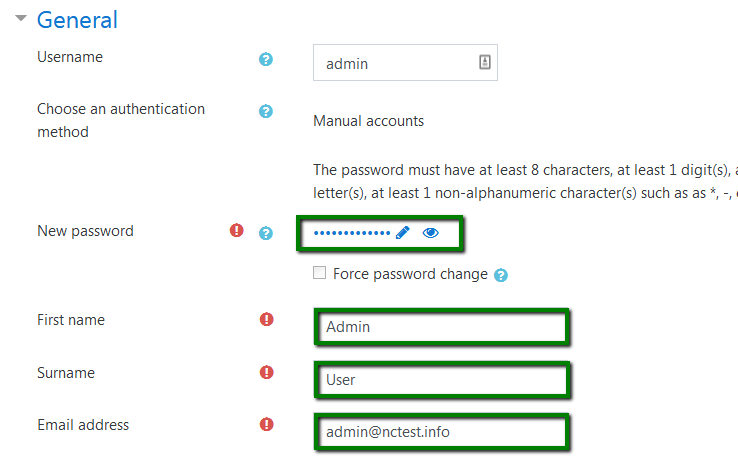
11. You will then be redirected to the page where you will need to enter the administrative details you want to use. Fill them out, scroll down the page, and click the Continue button. See below:
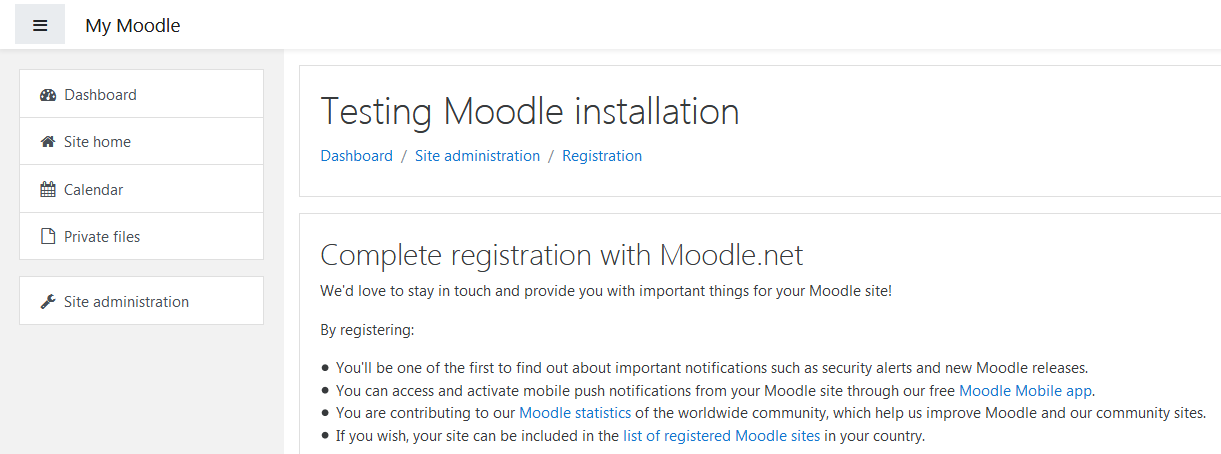
12. The next two pages will require you to fill out general information about your website. If you do not have all the necessary information at that time, don’t worry. You will be able to modify this later. Once you fill out the information, you will then be redirected to the administrative area of your website:
Congratulations! You just successfully installed Moodle.