This tutorial will help you to configure Microsoft Outlook 2016 for a cPanel email account.
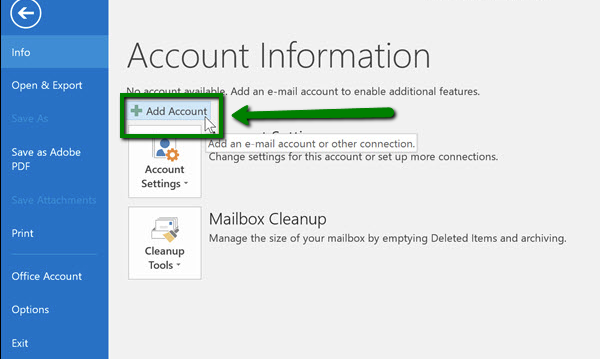
1. Open Microsoft Outlook 2016 on your device. If don't have any mailboxes added yet, you will see Info > Account Information page. Click the +Add Account button.
In case you have mailboxes set up before, go to the File tab > Info > Account Information page and click the +Add Account button:

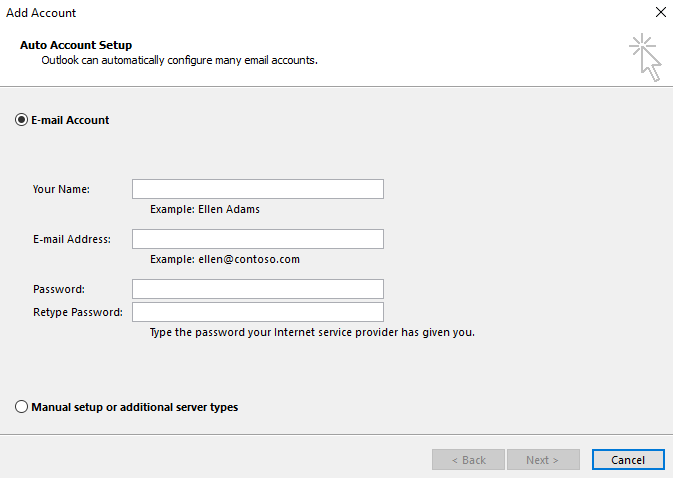
2. Select E-Mail Account and enter your information:
Your Name: the name of your account in Outlook
E-mail Address: full email address
Password: password for your email account
Click Next, disregard any warnings that appear and proceed to the next step.
If you are not able to proceed, you may need to repeat the process using the manual setup. The detailed instructions can be found below.
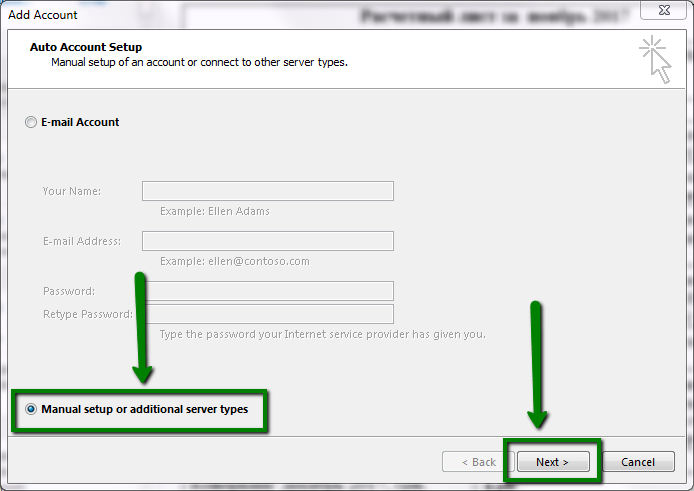
3. Select the Manual setup or additional server types option and click Next:
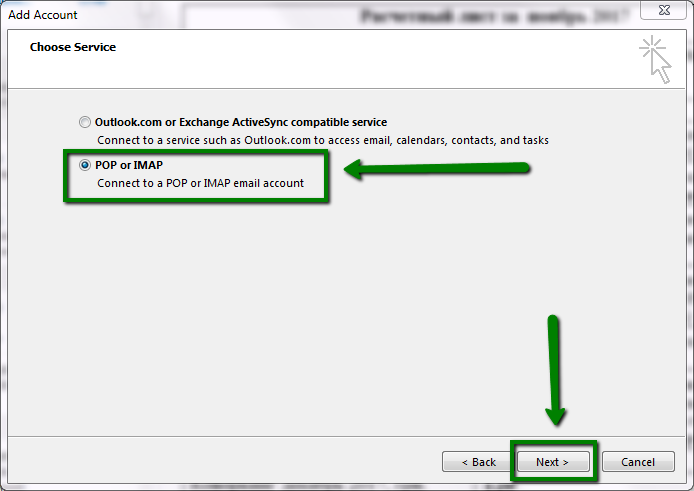
4. On the next page, select the POP or IMAP option and then click Next:
POP3 stands for Post Office Protocol and was designed as a simple way to access a remote email server. The most recent version is POP3, and is supported by virtually all email clients and servers.
POP works by downloading your emails from your provider's mail server, and then marking them for deletion there. This means you can only ever read those email messages in that email client, on that computer. You will not be able to access any previously downloaded emails from any other device, or with any other email client, or through webmail.
IMAP stands for Internet Message Access Protocol and was designed specifically to eliminate the limitations of POP.
IMAP allows you to access your emails from any client, and any device, and webmail login at any time, until you delete them. You are always seeing the same emails, no matter how you access your provider's server.
You can also use different devices and email/webmail clients to access the same mailbox and check, send and receive email, which is not available with POP3 connection.
Since your email is stored on the provider's server and not locally, you may run into email storage limits, when using IMAP.
5. Enter mailbox and server details:
Your Name - the name you would like the recipients of your emails to see
Email Address - your full cPanel email address
Password - password from your cPanel mailbox
Incoming mail server:server your account is hosted on (looks like XXXXX.web-hosting.com)
Outgoing email server:server your account is hosted on (looks like XXXXX.web-hosting.com)
Require logon using Secure Password Authentication (SPA): should be unchecked
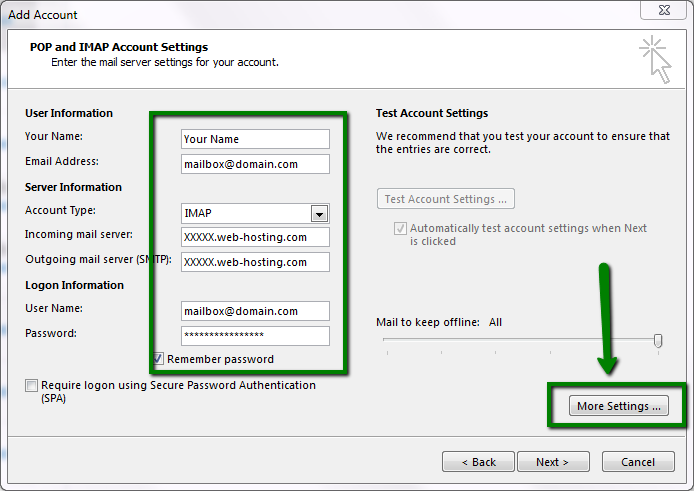
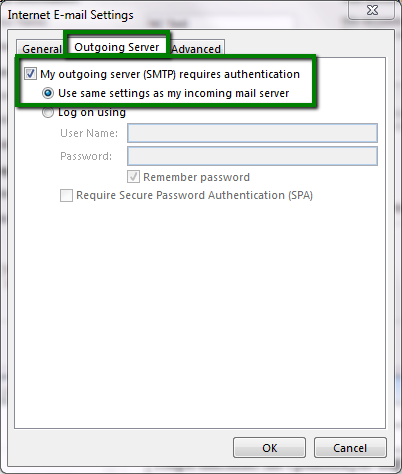
6. Next, click More Settings… and go to the Outgoing Server tab.
Select the option called My outgoing server (SMTP) requires authentication and select Use same settings as my incoming mail server:
7. Go to the Advanced tab and use the following ports and encryption based on the connection type you have chosen:
Incoming server (if are using IMAP): 993 port for SSL, 143 for TLS
Incoming server (if you are using POP3): 995 port for SSL, 110 for TLS
Outgoing server (SMTP): 465 port for SSL, 25/587 port for TLS
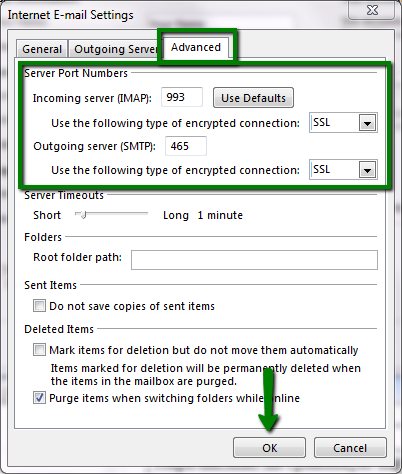
Click OK > Next
8. In case all the settings are correct, you will receive the following message:

That's it!