cPanel email account setup in Microsoft Outlook 2013

For automatic email account set up you need to do the following:

1. Open Outlook, select tab File > Add Account:


2. Check the option E-mail Account and fill in the corresponding fields:

Your Name: the name you would like the recipients of your emails to see
E-Mail Address: your full email address
Password: password for your email account

Make sure you do not have blank spaces in it.

3. Once all the fields are filled, click Next:


NOTE: if any warnings appear, disregard them and feel free to proceed.

If this option fails for some reason, try to follow the steps from scratch. If it does not help you can also try to set up email account manually.

In order to set up your email account in Outlook manually, complete the first step which is described above and then follow the instructions below:


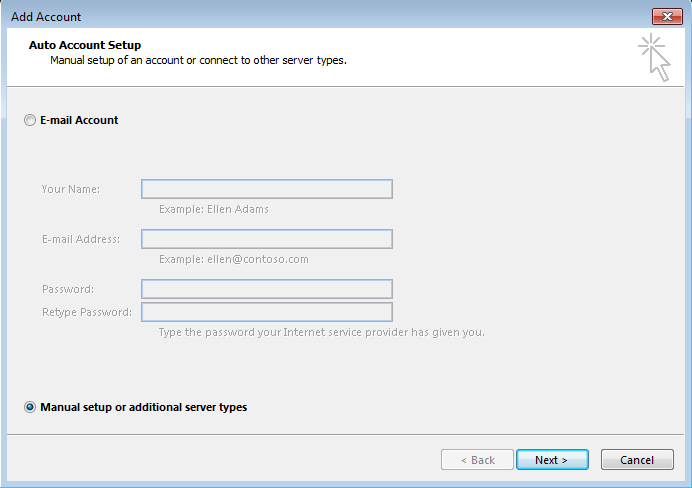
1. Check the option Manual setup or additional server types and click on Next:


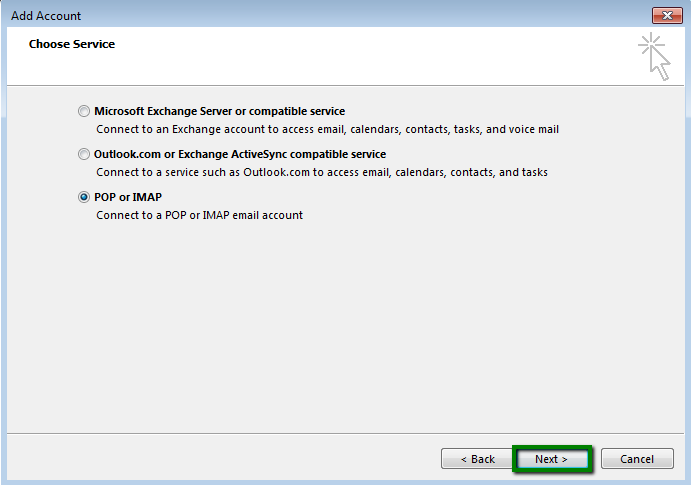
2. Select POP or IMAP and click on Next:


3. Fill out the corresponding fields:

Incoming and Outgoing mail server (SMTP): server your account is hosted on
User Name: full email address
Password: password for this mail account
Require logon using Secure Password Notification (SPA): should be unchecked


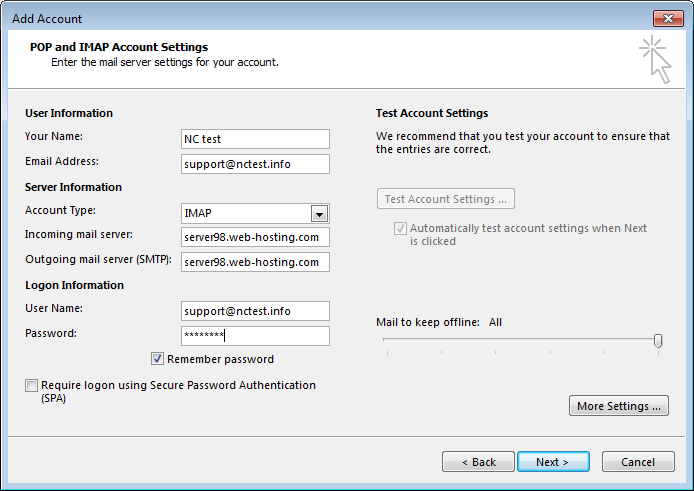
4. Once done, click on More Settings in the lower right corner of the window.

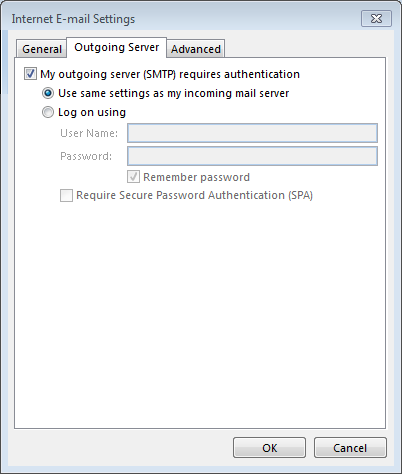
In the tab Outgoing Server checkmark the option My outgoing server (SMTP) requires authentication > Use same settings as my incoming mail server:


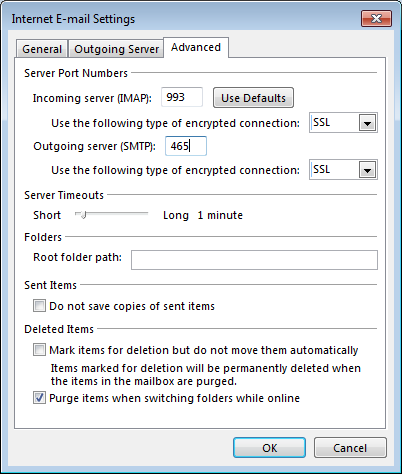
5. In the tab Advanced configure port settings as follows:

   IMAP: port 993, SSL or port 143, TLS
   POP3: port 995, SSL or port 110, TLS
   SMTP: port 465, SSL or port 25/587, TLS


6. Once all is done, click OK to close the window and then Next to test server connection:


That's it!

              
                      Need any help? Contact our HelpDesk

Updated
Viewed
39850 times

Need help? We're always here for you.

notmyip