$ U.S. Dollar€ Euro£ British PoundC$ Canadian DollarsA$ Australian DollarsRs Indian Rupees¥ China Yuan RMBMore Info
How to automatically install OpenClaw on a VPS
This guide provides instructions for configuring the OpenClaw application bundle template for Namecheap VPS hosting, which allows you to automatically install and deploy the OpenClaw AI assistant on your server.
The OpenClaw bot requires root access to the server, which is available on both our VPS and Dedicated Server plans. While both options support this requirement, a VPS is generally the recommended choice for running OpenClaw.
To simplify OpenClaw setup on a Namecheap VPS, you can add the OpenClaw application bundle to your server during the VPS purchase/reinstallation process, and our system will automatically install and pre-configure the AI assistant for you.
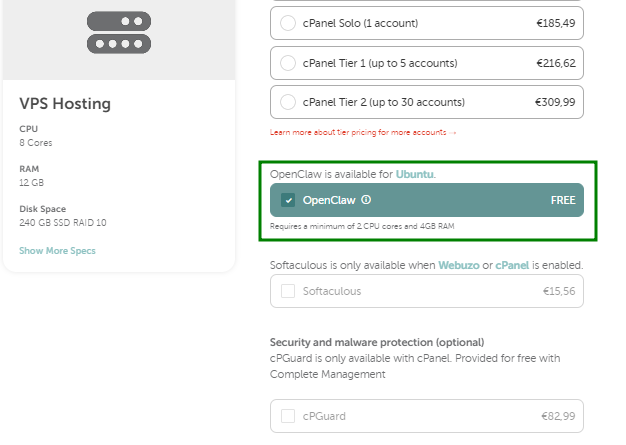
You can add the software during the new VPS purchase configuration stage:
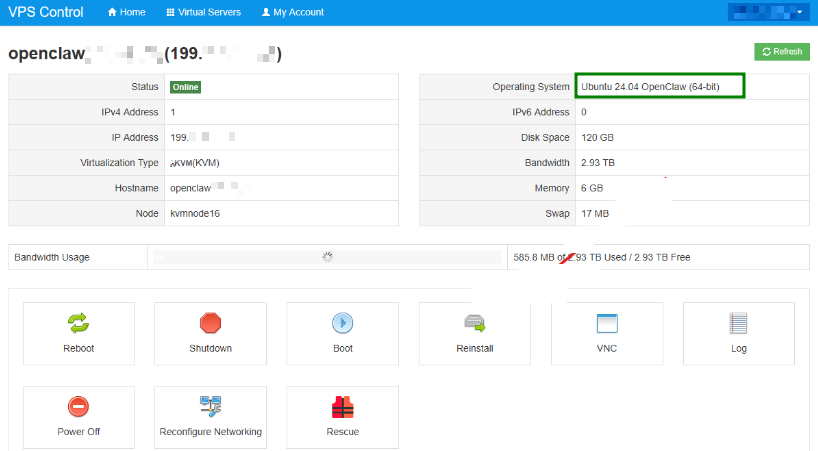
To add it to an existing VPS, you need to reinstall your VPS and select the Ubuntu 24.04 OpenClaw (64-bit) OS for it:
After the VPS service with the OpenClaw application bundle is successfully ordered, our system automatically installs an OpenClaw template on your VPS.
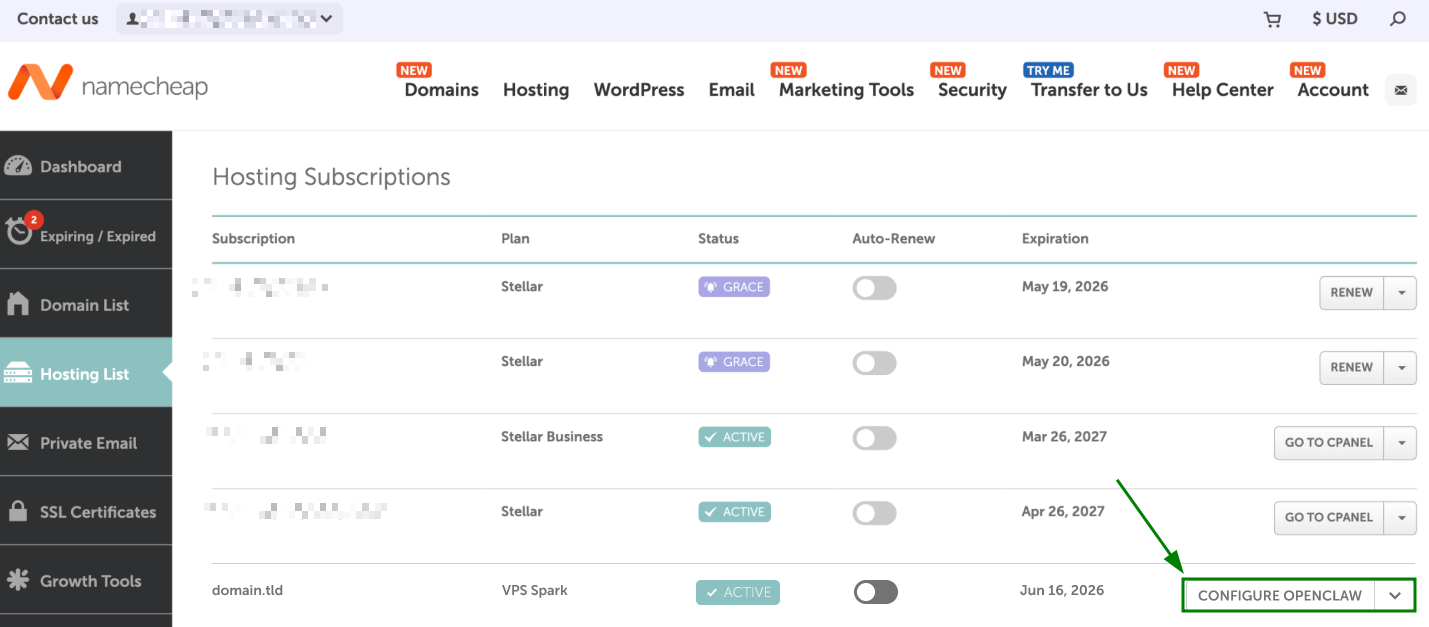
Now, you need to configure the AI assistant, which can be done from your Namecheap account > the "Hosting List" menu > by clicking on the Configure OpenClaw button next to the VPS service in question:
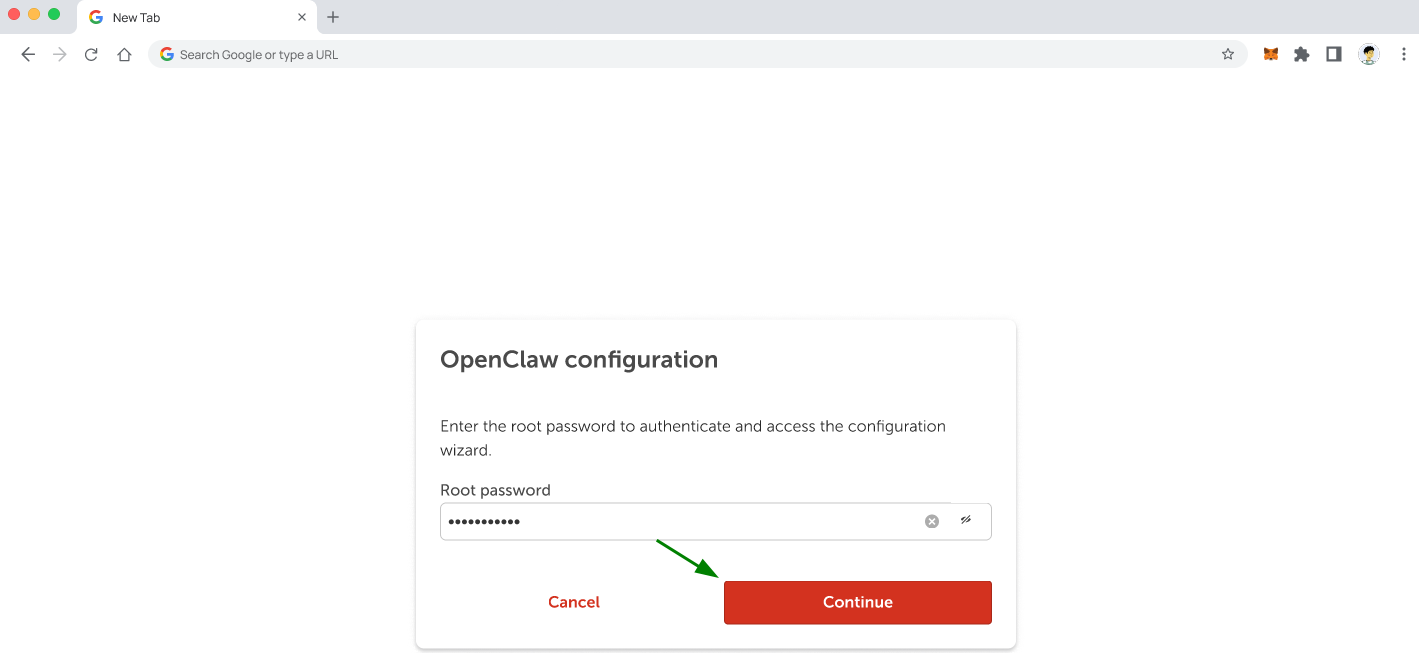
Enter your VPS root password to authenticate the VPS server root access. The login credentials can be retrieved in the Welcome Email delivered to your primary email account when your server was provisioned to you. Click on Continue once entered:
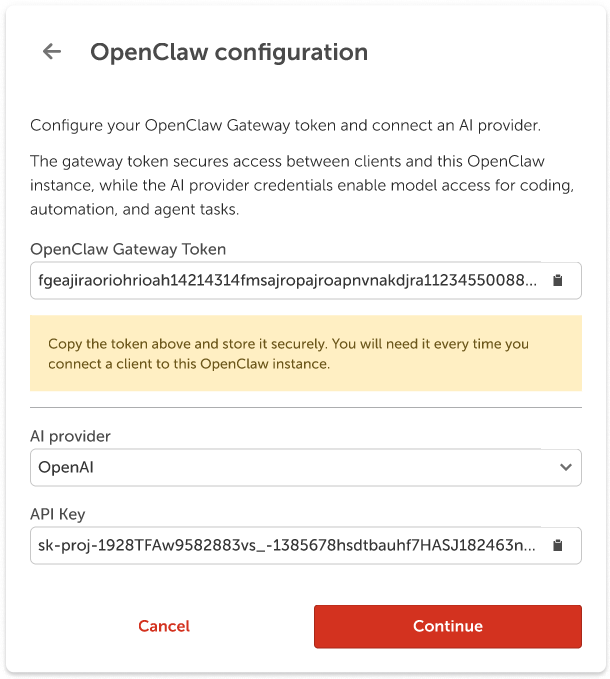
After authenticating the VPS root password, you can continue to the OpenClaw configuration. Choose the AI model provider from the drop-down list and enter an API key from the model provider.
The following model provider options are available in the drop-down:
Anthropic;
OpenAI;
Google (Gemini):
After everything is filled in, click on Continue to finish the OpenClaw AI assistant configuration.
Note: Copy and save the OpenClaw Gateway Token value because it's required to access the OpenClaw dashboard and to provide access between other customers with this OpenClaw instance. Treat your gateway auth token as a password. Rotate it regularly and use strong, random strings stored in an .env file rather than hardcoding them in configuration files.
Click Continue once this step is finished:
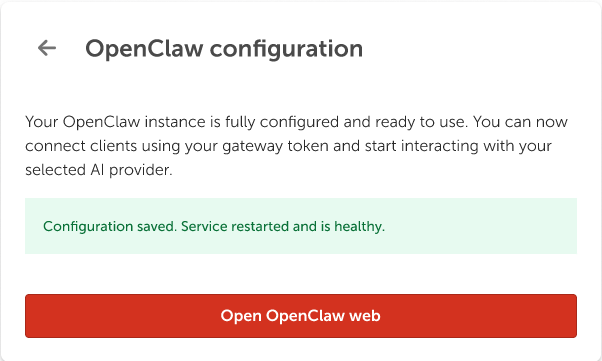
The following message will indicate that the configuration process has been finished:
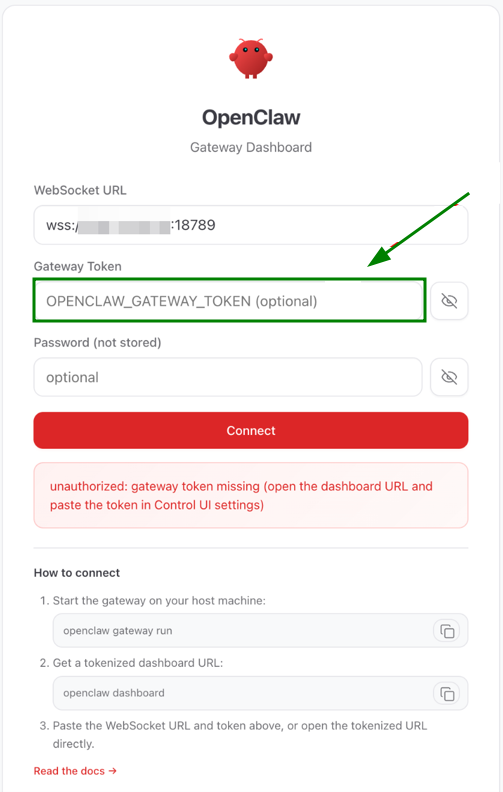
By clicking on the Open OpenClaw Web button, you will be redirected to the OpenClaw Web UI (https://your vps ip://18789) login page. Enter your OpenClaw gateway token in the Gateway Token field and click Connect to log in to your OpenClaw Web UI automatically: