This article is valid for Private Email subscriptions purchased on or after June 2, 2026.
This article will provide you with step-by-step instructions on how to synchronize scheduling on Android devices running Android 5.0 and later.
NOTE: Before setting up an email account this way, make sure you already have the required DNS records and mailbox created.
Below are the guidelines covering the CalDAV account setup in the application called
OneCalendar, which is very easy to use.
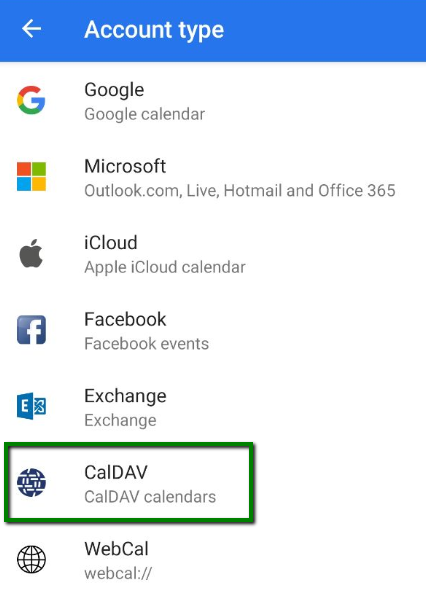
1. Once launched, choose the preferred theme. After this, you will be able to choose the Account type. Click on the CalDav option:
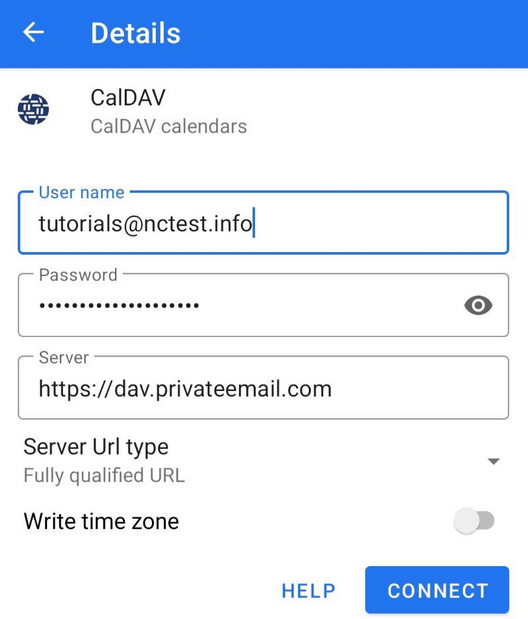
2. In the next window, choose fill in the information as follows:
https://dav.privateemail.com
- full Namecheap Private Email email address
- the password for this email address
Then click Connect to start synchronization:
3. Tap on the Calendar checkbox > click Done to finish the configuration of your CalDAV account:
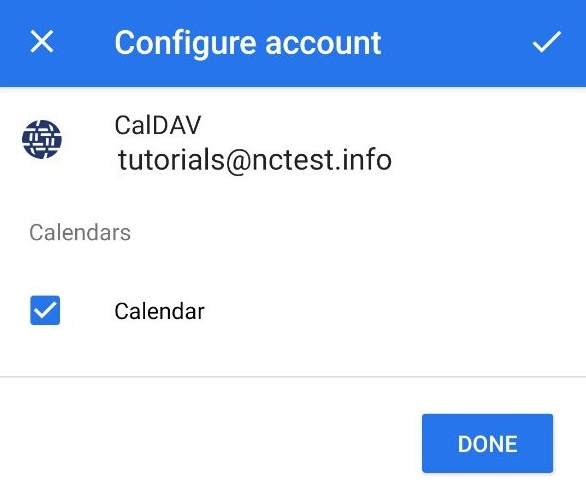
If everything is configured properly, the synchronization will start automatically.
That’s it!