Imunify360 is a powerful security tool available on our Shared and Reseller hosting plans. It helps keep your website safe by scanning for malware, blocking malicious activity, and offering real-time protection.
This guide will walk you through what Imunify360 does, where to find it, and how to use it to secure your site.
What is Imunify360?
Imunify360 is an all-in-one security solution built for Linux web servers. It protects your hosting account by:
- Scanning files and databases for malware;
- Blocking suspicious scripts with Proactive Defense;
-
Managing dangerous files in quarantine;
-
Automatically cleaning infected code (without affecting safe content).
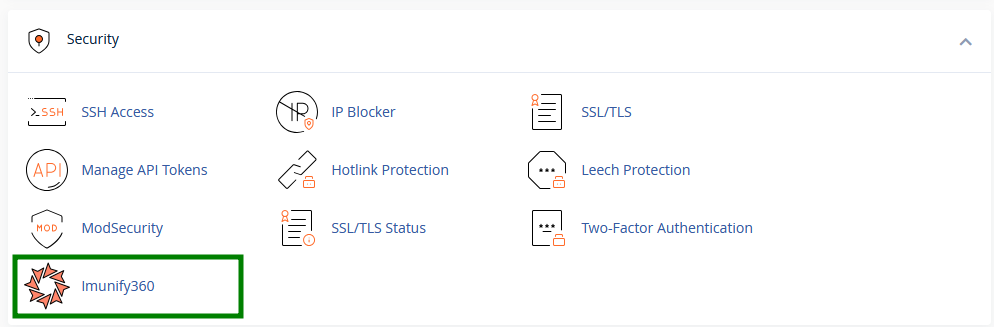
You can find it in your cPanel >> Security section >> Imunify360:
The Imunify360 interface is divided into several tabs, each serving a different purpose. The next sections explain how to use them and what actions are available.
Malicious tab
The Malicious tab is the main area for malware management. From here, you can run manual scans, review detected threats, and clean infected files.
Run a malware scan
To start a manual scan, click Start scanning:
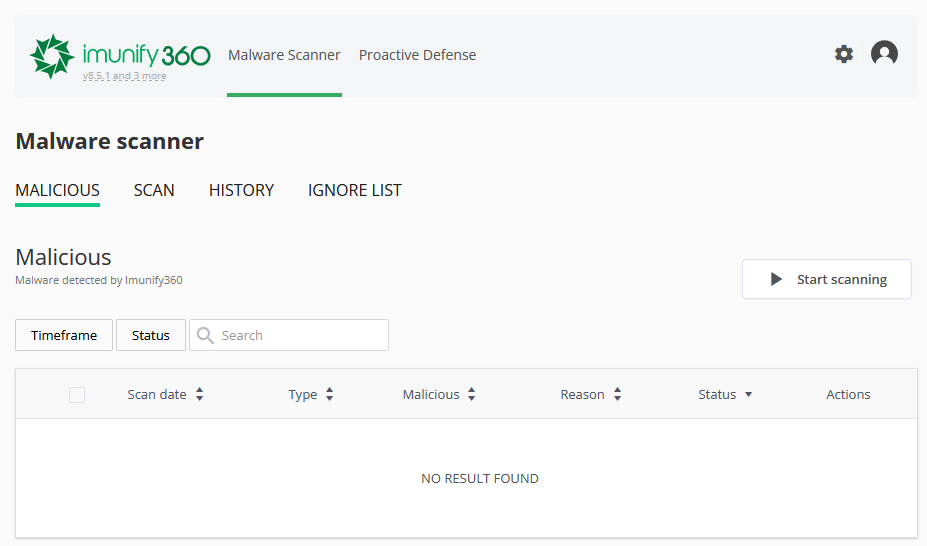
Tip: Imunify360 also performs automatic malware scans every week, so a manual scan is usually only needed if you'd like to check your account immediately.
Review scan results
When malware is detected, Imunify360 automatically attempts to remove only the malicious code while preserving the remaining file content. If a file contains only malicious code, its contents are removed.
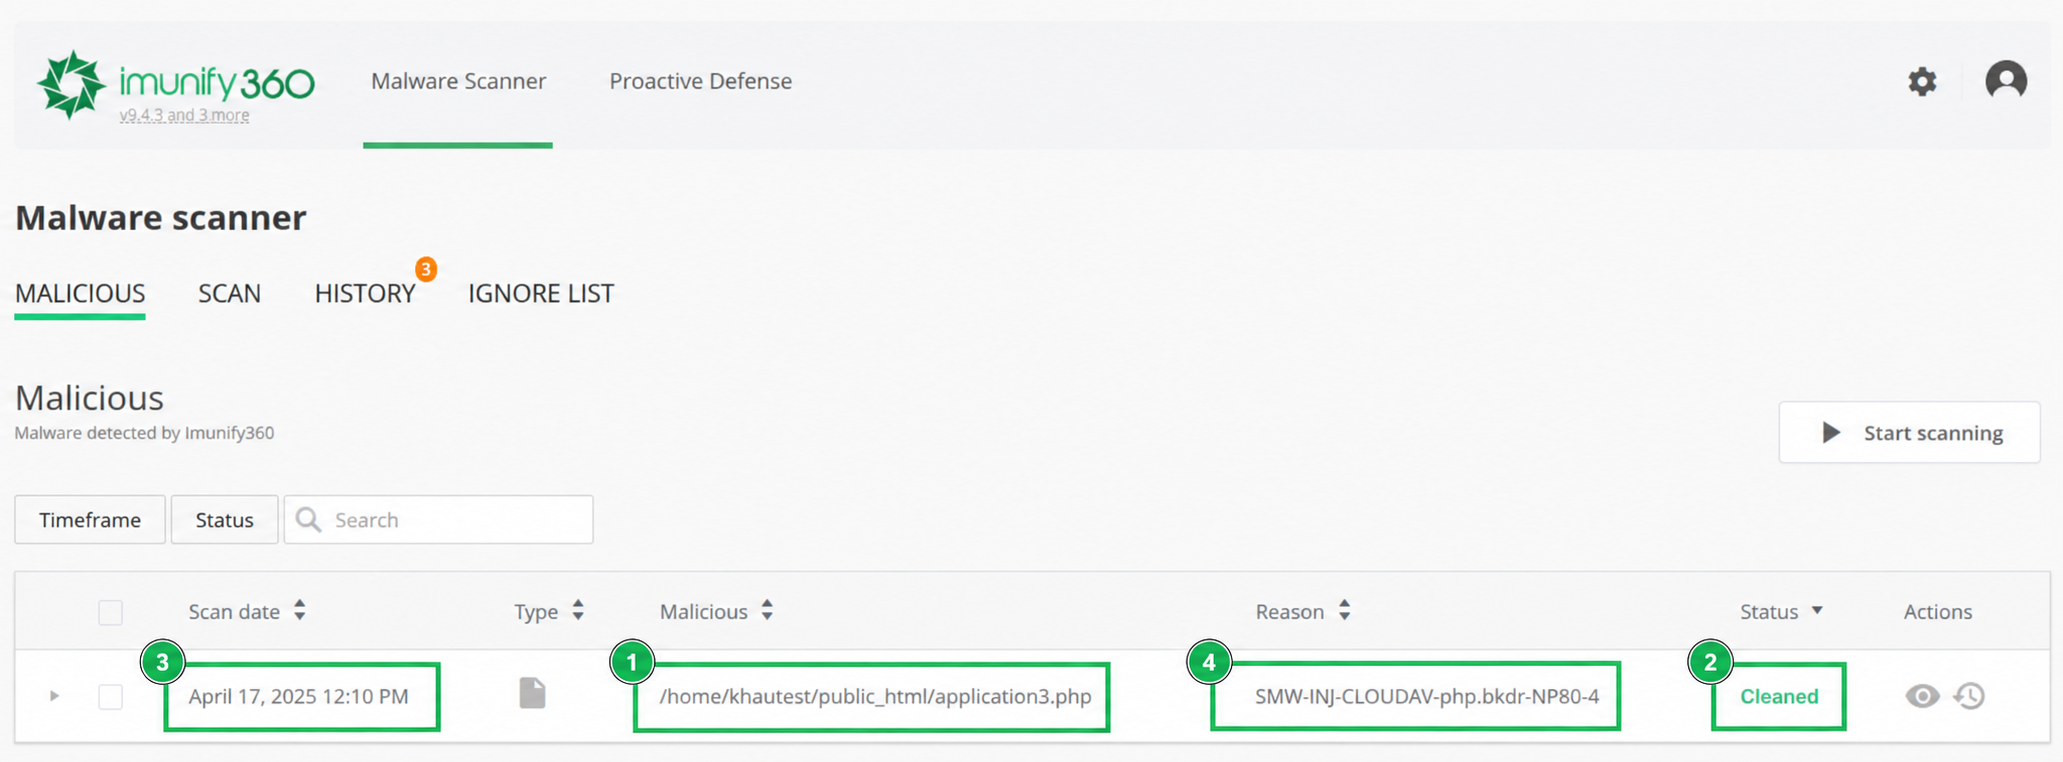
After the scan is complete, the Malicious tab displays each detected file together with:
- The file path;
- Detection status;
- Scan date;
- The reason why the file was flagged.
The following statuses may appear:
- Cleaned: the malicious code was removed, and the remaining file content was preserved;
- Content removed: the file contained only malicious code, so its contents were removed during the cleanup;
- Infected: malware was detected in the file during the scan.
Manage detected files
If manual action is required, you can use the available actions to manage detected files:
- View file content: allows you to inspect the file;
- Add to Ignore List: excludes the file from future malware scans;
- Restore: restores the version of the file saved by Imunify360 before cleanup (if available).
Note 1: The 'Restore' option cannot restore files from your hosting backups. On Stellar Plus/Business, you can manually restore clean files using the
AutoBackup tool in cPanel.
Note 2: The 'Clean up all' option is intentionally disabled, as the data is expected to be cleaned automatically. If a file has the 'Infected' status, you can modify it manually via
File Manager. If there are many 'Infected' files or managing them via File Manager is not convenient, please contact our
Support Team for investigation.
Scan and History tabs
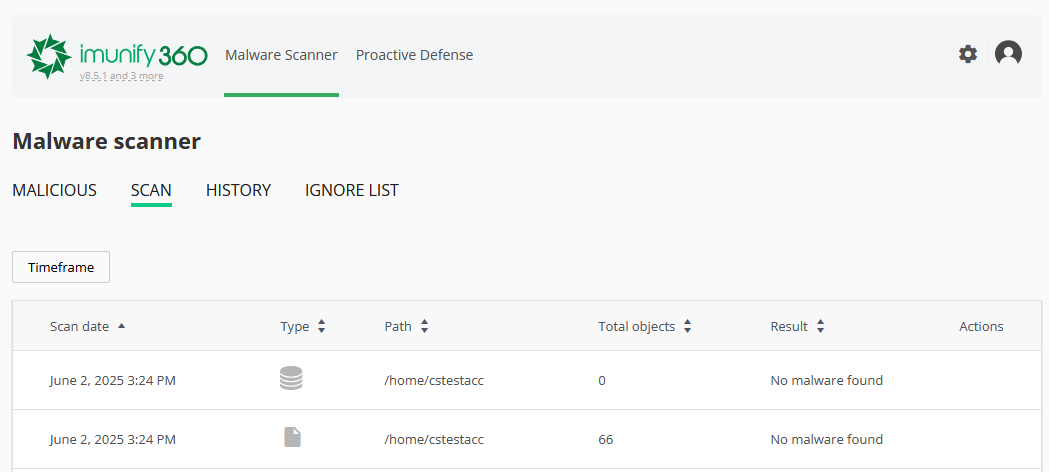
The Scan tab shows the information about all the scans performed in your cPanel account, including the scan date, folder path, the total number of scanned files, a number of threats, a number of files detected as suspicious during scanning, and actions taken for these files:
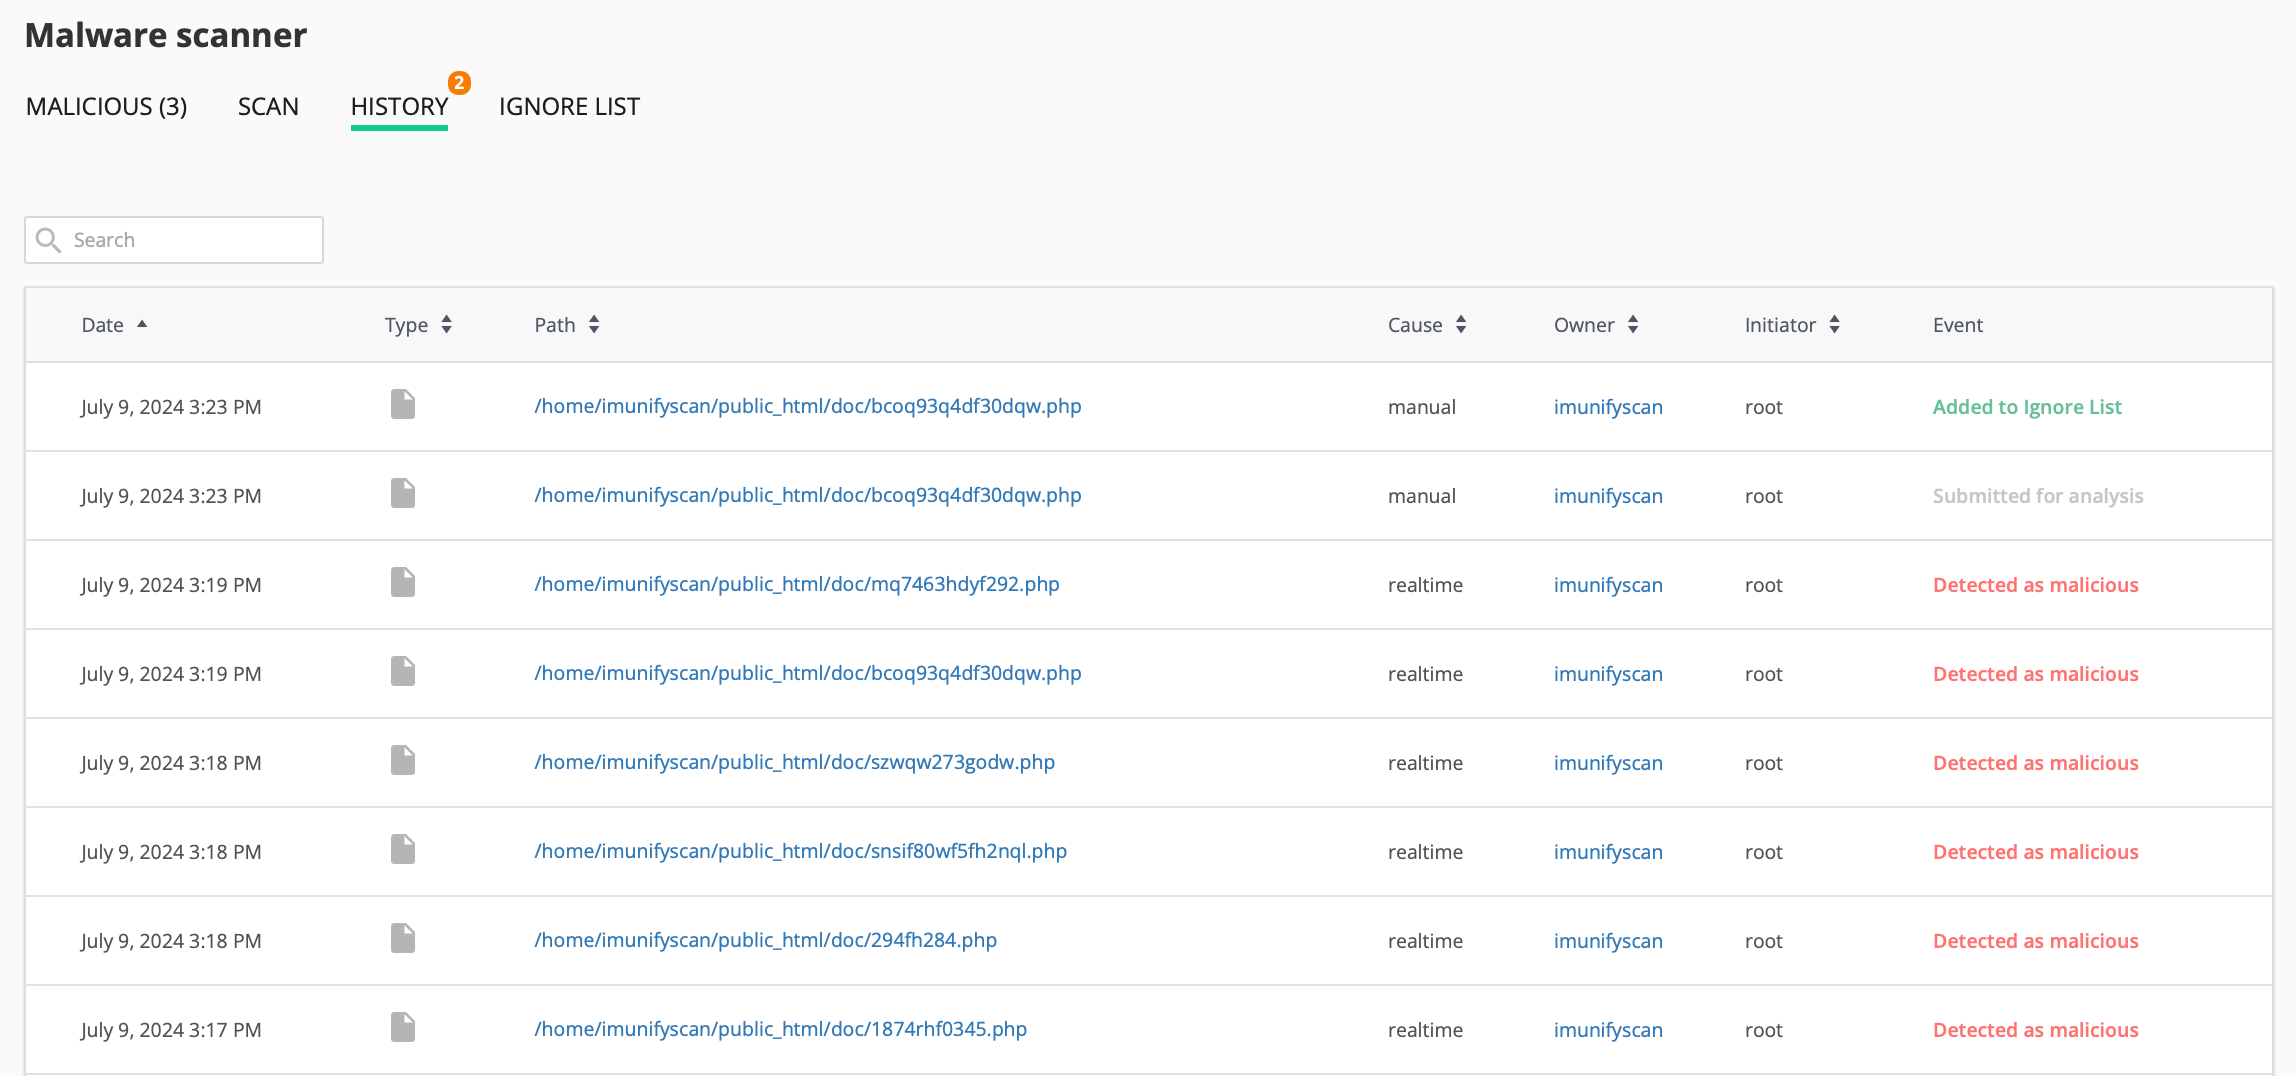
The History tab shows every action taken - including scans, cleanups, file restores, and Ignore List updates. This helps you track what's happened over time. Logs are stored on the server for 30 days.
Ignore List tab
Ignore List contains the list of files, databases, and directories that are excluded from Malware Scanner scanning.
You can exclude a file or folder from future scans:
-
Go to Malware Scanner >> Ignore List
-
Click Add new entry and enter the full path:
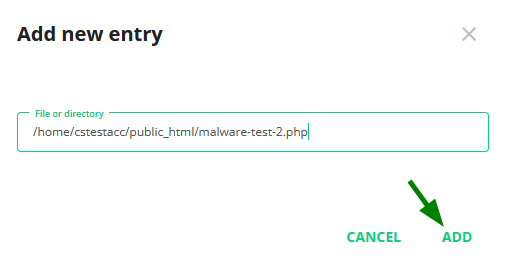
Imunify360 will skip these during future scans. You can remove items from the list anytime.
Note: Wildcards like /home/*/file.php are not supported.
What is Proactive Defense?
This feature blocks suspicious scripts before they can do any harm by monitoring dangerous behavior (like trying to inject code or modify system files).
You can see blocked actions under the Proactive Defense tab:
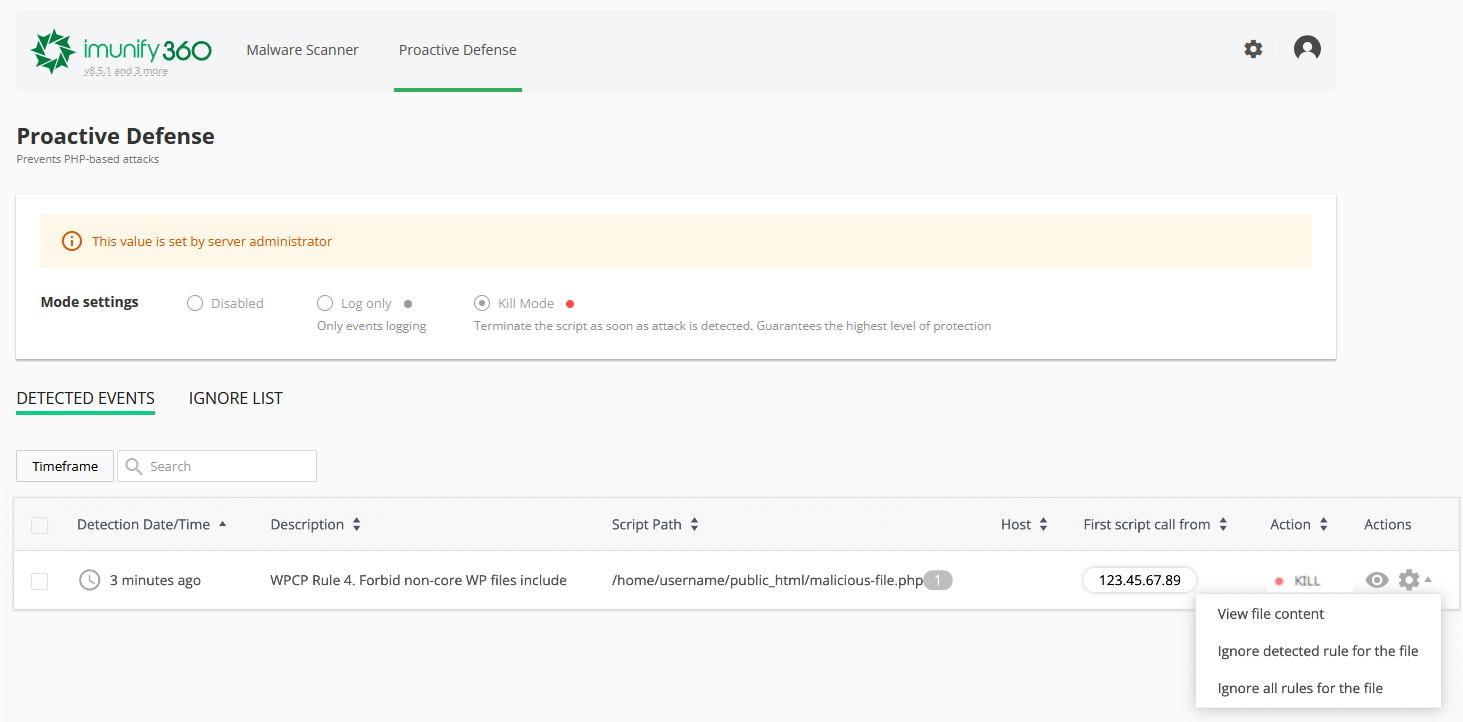
Proactive Defense operates in Kill Mode on Namecheap Shared and Reseller hosting servers. This is the highest level of protection - the script is terminated as soon as malicious activity is detected.
If you're sure a file is safe and want to allow it:
-
Click the gear icon next to the event.
-
Choose to Ignore detected rule or Ignore all rules for the file.
Note: Use the ignore options if you are absolutely certain that the action is safe.
That's it!