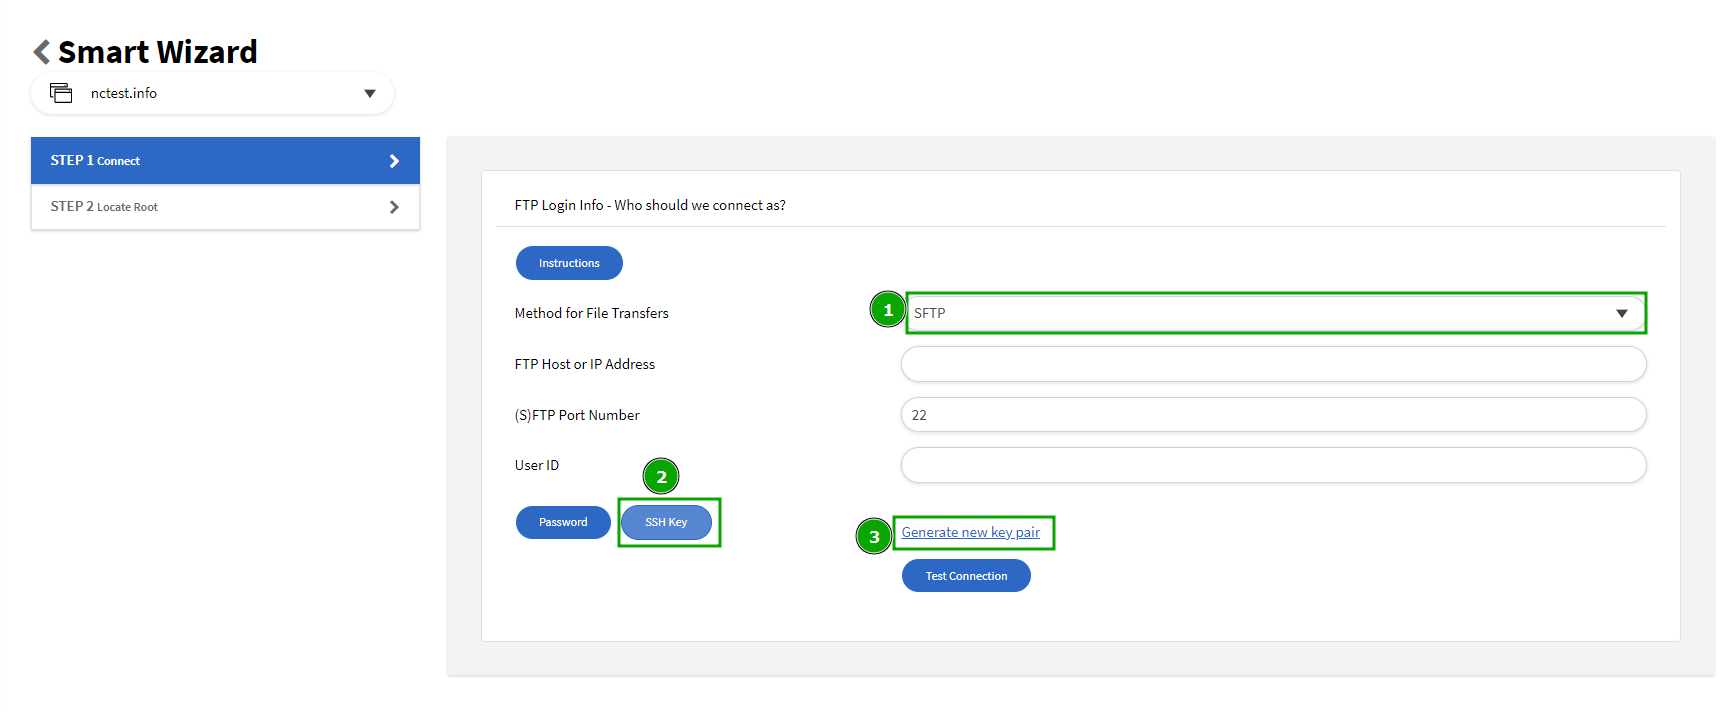
1. Select the
SFTP connection, click the
SSH key button,and press on the
Generate new key pair option:
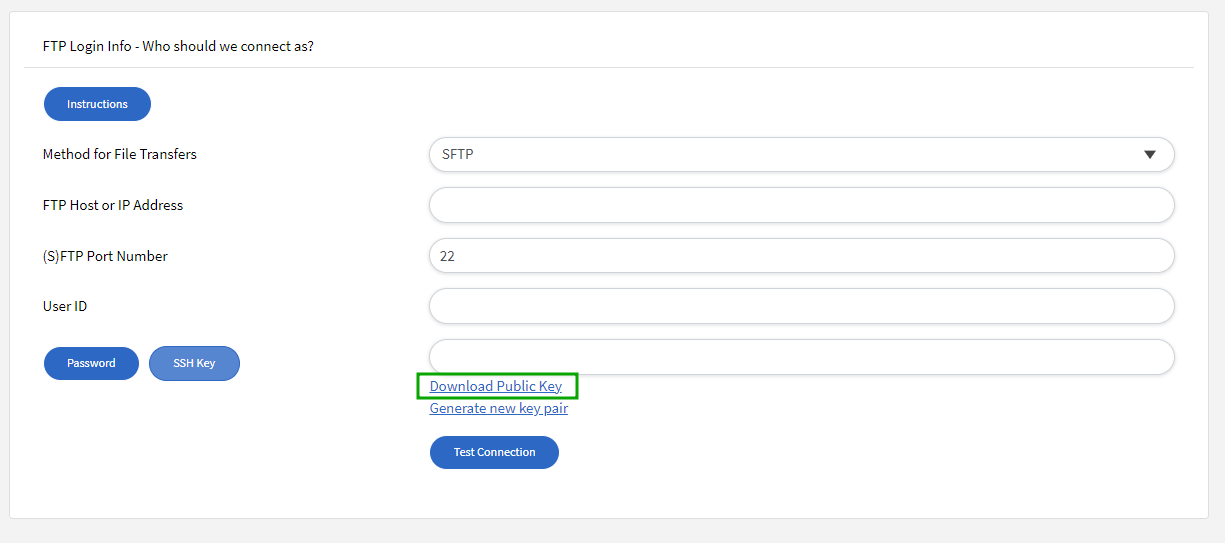
2. SiteLock will generate private and public keys. Once it is ready, download the file with the public key on your computer using the
Download Public Key option:
 NOTE
NOTE: It is not possible to receive the private key as SiteLock keeps it on their side.
3. Open the downloaded file on your computer with any text editor and copy the generated public key:
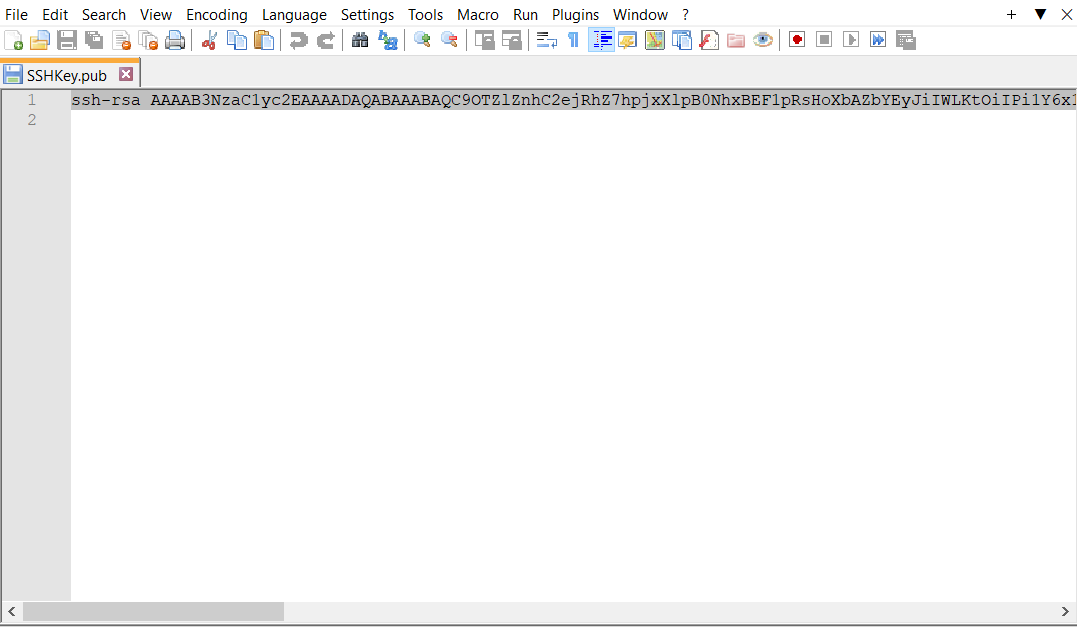
Now it is needed to add this public key to your cPanel.
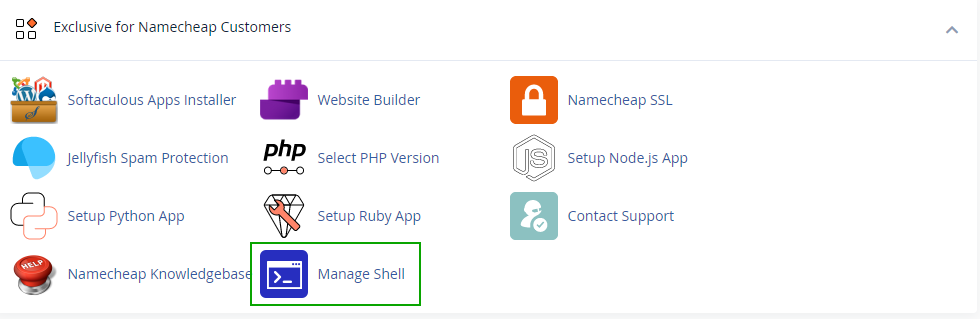
4. Go to your
cPanel account >> menu
Manage Shell:
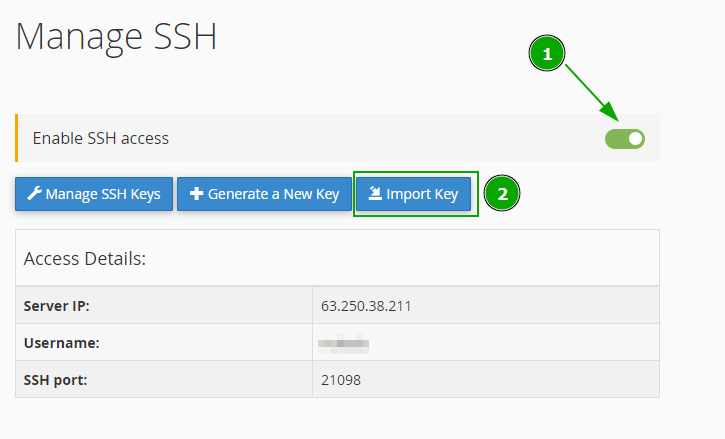
5. Enable SSH by turning the toggle button on and click the
Import Key button:
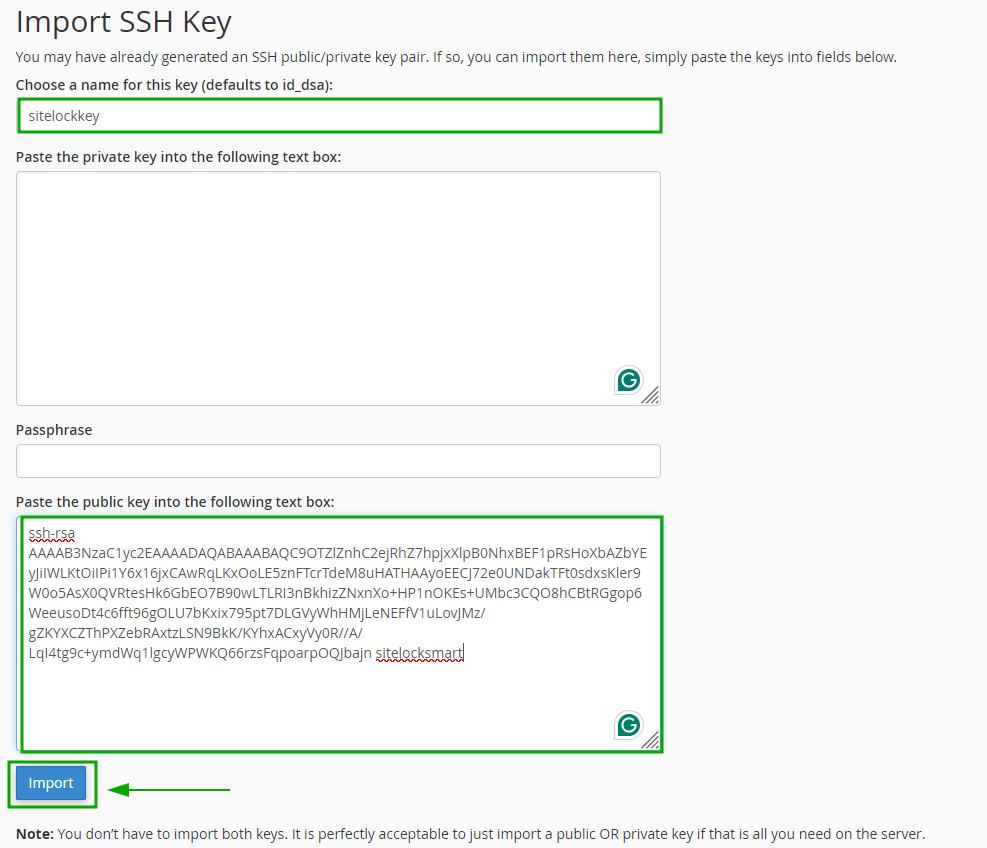
6. Fill in the following fields:
- Choose a name for this key (defaults to id_dsa) - enter the name of the key. You can name it whatever you want, we use the name "sitelockkey" in our example;
- The Paste the private key field should be empty as we do not have it and SiteLock keeps this private key on their side;
- The Passphrase field should be empty as well;
- The copied key from the downloaded file should be entered to the Paste the public key field.
And click
Import:
You will receive the Success message:

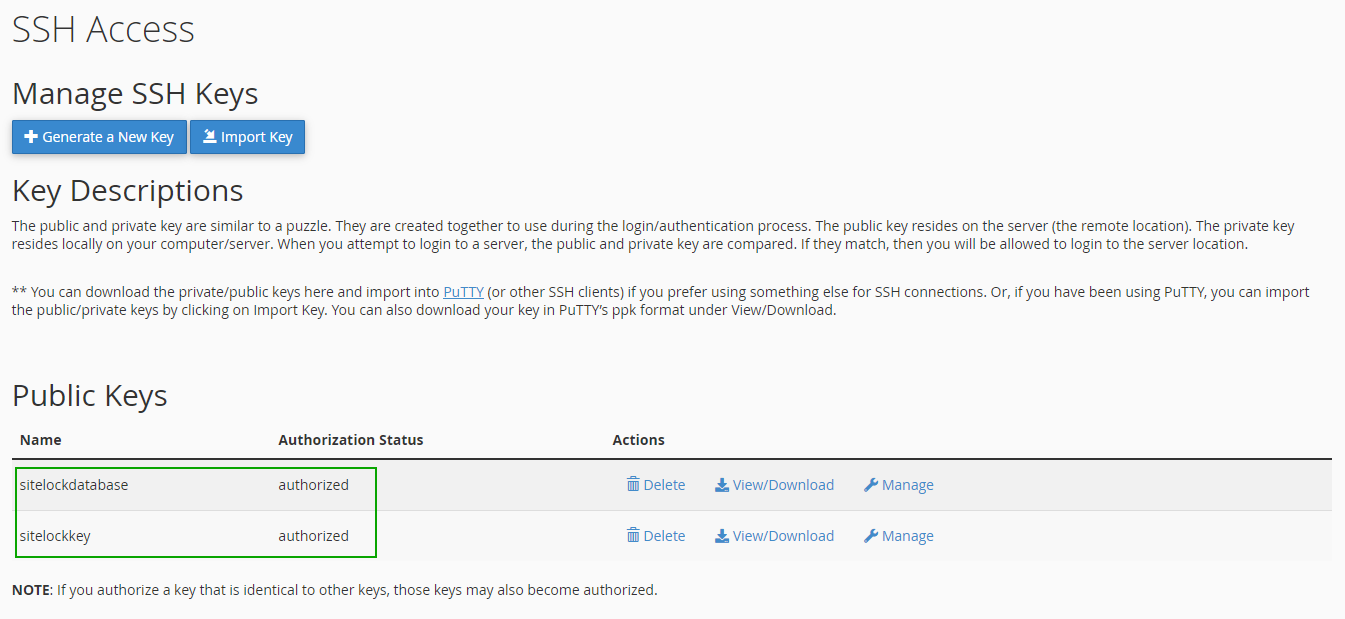
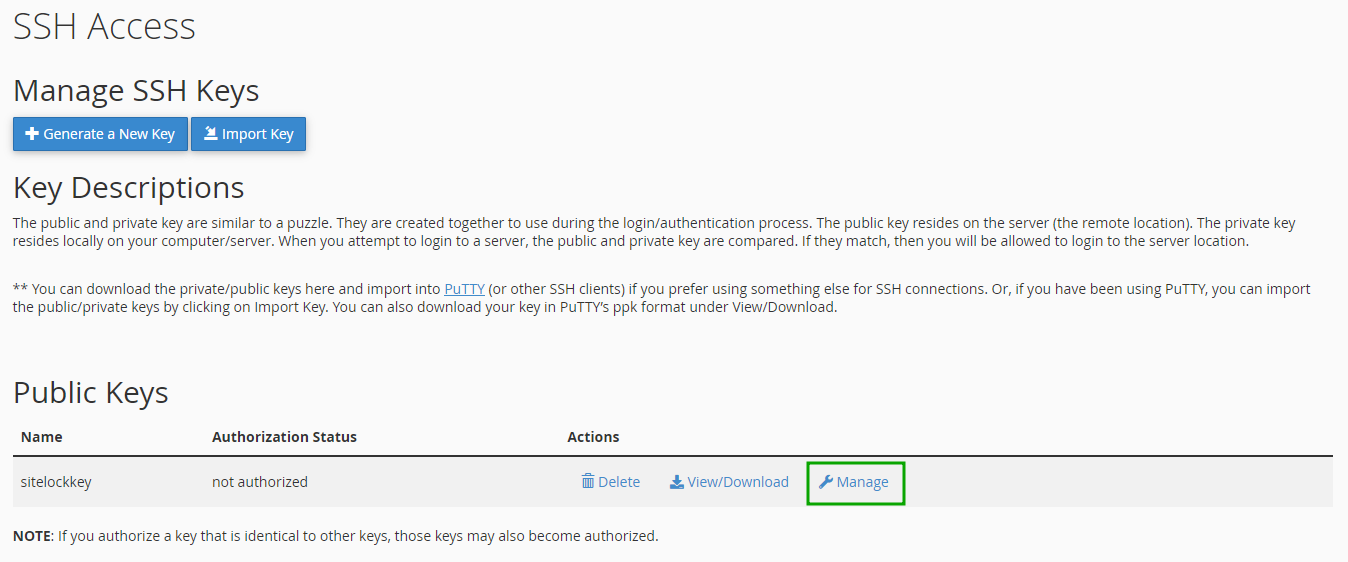
7. Now you need to activate the key. For this, go back to the
Manage SSH Keys and click the
Manage button near the imported key:
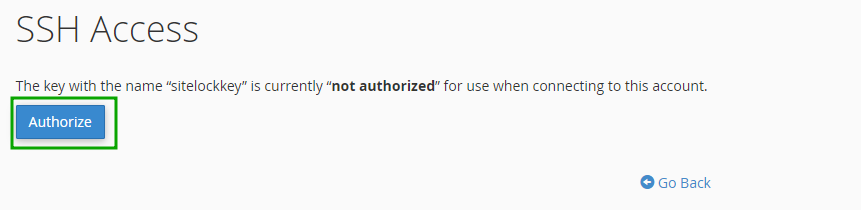
8. Click the
Authorize button:

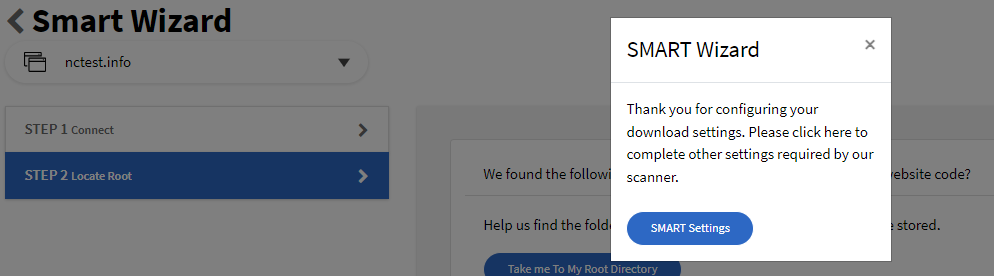
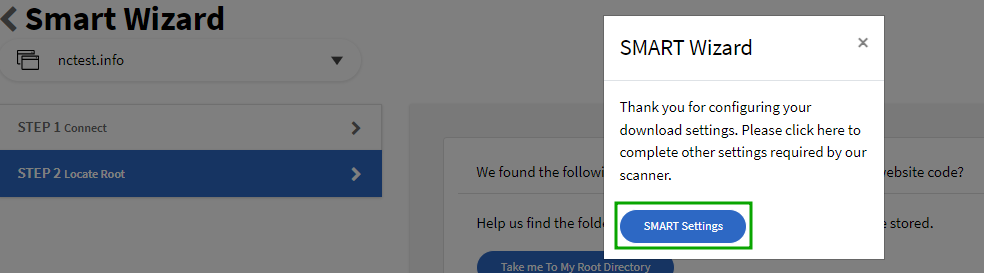
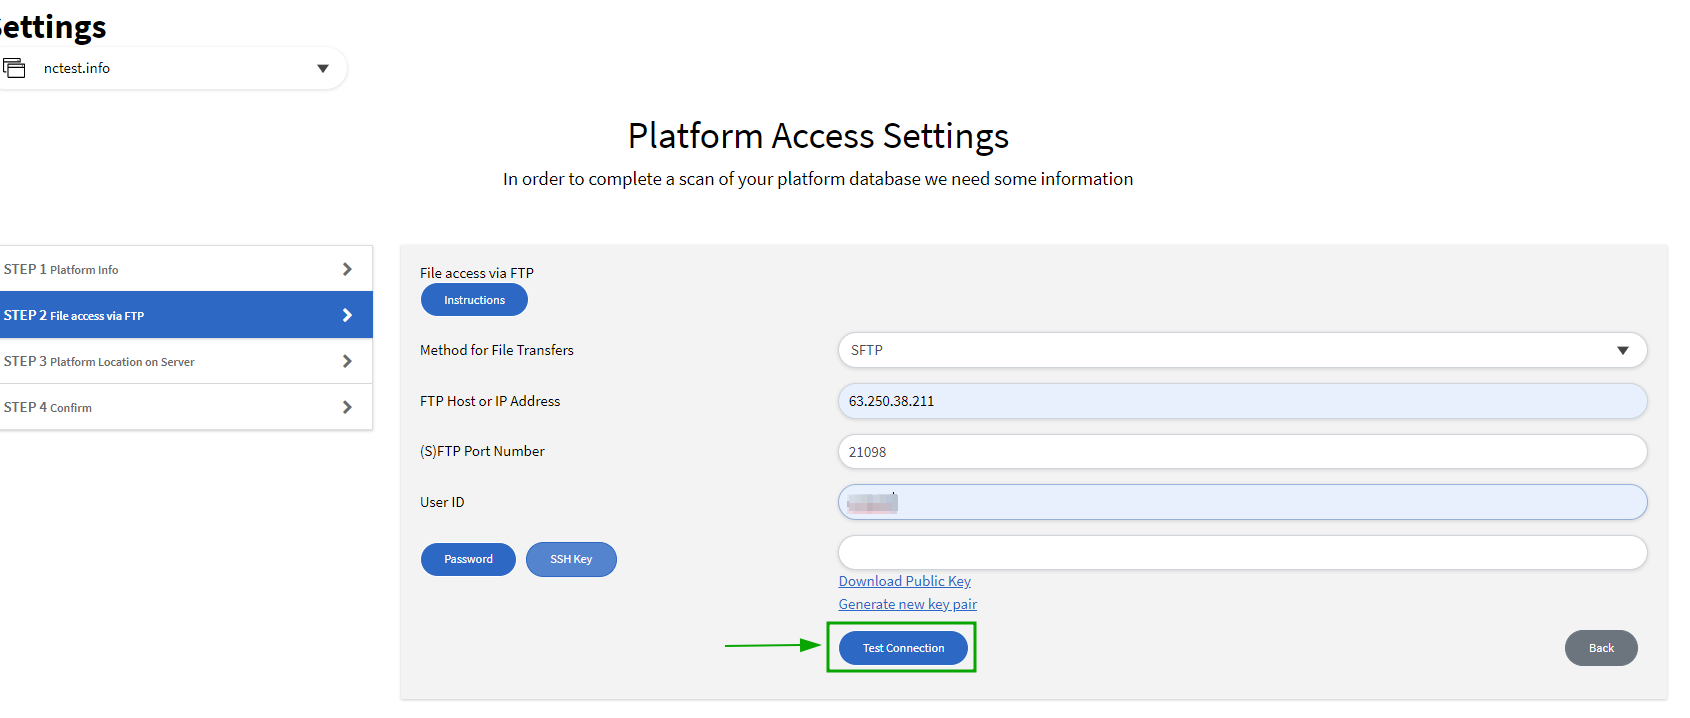
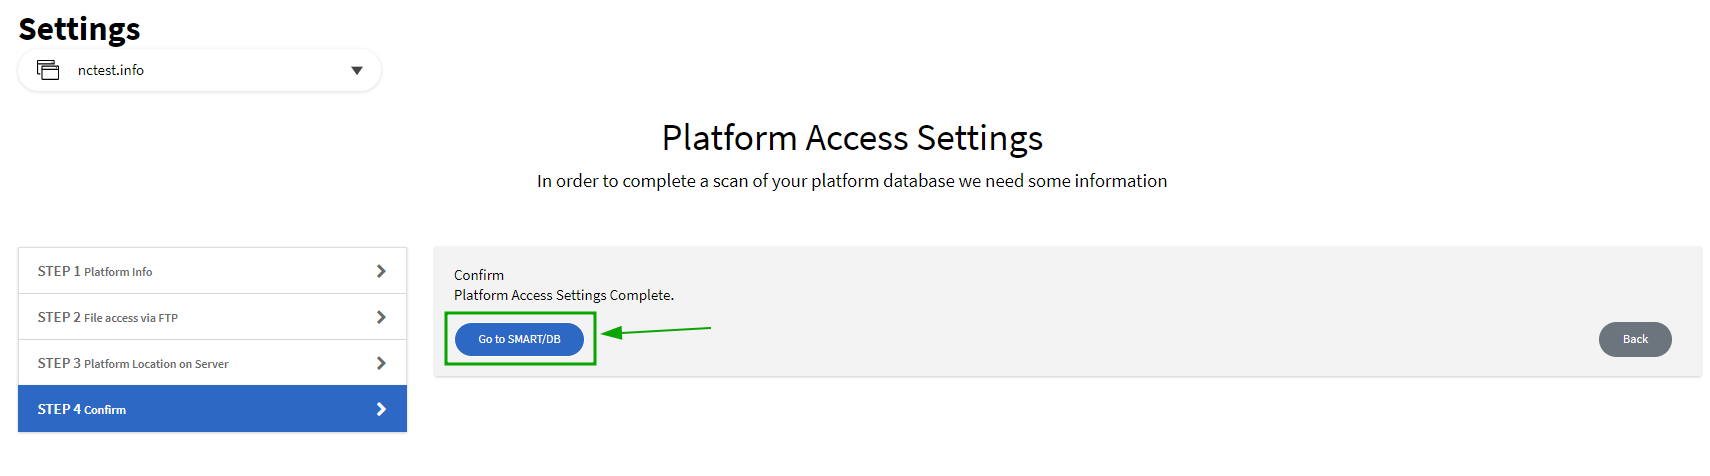
9. Go back to the SiteLock
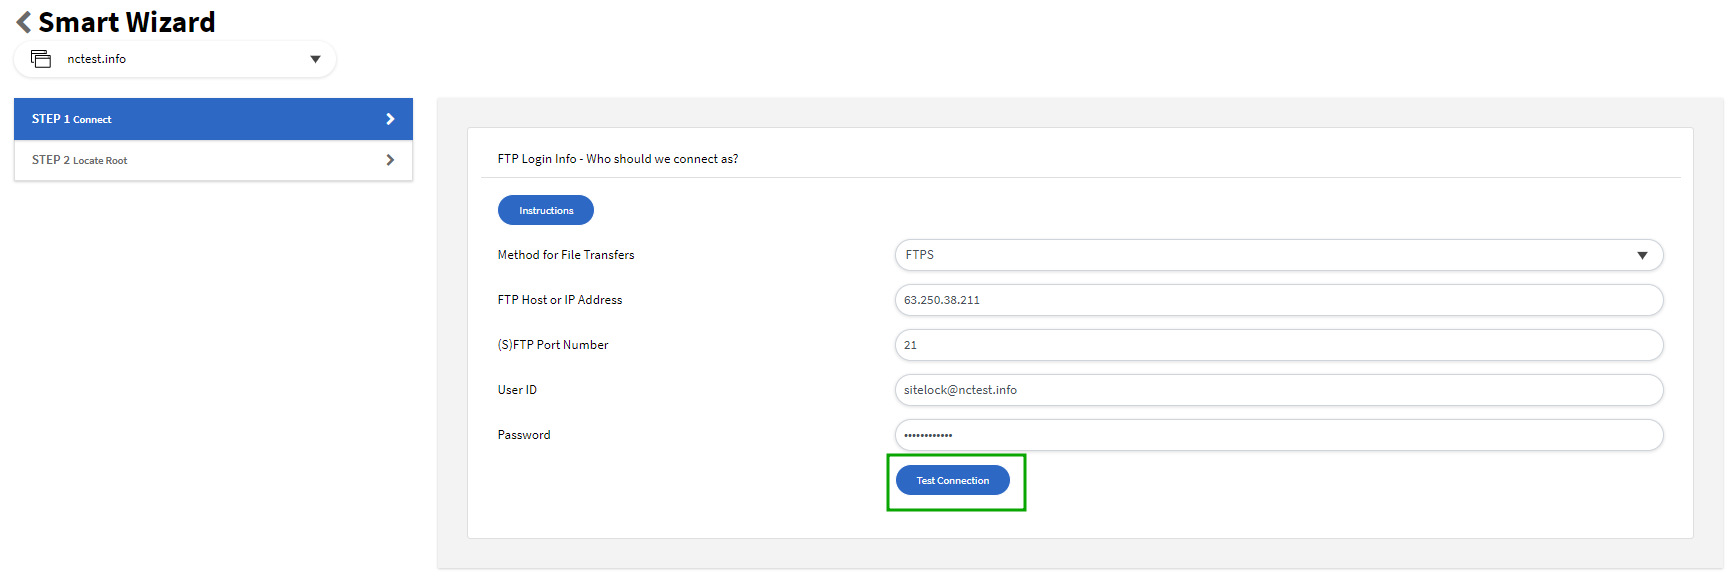
SMART configuration process and fill in the configuration form with your SFTP details:
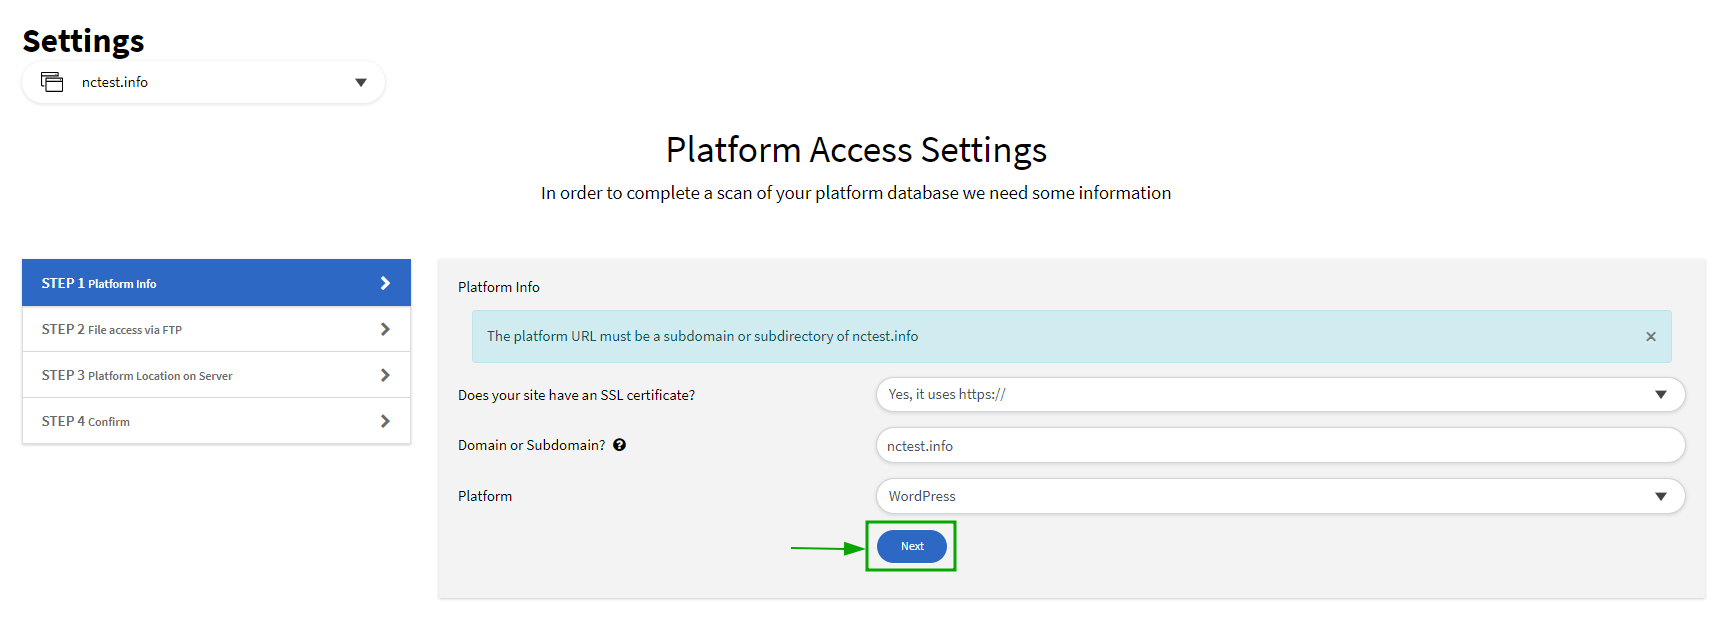
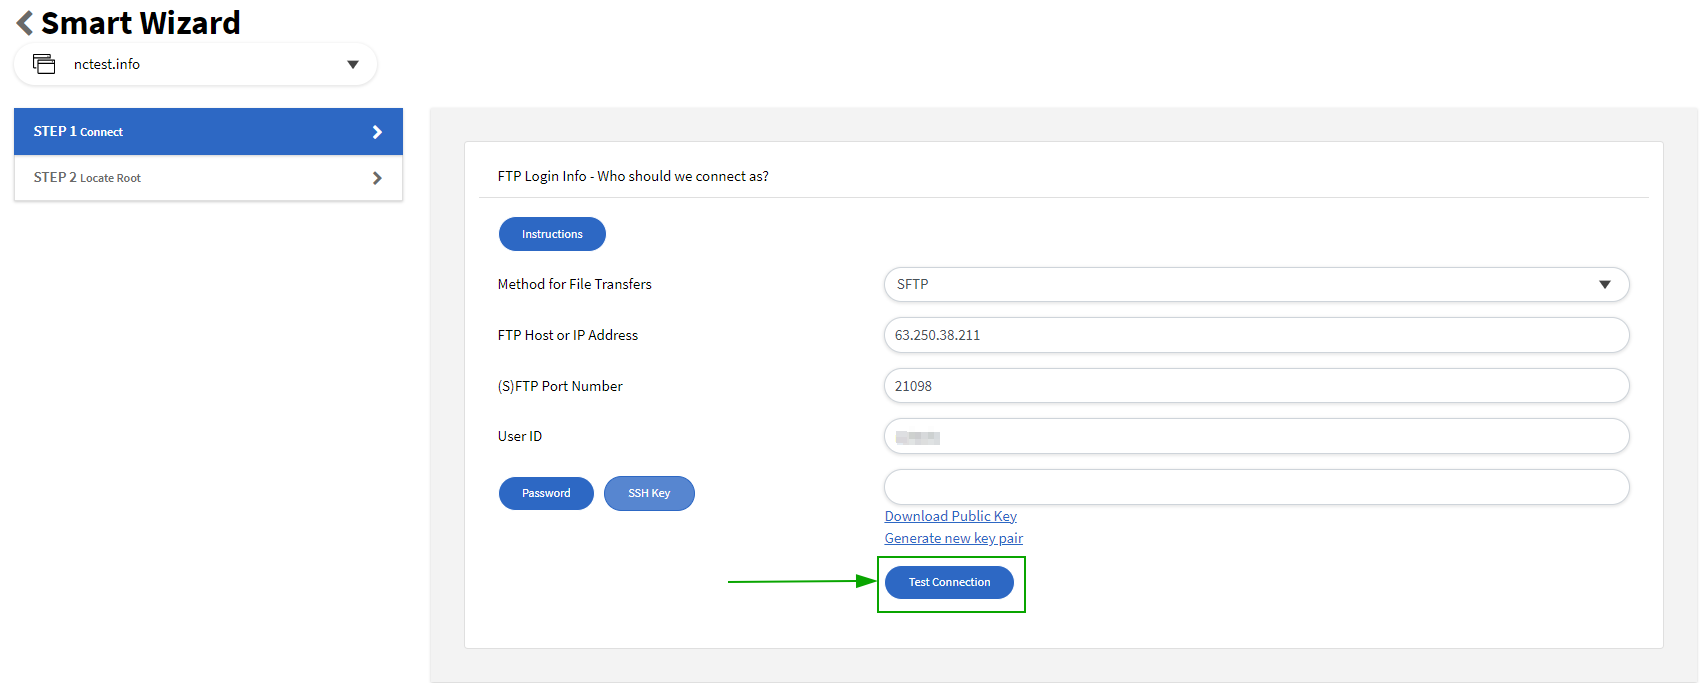 Method for File Transfers
: SFTP
FTP Host or IP address: your
servername or hosting account’s IP address
(S)FTP Port Number: 21098
User ID: your cPanel username (can be found in the email with the
Your Hosting Account Details for yourdomain.tld subject. It was sent to the email address assigned to your hosting billing profile)
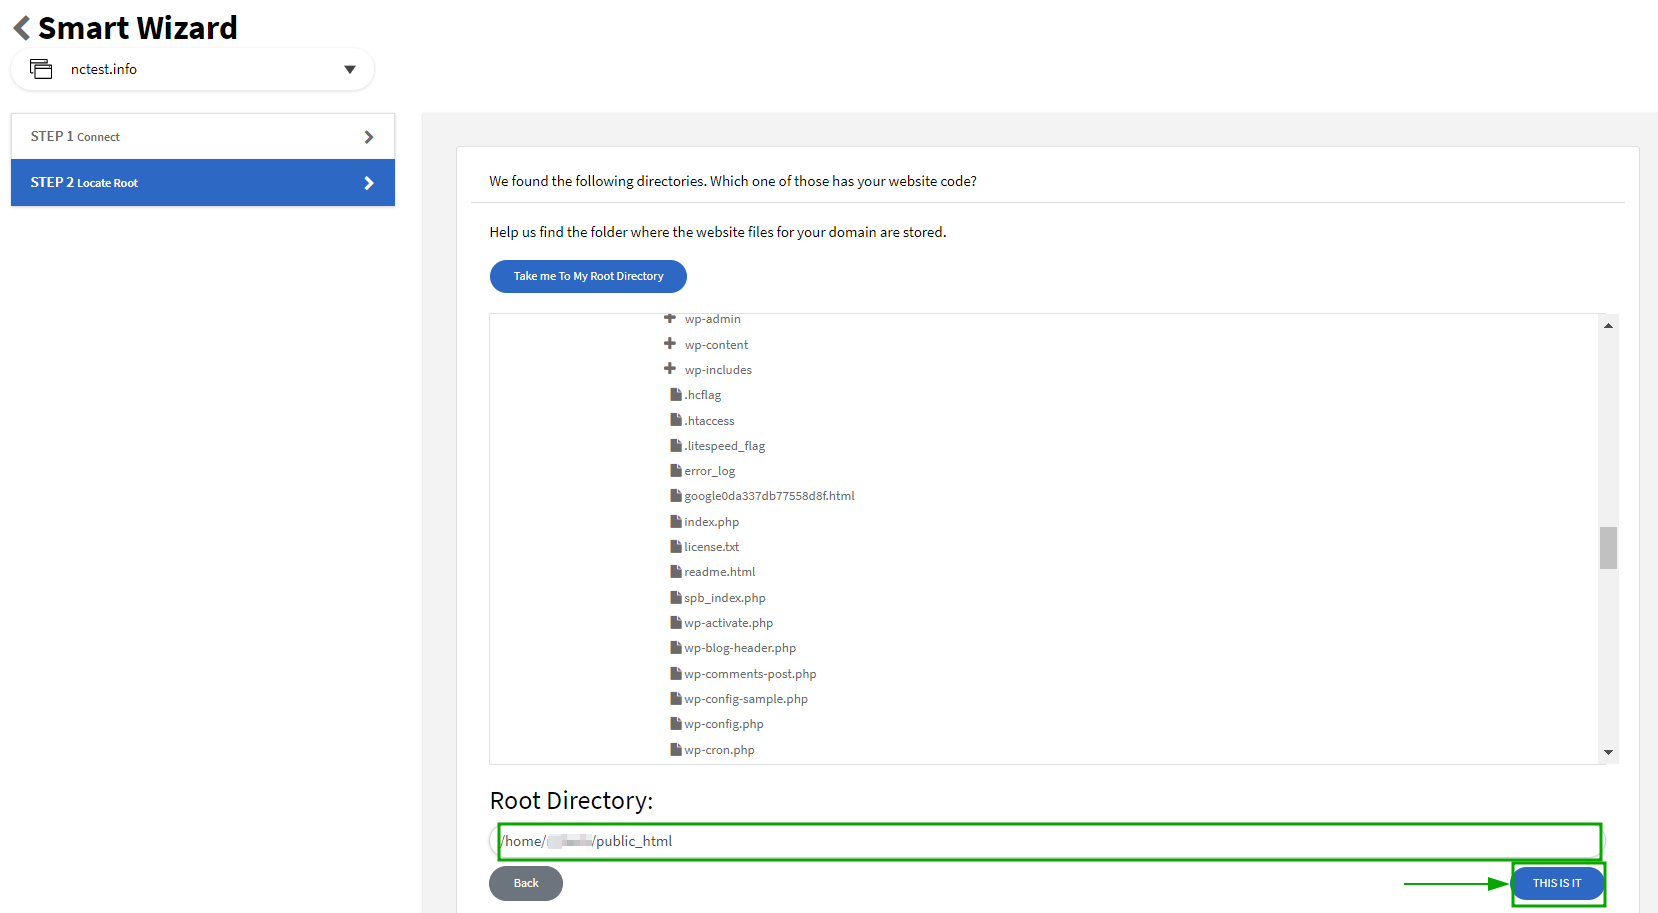
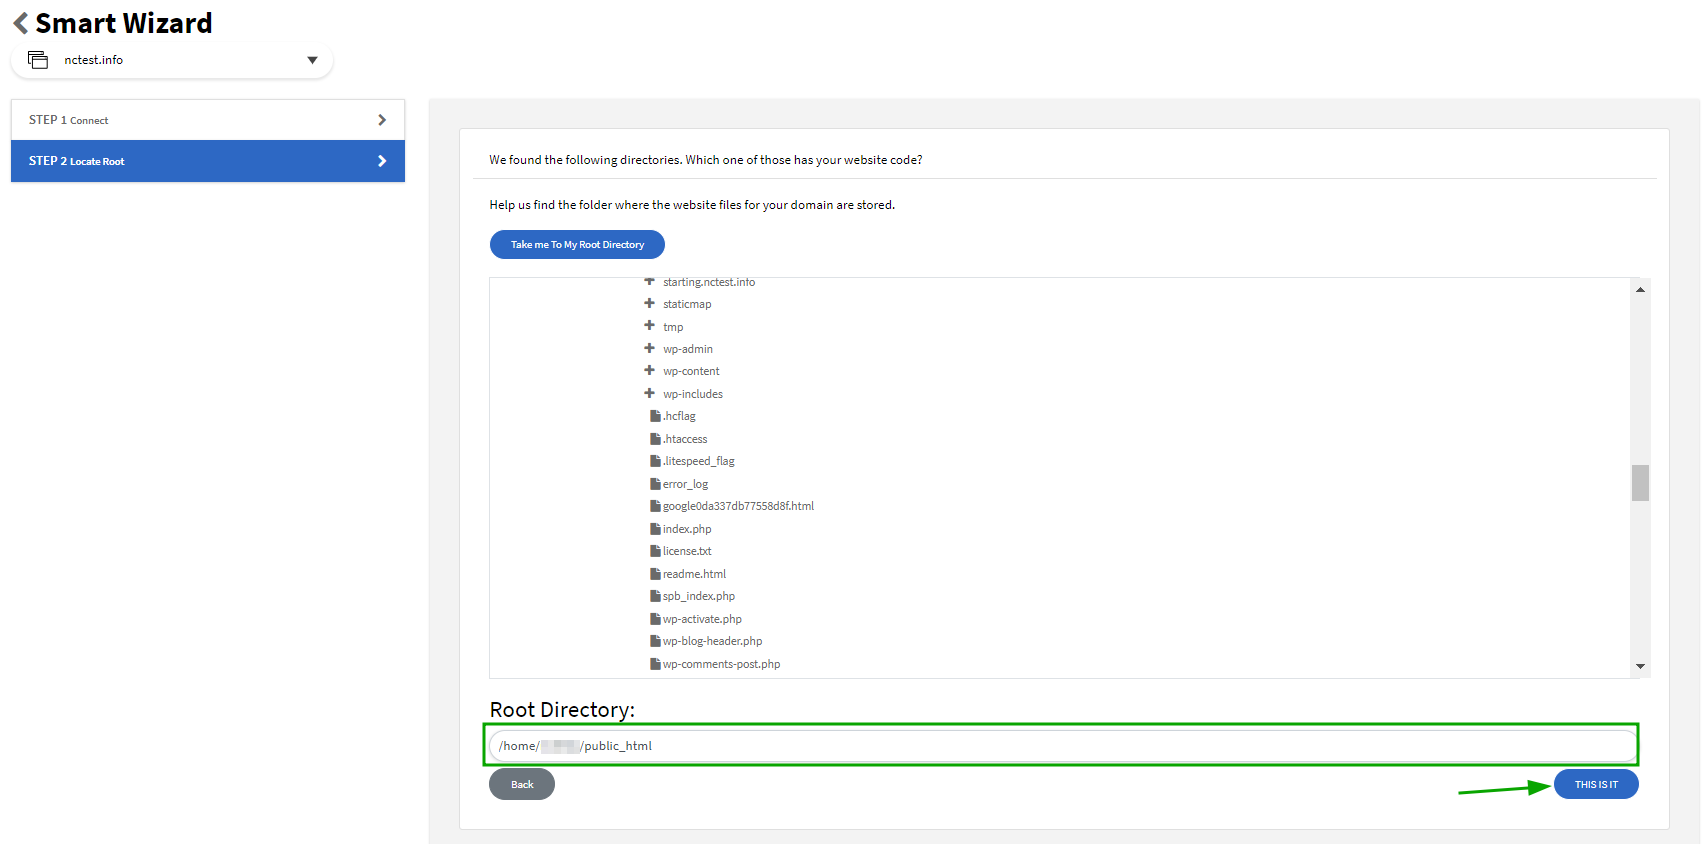
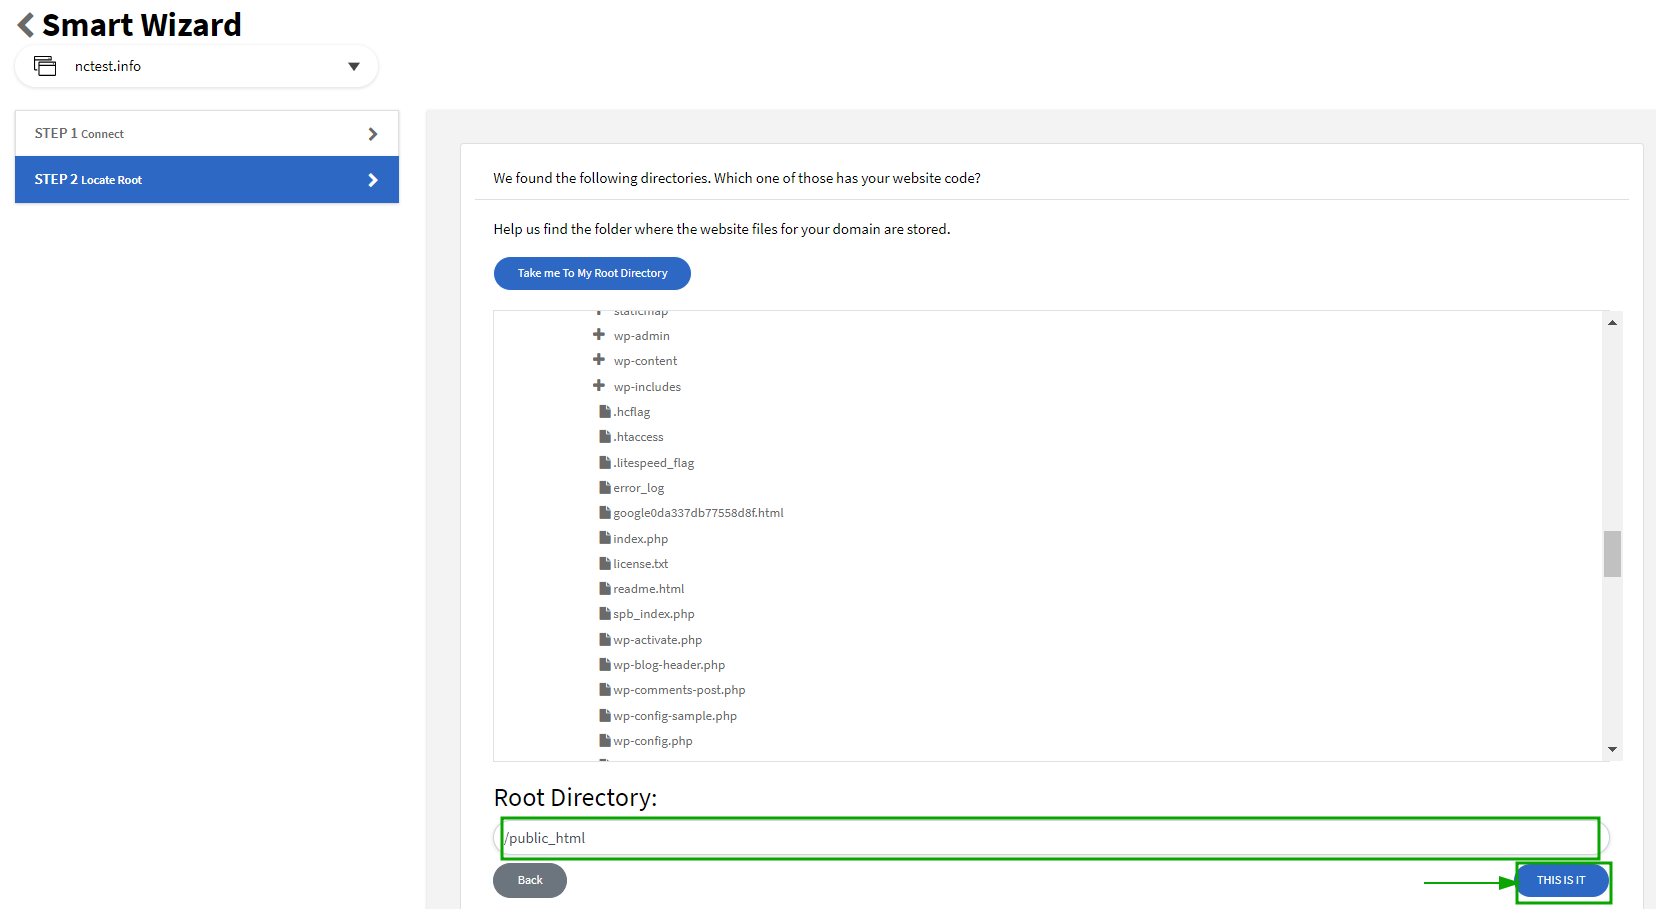
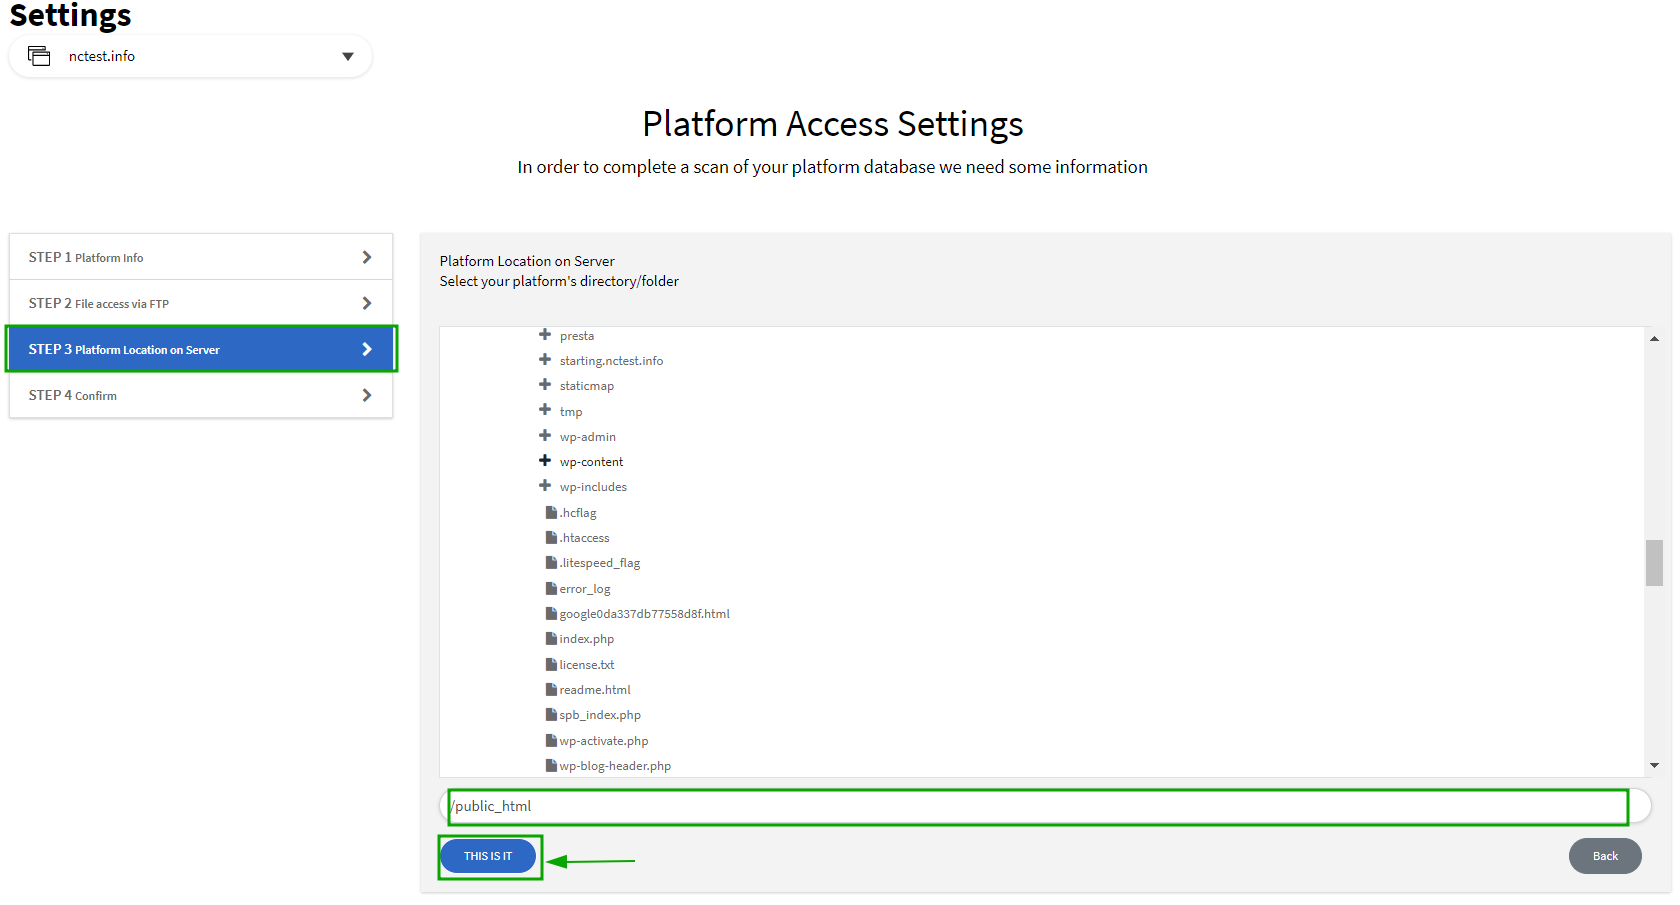
10. Select
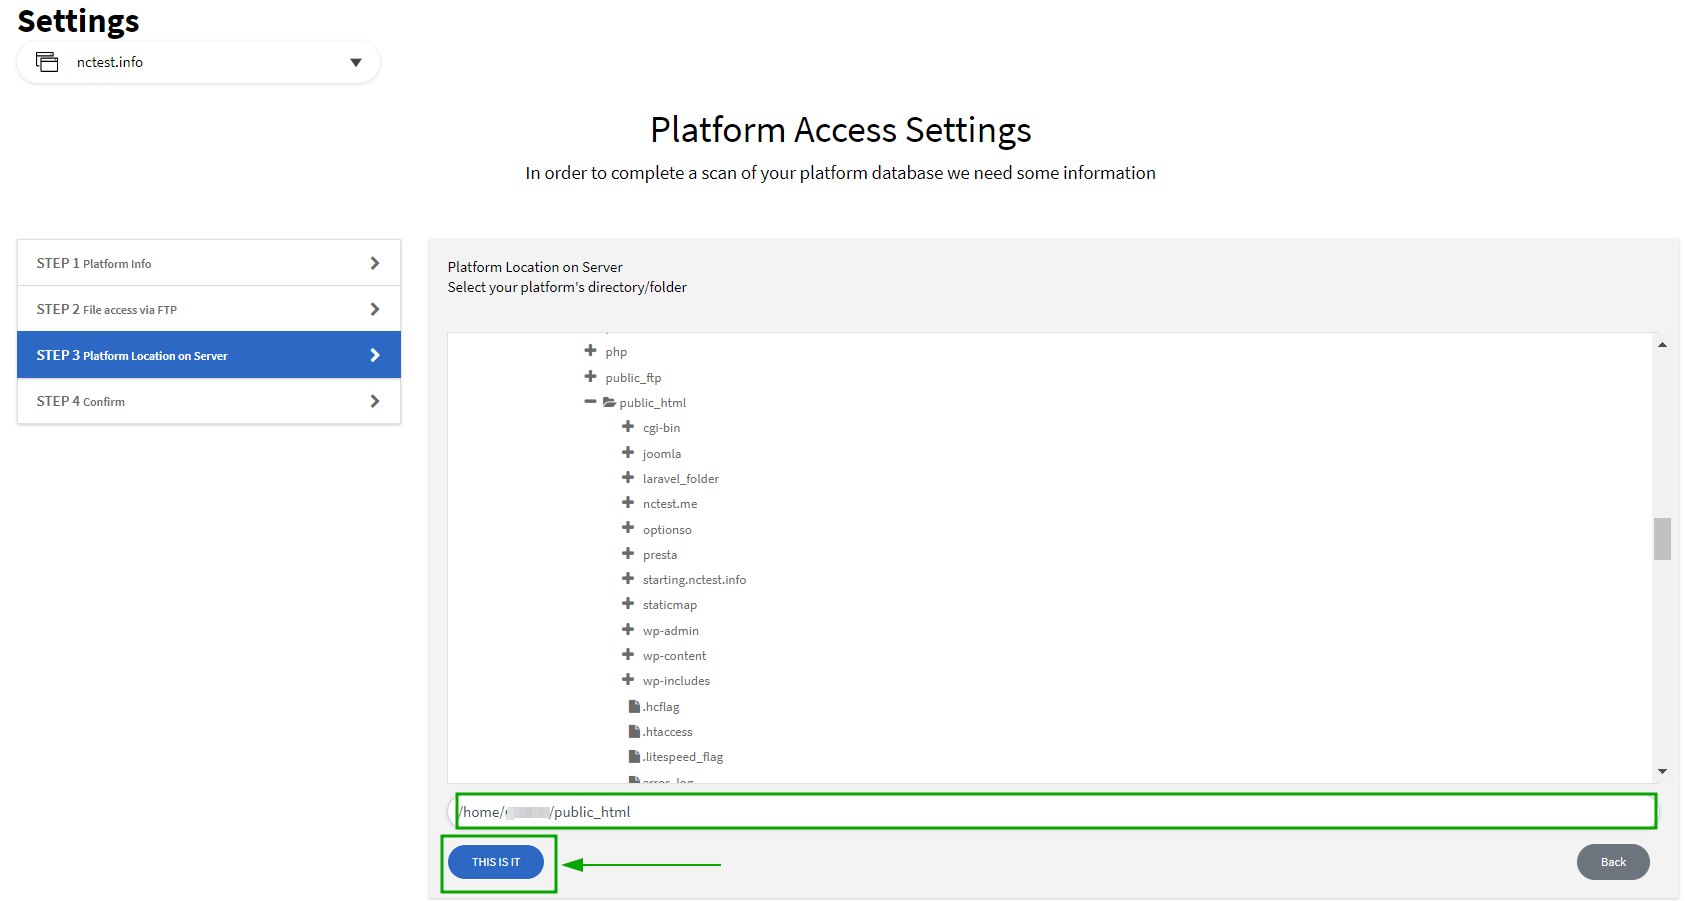
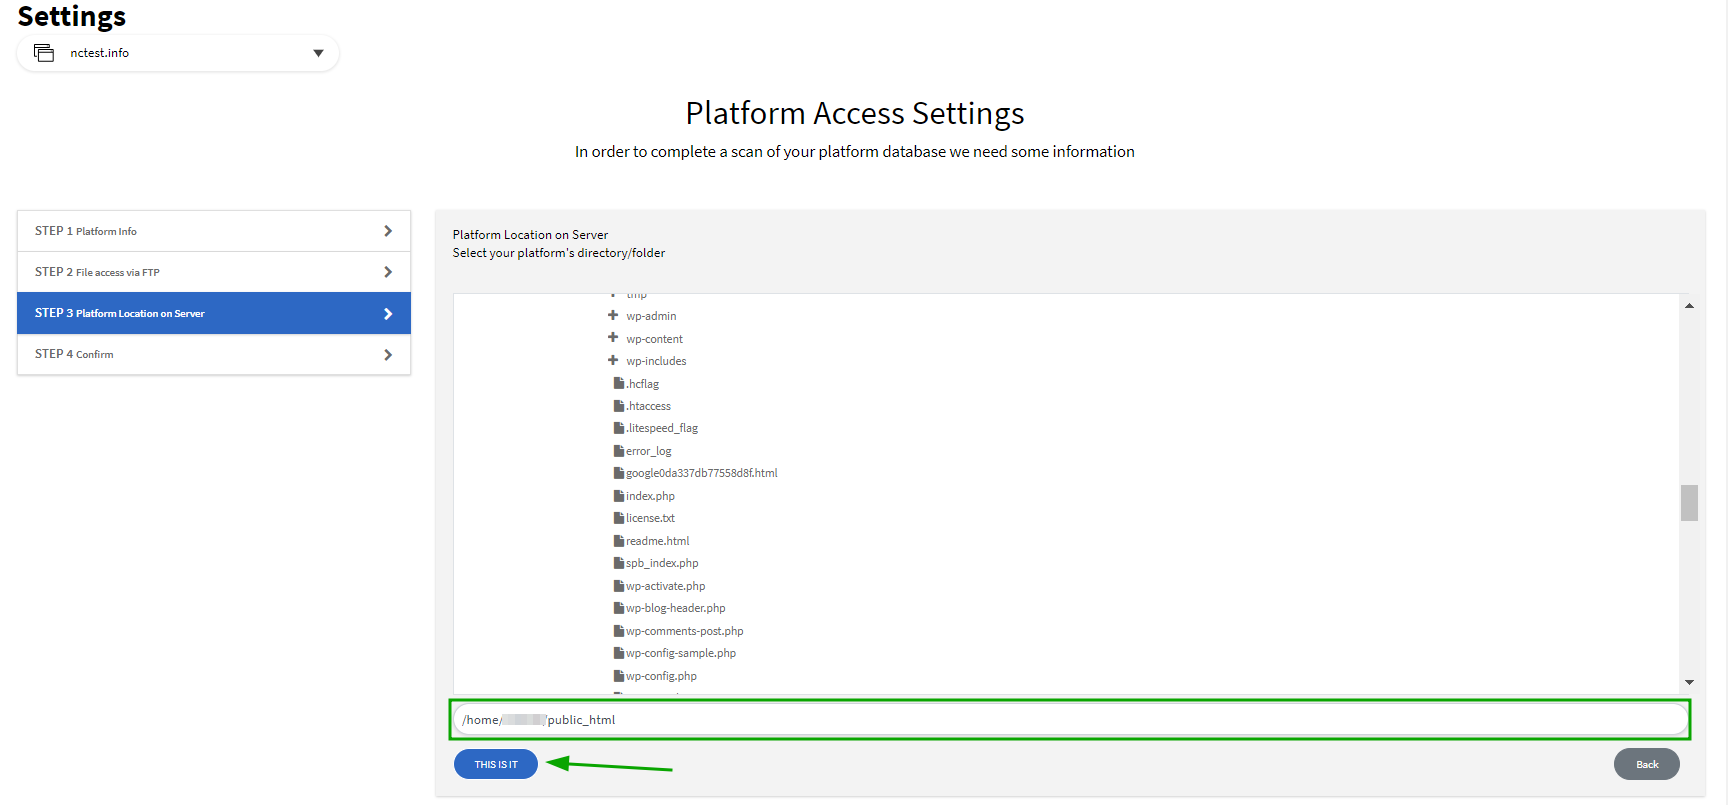
Test Connection and go to Step 2. You will see a list of folders present in your hosting account. Then you should select the
document root of your website (in our example, the website root folder is public_html) and click
That`s it: