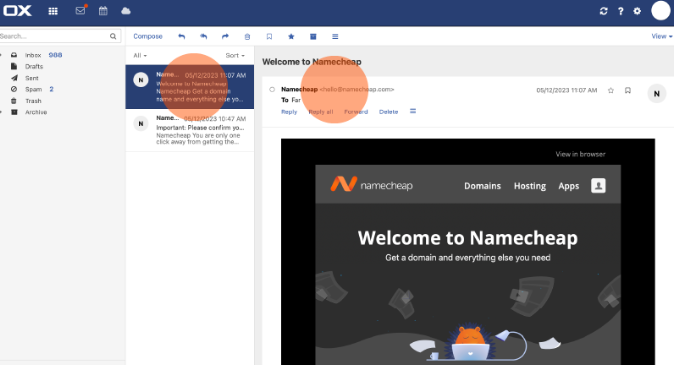
How to safelist Namecheap emails

Email is vital for businesses and freelancers. However, many important emails end up in Gmail's promotions or similar tabs instead of your inbox — leading to missed opportunities and reduced engagement.

Email providers use algorithms to filter incoming emails by separating different types of messages into tabs.

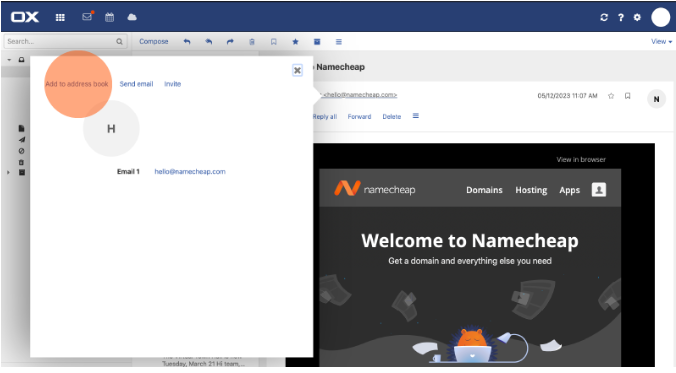
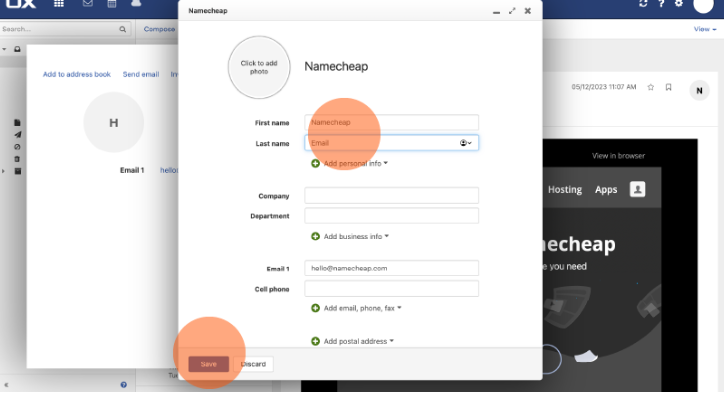
To ensure Namecheap emails reach your inbox, you can safelist your favorite email addresses or domains, adding them to your contacts or marking them as trusted sources.

Here we'll provide step-by-step instructions on how to label incoming emails correctly for:

The instructions to help you safelist Namecheap emails may vary depending on whether you're using Windows, Mac, Linux, iOS, or Android.

Gmail


If your Namecheap emails are going to your Promo tab, follow these steps:

  1. On your phone: Tap the 3 dots (...) and select "Move to inbox"


  2. On your desktop: Click the "Move to" folder icon, and choose "Primary" or "Inbox".


  3. Alternatively, you can drag and drop from one tab to another.


Apple Mail


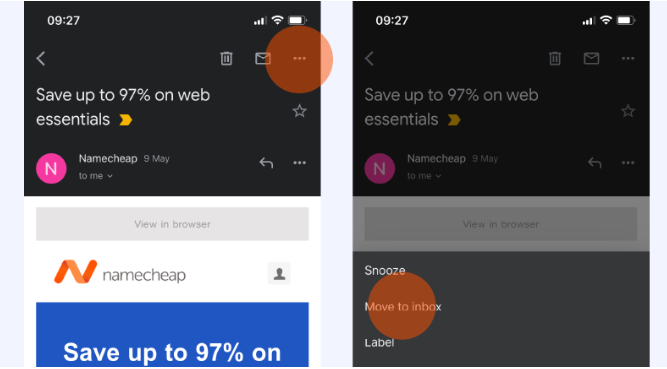
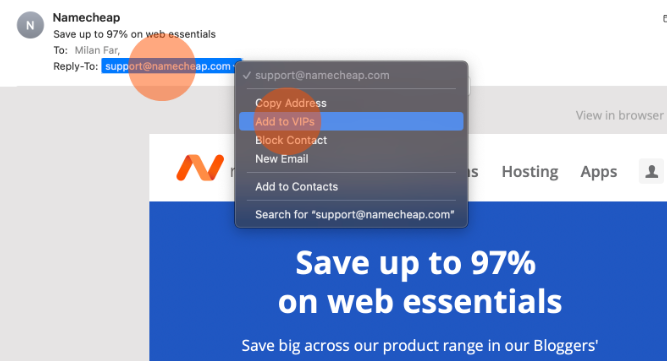
  1. To receive Namecheap emails in your Apple Mail inbox, click on our email address and tap "Add to VIPs":


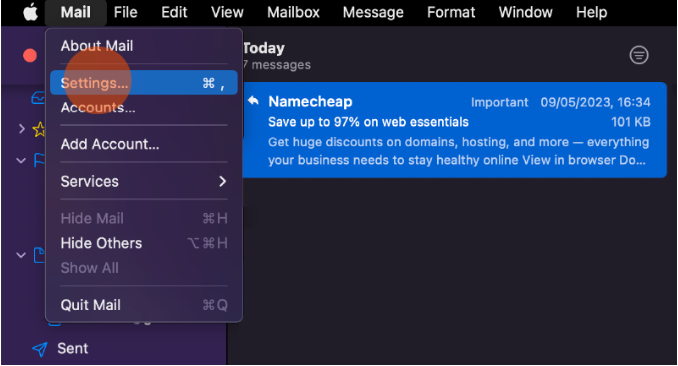
  2. Alternatively, you can open Apple Mail and select "Mail"> "Settings" from the top menu:


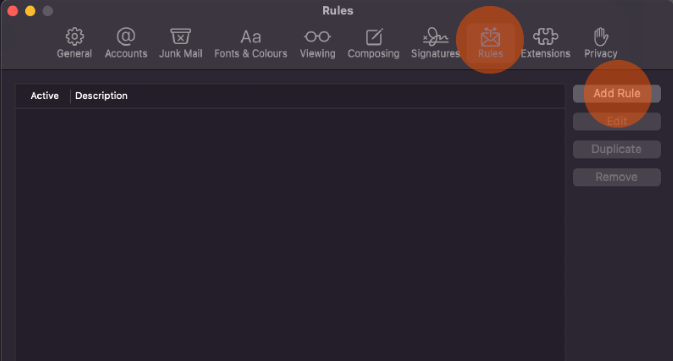
    • Click the "Rules" icon and the "Add Rule" button:


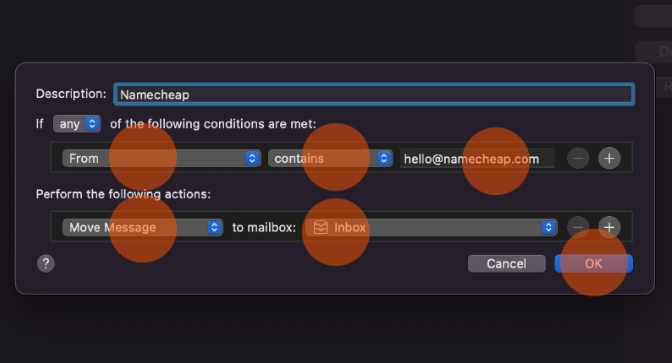
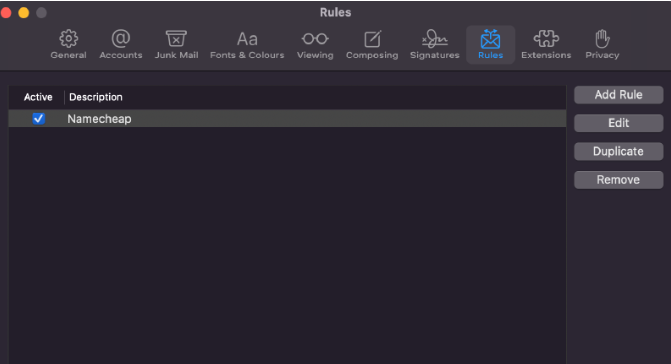
    • Create a rule with the following settings: "If any of the following conditions are met: From Contains [sender's email address]." Set the action to "Move Message"> "Inbox," and click "Ok."


Namecheap Private Email


  1. Log into your Namecheap Private Email account.

  2. Locate the email you want to safelist.

  3. Left-click on the email address.


  4. Select "Add to address book" from the context menu:


  5. Enter the sender's first and last name, and click "Save".


Yahoo! Mail


  1. Log into your Yahoo! Mail account and click the "Contacts" icon.

  2. Click "Add a new contact," enter the sender's name and email address, and click "Save."


AOL Mail


  1. Log into your AOL Mail account and click the "Contacts" icon.

  2. Click "Add New Contact," enter the sender's name and email address, and click "Add Contact."


Outlook


  1. Log into your Outlook account and click the "People" icon.

  2. Click "Add a contact," enter the sender's name and email address, and click "Create."


Verizon


  1. Log into your Verizon email account and click "Options"> "Block Senders."

  2. Locate the "Safe List," enter the sender's domain, and click "OK."


Comcast


  1. Log into your Comcast email account and click "Address Book"> "New"> "New Contact."

  2. Enter the sender's email address and click "Save."


Cox.net


  1. Log into your Cox.net email account and click "Preferences"> "Blocked Senders."

  2. Enter the sender's email address in the "Exceptions List" and click "Add"> "Save."


Road Runner


  1. Log into your Road Runner email account and click the "Junk Mail" folder.

  2. Select the email with the address you want to safelist and click "Mark as Not Spam."


AT&T WebMail


  1. Log into your AT&T WebMail account and select "Options"> "Filters."

  2. Click "Add Filter" and set the filter to "From Header contains [sender's email address]."

  3. In the "Move the message to" dropdown, select "Inbox" and click "Add Filter."


EarthLink


  1. Log into your EarthLink email account and click "Add."

  2. Enter the sender's domain and click "Save."


Thunderbird


  1. Open Thunderbird and check if the sender's email is in your "Junk" folder. If so, right-click the email and select "Mark As Not Junk."

  2. Click "Address Book"> "Personal Address Book"> "New Card," and enter the sender's email address. Click "Ok."


Windstream


  1. Log into your Windstream email account and click the "Settings" tab.

  2. Select "Messages"> "Allow and Block Messages"> "Advanced Block Senders."


That's it!


Need any help? Contact our HelpDesk.
Updated
Viewed
3397 times

Need help? We're always here for you.

notmyip