In order to create a new Namecheap Private Email mailbox, follow the instructions below:
1. Sign in to your Namecheap account.
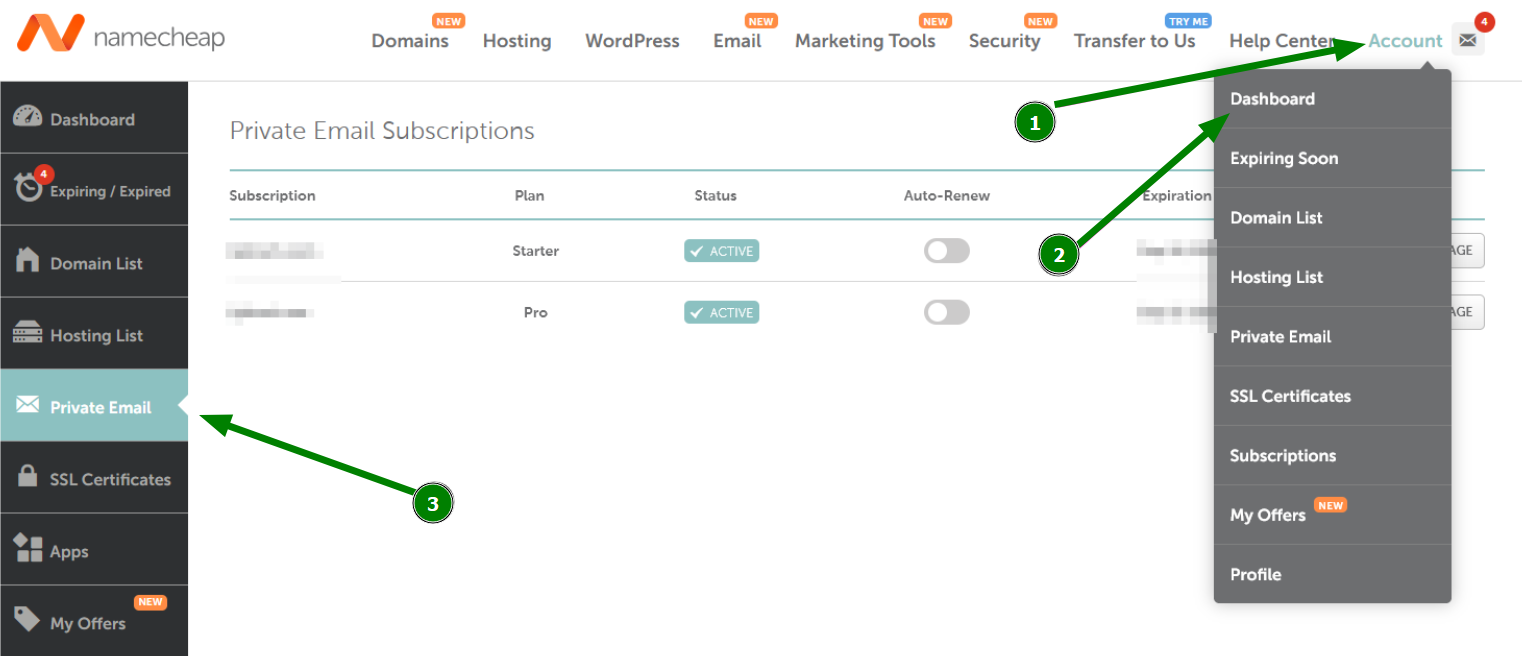
2. Click on the Account button in the top right corner and go to Dashboard.
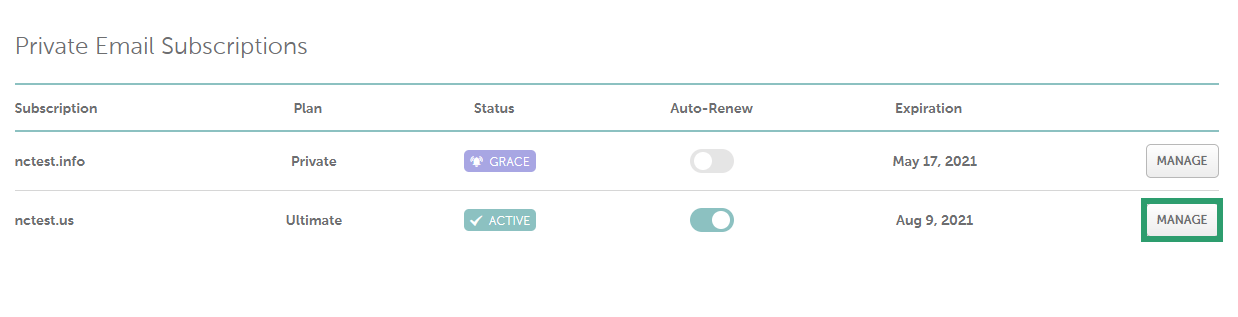
3. Go to the Private Email menu on your left and click on Manage next to the domain you have the Private Email subscription for. You will be redirected to the Private Email Management page:
4. Once there, click on the
Create Mailbox button:
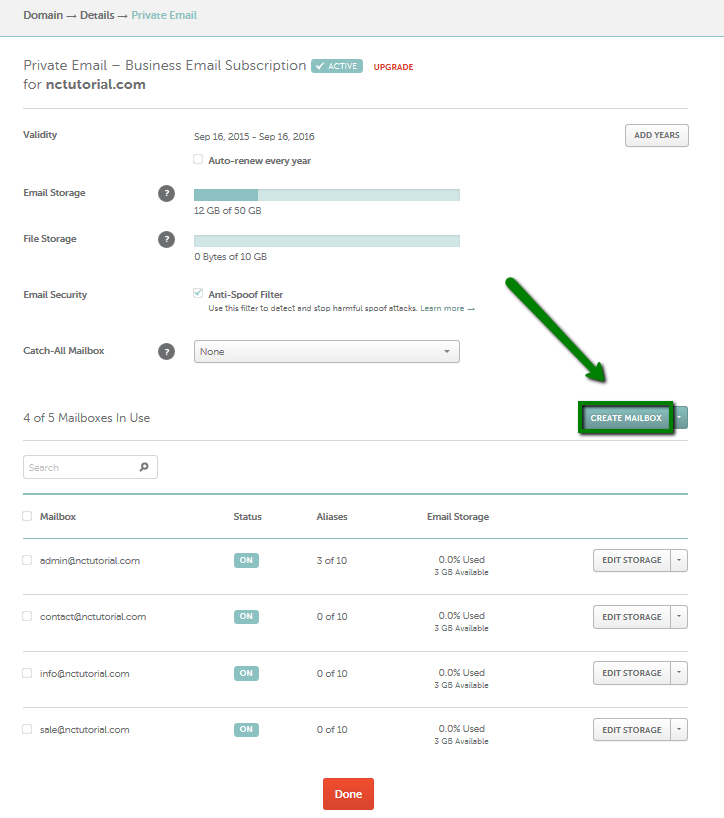
PLEASE NOTE: If you do not have a free slot for creating a mailbox, you will see
Buy Mailbox there instead of
Create Mailbox. In this case, it is
required to order one.
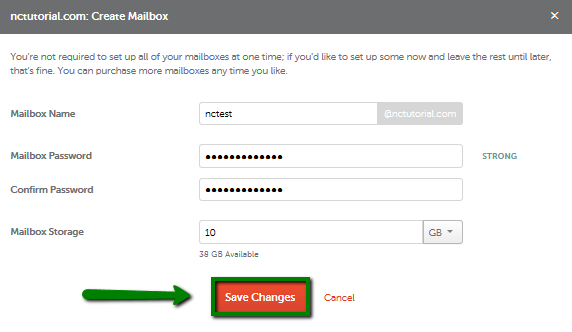
5. In the next window, insert the mailbox name you wish to have, the password to it, and mailbox storage, then click
Save changes:
Once done, you will get the message
Success! Mailbox your@mailbox.tld has been set up. Access it here: https://privateemail.com.If you return to the Namecheap Private Email subscription management window, you will see your newly created mailbox in the list:
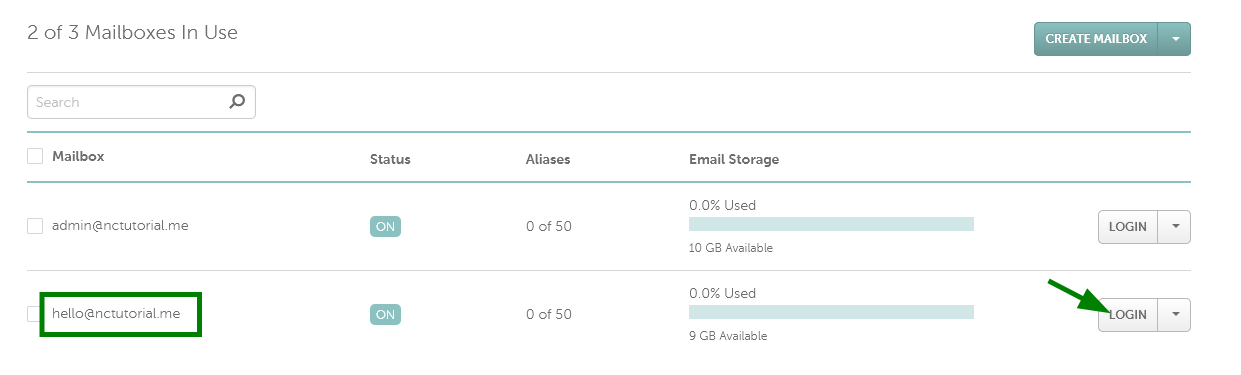
You can now use the Login button to access your mailbox web interface.
If you want to purchase more mailboxes, feel free to check
this article.
That's it!
Need any help? Contact our
HelpDesk