The Menu option allows you to create an interactive menu bar that features several elements to help you navigate your website. However, it’s just not limited to that. You can also add text elements to the menu or even links to other websites and resources.
Below you can find instructions on how to create a menu item and a drop-down list:
There are two types of menus present in Website Builder:
1. The Main menu - holds all the pages created on your website and is created from the start in most templates. It helps you navigate through the pages of your website.
2. The Additional menu - can be created manually and edited according to your preferences:
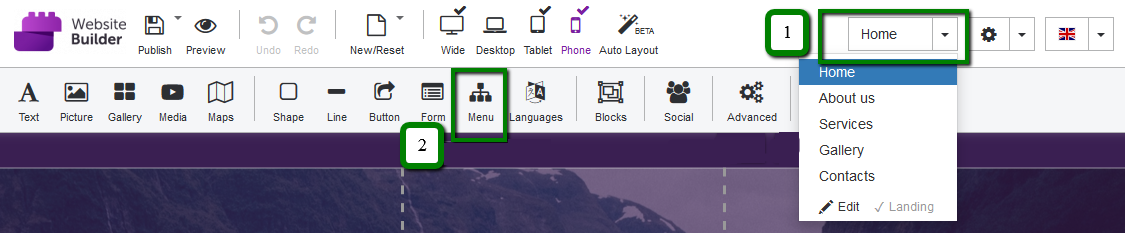
In order to configure a menu, click on the Edit tab of the preferred page. In our case it is the Home page:
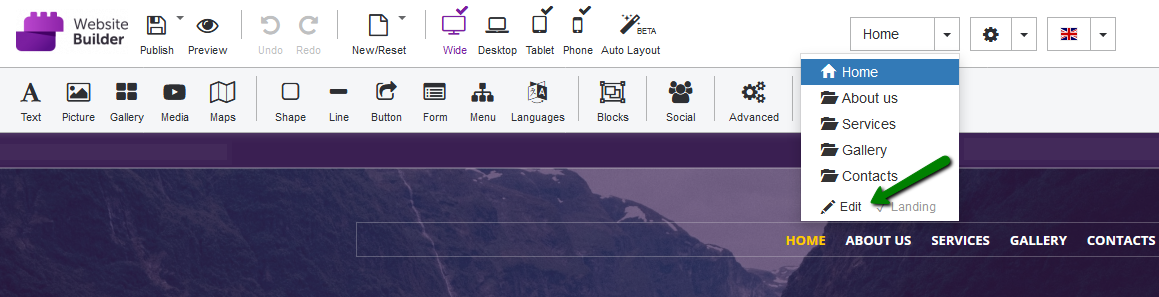
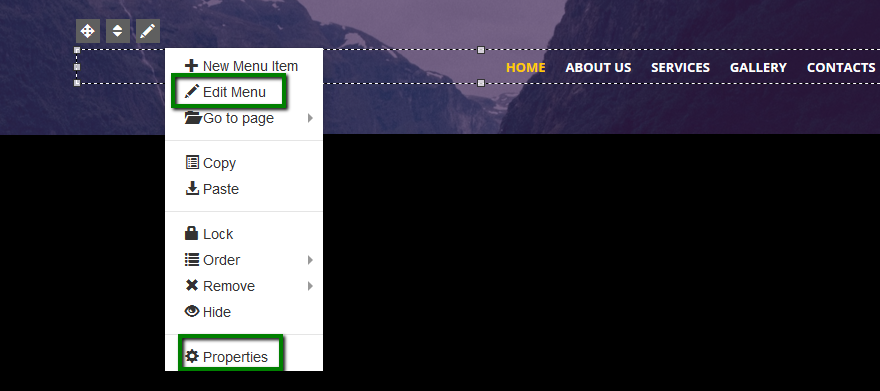
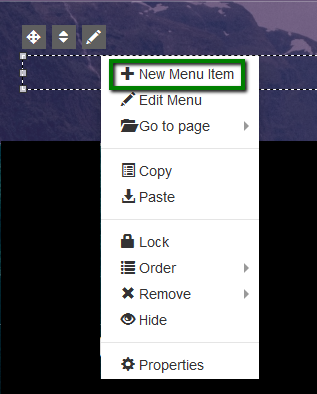
Or you can click the Pencil icon in the top-right corner of the menu element and select the Edit menu or Properties option:
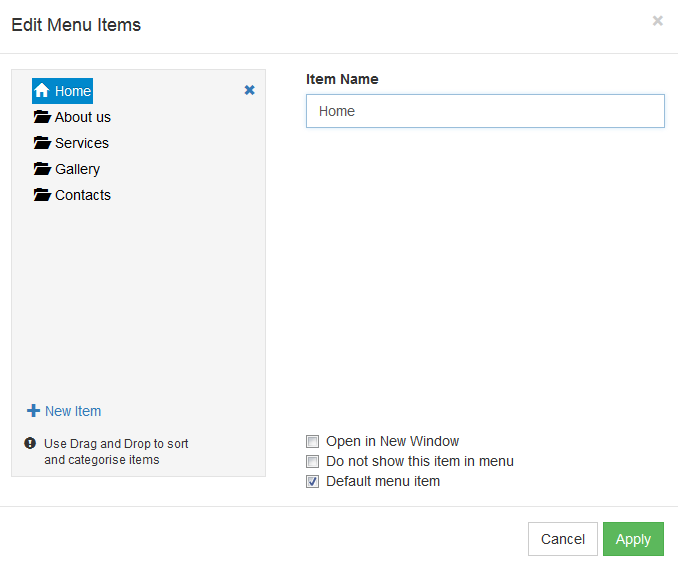
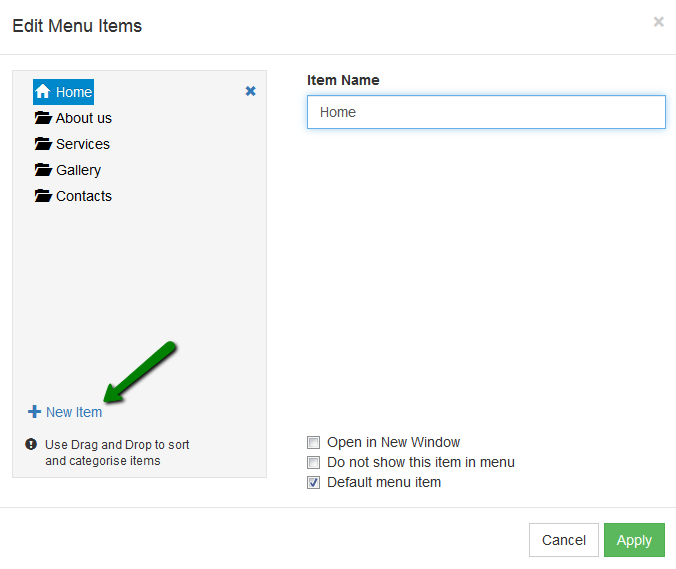
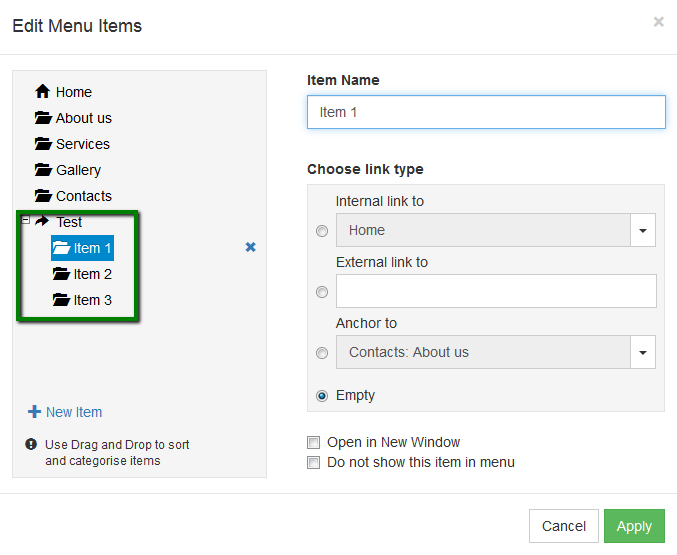
The Edit menu window allows you to edit, add, and rename the menu items, as well as group them into a drop-down menu:
The Properties window allows you to manage the orientation of the menu, change the background color, add an image, change the font and/or size of the item, etc.:
1. To create a menu item, click on the Pencil icon >> + New Item:
Or choose Edit Menu >> + New Item as an option:
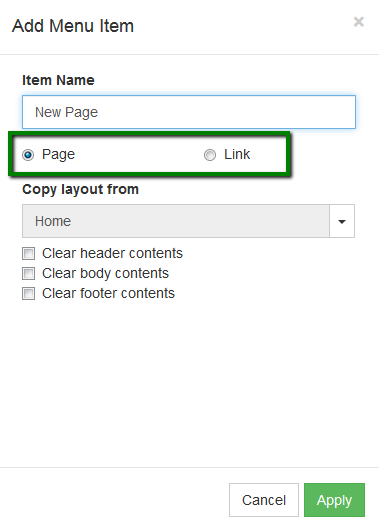
2. In the Add menu item window, you’ll see two available options: Page and Link.
The Page option allows you to create a new page by duplicating the style and content of any existing page on your website:
PLEASE NOTE: This option should not be used to create links to existing pages.
3. The
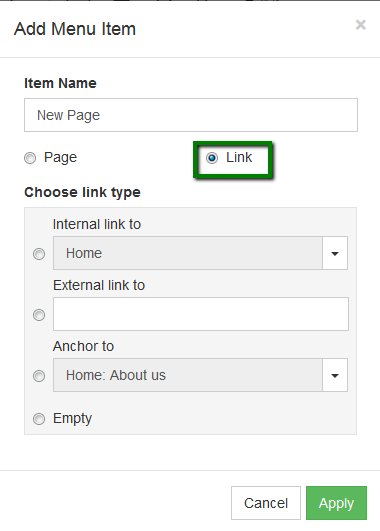
Link option allows you to create links to other pages of your website:
- Internal link - Links to an already existing page on your website.
- External link - Links to other websites.
- Anchor to - Links to a specific place on your website.
Empty refers to a simple text entry or does not link to anywhere specific. For example, it’s helpful when you want to create the titles of the drop-down menus:
4. In order to save the changes, click on the Apply button. The new menu item will then be created:
How to create a drop-down menu
Follow these steps in order to create a drop-down menu:
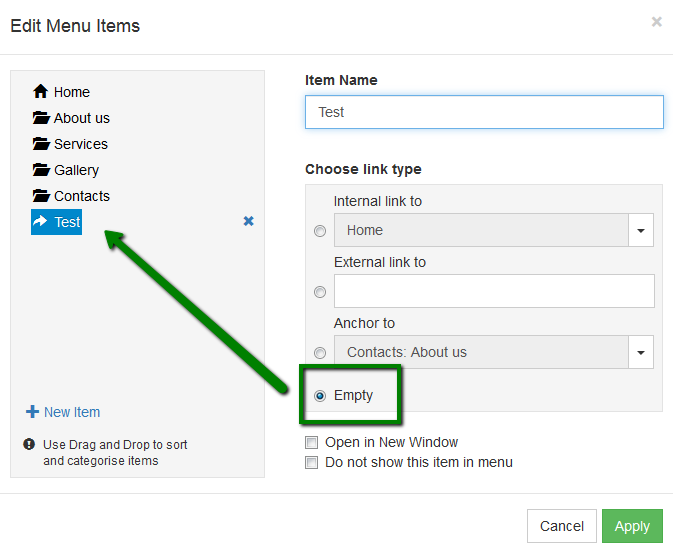
1. You will need to create the parent element (the title of the drop-down menu) with an Empty link type. As an example, we created a Test item (parent element):
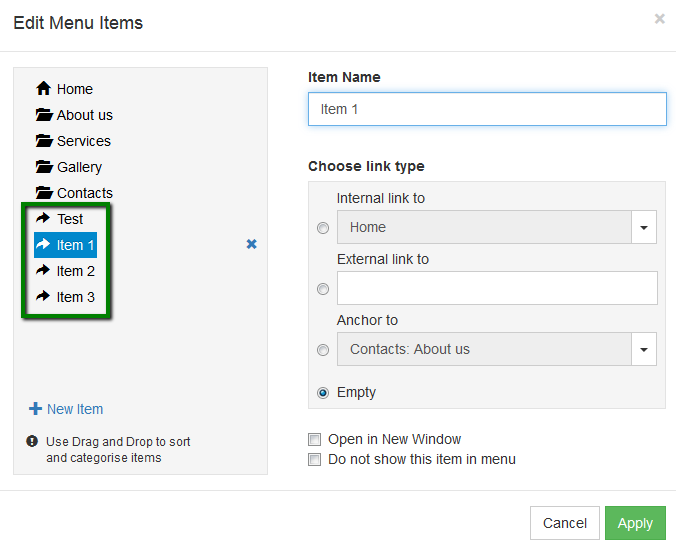
2. Now create its contents (the child elements) with an Empty link type (the one that’s shown in the drop-down list):
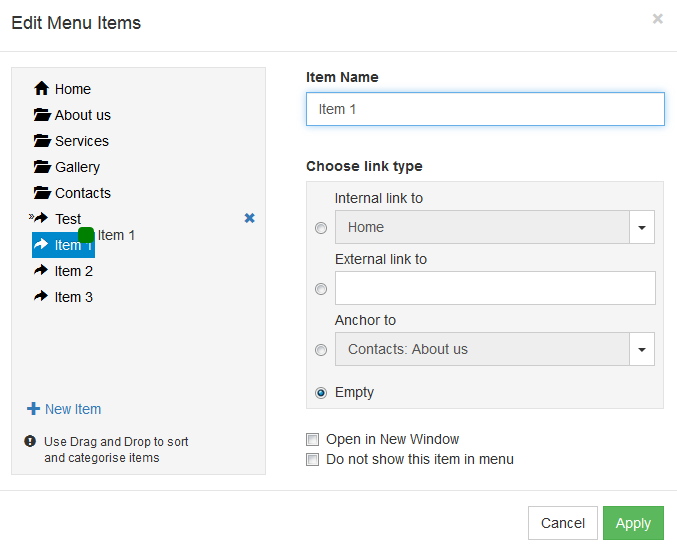
3. Now you will need to click and hold the first (child) element Item 1 and drag it on top of the (parent) element Test:
4. Once you see two arrows icon to the left of the Test element, you can release the left mouse button to drop the Item 1 element on it. It will now be assigned in the following way:
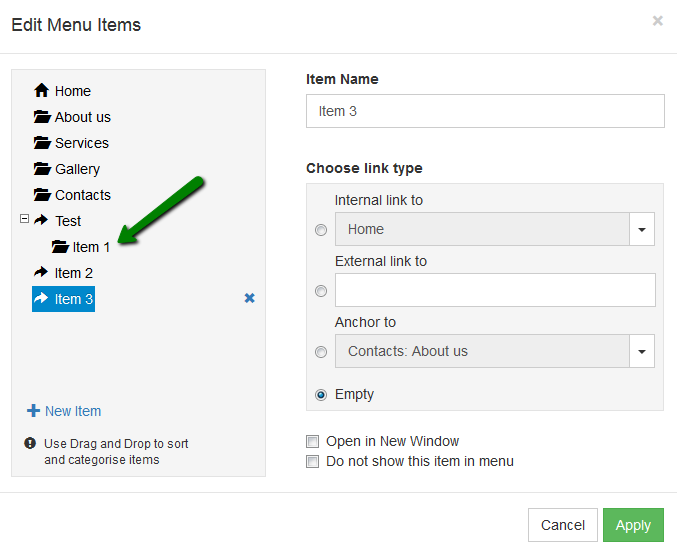
5. Now you need to repeat the same action for all contents of the drop-down menu:
6. Once you are done, click Apply and publish the changes to your website. Now you can check out your newly created drop-down menu:
Congrats! You’ve now created your drop-down menu in Website Builder.
Need any help? Contact our HelpDesk