
How to create a multilingual website with WordPress
With entire businesses shifting online to meet rising customer demands from all corners of the world, building a multilingual WordPress website in order to accommodate an even larger customer base is slowly becoming the new standard.
With a whopping 25% increase in online sales just in the first pandemic year and people planning to stick to their newly acquired online shopping habits, e-commerce will continue to grow. And we all know that when it comes to sales, be it of physical products, software, or even knowledge, speaking your customer’s language is crucial—and we’re speaking quite literally this time.
The growth of online shopping means that if your website is multilingual, your customer base will grow as well.

What is a Multilingual Website?
When we talk about translating a website, there are multiple ways to achieve this. Let’s look at some of the options and consider which will result in a true multilingual website.
Dynamic Website Translation Tools
There are great tools out there you can use for instant website translation that work on top of any website on the Internet, translating pages in a preferred language on the spot, like this one from TranslatePress.
This is an amazing tool for when you need to quickly browse a website in, let’s say, your native language, for your own personal purposes. You simply enter the URL of the page you wish to see translated, and the software automatically does the magic for you.
This, however, does not turn the set website multilingual. The site itself remains single language. You’re just simply adding translations on top of it, for your current visit only.
True Multilingual Websites
A true multilingual website is one that gives any visitor the opportunity to switch between multiple languages when they navigate it, choosing their preferred one from a selection that you provide and control.
This is a self-sufficient multilingual website where the content itself comes in two or more different languages. This typically means that the owner (or his designated team) purposefully provides multiple page versions for each and every language in which he wants to make his website available.
This entails a very different approach, the translation quality falling into the website owner’s hands (or his hired professional translator), rather than just winging it with solely machine translation and hoping for the best each time a new session is triggered.
But don’t let this scare you—just because it might sound complicated, it doesn’t mean it actually is. When you work with WordPress, there’s always a plugin that can help you easily achieve your goal. In this case, it’s TranslatePress, the multilingual plugin that lets you easily translate all of your websites’ content in minutes. With its highly intuitive visual interface, TranslatePress couldn’t work any easier.
Why Turn your Website Multilingual?
So, we’ve already grazed upon why turning your WordPress website multilingual would be beneficial, but let’s get a bit more technical too.
Let me list a few more tangible benefits of having a multilingual website, just to drive this one home:
Better user experience
People like getting their information in their native language. This gives them a sense of security and trust—especially when it comes to online shopping—and it makes their overall experience on a site at least a bit more personal.
This is why around 90% of people prefer to browse websites in their native language when given the opportunity, while 44% go as far as feeling like they are missing key information when web pages are not written in a language they understand.
Whether you target people from all around the world, or maybe just the USA, there’s still a good chance your site gets multilingual visitors, taking into consideration how many Americans speak a language other than English when at home.
So, why not offer these visitors the best user experience you can provide, giving them content they can fully understand?
Multilingual SEO
People use Google to search for anything. This is how they find answers to their questions and products for their needs.
When your site is only in English, your on-page SEO is also English exclusive. This can be a real missed opportunity when a lot of your potential clients might be searching for content similar to yours but in different languages.
Going multilingual lets you optimize your content for each one of your website languages, helping you rank in Google for people searching in those languages too, not just English.
More concrete, this means Google will start pushing your content to potential clients, even when they search in foreign languages, as long as you provide content in those languages as well.
The shareability factor
When you provide content that speaks your clients’ language, they are more likely to share the translated content to their social media channels, giving you another chance to raise brand awareness and visibility.
How to Create a Multilingual Website in WordPress
1. Set Up Your WordPress Site in a Single Language
First off, you’re going to need a single language WordPress website
Once your basic WordPress site is up, you can move on to customization and content. As far as design goes, there are plenty of pre-designed themes to help you out, and they all work just fine with the translation plugin we’ll use in the next section. So, no need to worry about how your website will look once you translate it.
Next, you can go ahead and populate your brand new site with all of your desired content. Go all out and don’t hold back, there’s nothing that you won’t be able to translate in the next step.
2. Install the TranslatePress Plugin and Add Secondary Languages
Now that your single language site is complete, let’s turn it multilingual.
The next thing on the list is installing the TranslatePress plugin, the plugin that’ll help you manage all of your website translations. TranslatePress comes in a free version, available for download directly from the WordPress repository, and 3 premium versions with extended features.
The free version should work just fine for most of the functionality we’ll present in this tutorial. You can download it for free and then install it just like you would any other plugin.
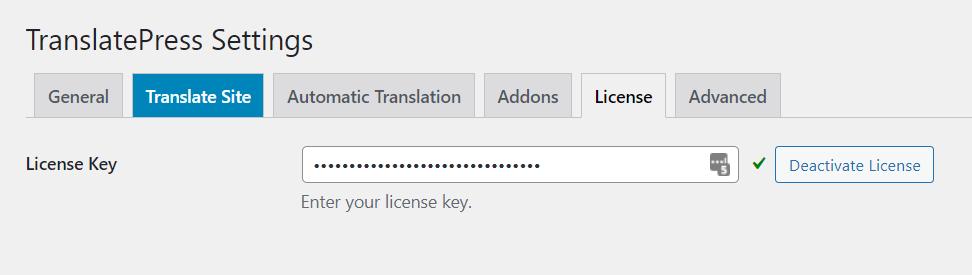
If you want to go with one of the pro licenses, after purchase, you’ll need to download the pro plugin from your account page and then upload it to your WordPress site from the Plugins section (Plugins >> Add New >> Upload Plugin). Next, don’t forget to activate your license by going to Settings (in the WordPress dashboard) >> TranslatePress, and navigating to the License tab. You’ll want to copy the license key from your account page here and click the “Activate License” button.
Next, you’ll want to navigate to the General tab of the TranslatePress settings area to set up your secondary language or languages. When using the free version of the plugin you can add one secondary language to your website (meaning your site will have two languages in total), while the pro version grants you unlimited secondary languages.
In the General tab, you’ll be able to set the default language of your site—that’s the language your site currently exists in. Then, in the “All Languages” section, add your new languages by selecting them from the dropdown.
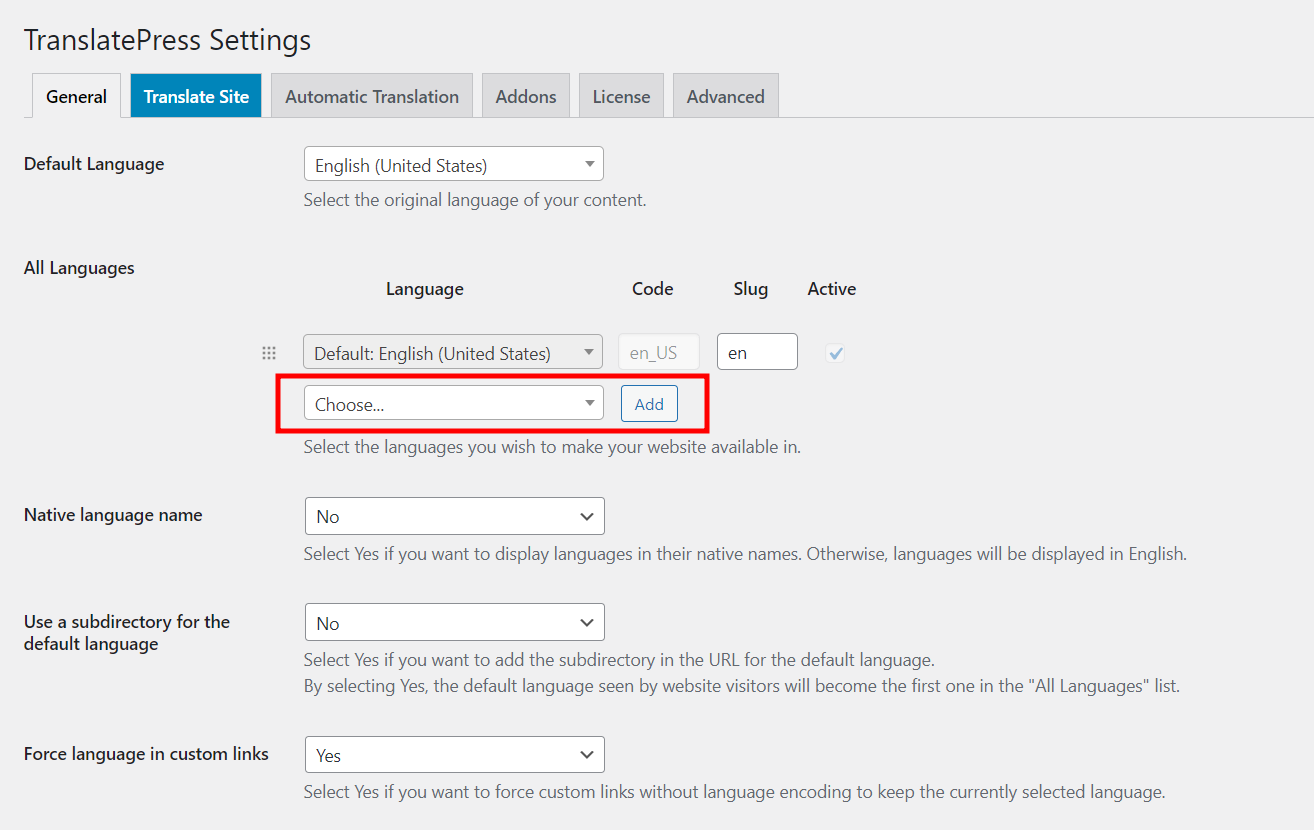
Don’t forget to click “Add” once you’ve found your desired language and then “Save Changes” at the bottom of the page to make it all official.
3. Set up Automatic Translation (Optional)
Next up, let’s speed things up a little!
Enabling automatic translation is 100% optional, but doing so might save you a lot of time if you’re working with a bigger website, with lots of content. (If you’re not interested in automatic translation whatsoever and you’d prefer to go in manually, you can skip straight to the next step.)
To enable automatic translation, simply navigate to the Automatic Translation tab from the TranslatePress settings area and select “Yes” from the dropdown. This will open up the rest of the settings for this functionality.
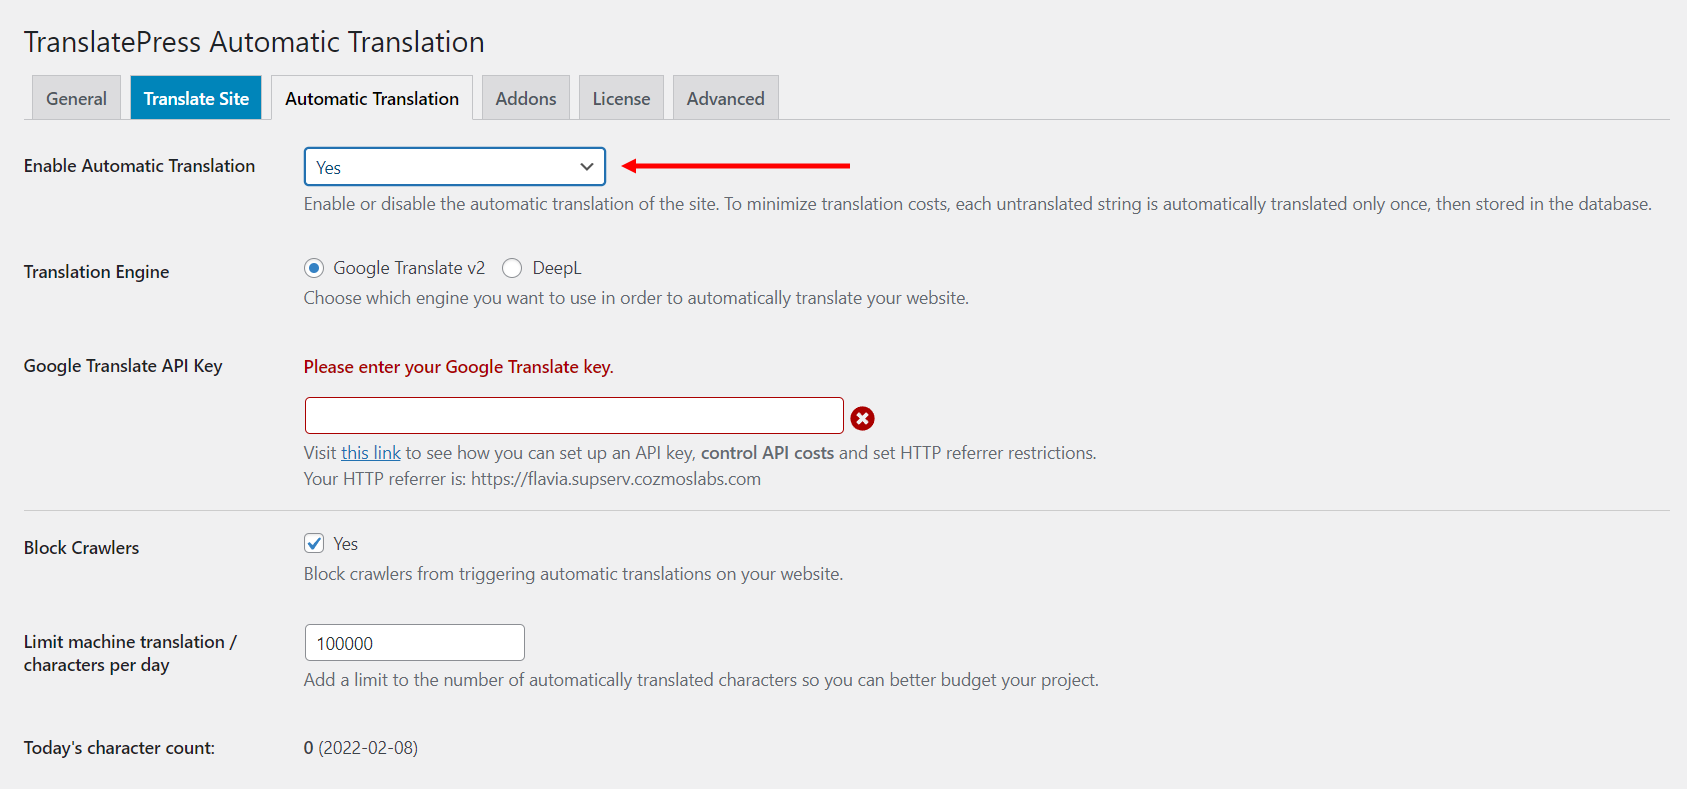
From here you’ll be able to choose your preferred translation engine—you can use the Google Translate API if you’ve opted for the free version of the plugin, or DeepL if you’ve purchased a pro version. Studies show that DeepL ranks a bit higher when it comes to accuracy, but Google Translate does offer support for much more languages, so it’s all up to you and your exact needs.
But no matter which service you choose, you’ll first need to retrieve an API key in order to connect your website to the desired engine. Fortunately, TranslatePress has thorough documentation on this process for both Google Translate and DeepL, so feel free to check that out when you get to this step.
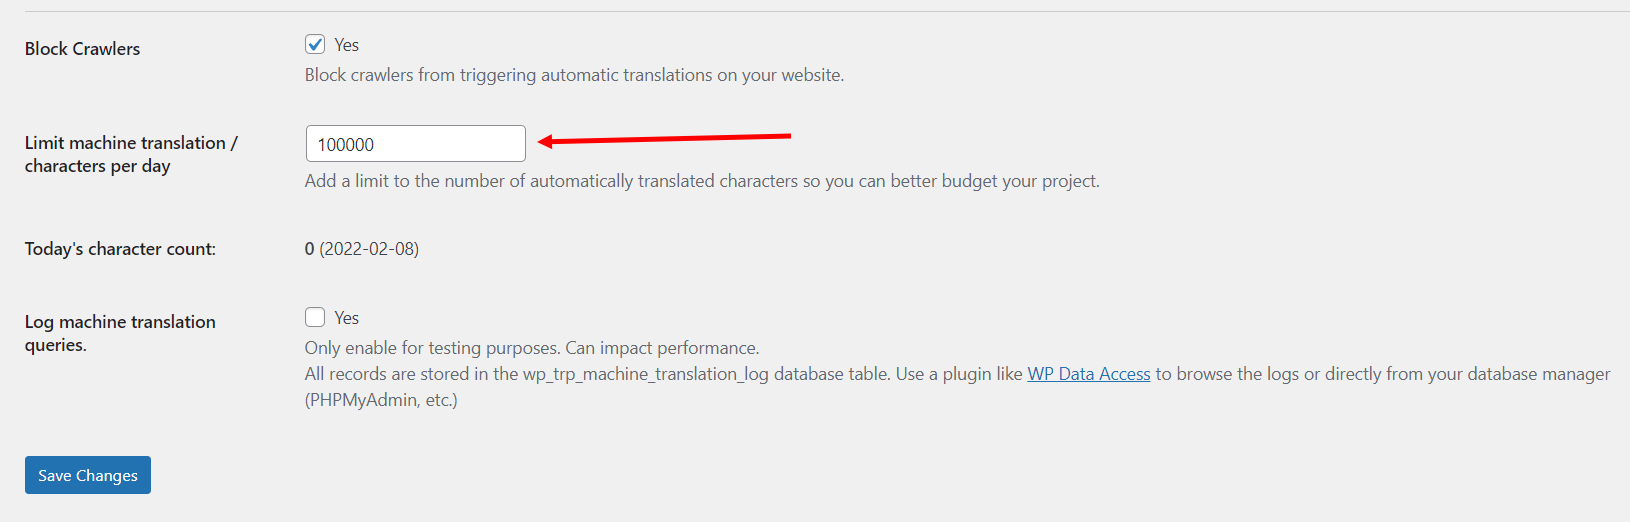
In the end, make sure to set a limit on the number of characters you wish to translate per day, in order to stay within your budget. While TranslatePress does not charge you for automatic translation, your chosen translation engine might, depending on your site’s dimensions. You can keep an eye on this from the “Limit machine translation / characters per day” section.
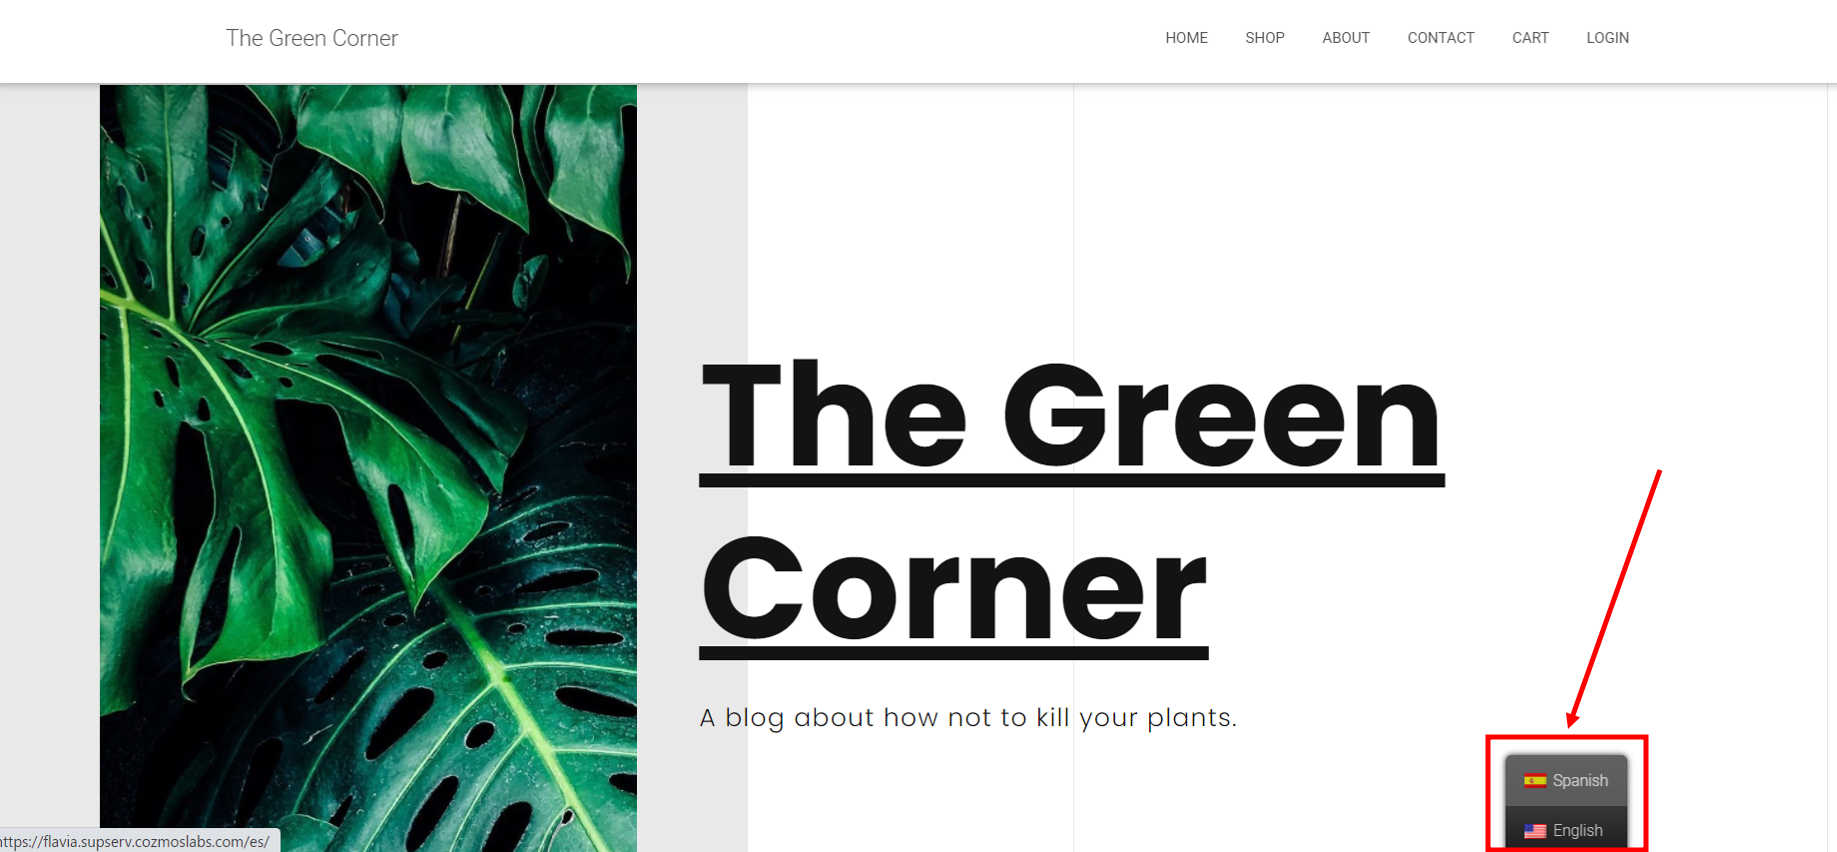
Once your setup is done, save your changes and navigate to the front-end of your site. You’ll now be able to see a floating language selector that has been added to your site by default. Use it to select your secondary language and then voilà! You should now be looking at your first automatically translated page.
In order to translate your entire website, all you have to do is navigate to the translated version of each page once. This action will fetch the translations from your translation engine of choice and then store them in your own database, so they won’t ever need to be retrieved again. You’ll have full ownership and control over these translations, regardless of whether you ever choose to stop paying for any of the translation APIs.
4. Translate Your Content
Now to the fun part! Let’s see how the visual translation editor works.
If you haven’t enabled automatic translation, this is where you’ll do your website translations. If you’ve already automatically translated your pages though, this is where you proofread everything and manually tweak anything that needs special attention.
To enter the visual translation editor, visit your website from the front-end while logged into your WordPress account and click the “Translate Page” button that was added to your admin bar.
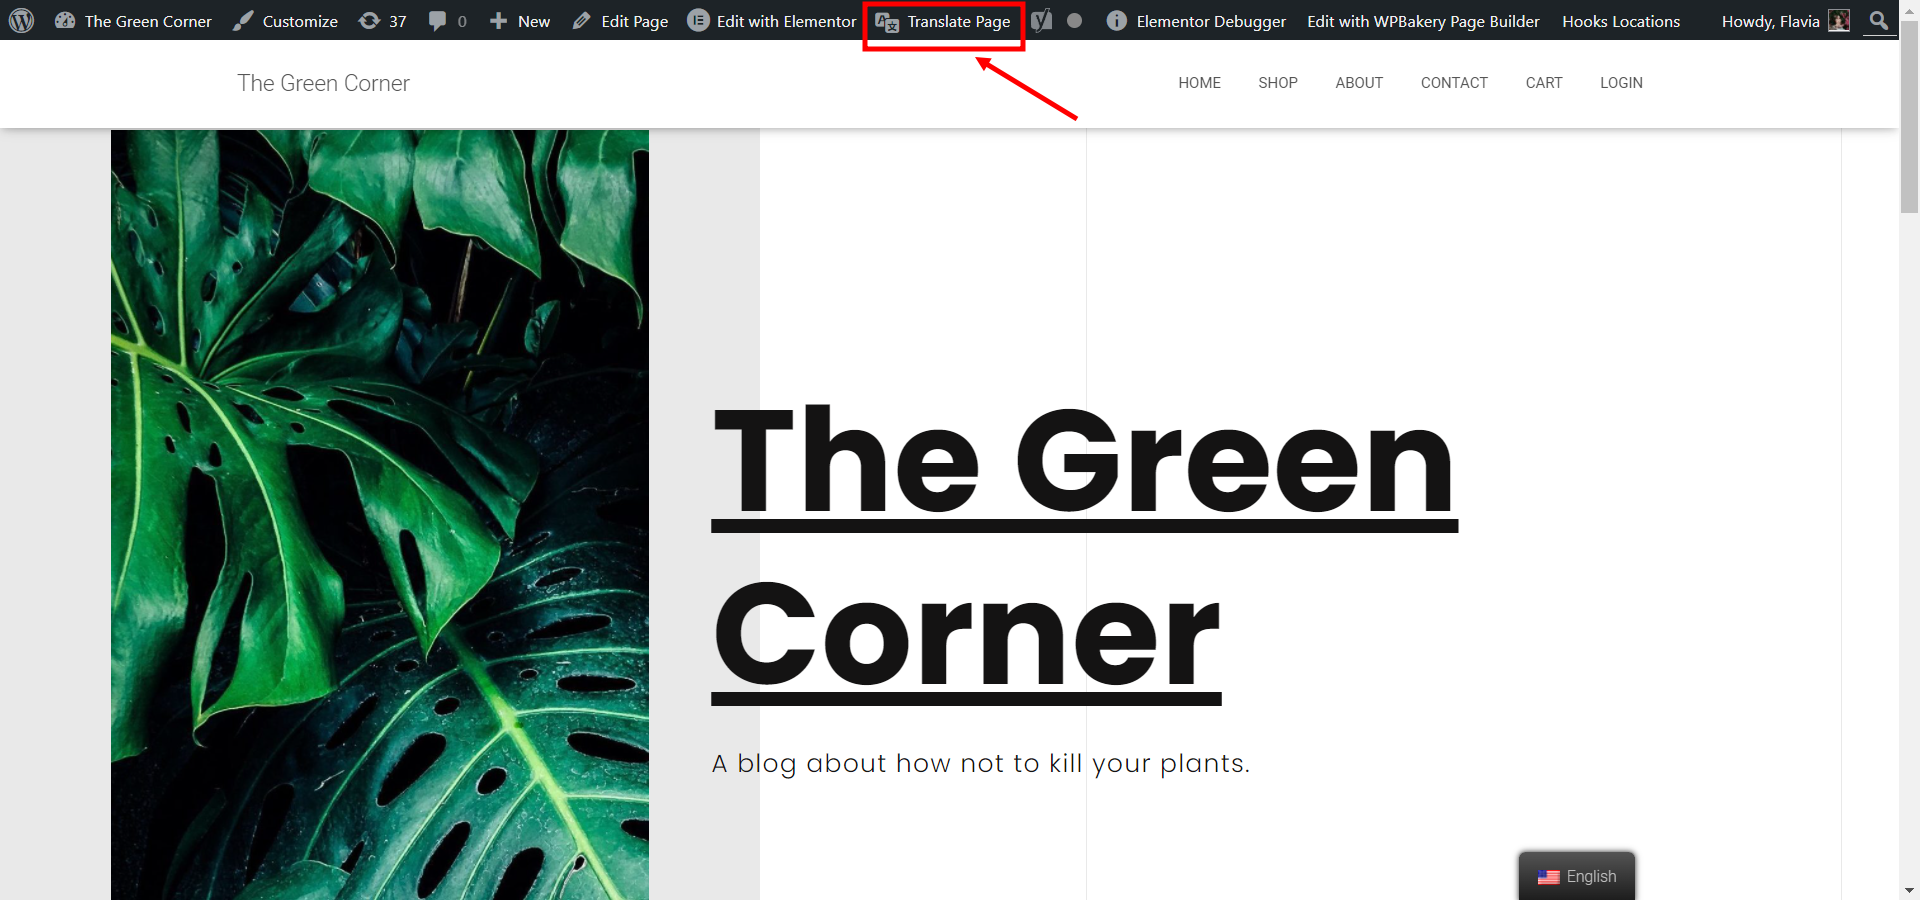
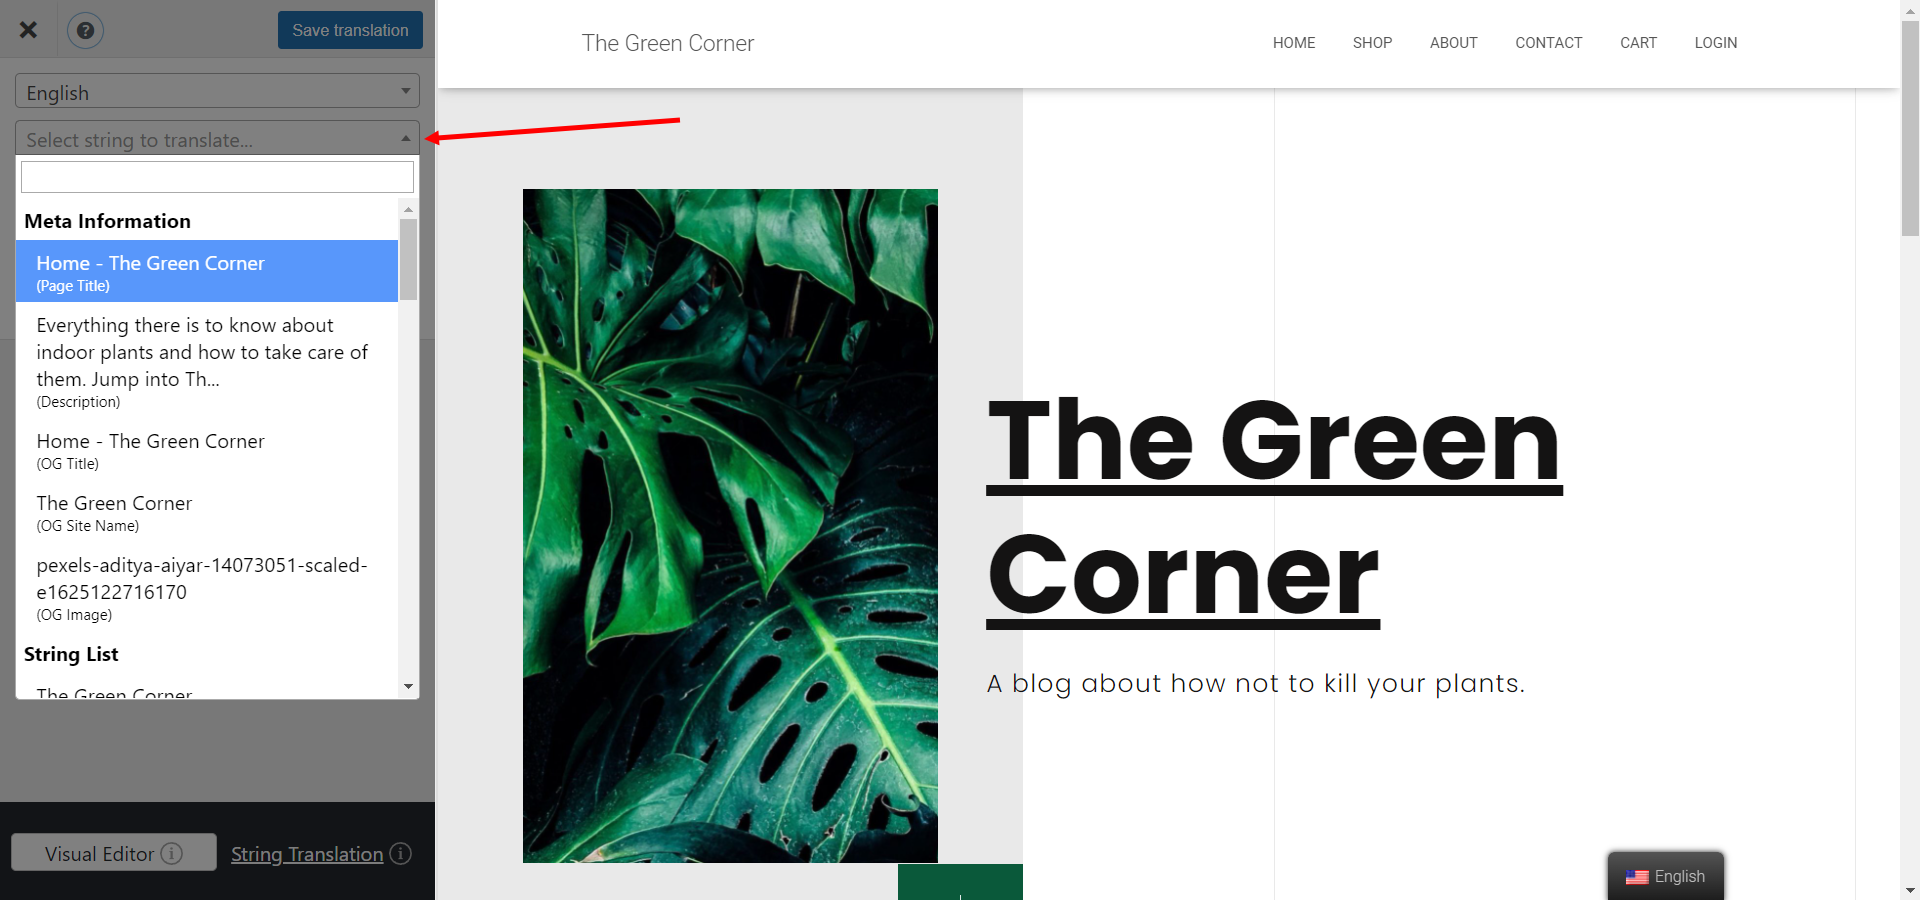
Once here, you’ll see a live preview of your site on the right part of your screen and a translation sidebar on the left.
All you have to do now is hover over a piece of content you wish to translate, click the pencil icon that appears, and then input your translation in the sidebar. Don’t forget to hit “Save Translation” or use the keyboard shortcut (CTRL+S or ⌘+S) after each translation.
Note: If you’ve already used automatic translation in the previous step, the translation fields will be pre-filled by the translation engine. However, you can go in and modify them by hand in the same way I’ve shown you above when something doesn’t sound natural or context-appropriate.
Now go on and do the same for every piece of content you wish to translate, including images, links, widgets, WooCommerce-related content, and so on.
When you translate repeating content, such as menu items, for example, you’ll only need to translate them once, and then TranslatePress will apply that translation to every page the item appears on.
5. Customize the Language Switcher
What would be the use of having your website available in multiple languages if those languages were not easily accessible to your visitors, right?
TranslatePress lets you customize the way your language switcher works and looks, right from the General tab. So, let’s navigate back to Settings >> TranslatePress >> General, and scroll all the way down to the “Language Switcher” section.
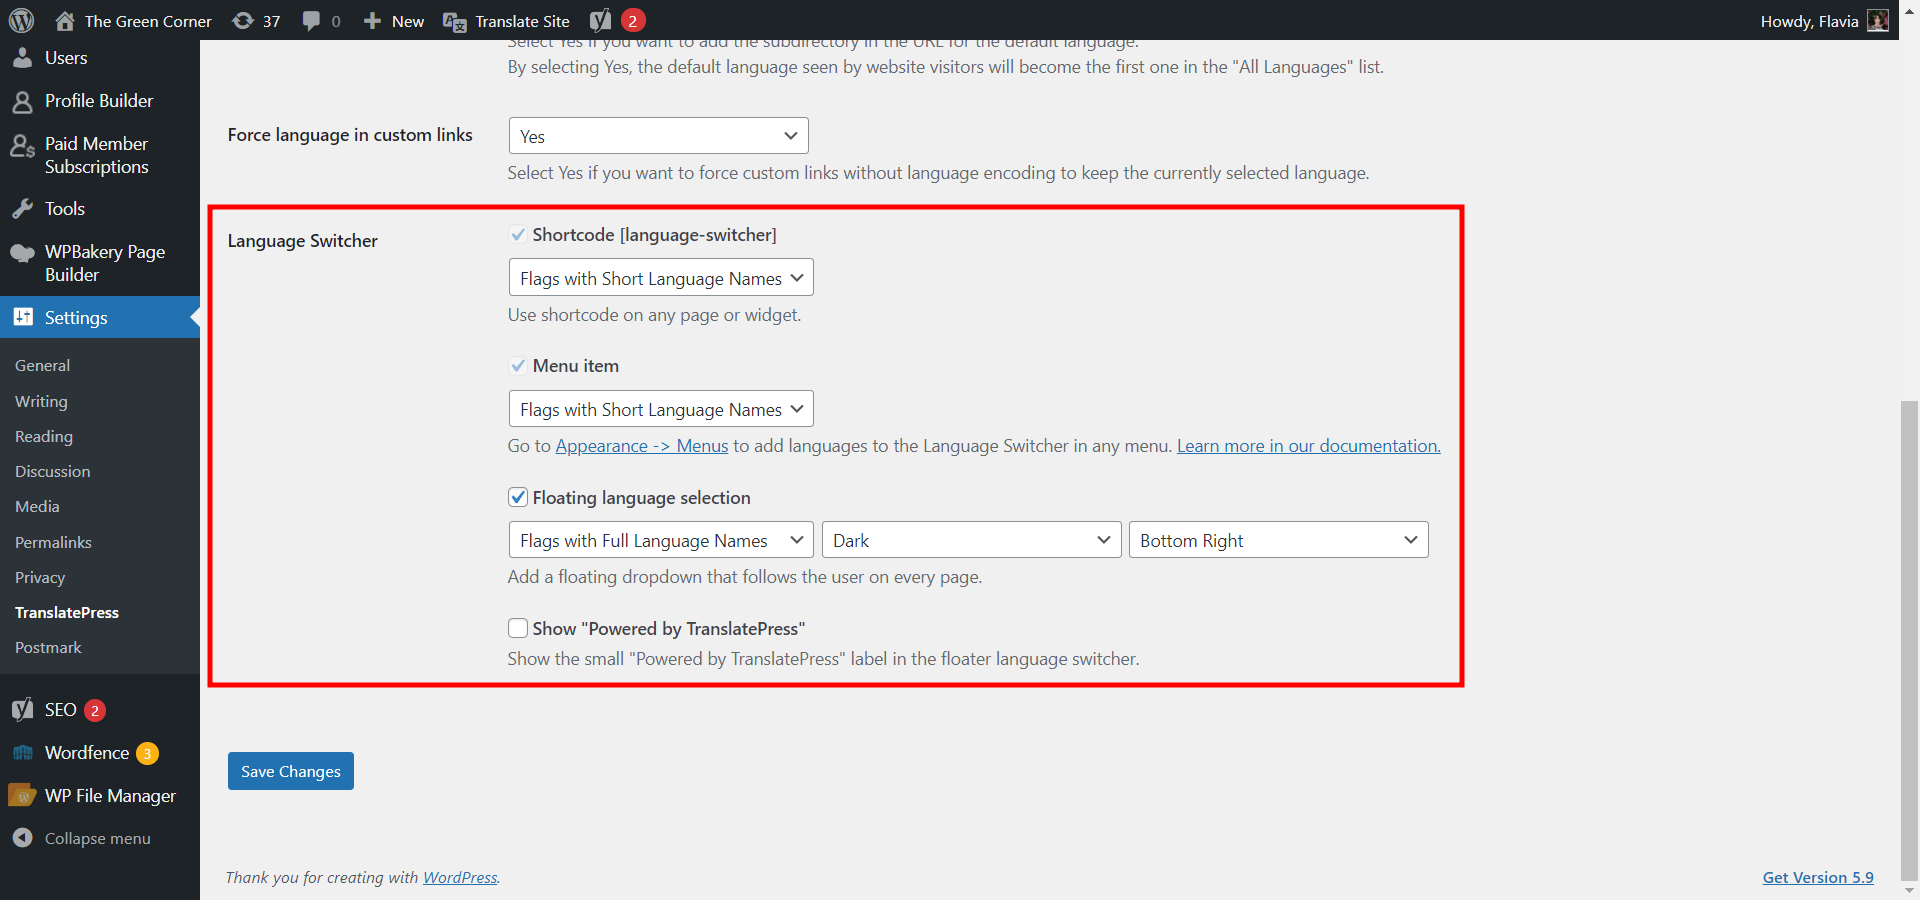
Here you’ll find 3 options, each letting you choose whether you want to display full or short language names and country flags.
The Shortcode language switcher is, just as the name suggests, a shortcode that can be used to place the switcher virtually anywhere you’d like on your site, be it a widget, footer, or some other placement. The Menu item switcher will display your language options inside any menu, along with your other menu items. And lastly, the option that is enabled by default, the Floating language selector will be placed in a corner of your choosing and will follow the user around on every page they visit.
If you feel like you could use a little bit of extra help setting one or more of these switchers up, here’s an in-depth tutorial on how to implement each one of these options.
SEO Translation
In order to fully benefit from turning your website multilingual, TranslatePress gives you the option to fully translate all SEO metadata as well, because appealing to Google is just as important as appealing to your visitors.
With the SEO Pack add-on, available with any pro license of TranslatePress, you’ll also be able to translate SEO titles, meta descriptions, URL slugs, image alt tags, and more, in order to secure your front-row seat in Google rankings with every language you’ve added.
When the add-on is active, you’ll be able to select all of these strings right from the translation sidebar, by looking for the “Meta information” section in the strings dropdown.
The add-on also takes care of the multilingual XML sitemap and hreflang tags for you, so you don’t ever have to worry about Google not recognizing your different languages apart.
Create your Multilingual WordPress Website Today
With the right tools, anything is easy. Even translating an entire website to a whole new language.
As you’ve seen in this tutorial, TranslatePress helps you translate all of your site’s content, including theme and plugin-related content, right from the front-end, with absolutely no technical skills required. So, now that we’ve shown you how fast and easy it is to set up your own multilingual site, all we can do is wish you Happy Translating!
Do you still have questions on how to create your own multilingual website using WordPress? Let us know in the comments below.